Web HMI in WordPress
The Web HMI, Web Trend, and Web Alarm products are completely open architecture that can be integrated into any web platform. WordPress is one of the most popular platforms to create websites.
NOTE: If you want to visualize your data in a desktop or mobile browser with zero programming, you may be interested in the OAS Open UIEngine .
The UIEngine is a robust no-code web application and HMI builder for developing rich user interfaces in a browser-based development environment.
See the UIEngine Documentation to learn more.
You can view the Web HMI in WordPress Video to familiarize yourself with the following steps to easily add a live user interface to your WordPress site.

What You Will Need to Start
In order to set up Web HMI in WordPress, you will need to have the ability to install a plugin on your WordPress site. Depending on your plan with WordPress or your user restrictions you may or may not be able to do this.
You will also need to have the OAS Service running and a license for WebHMI.
Adding the Script Files
The first thing you will need to do is add some script files to your site. If you don’t already have one, create a folder at the root of your site and call it js for JavaScript. If you already have a scripts folder, you can just use that one.
OAS installs with the script files you need. On my machine, they have been installed to: C:\Program Files\Open Automation Software\OAS\HTML_HMI. The files that you need are:
- opc-lib-min.js
- lib/jquery-1.8.3.min.js
The opc-lib-min.js file is the OAS Web HMI Script Library. The other file is the jQuery library. If your site already references a newer version of jQuery you may use that instead.
Copy those files into the js folder you just created.
Referencing the Script Files in the Page Headers
Next you will need to add references to the script files in the page headers of your site. If you already have the ability to do that, you can skip adding the plugin.
To add the plugin, go to the Dashboard of your WordPress site and from the left menu choose Plugins >> Add New. In the keyword search box, enter: Header and Footer Scripts.
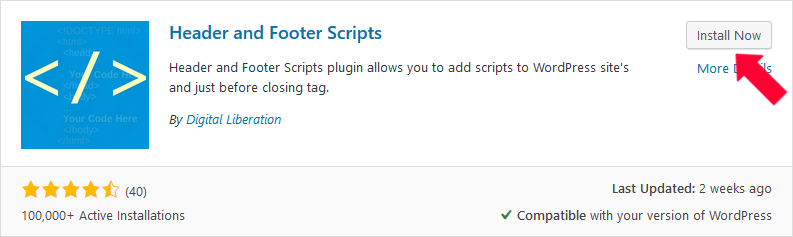
When you see the Header and Footer Scripts plugin in the results, click Install Now. Once it has installed, click Activate.
Next, from the left menu of the Dashboard, choose Pages >> Add New. Give your new page a title. At the bottom of the new page, you should see a new section that says Insert Script to Head.
Here is what you need to add:
<script  src="/js/lib/jquery-1.8.3.min.js"></script>
<script type="text/javascript" src="/js/opc-lib-min.js"></script>
<script type="text/javascript">
      OAS_config = {
        token:'7e61b230-481d-4551-b24b-ba9046e3d8f2',
        serverURL: 'http://localhost:58725'}
</script>
The first is the reference to the jquery library. Second, is the link to the opc-lib-min. If you put have yours in a different location, please be sure to change the src to reflect that.
The next line is the OAS_Config script block.
It has a security token in it that keeps session for the OAS WebHMI. It also has the URL for the OAS Service you want to point to. After the colon is the port number that you have the OAS Service set up on. Please note: that if your WordPress site is not on your local machine but your OAS Service is, you will need to have your service tied to a publicly accessible IP address or domain name, localhost will not work.
Click Save Draft to save your work.
Add HMI to the Page
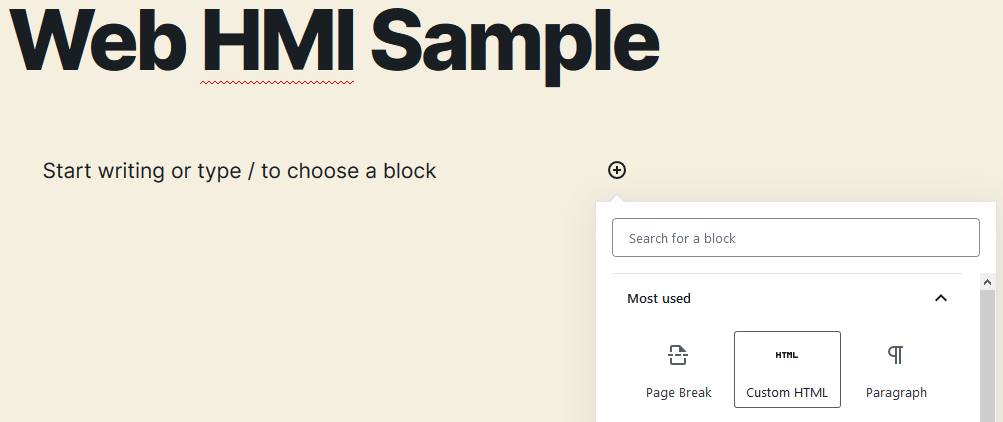
Click the Plus Sign to Add a Block. You will need to choose Custom HTML.
To create a div tag, enter:
<div id='myDiv' oas-tag-txt='{"tag":"Sine.Value"}'></div>You must have an ID for the div, it can be whatever you want. The OAS demo tags include a Sine Tag. If you don’t have a Sine Tag in your current configuration, enter the name of a tag that you do have followed by .Value. for the oas-tag-txt.
There are two articles in our knowledge base that you can reference to help you write your own:
Click Save Draft to save your work and then Preview to see the results.
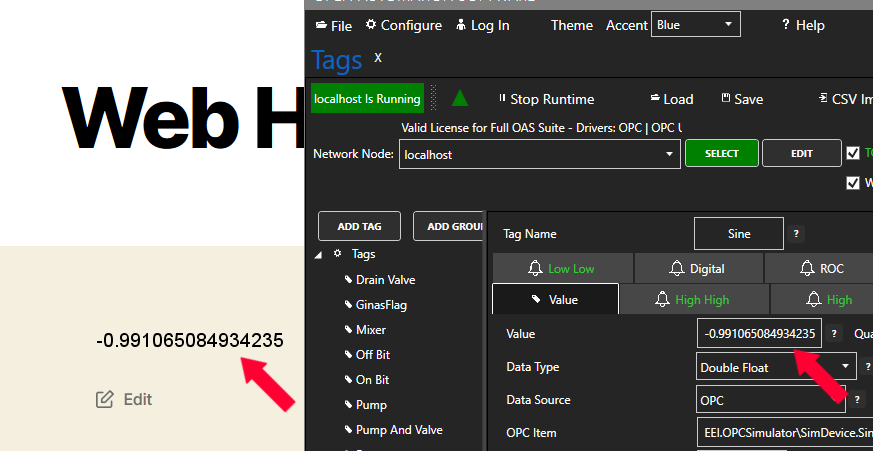
You should now be displaying the Sine Value (or the value of whatever tag you used) from your OAS Service in your WordPress site. If you open your OAS Configuration Application, you should be able to see the values updating together with a slight delay.
Utilizing the Web HMI Wizard
The OAS Web HMI Wizard is a tool to help developers create a Web HMI interface. Click Here to Open the Web HMI Wizard. There is a video that goes into detail about how to use it in here: Web HMI Wizard.
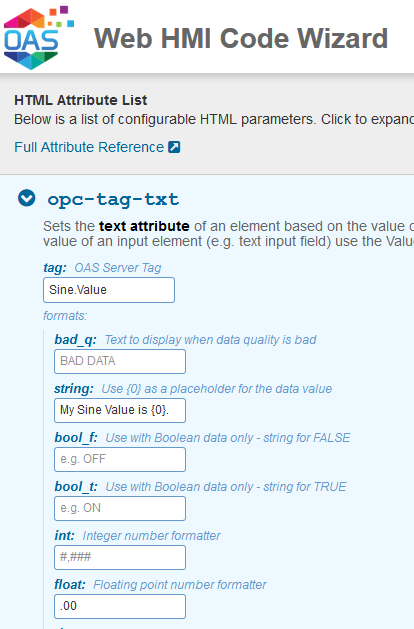
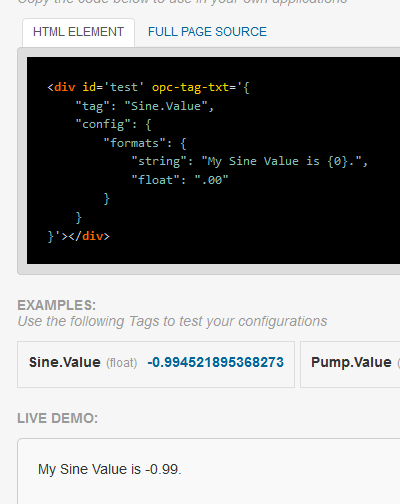
Open the Wizard and then expand the oas-tag-txt section on the left. Enter Sine.Value into the tag box. In the format string box below that, enter My Sine Value is {0}. In the format float box further down, enter .00. Now on the left you should see some code displayed in the HTML ELEMENT window and the Live Demo window below that should be displaying your Sine Value as a string truncated to two decimal places with the My Sine Value is in front of it.
Cut and paste the code from the HTML ELEMENT box into your WordPress site inside of a Custom HTML block to add it to your page.
Add the Header Scripts to Your Whole Site at Once
If you’d like to add the header scripts to all of the pages in your site instead of just one, you can. First, cut the code out of your first page. Then go to your WordPress Dashboard and from the left menu select Settings >> Header & Footer Scripts. Paste the code into the Header Box there and click Save Settings. You can also add the OAS_Config script block to an external file and then just add a script reference to that file to further contain things.