Create a Hosting Application
Once you have compiled the custom Driver assembly, your next step will be to Create a Hosting Application that will load the assembly and run it. This application can be any .NET app, but for most deployments, you will be creating a .NET Windows Service or a Console Application. Services are perfect for deployment on a Windows platform, and Console Applications, when written using .NET Core, can be hosted on non-Windows operating systems like Linux and Mac. Additionally, you can create an Android or iOS app using the Xamarin development tools within Visual Studio.
In this example we will be creating a .NET Windows Service that will use the Driver Assembly created in the previous tutorial Creating a Universal Driver Interface. If you have not reviewed this tutorial, please go back and review it before proceeding with the steps below.
The Hosting Application Architecture
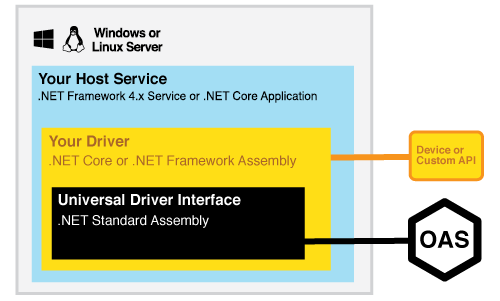
The previous example results in a .NET assembly that uses the OAS Universal Driver Interface to read and write data and configurations within the OAS Platform. This assembly is designed to be hosted by an application that will load it in memory and communicate with a designated OAS Server.
Prerequisites
You will need to be running Open Automation Software Version 11 or greater to support Universal Drivers. You can download the latest version at /download/
You will also need Microsoft Visual Studio to work with any of these examples and to compile your custom driver. If you do not currently have Visual Studio installed, you can try out Visual Studio Community which is a fully functional, free version of the IDE.
Step 1
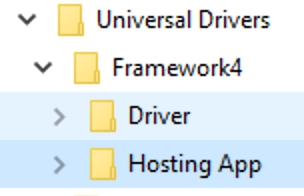 Copy the C# or VB Hosting App Code from the OAS installation path, typically C:\Program Files\Open Automation Software\OAS\Universal Drivers\Framework4\Hosting App\. Locate the Windows Service directory and copy to a location of your choosing, then open the project in Visual Studio. We suggest copying to a directory near the Driver source code you created in the previous tutorial as you will be referencing it.
Step 2
 Open up your choice of VB or C# example code, preferably matching the language chosen for your driver. It is not necessary for them to be written in the same language, but is easier to debug when they are consistent.
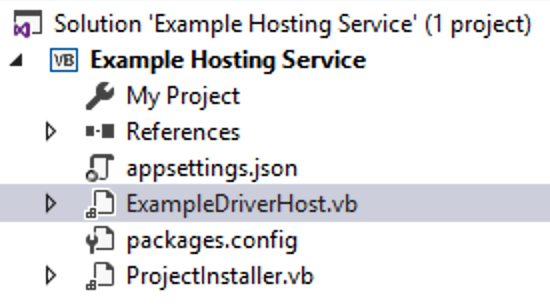
The main hosting code exists in the ExampleDriverHost file (.vb or .cs depending on the language).
Application configurations are located in the appsettings.js file.
The ProjectInstaller file is used for installation of the Windows service once the project has been compiled.
Step 3
Reference the Driver and ensure startup code is bound to it properly.
First, expand the project references and locate the ExampleDriver assembly. Right-click and remove this reference. This is the pre-compiled Driver that you will be replacing with your own.
Next right-click on the References and select Add Reference, navigating next to the location of your compiled Driver assembly. In the Reference Manager dialog, select Browse and then locate the compiled assembly. This will be below the bin directory in your Driver project. The assembly itself will be in the bin\Release folder or bin\Debug folder depending on the mode you used to compile the Driver. Either version will work. Select the assembly that matches the name of the assembly set in Step 2 of the Create a Universal Driver Interface tutorial. If you set this to ExampleDriver, locate and select ExampleDriver.dll.
The example Service assumes you have not changed the namespace or class names of the example Driver. If your Driver namespace was changed, you’ll see an error like the one below. Just change all reference to ExampleDriver to match your namespace.

Step 4
Edit the appsettings.json file to configure your deployment.
The appsettings file does not get compiled but it is distributed with the Windows service. This file holds configuration settings that can be altered based on how you wish the deployment to operate at runtime. The default settings are as follows:
{
    "ServiceNode": "127.0.0.1",
    "LiveDataCloudNode": "",
    "PortNumber": 58727,
    "MachineName": "LocalMachineName",
    "StoreAndForward": false,
    "UserName": "",
    "Password": ""
}
- ServiceNode
This is the IP Address of the OAS Server that the Driver will connect to and transmit data - LiveDataCloudNode
The optional name of the configured Live Data Cloud node if you are connecting to a remote host via another OAS Server - PortNumber
The port on which to communicate with the OAS Server. This defaults to 58727, but may be configured on the remote OAS Server for TCP communications - MachineName
This is the local identifier for the machine housing the Driver. This will be displayed in the Configure Drivers screen on the destination OAS Server’s Configuration application and useful for identifying Drivers if multiples of the same type are deployed on several devices - StoreAndForward
A boolean indicating whether to cache data when a connection cannot be made to the OAS Server, forwarding when a connection is reestablished - UserName/Password
The credential used to connect to the remote OAS Server if a credential is required
Step 5
Configure the ServiceInstaller to set up  the Service runtime settings.
Within the Visual Studio Solution Explorer, click on the ProjectInstaller(.vb or .cs) and you should see a “Designer” that displays a reference to ServiceInstaller1. Click on ServiceInstaller1 and in the properties pane you should see the settings pictured here.
These settings determine the way your service will behave when you install it. The properties to consider are:
- DisplayName
This is what you will see in the list of services when you open your Service Control Panel. - Service Name
The unique name for the service which is used behind the scenes - StartType
How the service is configured to start. Manual means the service must be started by a user and it will not start when the server reboots. Automatic will attempt to start the service when the server reboots. This is preferable for infrastructure components such as a Driver.
Fee free to alter any of these and then Build the service project.
Step 6
Install your service using the InstallUtil. Using a command-line window, navigate to the location of the compiled service. This will be within the /bin directory within the directory holding the project source code. As with the driver, the compiled code will be within either a Debug or Release director depending on what mode you selected when building the project.
From within this directory, execute the following command:
installutil ExampleHostService.exe
If you changed the name of your service’s assembly name, your .exe may have a different name. Just use that name instead. Be sure to include the .exe or the installation will not proceed.
If the service installs correctly, you should see the message below:

If you see any error messages, be sure to close and start your Command Prompt “As Administrator” to ensure you have the permissions to install a service on your machine.
Check that the service installed properly in the Services Control Panel and you should see it listed.

NOTE:
To uninstall the service, make sure the service is stopped and follow the same steps for installation, but instead execute:
installutil -u ExampleHostService.exe
Step 7
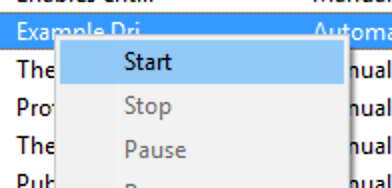 Start the service by selecting it from the Service Control Panel and select Start. If the service functions properly and starts with no issues, you should see “Running” under the Status column.
Step 8
 Open OAS Configuration to Configure Drivers and Tags. Within the OAS installation directory, you can find the OAS Configuration.exe application. Execute this application and when the window opens select Configure > Drivers. Then click Select next to the field containing “Localhost“. You should see your new ExampleDriver listed to the left. Select it and you should see the following screen:
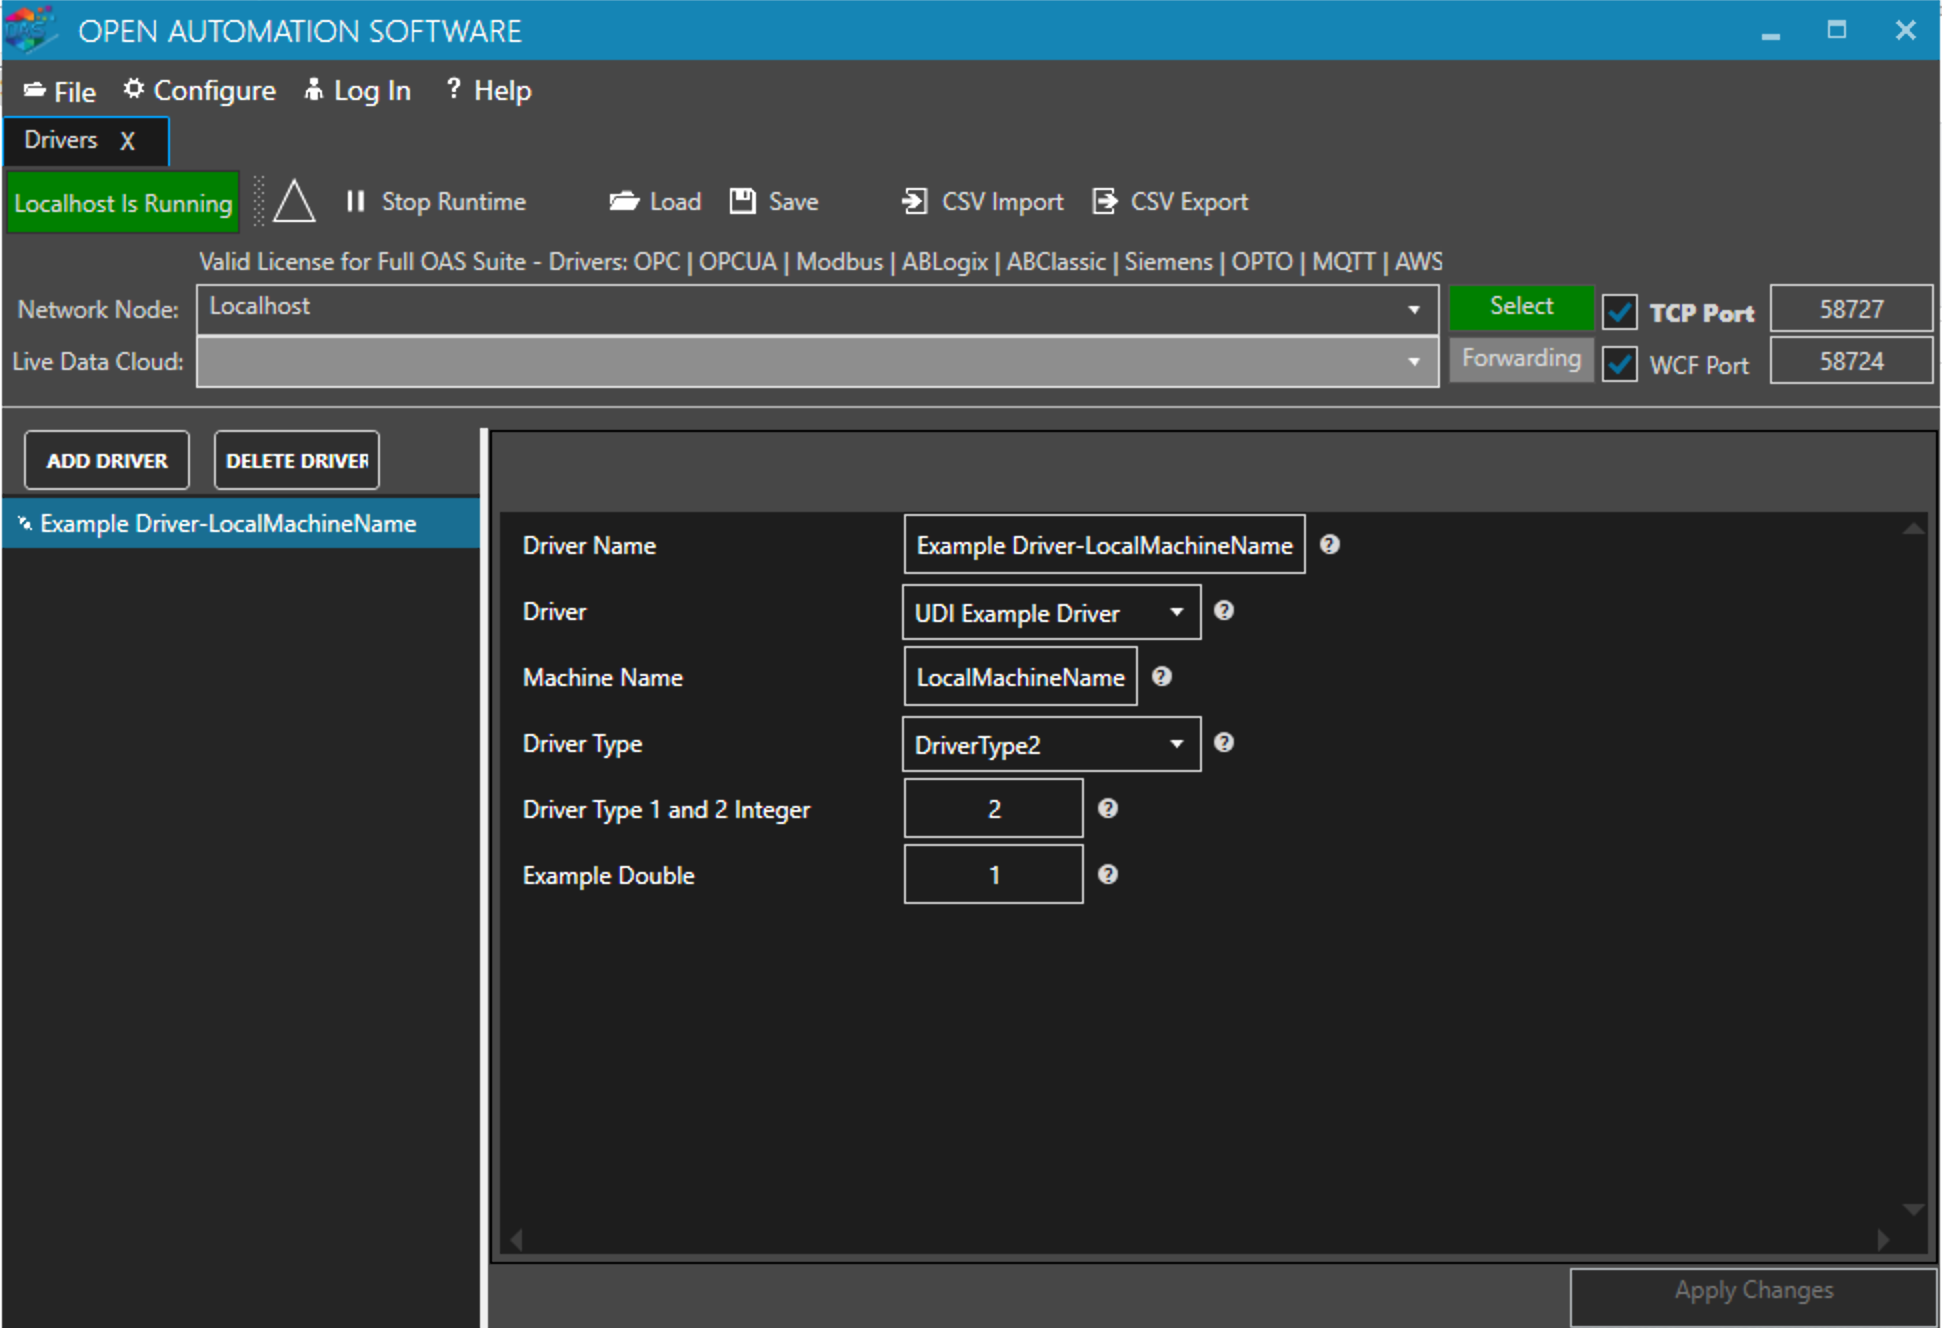
Driver Properties as defined in the code can be seen on the right.
Select Configure > Tags and click Select for Localhost as you did above. In this case you will now see the list of Tags configured on the server. Scroll the Tag list and you will see the tags that were configured automatically by the Driver listed under Example Driver.
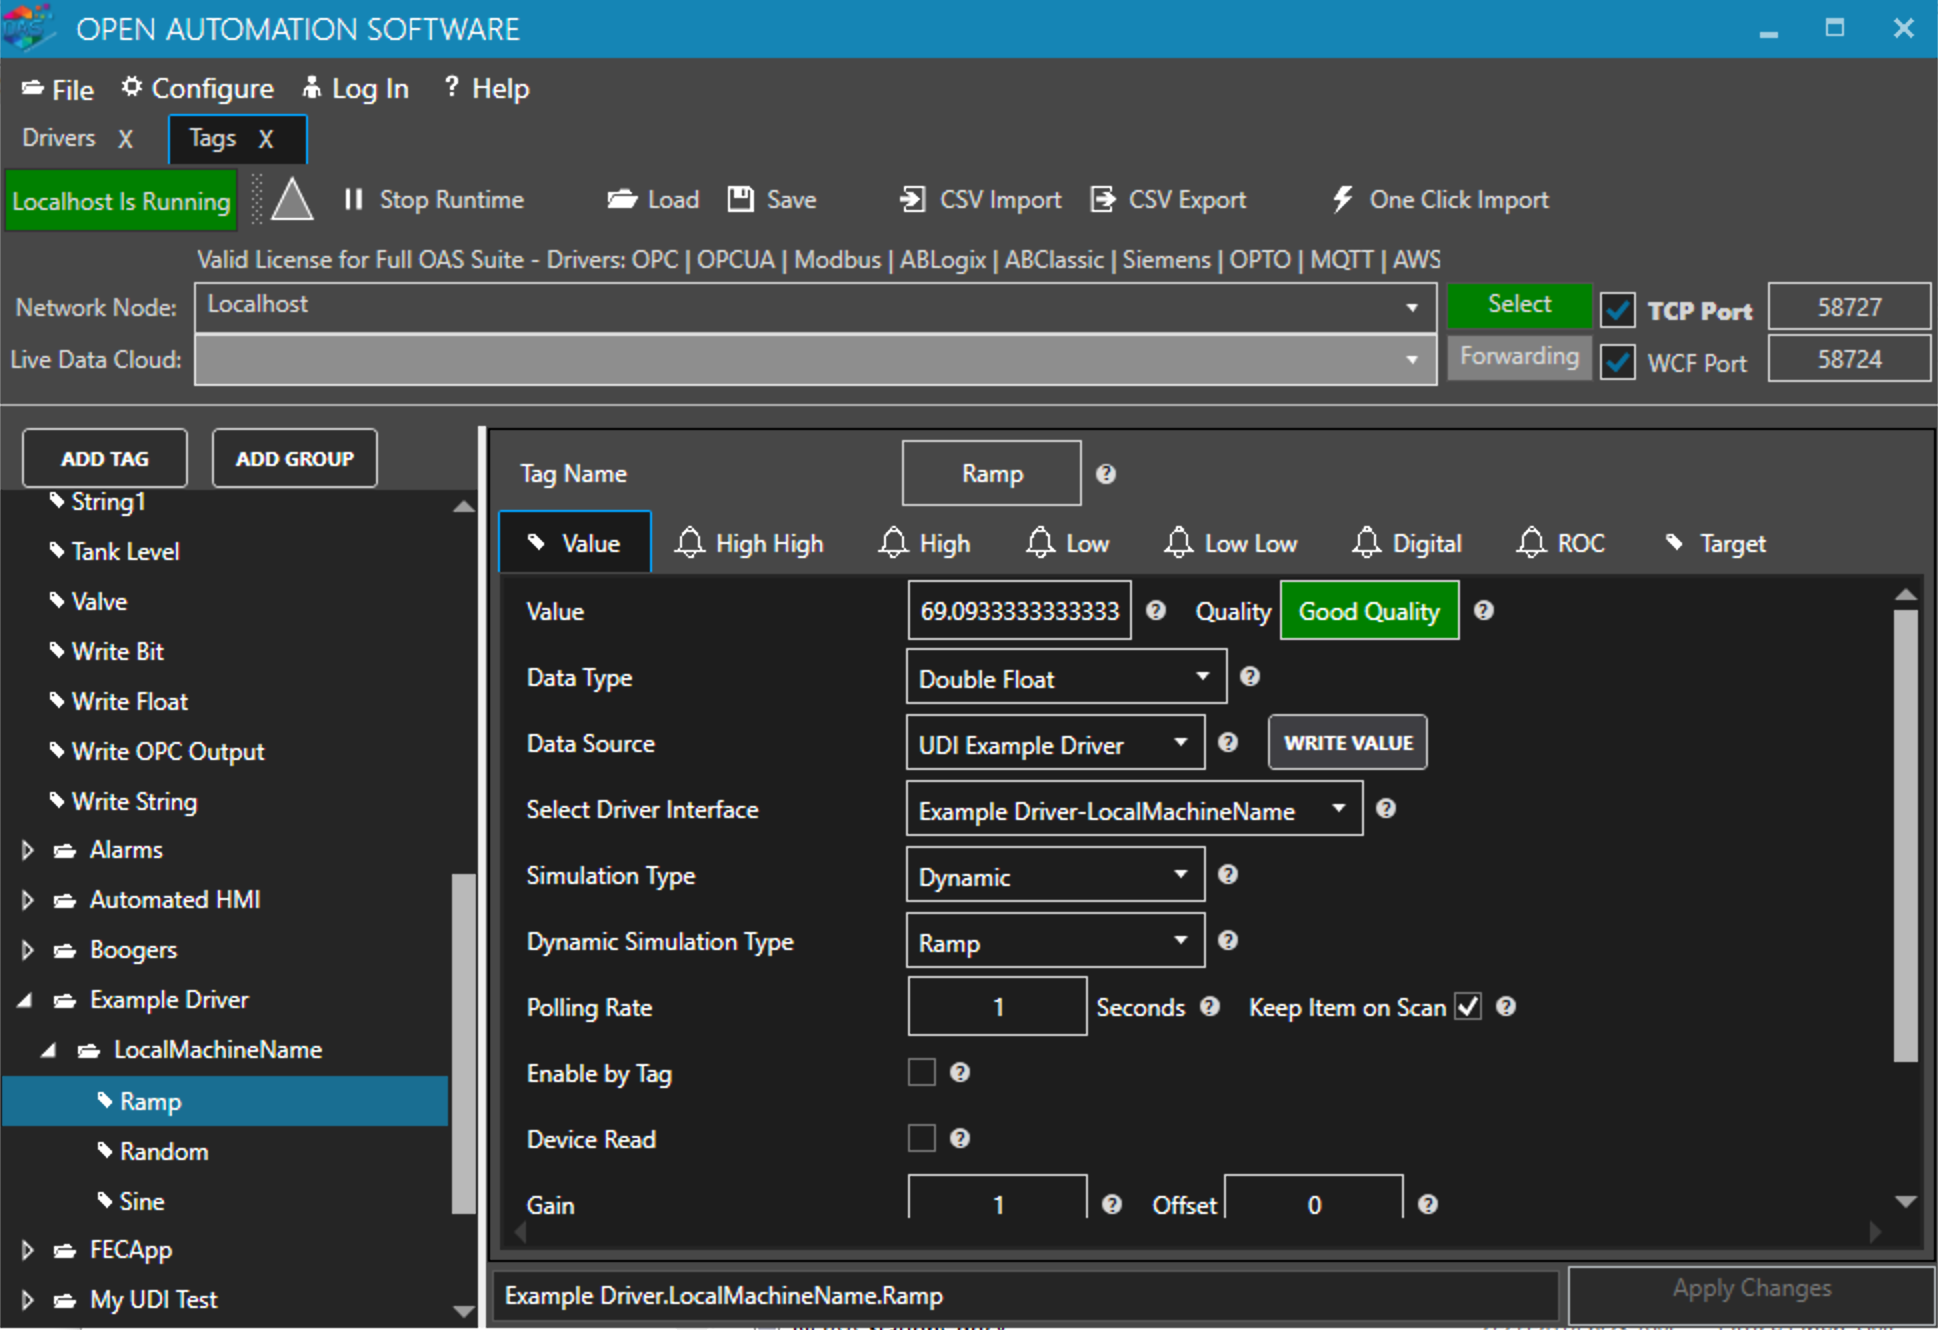
Select any of these Tags and you can see how they are set up to use the custom Driver to feed dynamic data.