One Click OPC UA
Tags can be automatically set up using the One Click OPC UA feature, which browses OPC UA servers automatically and creates tags based on the nodes defined in the OPC UA server. You can then delete tags from the configuration that are unnecessary.
Note: You will need to be running Open Automation Software Version 12.0.0.9 or greater to support the One Click OPC UA feature. You can download the latest version from our Open Automation Software Download page.
Step 1 – Configure OPC UA Driver
NOTE: If you have already defined a driver as described in the Getting Started – OPC UA Server guide you can proceed to Step 2 – Configure OPC UA Tags.

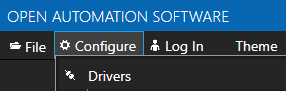
Start Configure OAS application from the program group Open Automation Software.
Select Configure-Drivers.
NOTE: To configure remote OAS Engines enter the IP Address or node name in the Network Node field and click on Select.

Enter a meaningful Driver Interface Name that you will refer to this physical connection when defining Tags with an OPCUA Data Source.

Set the Driver type to OPC UA.

Define the Server Url property to the endpoint of the OPC UA server to connect to.

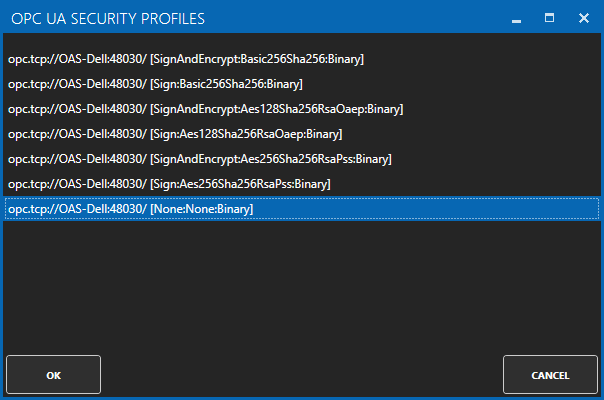
Use the BROWSE button of the Security Profile to select one of the security profiles. Use None:None:Binary for the fastest interface.

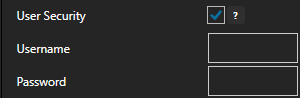
If the server requires user authentication enable the property User Security to define the Username and Password.
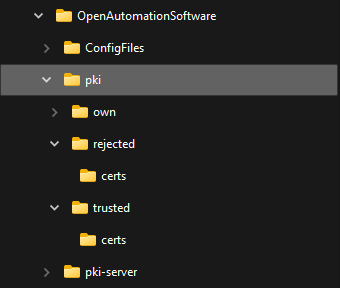
NOTE: The certificate path is C:\ProgramData\OpenAutomationSoftware\pki on Windows and /ConfigFiles/pki/ on Linux. You may need to move the server’s certificate from the rejected\certs folder to the trusted\certs folder.
Select the Add Driver button in the upper left of the window to add the Driver Interface as an available selection when defining Tags in the next step.

Step 2 – Configure OPC UA Tags
Select Configure-Tags.

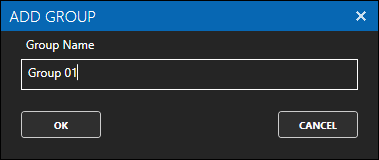
Select Add Group to add a group to place tags in.
Select the Group 01 group, then click the One Click Import button on the top toolbar.

Select the OPC UA Driver Interface defined in Step 1 if there are multiple drivers defined.
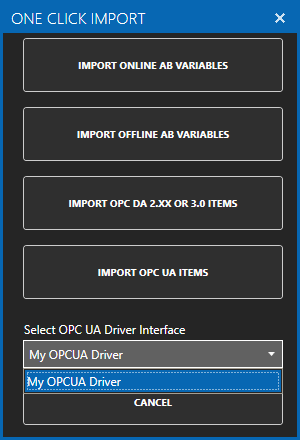
Select the IMPORT OPC UA ITEMS button.
Browse and select the parent folder containing all nodes this parent folder and all sub folders to automatically add.
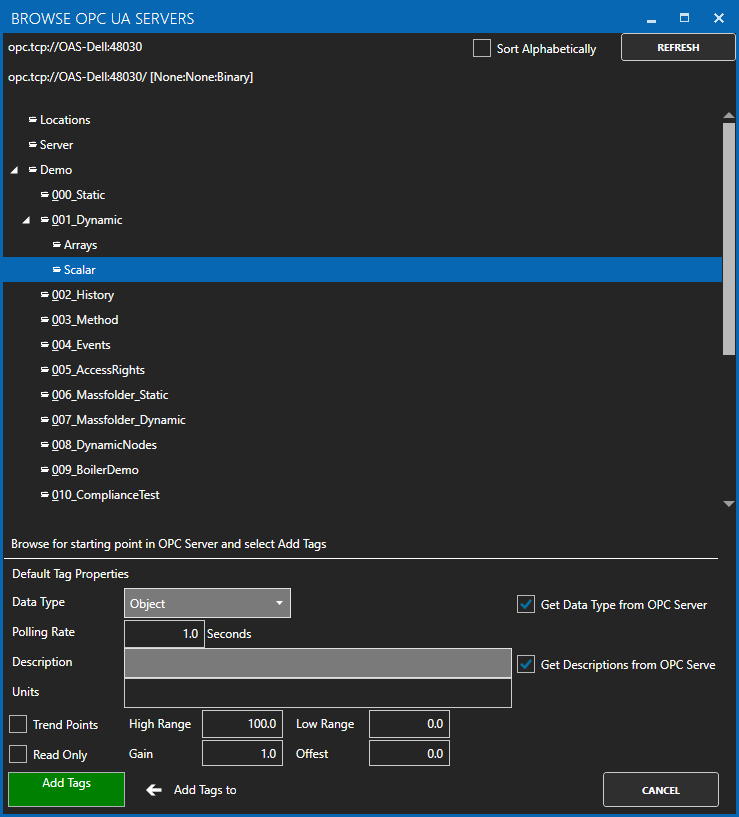
Select to enable the options to Get Data Type from OPC UA Server and optionally the Descriptions.
Select the green Add Tags button in the lower left to all all nodes in this selected folder and all of its sub folders.
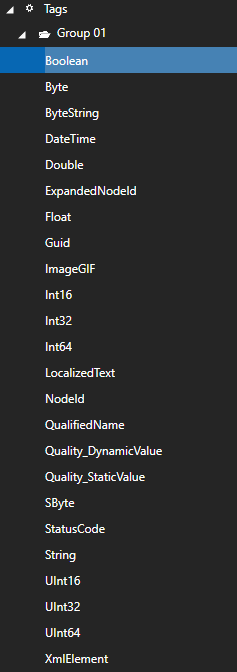
Optionally delete Tags and Groups you do not want to be included in the configuration that have been imported.
Select the Save button on the toolbar at the top.
Step 3 – Save OPC UA Tags and Drivers
Select the Save button on the toolbar at the top.

Enter a file name to be saved in C:\ProgramData\OpenAutomationSoftware\ConfigFiles directory on Windows or ConfigFiles subdirectory on Linux.
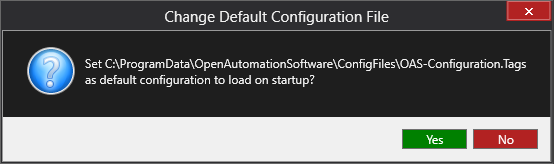
When prompted to set the file as the default configuration to load on startup select Yes.
NOTE: The tags and and drivers are both saved into one file.
The tags defined are now ready for use in all OAS features like Data Logging, Data Route, and Open UIEngine.