How to Install OAS in Linux (Installer Script)
This article covers how to install OAS in Linux using the provided installer script.
If you have issues running the script or prefer to have more control over the installation, please refer to the Manual Installation documentation.
1 - Download OAS
In this section you will download the OAS platform for Linux and extract it.
Download the Linux version of OAS for the platform that is relevant to you.
Fully functional trial versions of the software are available for Windows, Windows IoT Core, Linux, Raspberry Pi and Docker on our downloads page.
Change directory into your user's home directory. For example:
cd /home/oasExtract the
oas-linux.zipfile to the current directory. This will create a new folder calledoas-linux.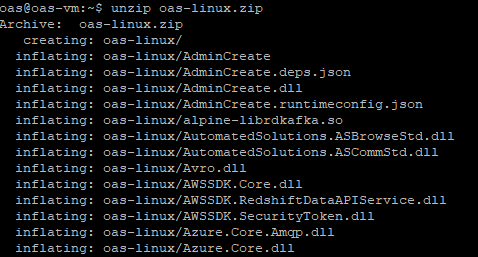
Tips
To unzip a
zipfile you might need to install the unzip utilities. In a Debain based Linux system you can do this using the following command:sudo apt-get install unzipMove into the
oas-linuxfolder.cd oas-linuxGive the
OASEnginebinary the execute permission.chmod +x OASEngine
2 - Run Linux Installation Script
This step will install OAS using the installation script provided, and will take the following actions:
- Create a linux account, under which the OAS service will run
- Copy the OAS installation to the new user account's home directory
- Configure OAS to run as a service at startup
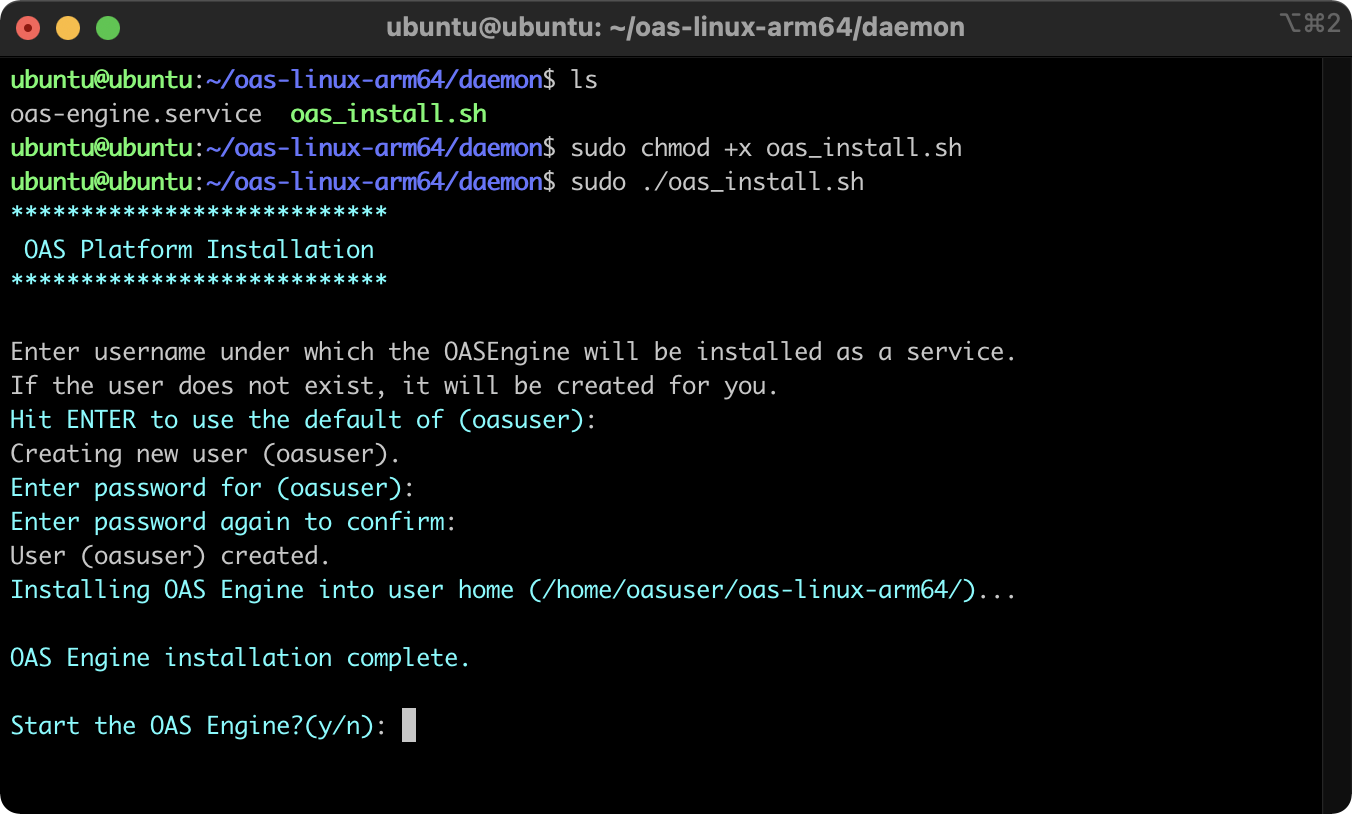
Locate the installer script
oas_install.shwithin thedaemondirectory. The full path should be:/home/<userid>/oas-linux/daemon/oas_install.shEnsure the script is marked executable by issuing the following command:
sudo chmod +x oas_install.shRun the installation script, using the
sudocommand which will grant the proper permissions needed by the script to perform all of the installation steps:sudo ./oas_install.shTips
NOTE: When you execute any script on Linux and receive an error such as “No such file or directory”, this may be resolved by converting the file to unix-type line breaks. This can be done with the command
dos2unixwhich is installed using the following commands on many Linux distributions:sudo apt updatesudo apt install -y dos2unixYou should now see the following prompt to start the installation:
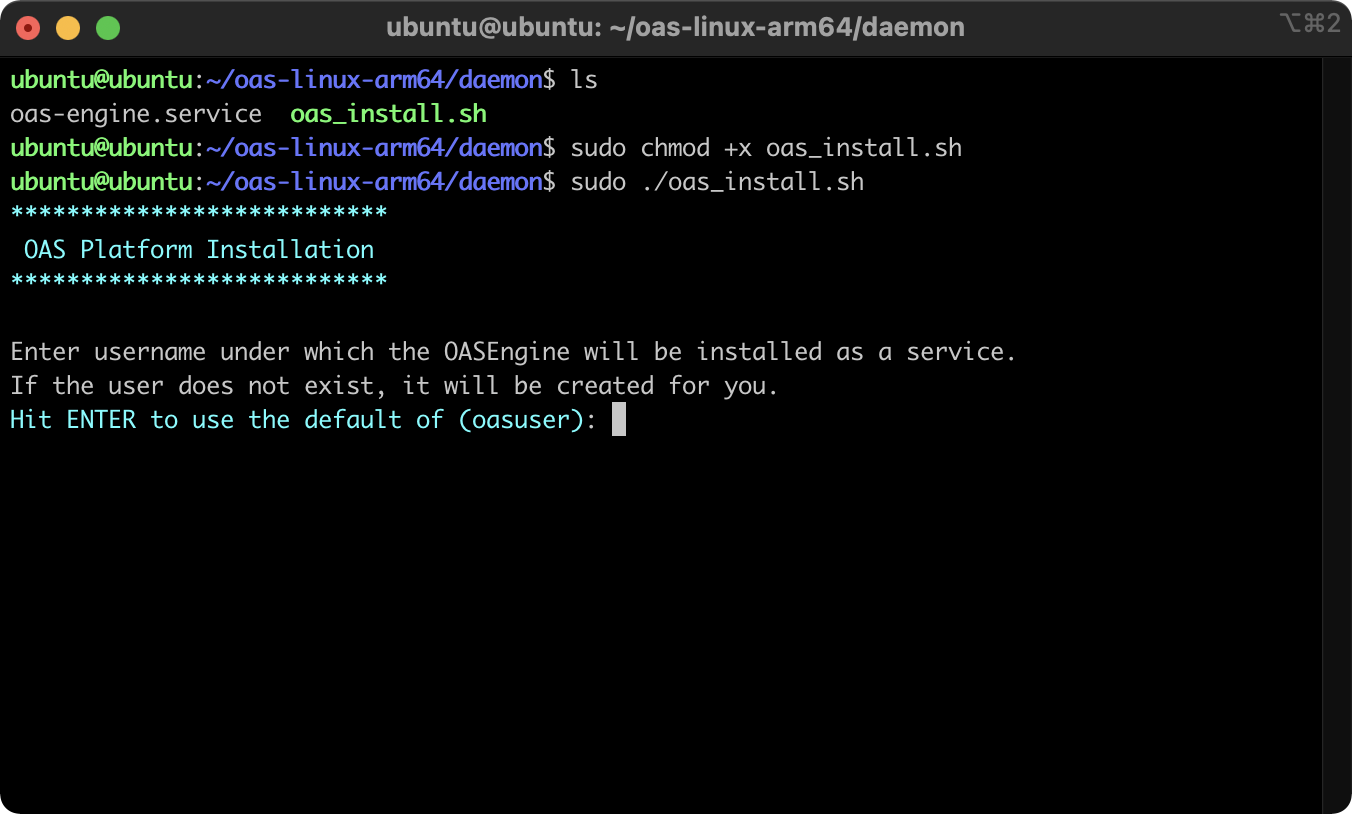
Select a user account to host the OASEngine. If the user does not exist, you will be prompted to create a password for the new user.
Complete the installation and optionally choose to start the OASEngine service
The OASEngine is now installed as a user service or daemon under the account selected or created (default: oasuser). This service is managed by systemd and can be controlled or monitored like any systemd service. By default, the OASEngine is now configured to start up when the machine reboots.
You can now use the Configure OAS application to configure the server. This can be done from any local or remote workstation or server using Windows or Linux. The Windows client is installed as part of the OAS platform.
The Linux client can be downloaded and installed independently from the downloads page.
Note
Ensure that the PC Firewall allows TCP communication on port 58727. For more information on configuring an OAS installation see the documentation for the Configure OAS application.
3 - Linux Service Control
Confirm the service is running
Log into the Linux machine using the credential created during the installation. By default this is oasuser. Then, execute the following command to determine the oas-engine status:
systemctl --user status
This should return something similar to:
State: running
Jobs: 0 queued
Failed: 0 units
Since: Mon 2021-03-01 16:34:33 UTC; 3 weeks 6 days ago
CGroup: /user.slice/user-1001.slice/user@1001.service
├─oas-engine.service
│ └─2214 /home/oasuser/oas-linux-arm64/OASEngine
If you do not see the oas-engine.service listed as running, you can begin troubleshooting by attempting to run the OASEngine manually and checking for errors on startup in the console.
Start the service
systemctl --user start oas-engine
Stop the service
If you want to manually stop the service run the following command:
systemctl --user stop oas-engine
4 - How to Uninstall OAS
Included with the OAS installation script is an uninstaller, as well. This file is oas_uninstall.sh and located in the same directory as the installation script. Similarly, you will need to mark this file for execution before running it. Only use this script if the installation script was successful. Use the following commands to mark for execution and then start the uninstaller:
sudo chmod +x oas_uninstall.sh
sudo ./oas_uninstall.sh
The uninstaller script will attempt to back out the installation by performing the following actions.
- Stop the OASEngine service
- Remove all installation files
- Remove user account created for running the service (optional). When prompted to remove the OAS user account, you can choose ‘no’ to keep the account intact.
5 - Next Steps
Now that you've successfully started the OAS Engine for Linux you can try connecting to it using the Configure OAS application from your favorite desktop environment.
In the Configure OAS application simply set the Network Node to the Linux OAS Engine server IP address or host name when logging in or selecting a node.