Getting Started with OASData
The OASData component is used for real time and historical data access against a local or remote OAS instance. This component can monitor any Tag changes and raise and event within your custom code when the value or state of a Tag has changed.
The OASData .NET Standard 2.0 component and OPCSystems component for .NET Framework 4.0 applications can be included in Windows Services, Web Services, ASP.NET Web Applications, WinForm Applications, and WPF Applications. They are 100% managed code components and can be used to communicate and set up both local and remote services.
With the release of the OAS Platform v12, the .NET programmatic interface for server configuration is based on .NET Standard 2.0 with the OASConfig component. This allows you to configure an OAS server from an application that can be deployed to any supported OS, including Linux, Mac, Android, and iOS.
NOTE: If you are using the OAS WPF HMI product use the OPCWPFDasbhoard.OPCWPFData component. If you are using the OAS WinForm HMI product use the OPCControls.OPCControlData component. For .NET Framework 4.0 projects without the need for user interface controls use the OPCSystemsDataConnector assembly.
All components and assemblies ship with the OAS Platform and have the same easy to use programmatic methods.
Download Realtime Data Access – VB and C# – Windows Server and .NET Core Console App examples for programmatic tag creation and realtime data access.
Requirements
For all .NET development, Microsoft Visual Studio 2015+ is recommended. For developing cross-platform .NET Standard or .NET Core solutions, Visual Studio 2019+ is recommended. For developing Android and/or iOS solutions, be sure to include Xamarin extensions to Visual Studio. With the exception of Xamarin apps which require C#, all code can be written in either VB.NET or C#.
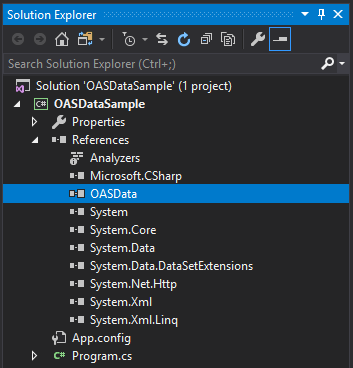
Step 1: Include the OASData Assembly
After creating a new Visual Studio project, add a reference to the OASData assembly, found in the OAS installation directory. This is typically:
C:\Program Files\Open Automation Software\OAS\Controls\NetStandard\OASData
- .NET 5 or greater
- .NET Core 2.0 or greater
- .NET Framework 4.61 or greater
- Xamarin.iOS 10.14 or greater
- Xamarin.Android 8.0 or greater
- UWP 1.0.0.16299 or greater
For .NET Framework 4.6.0 or less it is typically C:\Program Files\Open Automation Software\OAS\Controls\NetFramework\OPCSystemsDataConnector
Step 2: Include a single instance of OASData
Your application typically does not need more than one instance of the OASData.Data class. So, this can be created when your application starts.
The following is an example of a console application using a single static instance of the OASData.Data class which will be available and shared by all other members of the application.
VB
Imports System
Imports System.Collections.Generic
Imports System.Linq
Imports System.Text
Imports System.Threading.Tasks

Namespace OASDataSample
    Class Program
        Shared oasd As OASData.Data = New OASData.Data()

        Private Shared Sub Main(ByVal args As String())
        End Sub
    End Class
End Namespace
C#
using System;
using System.Collections.Generic;
using System.Linq;
using System.Text;
using System.Threading.Tasks;

namespace OASDataSample
{
    class Program
    {
        static OASData.Data oasd = new OASData.Data();
        static void Main(string[] args)
        {
            // additional code here
        }
    }
}
Step 3: Add a ValuesChangedAll Event Handler
To monitor changes in Tag values or data quality, add a handler for the ValuesChangedAll event when your application is started.
VB
Imports System
Imports System.Collections.Generic
Imports System.Linq
Imports System.Text
Imports System.Threading.Tasks

Namespace OASDataSample
    Class Program
        Shared oasd As OASData.Data = New OASData.Data()

        Private Shared Sub Main(ByVal args As String())
            oasd.ValuesChangedAll += AddressOf Oasd_ValuesChangedAll
            Console.ReadLine()
        End Sub

        Private Shared Sub Oasd_ValuesChangedAll(ByVal Tags As String(),
            ByVal Values As Object(),
            ByVal Qualities As Boolean(),
            ByVal TimeStamps As DateTime())
        End Sub
    End Class
End Namespace
C#
using System;
using System.Collections.Generic;
using System.Linq;
using System.Text;
using System.Threading.Tasks;

namespace OASDataSample
{
    class Program
    {
        static OASData.Data oasd = new OASData.Data();
        static void Main(string[] args)
        {
            oasd.ValuesChangedAll += Oasd_ValuesChangedAll;

            Console.ReadLine(); // keep the app running until <enter> is pressed
        }

        private static void Oasd_ValuesChangedAll(
            string[] Tags,
            object[] Values,
            bool[] Qualities,
            DateTime[] TimeStamps)
        {
            // read Tag values here
        }
    }
}
Step 4: Add Tags to Monitor
Using the AddTag or AddTags methods, you can register one or more OAS Tags to be monitored for any changes that occur on the server. AddTag is used for one Tag at a time while AddTags allows you to add multiples in a single call.
The following example adds tags to monitor and then writes updated values to the console output as they arrive.
Tag Syntax
When referencing Tags in any call, it is assumed that you are accessing them on the OAS server you have connected to, localhost by default. However, you can also access remote Tags on any OAS server that can be reached by the client as well as between servers connected via Live Data Cloud. Read more about the proper syntax for accessing Tags and Tag Variables.
VB
Imports System
Imports System.Collections.Generic
Imports System.Linq
Imports System.Text
Imports System.Threading.Tasks

Namespace OASDataSample
    Class Program
        Shared oasd As OASData.Data = New OASData.Data()

        Private Shared Sub Main(ByVal args As String())
            oasd.ValuesChangedAll += AddressOf Oasd_ValuesChangedAll
            oasd.AddTags(New String() {"Sine.Value", "Random.Value", "Ramp.Value"})
            Console.ReadLine()
        End Sub

        Private Shared Sub Oasd_ValuesChangedAll(ByVal Tags As String(),
            ByVal Values As Object(),
            ByVal Qualities As Boolean(),
            ByVal TimeStamps As DateTime())

            For i As Integer = 0 To Tags.Length - 1
                Console.WriteLine("{0} : {1} : {2} : {3}", TimeStamps(i), Tags(i), Values(i), Qualities(i))
            Next
        End Sub
    End Class
End Namespace
C#
using System;
using System.Collections.Generic;
using System.Linq;
using System.Text;
using System.Threading.Tasks;

namespace OASDataSample
{
    class Program
    {
        static OASData.Data oasd = new OASData.Data();
        static void Main(string[] args)
        {
            oasd.ValuesChangedAll += Oasd_ValuesChangedAll;

            oasd.AddTags(new string[] {
                "Sine.Value",
                "Random.Value",
                "Ramp.Value"
            });

            Console.ReadLine(); // keep the app running until <enter> is pressed
        }

        private static void Oasd_ValuesChangedAll(
            string[] Tags,
            object[] Values,
            bool[] Qualities,
            DateTime[] TimeStamps)
        {
            for(int i = 0; i < Tags.Length; i++)
            {
                Console.WriteLine("{0} : {1} : {2} : {3}",
                    TimeStamps[i], Tags[i], Values[i], Qualities[i]);
            }
        }
    }
}
Step 5: Explore the API
Explore the OASData API for the specific operations you require to read and write OAS Tag values on both local and remote OAS instances.