Getting Started – Web HMI Dashboard
NOTE: The OAS Open UIEngine is a more feature-rich, no-code HMI and application development platform for your automations than the Web HMI Dashboard, which is a basic set of tools for visualization.
See the UIEngine Documentation to learn more.
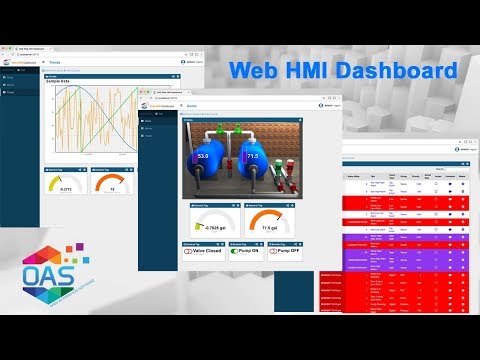
- 00:00 – Features of a WEB HMI Dashboard
- 01:33 – Alarm Dashboard
- 01:39 – Trend Dashboard
- 01:55 – Add a Dashboard
- 02:04 – Add a Module
- 02:59 – Built-in Modules
- 03:04 – Numeric Tag Module Configuration
- 04:53 – Boolean Tag Module
- 05:56 – Display Multiple Tags with real time values
- 07:09 – Alarms Module
- 08:21 – Trends Module
- 10:28 – Custom Module
- 10:34 – Configuration
- 11:16 – Demo Module
- 11:43 – Getting Started
- 12:58 – Open OAS Configuration App
- 13:20 – Static Files
- 14:46 – Removing a Module
- 16:25 – Deploying to IIS
- 18:41 – Conclusion
Step 1
Configure Web Services within the OAS Platform. For instructions on how to accomplish this as well as optionally using SSL for secure communications, see the following article:
Configuring OAS Web Services
Step 2
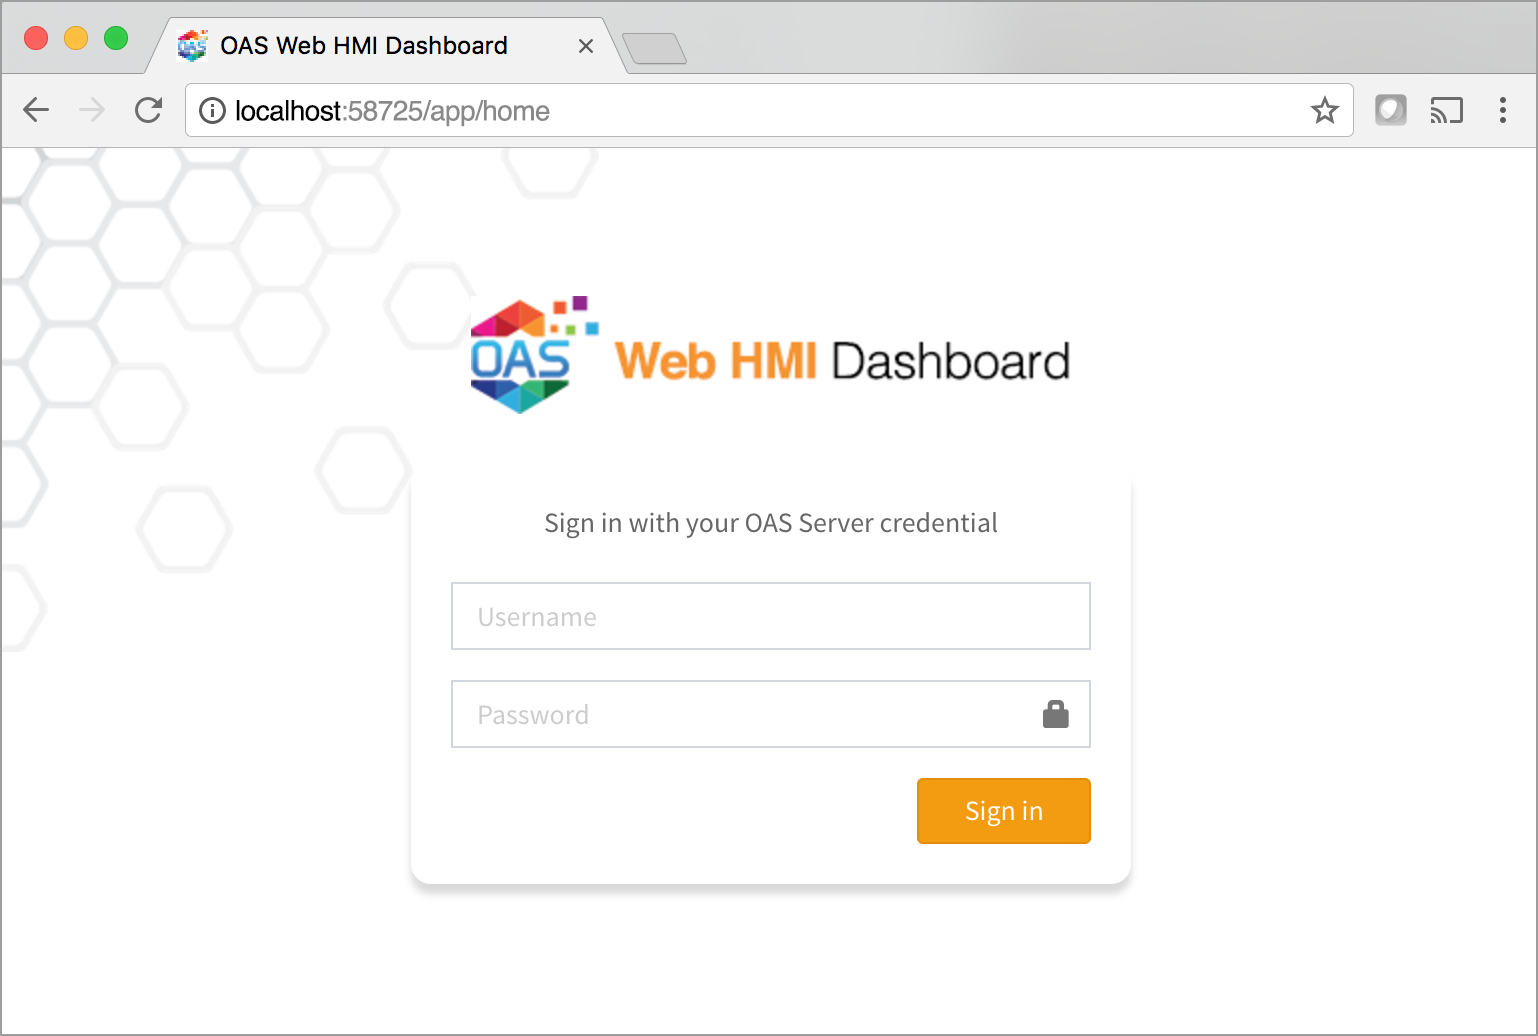
Open a browser to the Web HMI Dashboard at the following address:
http(s)://<server>:<port>/app/home
For example, if you are on the same machine as the OAS Service installation, you are not using SSL, and you are using the default port, the URL will be:
http://localhost:58725/app/home
Step 3
Once presented with the Web HMI Dashboard login screen, enter in an OAS server credential, or leave blank to use the default server credential and click “Sign In“.
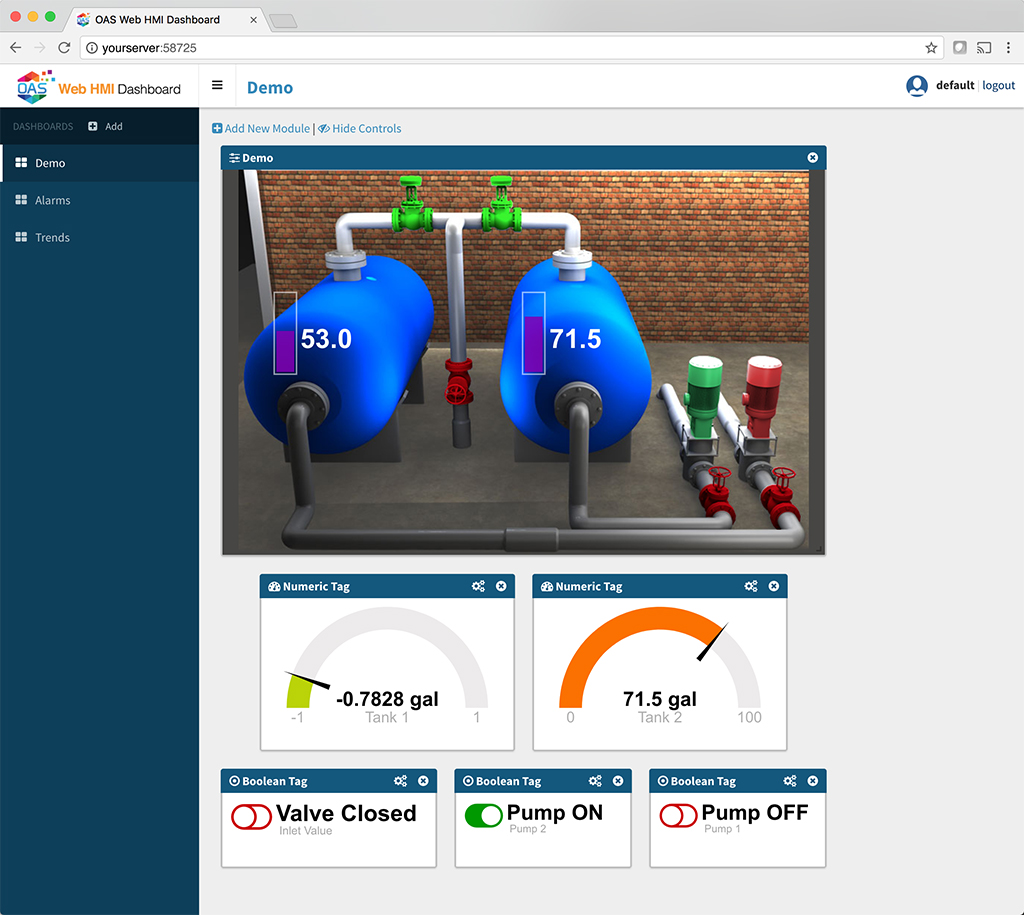
Upon successfully logging in, you will be presented with your personalized Web HMI Dashboard. If the application is in Demo Mode, you will be provided with some demo dashboards and you will see live data flowing into each module. All modifications to your dashboard will be saved within your login and remembered for your next session.
Additional Configuration Settings
By default, the Web HMI Dashboard will run in Demo Mode which will do the following:
- All logins no matter the credentials, will be allowed to log into the application and be provided individual dashboard settings
- New logins will be pre-populated with demo dashboards
To alter any application configurations, locate the Web HMI Dashboard directory located in the installation directory for Open Automation Software. This is typically in C:\Program Files\Open Automation Software\OAS. The Dashboard directory is labeled “www“.
Within this directory, look in the “js” directory and locate the file app_config.js. This is a JSON file containing application settings.
oas_url : optional hard-coded URL of the OAS server location. Omit this setting and the application will assume the server:port used to connect to the app
show_login_url : <true | false> determines if the OAS url can be supplied by the user in the login screen to point the application to a specific OAS service
session_timeout : <integer> number of minutes of inactivity before the user session is ended and the login screen is displayed
demo_mode : <true | false> enables or disables demo mode
demo_dashboards : a JSON representation of the demo dashboards pre-populated for new users in demo_mode