Getting Started – Web HMI
The following content will get you started with Web HMI, building your own web user interfaces with real time data.
NOTE: If you want to visualize your data in a desktop or mobile browser with zero programming, you may be interested in the OAS Open UIEngine .
The UIEngine is a robust no-code web application and HMI builder for developing rich user interfaces in a browser-based development environment.
See the UIEngine Documentation to learn more.
For full reference information on Web HMI visit Programming Reference – Web HMI

Step 1
Configure Web Services within the OAS Platform. For instructions on how to accomplish this as well as optionally using SSL for secure communications, see the following article:
Configuring OAS Web Services
Step 2
Create a project directory. (Example C:\myWebHMI)
Step 3
Copy the 4 supplied files from C:\Program Files\Open Automation Software\OAS\HTML_HMI, js and css subdirectories to your project directory keeping the directory structure just the same.
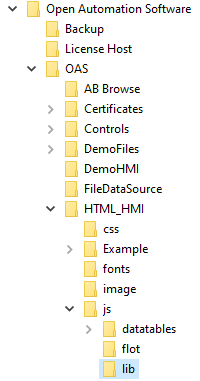
Directories
1. js/lib/jquery-1.8.3.min.js
2. js/lib/json2.js
3. js/opc-lib-min.js
4. css/opc-style.css
Note: You can use any version of jQuery as long as it is v1.8 or greater, and the json2 library is only necessary for older browsers such as IE 8.
Step 4
Open/create a new text document and add the following minimum code:
<!DOCTYPE html>
<html>
    <head>
        <script type="text/javascript" src="js/lib/jquery-1.8.3.min.js"></script>
        <script type="text/javascript" src="js/opc-lib-min.js"></script>
        <script type="text/javascript" src="js/lib/json2.js"></script>
        <link rel="stylesheet" stype="text/css" href="css/opc-style.css"/>
        <script type="text/javascript">
            OAS_config = {
                token:'7e61b230-481d-4551-b24b-ba9046e3d8f2',
                serverURL: 'http://localhost:58725'
            };
        </script>
    </head>
    <body>
    </body>
</html>
Networking
In the web page set the serverURL to the IP Address, Network Node Name, or registered domain name of the Linux or Windows devices where the OAS Engine located.
serverURL: 'http://192.168.0.1:58725'
Specify the tag names in the HTML code as local tags. The web browser can be run locally or remotely, it will communicate to the server specified in the serverURL as a relative path for the tag values. In this example the tags would be running on the same server as 192.168.0.1 and the content in the page would reference the tag as local even if the client browsers are running on remote devices.
Local Tag
myGroup.myTag.Value
If the tag is located on a different system than the serverURL or you want to host data from multiple OAS Engines use the Remote Tag Access syntax.
\\192.168.0.1\myGroup.myTag.Value
Live Data Cloud Networking from local OAS Engine
RemoteSCADAHosting.myLiveDataCloudNode.myGroup.myTag.Value
Live Data Cloud Networking though remote OAS Engine
\\192.168.0.1\RemoteSCADAHosting.myLiveDataCloudNode.myGroup.myTag.Value
Step 5
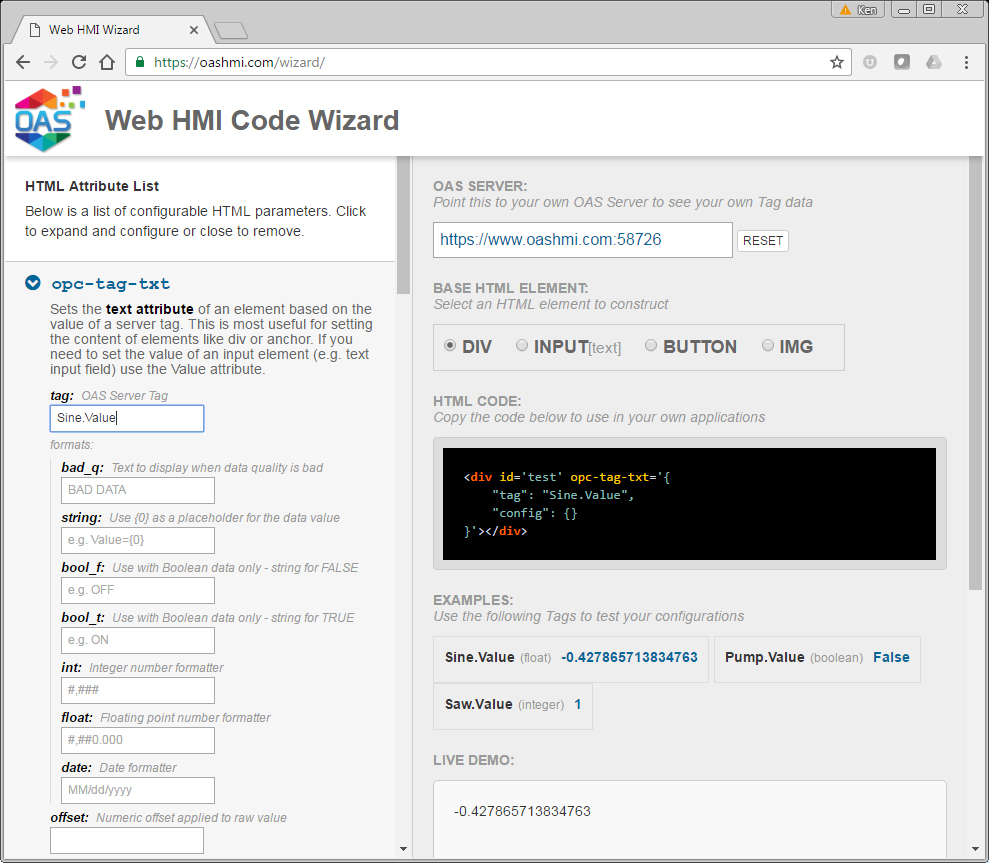
If you are new to HTML code use the HTML Wizard code generator at http://opcweb.com/wizard/ to generate the code for you.
In the body add the following code to display the Ramp tag value:
<div>Ramp Value = <label id="txt1" oas-tag-txt='{"tag":"Ramp.Value","config":{"formats":{"bad_q":"?????","float":"0.0"}}}' ></label></div>
Step 6
Below the Ramp code add the following code to display the Pump tag Value:
<div>Pump Value = <label id="txt2" oas-tag-txt='{"tag":"Pump.Value","config":{"formats":{"bad_q":"?????"}}}' ></label></div>
Step 7
Finally below the Pump code add the following to create a button that will allow you to “Toggle” the Pump Value.
<div><button id="tog2" oas-tag-set='{"tag":"Pump.Value","config":{"evt":"click","offset":0,"set":"toggle","set_src":""}}'>Toggle Pump</button></div>
NOTE: To be able to set a value (write to it) it must first be setup to read in the web application.
Step 8
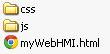
Save your file as myWebHMI.html
Step 9
Deploy the your application to any web server. This can be IIS on Windows, or any HTTP server on Linux, and even cloud hosting services.
Step 10
To see the results open a browser to the location of your HTML file.
Full Source Code
Your final code should look like this:
<!DOCTYPE html>
<html>
    <head>
        <script type="text/javascript" src="js/lib/jquery-1.8.3.min.js"></script>
        <script type="text/javascript" src="js/opc-lib-min.js"></script>
        <script type="text/javascript" src="js/lib/json2.js"></script>
        <link rel="stylesheet" stype="text/css" href="css/opc-style.css"/>
        <script type="text/javascript">
            OAS_config = {
                token:'7e61b230-481d-4551-b24b-ba9046e3d8f2',
                serverURL: 'http://localhost:58725'
            };
        </script>
    </head>
    <body>
    <div>Ramp Value =  <label id="txt1" oas-tag-txt='{"tag":"Ramp.Value","config":{"formats":{"bad_q":"?????","float":"0.0"}}}' ></label></div>
    <div>Pump Value = <label id="txt2" oas-tag-txt='{"tag":"Pump.Value","config":{"formats":{"bad_q":"?????"}}}' ></label></div>
    <div><button id="tog2" oas-tag-set='{"tag":"Pump.Value","config":{"evt":"click","offset":0,"set":"toggle","set_src":""}}'>Toggle Pump</button></div>
    </body>
</html>
NOTE: To be able to set a value (write to it) it must first be setup to read in the web application.
Open Automation Software provides a tool for automatically creating the HTML code to read and write to Open Automation Software Tags using the HTML HMI Wizard.