Overview – Configure OAS
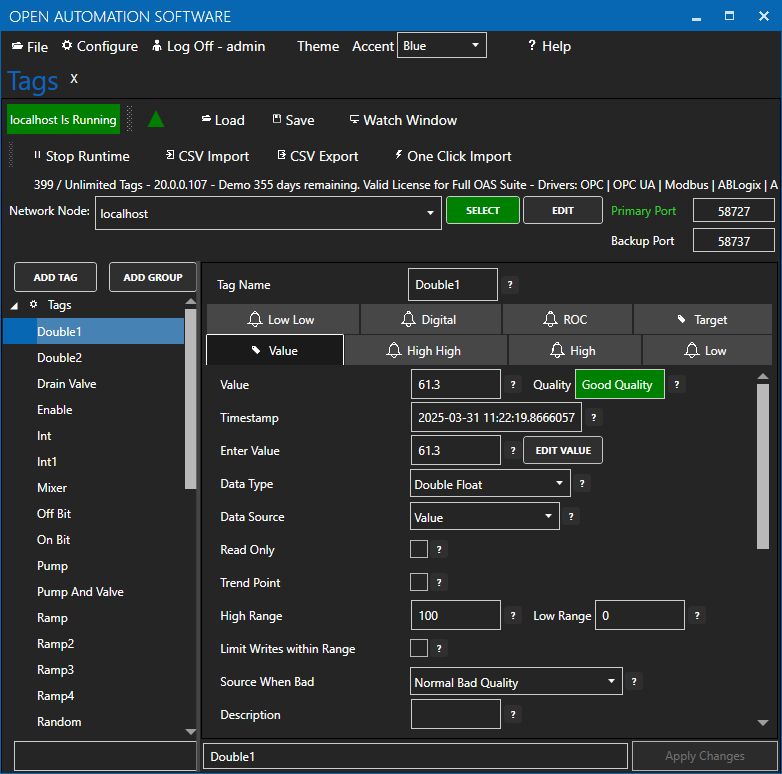
The Configure OAS application is the primary configuration tool for configuring the OAS platform. It can be used to configure both locally installed and remote OAS instances as long as the remote instance is reachable via a network from the host where Configure OAS is used.

If you are using the Windows version of the OAS platform, the Configure OAS application is included by default.
If you are running on a Linux platform, you will find the download link for the Configure OAS application in the Downloads section. The Linux version has been tested on:
- Ubuntu
- Linux Mint Cinnamon
- Linux Mint XFCE
- Linux Mint Mate
- Debian KDE
You can use Windows or Linux to configure any any local or remote OAS instance running on Windows or Linux, as well as Docker or Raspberry Pi.
In this guide you will learn about the Configure OAS application’s main features and screens.
Windows Installation
Configure OAS is installed by default when you install the OAS platform on a Windows host.
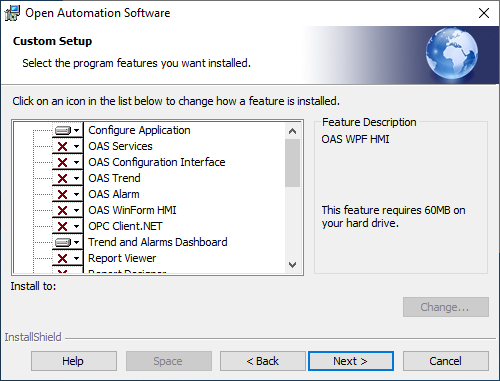
You can also install the Configure OAS application without installing the main OAS services. This can be useful if you have a configuration or maintenance server that users will use to configure remote OAS instances. This is especially useful if you have Linux or Docker installations and you need to configure them using Configure OAS. To achieve this, make sure you select a Custom installation type when installing OAS.
In this example we will only install the Configure OAS application and the Trend and Alarms Dashboard. Both of these applications can connect to remote OAS instances.

The Configure OAS application can be started from the Windows start menu. You can find it there by searching for Configure OAS or by locating it in the Open Automation Software start menu folder. The icon will look similar to this example.

Linux Installation
You can install the Configure OAS application on a Linux machine independently to the main OAS platform. Once you have downloaded the relevant Debian installer you can run your installation using the following command.
sudo dpkg -i oasconfiguration_linux-amd64.debOnce installed you can run the application using the oasconfiguration command or using the Configure OAS shortcut in the start menu.

Local and Remote Configuration
Because the Configure OAS application is a stand-alone application, it can be used to configure any running OAS instance that can be reached either locally on the same host or on the network where the Configure OAS application is installed. If you are connected to the internet, it can even access any publicly accessible OAS instance host as long as you have the IP address or the host name and the OAS services are exposed.
During login and within the OAS instance you have the option to select the Network Node that you want to connect to. The term Network Node simply means the IP or hostname of the local or remote OAS instance that you wish to configure.
In the login dialog window you can provide a Network Node:

When you open a configuration screen, you can also set the Network Node you want to access:

Note that once you login, those credentials will be used for all configuration actions with an OAS instance. This assumes that you have the same username and password configuration on all your network nodes, otherwise you’ll have to login with different credentials and then update the network node.
Main Window
When you launch the Configure OAS application you will see a toolbar and a blank surface below this.
Logged Out State
By default, the Configure OAS application is in a logged out state with no configuration screens open.

Here is an overview of the menu items:
| Menu Item | Description |
|---|---|
| File | Use the File > Exit menu item to close the application. |
| Configure | Access to the configuration screens. |
| Log In | Login as an authenticated user. |
| Theme | Select a light or dark theme. |
| Accent | Select the theme accent. |
| Help | Access further help and resources. |
Login
When you access a configuration screen in the Configure menu, Configure OAS will ask you to login. If you have installed OAS for the first time you will be asked to set up a new Admin account password. This will give you full access to Configure OAS. If you are logging in to an existing OAS instance you can use whichever user accounts you have configured for the instance you are configuring. This will depend on your security configuration.

If you have security configured where the Default security group has been restricted and you cancel the login, the configuration screen will still load, but you will see error messages.
Logged In State
After you login, you will see the username that you used to login appear in the toolbar and the Log In menu item will now say Log Off.

Configuration Screens
The Configure OAS configuration screens allow you to configure all of the various OAS platform features. You can access each screen by selecting the screen name from the Configure menu. This menu is organized by OAS features.
Here is a list of available screens and associated Knowledge Base links to help you find more specific information:
| Configure Menu Item | Description | KB Links |
|---|---|---|
| Quick Start | Open the Quick Start Guide application | |
| Tags | Manage Tags and Tag Alarm Limits | Overview – Tags |
| Drivers | Manage Device Connectors | Connectors |
| User Interface | Opens the UIEngine configuration and viewer website in your default browser | OAS Open UIEngine Documentation |
| Data Logging | Manage data logging to database and CSV files | Overview – Data Logging |
| Alarm Logging | Manage alarm logging to database and CSV files | Overview – Alarm Logging |
| Alarm Notifications | Manage alarm notifications to E-mail, SMS and Voice | Overview – Alarm Notification |
| Alarm and Event OPC Servers | Present OAS Alarms as an OPC Alarms and Events | Overview – Tags |
| Reports | Manage reports | Overview – Reports |
| Recipes | Manage Recipe for batch data ingestion from a database | Overview – Recipe |
| Data Route | Manage Data Routes for Tag to Tag data transfer | Overview – Data Route |
| Excel | Open the OAS Excel Tag Browsing assistant | Excel |
| Live Data Cloud | Configure hosting via Live Data Cloud | Live Data Cloud Networking |
| UDP Broadcast | Configure the Broadcast side of a Unidirectional Gateway connection | Getting Started – Unidirectional Network Gateway |
| UDP Receive | Configure the Receiver side of a Unidirectional Gateway connection | Getting Started – Unidirectional Network Gateway |
| Security | Manage security groups | Getting Started – Security |
| Users | Manage users and map them to security groups | Getting Started – Security |
| Options | OAS instance configuration options | Options |
| System Status | OAS instance system status | |
| System Errors | OAS instance system error list | |
| Container License | OAS Docker and VM container license management | License Activation |
| License | OAS instance license management | License Activation |
