MQTT Broker
OAS is both a MQTT Client and MQTT Broker.
To interface with another MQTT Broker please see the Getting Started MQTT guide.
To send and receive data to a Sparkplug B Edge of Network Nodes see the Getting Started Sparkplug B Host App guide.
To enable OAS as a Sparkplug B EoN Node to interface with Host and Client Applications see the Getting Started Sparkplug B EoN Node guide.
The Open Automation Software MQTT Broker is built into the OAS Engine which can be deployed on both Windows and Linux operating systems. MQTT Broker support was added to OAS version 15.00.0001 and does require a license of the MQTT driver to enable read and write functionality.
The OAS MQTT Broker supports reading, and writing to all local and remote OAS Tags, including Live Data Cloud.
You can view the MQTT Broker Video to familiarize yourself with the following steps to interface with local and remote OAS Tags.

- 0:00 – Introduction – OAS as MQTT Broker
- 0:15 – OAS as MQTT Client and MQTT Broker
- 0:20 – MQTT Client
- 0:40 – MQTT Protocol
- 0:44 – What’s MQTT Broker
- 0:58 – Where is built MQTT Broker
- 1:07 – What MQTT Broker support and requires
- 1:29 – How to Interface MQTT Client with OAS as an MQTT Broker
- 1:41 – How to verify if you have a valid license for MQTT
- 2:07 – Set up OAS as a MQTT Broker
- 3:23 – Set up to Subscribe to OAS MQTT Broker
- 5:54 – Sending a JSON message to the OAS MQTT Broker from MQTT Client
- 7:08 – More information
The following guide demonstrates how to interface an MQTT Client with OAS as a MQTT Broker.
Step 1
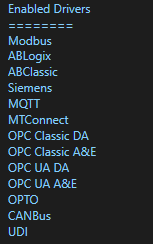
After installing Open Automation Software the verify you have a license of MQTT on OAS Engine that the MQTT Client will connect with.
Use the Configure OAS application and go to Configure-License and use Select to check the OAS Engine that MQTT appears in the Enabled Drivers list.
Step 2
To setup the OAS MQTT Broker go to Configure-Options and select the MQTT Broker tab.
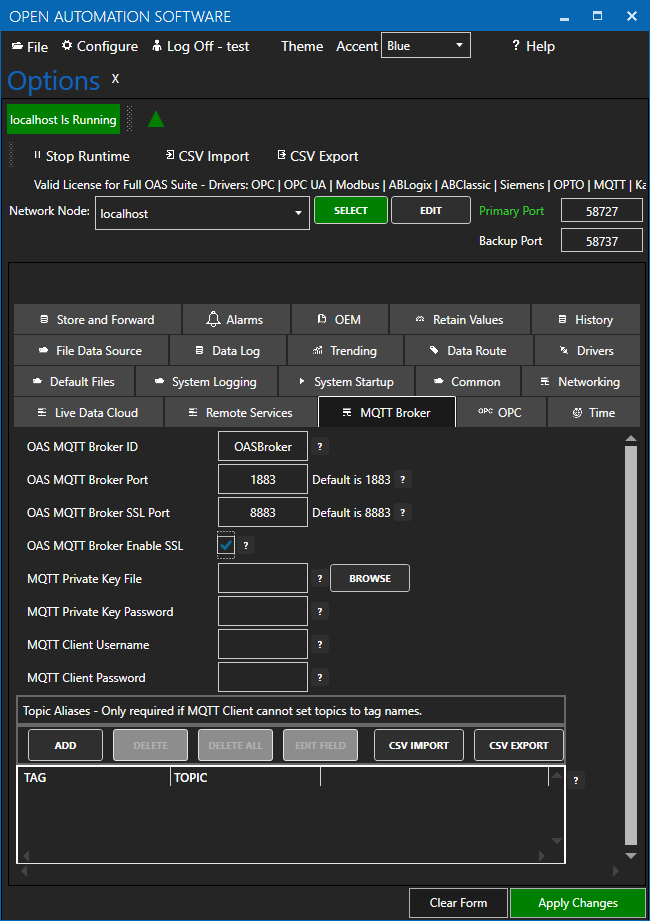
- Enter the ID you want to use for the OAS Broker in the OAS MQTT Broker field.
- Choose either the default broker port (1883) or enter a new port into the OAS MQTT Broker Port field.
- For SSL/TLS, choose either the default broker SSL port (8883) or enter a new port into the OAS MQTT Broker SSL Port field.
- If you want to use SSL/TLS, Check the box for OAS MQTT Broker Enable SSL.
- In the MQTT Private Key File field select Browse and select your private key file.
- If you have a password assigned to the private key enter it into the MQTT Private Key Password field.
- Enter the username in the MQTT Client Username field to require MQTT Clients to connect using a specific username.
- Enter the password in the MQTT Client Password field to require MQTT Clients to connect using a specific password.
- Optionally enter Topic Aliases to map topic names to OAS tag names. This is only required if the MQTT client cannot define the topics to interface with.
Step 3
If security is left to the Default to Enable All Features in all OAS Engines you can proceed to Step 4.
If Security has been setup on any of the OAS Engines to restrict Reading Tags or Writing Tags go to Configure-Options and select the Remote Services tab.
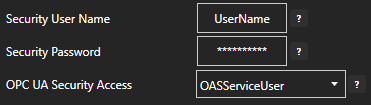
Set the Security User Name and Security Password to user to gain access to the remote OAS Engine for read and write access to the tags to be monitored and set by the MQTT Broker.
Step 4
The OAS MQTT Broker is now ready for use.
Naming Conventions
To access OAS tags set your topic to the OAS standard naming convention. A few examples below.
- Read the value from the Ramp tag on the local OAS service. Topic = Ramp.Value
- Read the Description from the Ramp tag on the local OAS Service. Topic = Ramp.Description
- Read the value of Alarms Not Acked tag in the subgroup Alarms on the local OAS service. Topic = Alarms.Active Not Acked.Value
- Read the value of the Ramp tag from a remote OAS service. Topic = \\Domain or IP address\Ramp.Value
\\192.168.0.1\TagName.Value
Live Data Cloud Networking from local OAS Engine:
RemoteSCADAHosting.myLiveDataCloudNode.TagName.Value
Live Data Cloud Networking through remote OAS Engine:
\\192.168.0.1\RemoteSCADAHosting.myLiveDataCloudNode.TagName.Value
Payload
The payload is in standard JSON format and includes the Value, Timestamp, and Quality.
Example Payload for Ramp.Value: {“Value”:84.0,”TimeStamp”:”2020-07-22T12:59:44-04:00″,”Quality”:true}
To return the tag value only not in JSON format subscribe to TagName.ValueOnly. Supported with OAS version 20.00.0133 or greater.
To Write to an OAS Tag use the same topic format as described above.
You can publish to any existing Tag.
You can create tags with the Data Type set to JSON in OAS to be able to publish extended meta data on OAS Tags. Using the JSON Handling in OAS you can parse the JSON message for extended functionality.
Wildcards
The following wildcards are supported with OAS version 18.00.0041 or greater.
- # – Subscribe to all tags from the OAS Engine for the .Value variable of each tag.
- +/<tag variable> – Subscribe to all tags from the OAS Engine for the tag variable specified. Example: +/DigitalAlarmActive
Deployment
You can deploy the OAS Engine to multiple servers on Windows or Linux using standard deployment or Docker containerized deployment, each OAS MQTT Broker supports communications to any OAS Engine.