Getting Started MTConnect
The following guide shows you the easy steps to define the MTConnect schema that can be used to read the possible data items and automatically create OAS Tags to be used with live update.
Use the following steps to become familiar with the easy setup of MTConnect in OAS.
Step 1 – Check MTConnect License

Start Configure OAS application from the program group Open Automation Software.
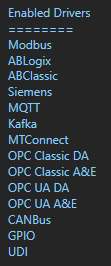
Select Configure-License. Verify that MTConnect is one of the available Drivers in the lower left of the form. If you do not see MTConnect available contact support@oasiot.com to update your license.

NOTE: To configure remote OAS Engines enter the IP Address or node name in the Network Node field and click on Select.


NOTE: You will need to be running Open Automation Software Version 14.0.0.30 or greater to support MTConnect communications. You can download the latest version at www.openautomationsoftware.com/downloads/open-automation-software/
Step 2 – Configure MTConnect Driver
Select Configure-Drivers.

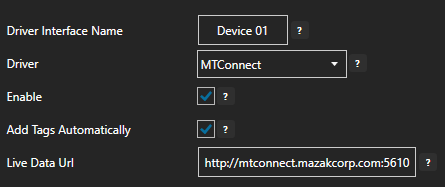
Enter a meaningful Driver Interface Name that you will refer to this physical connection when defining Tags with a MTConnect Data Source.

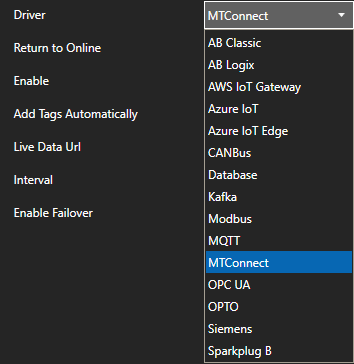
Set the Driver to MTConnect.

Leave Enable and Add Tags Automatically enabled.

Specify the Live Data Url for the MTConnect stream.

Optionally define a secondary failover of data stream if the primary data stream fails with the property Enable Failover.

If both the primary and secondary device are offline the Return to Online settings determines the retry frequency.
View Driver Interface Failover for more information and and video demonstrating communications failover.
Select the Add Driver button in the left window to add the Driver Interface as an available selection when defining Tags in the next step.

Note: If you need to define several Driver Interfaces you can use the CSV Export and CSV Import on the toolbar in the upper right together with Microsoft Excel.

Drivers can also be programmatically assigned with the OAS REST API or .NET Server Configuration interface.
Step 3 – Configure MTConnect Tags
Select Configure-Tags.

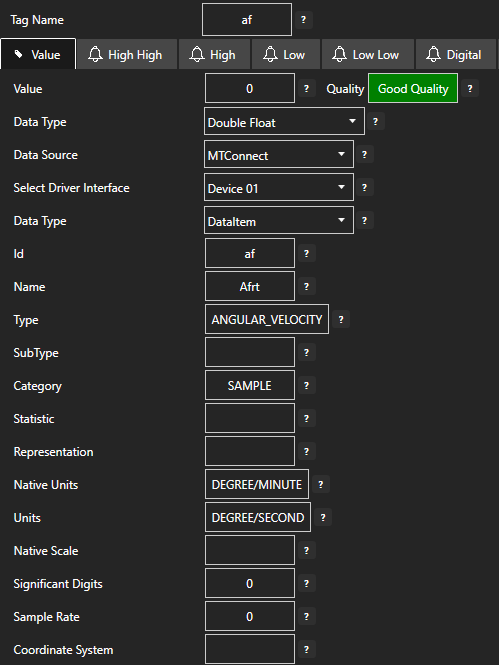
With the OAS Engine in Runtime and the Driver Interface property Add Tags Automatically is enabled all of the possible MTConnect data items will be added under a Tag Group with the same name as the Driver Interface specified.

Expand the tag group and sub groups to see all tags added.

If the Tag MTConnect Data Type is set to DataItem and the data stream has sent a value for the Id the current value will appear with Good Quality.

NOTE: You can optionally enable transaction logging for MTConnect communications to record all value changes to text files.
To record all data values for all Ids received from the data stream select Configure-Options and click the Network Node Select to then view the System Logging tab and enable the property Log MTConnect Communications and set the Transaction Log Path of where the files will be placed.

You can change the tag names of the OAS Tags if the automated creation does not suite your desired tag name.
Use the CSV Export and CSV Import on the toolbar in the upper right together with Microsoft Excel. to change multiple Tags.

NOTE: Tags can also be programmatically assigned with the OAS REST API or .NET Server Configuration interface.
Step 4 – Save MTConnect Tag and Driver Configuration
Select the Save button on the toolbar at the top.

Enter a file name to be saved in C:\ProgramData\OpenAutomationSoftware\ConfigFiles directory on Windows or ConfigFiles subdirectory on Linux.
When prompted to set the file as the default configuration to load on startup select Yes.

NOTE: The tags and drivers are both saved in to the one .Tags file.
The tags and drivers defined are now ready for use in all OAS features like Data Logging, Data Route, and Open UIEngine.

