Getting Started Azure IoT Data Hub
Create an IoT hub
View the following video for a complete demonstration of how to send live data to Azure IoT Data Hub.
You need to create an IoT Hub for your device to connect to. The following steps show you how to complete this task using the Azure portal:
Step 1
Sign in to the Azure portal.
Step 2
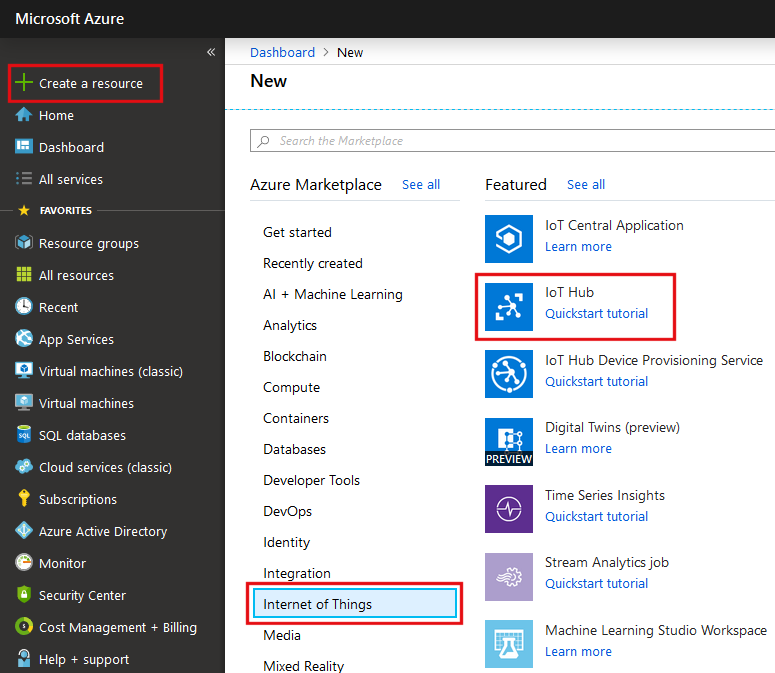
From the left menu, Select Create a resource, then click Internet of Things, and then click IoT Hub.
Step 3
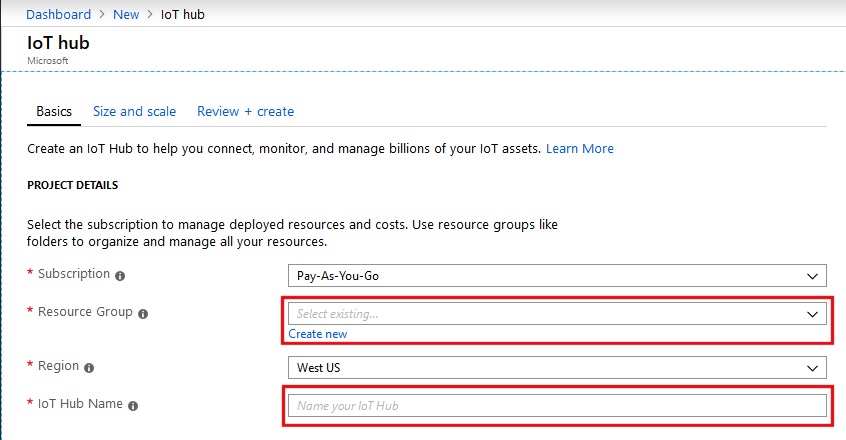
Under the Basics tab, fill in the information for your new hub.
Step 4
In Resource group, create a new resource group, or select an existing one. For more information, see Using resource groups to manage your Azure resources.
Step 5
In the Name box, enter a name for your IoT hub. If the Name is valid and available, a green check mark appears in the Name box.
Select a Pricing and scale tier. This tutorial does not require a specific tier.
Step 6
In Resource group, create a new resource group, or select an existing one. For more information, see Using resource groups to manage your Azure resources.
Step 7
In Location, select the location to host your IoT hub.
Step 8
When you have chosen your IoT hub configuration options, click Create. It can take a few minutes for Azure to create your IoT hub. To check the status, you can monitor the progress on the Startboard or in the Notifications panel.

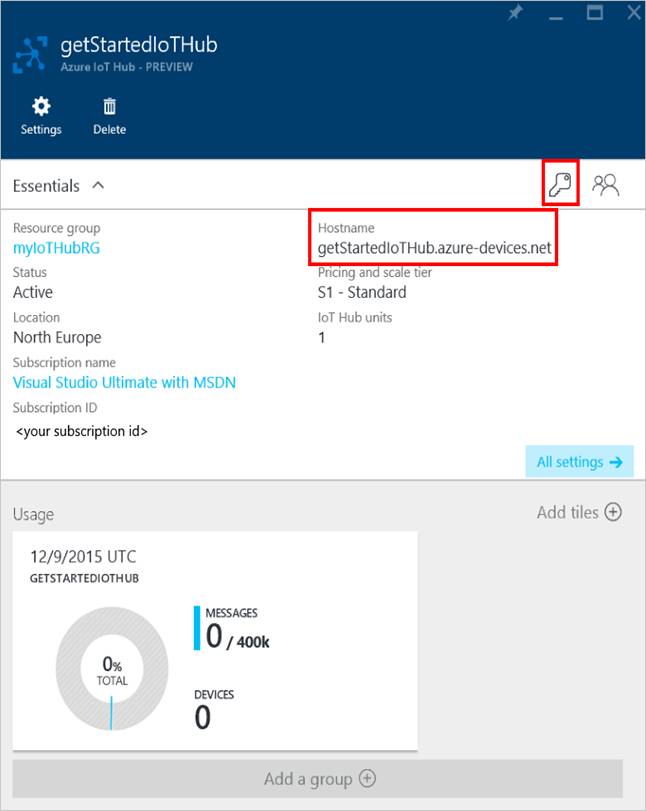
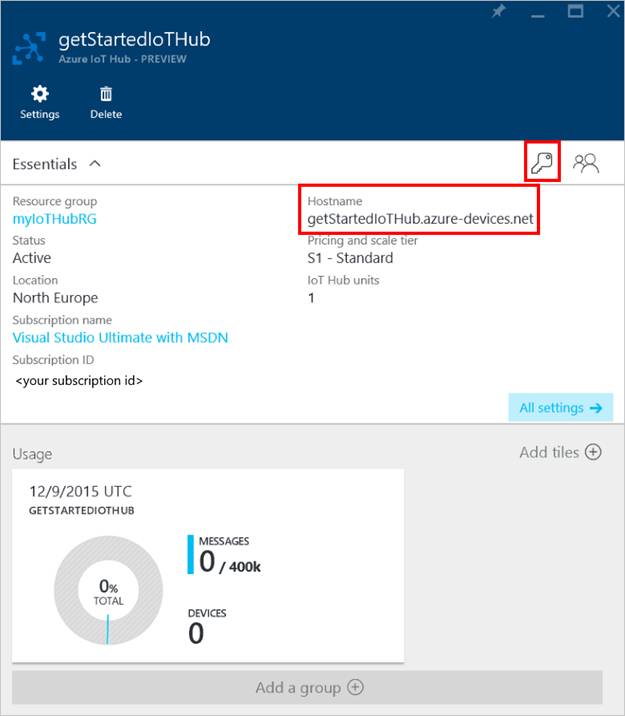
When the IoT hub has been created successfully, open the blade of the new IoT hub, make a note of the Hostname, and then click the Keys icon.
Step 9
Click theiothubowner policy, then copy and make note of the connection string in the iothubowner blade.
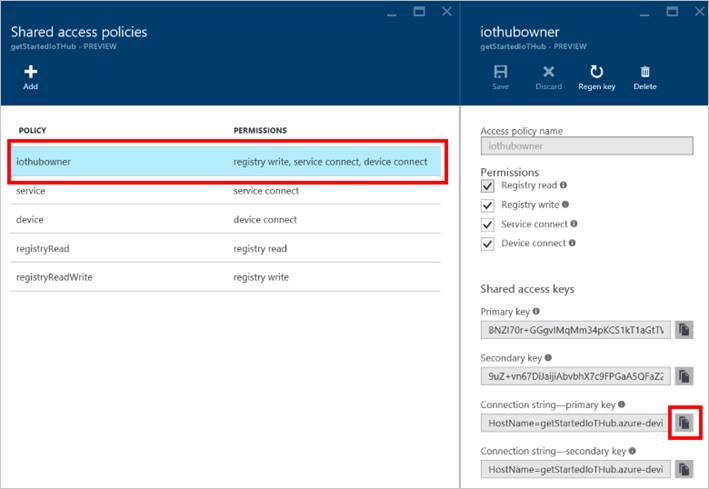
You have now created your IoT hub and you have the hostname and connection string you need to complete the rest of this tutorial.
Create an IoT Driver
Step 1
Open Configure OAS
Step 2
Select Drivers
Step 3
Select your local or remote system
Step 4
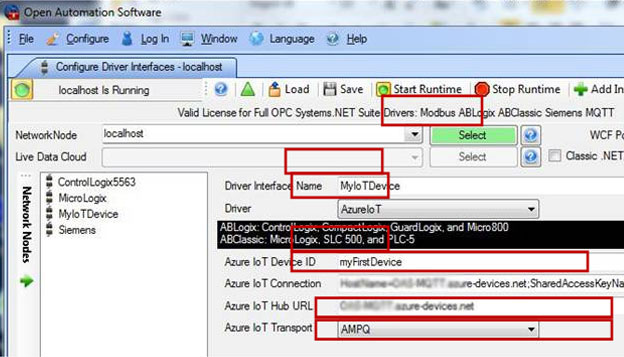
Enter the Driver Name you wish to use.
Step 5
Select Azure IoT Driver from the combo box
Step 6
Enter the Azure IoT Device ID you want to use.
Step 7
Enter the Connection String from Step 5 of the previous section into the Azure IoT Hub Connection field.
Step 8
Enter the hostname from Step 4 of the previous section into the Azure IoT Hub URL Field.
Step 9
Select the preferred Azure IoT Transport.
Step 10
At the bottom Left of the configure application select Add.
Route Live Data to your Azure IoT Hub.
Step 1
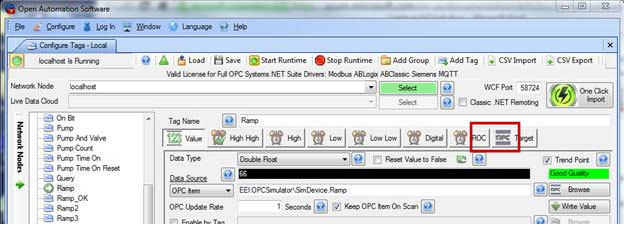
Select Configure Tags.
Step 2
From the demo tags select the Ramp Tag.
Step 3
Select the Target button
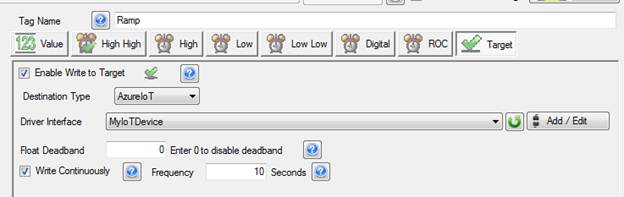
Step 4
Enable Write to target.
Step 5
Select the Azure IoT Destination type.
Step 6
Select the Driver interface you created.
Step 7
Apply the Changes and you should now be writing to your IoT Hub.
Step 8
The message is formatted as follows.
{“deviceId”:”myFirstDevice”,”TagName”:”Ramp”,”Value”:66,”DataType”:”DoubleFloat”,”Quality”:true,”TimeStamp”:”2016-04-11T14:38:53.7125255″}
.