Getting Started – .NET WinForm HMI
- 00:00 – Introduction
- 00:10 – How to Create an HMI Presentation using OPC Controls.NET
- 00:30 – How to Use the Controls without Writing any Code
- 00:36 – Create a Winform Application
- 01:11 – Select OPC Controls Components
- 01:33 – Label Control
- 01:47 – Network Node
- 02:21 – Set the Formatting
- 02:32 – OPC Controls Button
- 02:40 – Set the Color of the Button
- 02:47 – Set the Pump Value
- 03:20 – Test the Application
- 03:47 – More Questions
If you do not have a copy of Visual Studio you can download a free version of Visual Studio Community (formerly Visual Basic Express or C# Express) from https://visualstudio.microsoft.com/vs/express/. You can choose whether to use Visual Basic or C#, but if you have no experience with either language, Visual Basic is easier for new developers. No programming is required to use WinForm HMI.
- All OAS .NET Assemblies are distributed with the OAS Platform and located within the installation directory and subdirectory \Controls\.
- For .NET 8 applications install the assembly package from NuGet within Visual Studio
Direct link to the OASIOT.OASWinFormHMI package: https://www.nuget.org/packages/OASIOT.OASWinFormHMI
The following steps can be used to add visualization to a C# or Visual Basic.NET application. Refer to the VB.NET example for programmatic interface of using the OPCControls components. All properties are programmatically accessible.
The following example demonstrates the use of WinForm HMI with no code required.
Step 1: Create New Project
Load the default DemoTags Tag configuration file if you have replaced your tag configuration with your own tags.
Start Visual Studio and select File->New->Project to create a new C# or VB project for Windows Forms App (.NET Framework) or Windows Forms App for .NET 8+.

When prompted choose C# or Visual Basic as language to target Windows Desktop applications.

Choose Windows Forms App (.NET Framework) or Windows Forms for .NET 8 as the new project type for C# or Visual Basic.

Set the Project name, Location, and the Framework of 4.6.2 or greater.
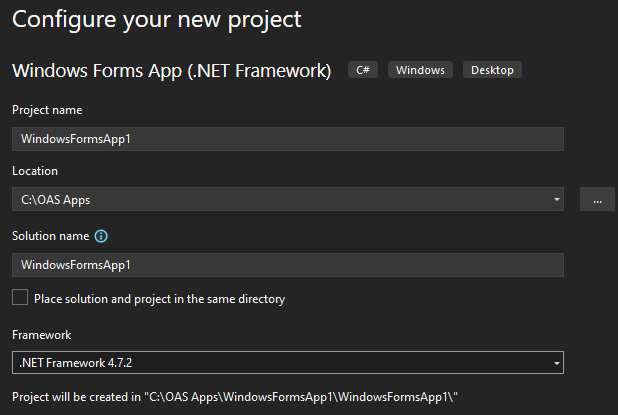
Select Create in the lower right corner.

Step 2: Add Controls to Form
Select View-Toolbox to select controls from the Open Automation Software group.
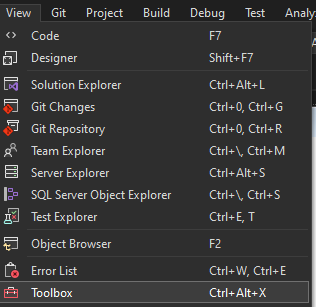
From the Toolbox if OPCControls components are not available right click in the Toolbox and select Choose Items.
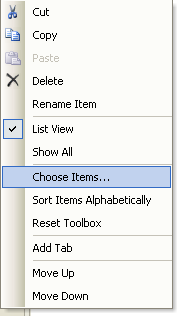
NOTE: If you have installed Visual Studio after Open Automation Software you can either right click on the Toolbox and select Choose Items to include the OPCControls.dll assembly from C:\Program Files\Open Automation Software\OAS\Controls\NetFramework\OPCControls\ or uninstall Open Automation Software and reinstall to register the OPCControls.dll assembly with Visual Studio.
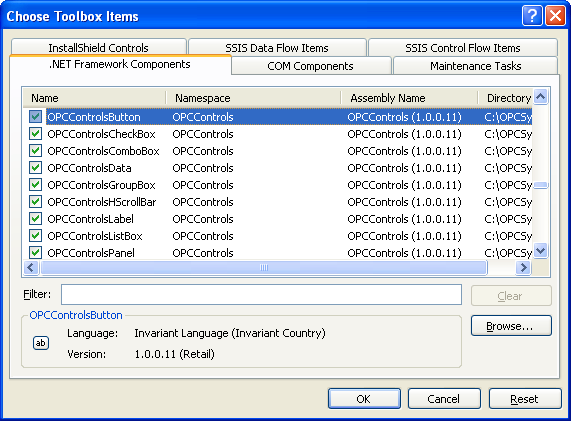
From the .NET Framework Components select all of the OPC Controls components and then select OK.
Label
Add an OPCControlsLabel component onto the Form.

Right click on the OPCControlsLabel window and select Properties.
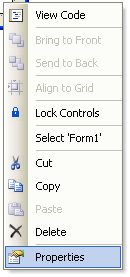
Select the TextOPCSystems_Tag property and use the browse button at the right to set the Open Automation Software Tag to Ramp.Value.

NOTE: If you wish to run this application on remote PCs make sure to include the Network Node or IP Address of the OAS Engine. Select your Network Node or IP Address in the Browse Tags window.
Value is the most commonly used Variable. See Tag Variables for a complete list of all variables possible.
Local Tag
myGroup.myTag.Value
\\192.168.0.1\myGroup.myTag.Value
Live Data Cloud Networking from local OAS Engine
RemoteSCADAHosting.myLiveDataCloudNode.myGroup.myTag.Value
Live Data Cloud Networking though remote OAS Engine
\\192.168.0.1\RemoteSCADAHosting.myLiveDataCloudNode.myGroup.myTag.Value
The following is an example of accessing an element of an array as a read only variable.
myGroup.myTag.Value[0]
Note: All Tag names are case sensitive. Ramp.Value is valid, ramp.value is not.
Button
Add an OPCControlsButton to the Form.

Set the TextOPCSystems_Tag to Pump.Value. If the Pump Tag does not exist create a Boolean Tag using Configure-Tags with the name Pump.
Set the Format fields as defined below.

Set the BackColorOPCSystems_Tag to Pump.Value.

Set the SetValueOPCSystems_Tag to Pump.Value and the SetValueOPCSystems property to True.

TextBox
Add an OPCControlsTextBox to the Form.

Set the TextOPCSystems_Tag property to Pump.Value. The Format properties for Boolean to Off and On.

Step 4: Build Project
Set the compile mode on the Visual Studio toolbar to Release.

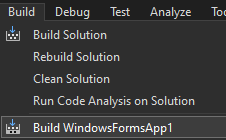
Select Build from the VS menu and select to build the application.
Step 5: Run Project
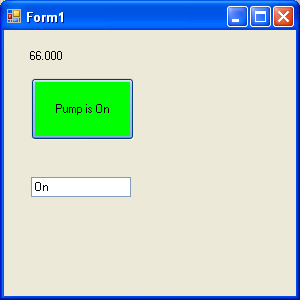
Use Windows File Explorer to browse for the application located in the bin\Release directory and run the application.
Step 6: Deploy Application
NOTE: For remote deployment first make sure the Tags as described in steps 4, 5, and 6 are set to a Network Node or IP Address. You can optionally use the OPCControlsNetworkNodes component and assign a network node alias to change all “localhost” tags to the desired remote node. This is done with the AddNetworkNodeAlias method. Refer to the VB.NET Example on the exact syntax of how to use this method. Notice how all OPC Controls data sources for a particular node can be reassigned to a remote node with one simple call.
To deploy the application simply copy the files in the bin\Release directory to the target systems, or follow the Smart Client Deployment guide using Click Once Deployment. The remote system that will run the application should have the .NET Framework version installed that the application targets.
Step 7: Other Controls and Properties
There are other OPCControls Components to add to the project with different properties to each control. ImageIndex is available in many of the controls to display different images based on analog or discrete data.
The OPCControlsData component can be used to access data via code with very simple methods. Refer to the .NET Real Time Data Access Programmatic Interface.

