Authentication Examples
Security is included for free with all of the product features of Open Automation Software. To ensure that all requests for server data be performed by an authorized user, the OAS Web HMI Script Library attaches an authentication token to each request. This token is generated by the Open Automation Software Server when provided a valid credential. The token will expire after a period of disuse, or when the Open Automation Software Server is restarted, so it should be generated dynamically when a page is initially accessed.
This article covers how to generate and store these tokens with:
- ASP.NET both C# and VB
- JavaScript
STEP 1
The first step for either method is the same: define and configure your security groups and users. This Getting Started – Security article describes how to do that with the OAS configuration tool. There is also a video about that here. Security users and group can also be set up with the OAS programmatic interface, learn about that here.
You will need to include a few files at the top of your pages as well:
- jQuery v1.8.3 or later
- The OAS Web HMI Script Library
- A small block of Javascript containing an authentication token and URL location of the Open Automation Software Server.
You can learn more about that on our Installation and Configuration page.
STEP 2
ASP.NET Authentication
Here is the login page for the .NET example:

In the button click event, first assign the username and password entered by the user to local variables. Next, instantiate a new instance of the OASConfig.Config object. Then, assign the token returned by the GetToken method to an ASP.NET session variable. Doing so allows you to retrieve that information in the subsequent pages. Depending on the version of ASP.NET you are using, you can pass the token in different ways. The example also stores the OAS Server address as a session variable. Finally, redirect the user to the next page.
C#
protected void btnSubmit_Click(object sender, EventArgs e) {
  string un = username.Value;
  string pw = password.Value;
  string err = "";
  var config = new OASConfig.Config();
  Session["token"] = config.GetToken(un, pw, "", ref err);
  Session["OASServer"] = "http://localhost:58725";
  Response.Redirect("default.aspx");
}
VB
Private Sub btnSubmit_Click(sender As Object, e As EventArgs) Handles btnSubmit.Click
  Dim un As String = username.Value
  Dim pw As String = password.Value
  Dim err As String = ""
  Dim token As String = ""
  Dim config As New OASConfig.Config()
  token = config.GetToken(un, pw, "", err)
  Session("token") = token
  Session("OASServer") = "http://localhost:58725"
  Response.Redirect("default.aspx")
End Sub
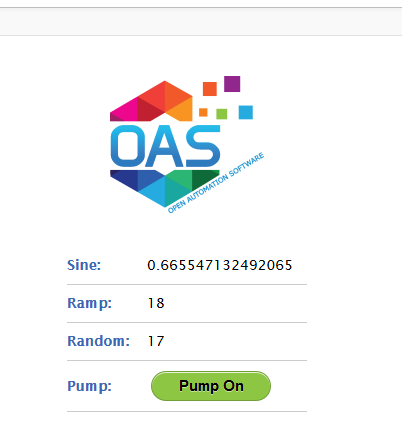
If a token was successfully created and the user has permissions to view tags, the display screen will look like this:

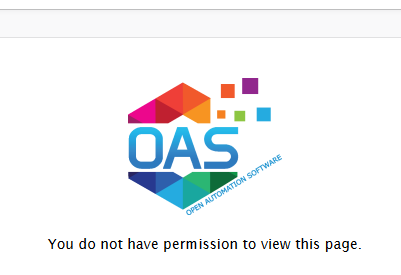
If they did not provide valid credentials, the screen they will see will look like this:

The OAS Service generates a token whether or not the user provides valid credentials. However, if the user has bypassed the login page, no token has been created. So here, check to for the existence of a token. If none exists, return them to the login page to authenticate. If one does exist, use the ASP.NET ScriptManager to programmatically write JavaScript to pass the token to the OAS Service on the client side.
C#
protected void Page_Load(object sender, EventArgs e) {
  string token = "";
  if (Session["token"] != null) {
    token = Session["token"].ToString();
  }
  if (token == "") {
    Response.Redirect("login.aspx");
  }
  ScriptManager.RegisterStartupScript(this, this.GetType(),
    "OASWebToken",
    "OAS_config = {token:'" + token + "',serverURL: '" + Session["OASServer"] + "'};",
    true);
}
VB
Protected Sub Page_Load(ByVal sender As Object, ByVal e As System.EventArgs)
Handles Me.Load
  Dim token As String = Session("token")
  If token = "" Then
    Response.Redirect("login.aspx")
  Else
    Dim server As String = Session("OASServer")
    ScriptManager.RegisterStartupScript(Page, Me.GetType(), "OASWebToken",
      "OAS_config = {token:'" + token + "',serverURL:'" + server + "'};", True)
  End If
End Sub
JavaScript Authentication
Next, let’s look at how to do this entirely from the client side using JavaScript.
At the top is the OAS_config tag, set with a dummy token and the OAS Service URL. I also have a watch_tags call in it so that it is talking to the OAS Service and am specifying a function, updateStuff(), in the refresh_callback. In the updateStuff() function, I first check to see if if a new token has been created in the submit function above. If it has been, I add it to window object’s localStorage so that I access it from subsequent pages. I then, redirect the user to the next page. There, the submit function takes the username and password and calls OAS.authenticate to validate the user and retrieve the new token. The event.preventDefault() stops the form from submitting and allow the updateStuff() to handle it.
JavaScript for Login Page
<script type='text/javascript'>
  OAS_config = {
    token:'-481d-4551-b24b-7e61b230ba9046e3d8f2',
    serverURL: 'http://localhost:58725',
    refresh_callback: updateStuff,
    watch_tags:["Sine.Value"]
  };

  $( document ).ready(function() {
    $( "#form1" ).submit(function( event ) {
      // on submit, get the
      // username and pw and authenticate
      var un = $("#username").val();
      var pw = $("#password").val();
      OAS.authenticate(un,pw);
      event.preventDefault();
    });
  });

  function updateStuff() {
    if (OAS.token != OAS_config.token) {
      //check to see if a new token was created
      localStorage.setItem('token', OAS.token);  //store the token in local storage
      location.href = "default.htm"; // redirect to main page
      console.log("Token Set:" + localStorage.getItem('token'));
    }
  }
</script>
JavaScript for Display Page
At the top of your display pages, you will need to include the following JavaScript as well. It retrieves the token from localStorage and puts in the OAS_config.
<script type='text/javascript'>
   OAS_config  = {
   token: localStorage.getItem('token'),
   serverURL: 'http://localhost:58725'
   };
</script>
STEP 3
The HTML for All Authentication Methods
If the a token has been generated, the user is allowed to stay on the page. If authentication fails, the user should not be able to view anything; this can be accomplished by creating a Boolean tag in the OAS Configuration tool called FlagTrue. For organizational purposes, put it in a folder called SecurityDemoFlags. Set the default value of the flag to true. Surround the portion of the page that is not to be displayed to unauthorized users with a div tag. Use an OAS attribute on the tag to control visibility. If the user is not able to read tags, tags will come in with bad_q. Set the bad_q for the Boolean tag controlling visibility to false. With it set this way, unauthorized users will not be able to see this area of the page and authorized users will.
Below there is another div which displays the message: You do not have permission to view this page. Use the same flag to control visibility for this div. When an unauthorized user visits the page, OAS sends the false bad_q indicator to the tag that set above. This div has an OAS attribute of “trigger: on_false”.
Learn more about adding OAS attributes to HTML tags here in our HTML Attribute Reference or by using our Web HMI Wizard.
In this demo, there are several tags and a button that toggles a pump on or off. If the user has read permissions only, the button would display the value of the pump but would not allow the user to change it. You can create different groups/users and control what the users are able to see and do.
<div style="margin-left: auto; margin-right: auto; width: 240px; text-align: center;">
  <img src='images/logo.png'/>
    <div id="divDisplay" style="margin-top:30px;"
      oas-tag-vis='{
        "tag": "SecurityDemoFlags.FlagTrue.Value",
        "config": { "bad_q": false }
    }'>
    <div class="d1">
      <span class='heading'>Sine:</span>
      <label id='lb1' oas-tag-txt='{"tag":"Sine.Value"}'></label>
    </div>
    <div class="d1">
      <span class='heading'>Ramp:</span>
      <label id='lb2' oas-tag-txt='{"tag":"Ramp.Value"}'></label>
    </div>
    <div class="d1">
      <span class='heading'>Random:</span>
      <label id='lb3' oas-tag-txt='{"tag":"Random.Value"}'></label>
    </div>
    <div class="d1">
      <span class='heading'>Pump:</span>
      <button onclick="return false;" id='test'
        oas-tag-txt='{
          "tag": "Pump.Value",
          "config": {
            "formats": {
              "bool_f": "Pump Off",
              "bool_t": "Pump On"
            }
          }
        }'
        oas-tag-set='{
          "tag": "Pump.Value",
          "config": {
            "evt": "click",
            "set": "toggle",
            "set_confirm": false
          }
        }'
        oas-tag-bkg='{
          "type": "group",
          "all_f": { "color": "#FF0033" },
          "bad_q": {},
          "group": [
            { "tag": "Pump.Value", "config": { "color": "#8DC642" } }
          ]}'>
      </button>
    </div>
  </div>
</div>

<div style="width: 500px; text-align: center; margin-left: auto; margin-right: auto;" id="divMessage"
  oas-tag-vis='{
    "tag": "SecurityDemoFlags.FlagTrue.Value",
    "config": { "trigger":"on_false" }
}'>You do not have permission to view this page.</div>
Here are downloadable source code examples for all three types of Authentication:
