Getting Started – Recipe
View the following video for a step by step tutorial on setting up data transfer from a database:

Recipes are used to transfer values from a database to Open Automation Software Tags. If the Tags Data Source is set device data or IoT Cloud systems the values will also be written to the source the Tag is defined to. The most common implementation is to have a variable in a PLC trigger the recipe execution.
The PLC will then wait for either the Confirmation or Error Code to be written to the PLC to indicate if the recipe execution has completed. If in Error the PLC can then retry the Trigger.
Follow the steps listed below or view the video on defining recipes.
For a complete list of all Recipe properties refer to the Recipe Properties section in this help file.
Step 1
 Start Configure OAS application if it is not already running.
Step 2
Select Configure Tags to add some Tags to use with the Recipe execution.
Step 3
Select the Local OAS Service by selecting the Select button next to the Network Node dropdown.
![]()
Step 4
If you are working on an existing Tag configuration you want to keep save it now.
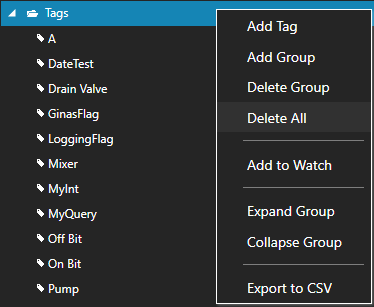
Right Click on the Tags Group at the root level of the Tag Tree and select Delete All to clear all Tags.
Step 5
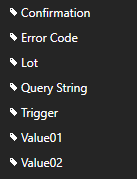
Add the following Tags with the specific Data Types:
Trigger as a Boolean
Value01 as an Integer
Value02 as an Integer
Lot as a String with the Value A
Confirmation as a Boolean
Error Code as an Integer
Query String as a String with Data Source of Calculation
“WHERE Lot = ” & “‘” & [Lot.Value] & “‘”
Step 6
Select the Save button on the toolbar at the top and use the file name Recipe Tags.

Step 7
Use Microsoft SQL Server, Oracle, Access, mySQL, PostgreSQL, Cassandra, or MongoDB to create the following Table.
Create a Database called OASDemoRecipes
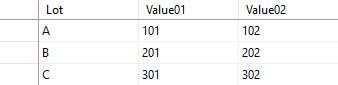
Create a Table called RecipeValues with the following structure.
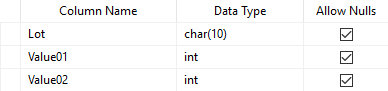
Enter the following values to the Table RecipeValues.
Step 8
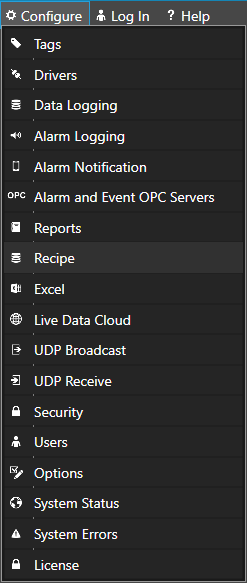
With the Configure OAS application select Configure-Recipes.
Step 9
Select the Local OAS Service by selecting the Select button next to the Network Node dropdown.
![]()
Step 10
Enter the Recipe Name Recipe 01.
![]()
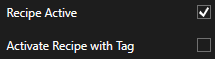
Set the Recipe Active. You also have he option to Activate the Recipe with a Tag. For this tutorial just check the Recipe Active box.
Set the Recipe Type to Wide Table.
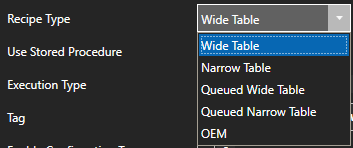
- A Wide Table type allows you to map the database fields to read to the OAS tags in the Tags tab of the recipe group.
- A Queued Wide Table type performs the same as Wide Table type and will delete the top record if the recipe execution is successful.
- A Narrow Table has only 2 fields, one for the Tag Name to set and one for the Value to write to the Tag. Using this type you can define the Tags to write to in the database table along with the values.
- A Queue Narrow Table type performs the same as Narrow Table type and will delete the records obtained if the recipe execution is successful.
Set the Tag to Execute Recipe as Trigger.Value.
Enable Confirmation Tag as Confirmation.Value.
Enable Error Tag as Error Code.Value.
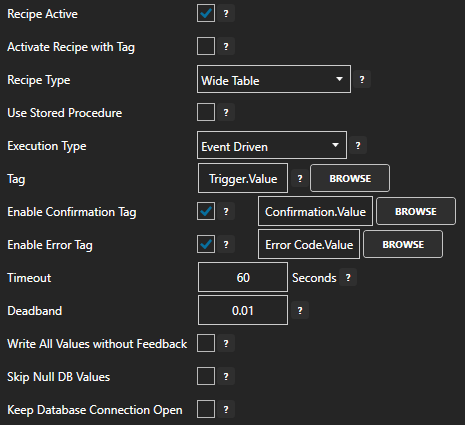
When a recipe is executed it will only write to Tags where the desired value from the database is different than the current value of the Tag. For floating point values use the Float Deadband property under the Common tab to define what is the allowable range to determine if a value is the same or different.
The Timeout property is the amount of time the recipe execution will wait for all values to be returned from the Tags. If one or more of the values does not read back from the data source the recipe execution will end with an Error Code of Timeout.
The property Write All Values Without Feedback will not wait for the values to be returned and will write all database values to all defined Tags. This is preferred for a faster execution when using the Execution Type Continuous.
Step 11
Select the Tags Tab
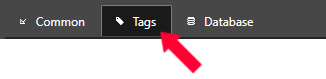
With the Tags properties you can assign the database table fields to Open Automation Software Tags to write to when the recipe executes.
All OAS Tag Variables that are write capable including configuration parameters can be updated.
If the Data Source of the Open Automation Software Tag is defined to a device or IoT cloud server a write to the Value variable will it will automatically write the database value to the source.
Select the Add Field button.

Select the Tag and Parameter Value01.Value.
Change the Field Name to Value01.
Change the Data Type to Integer.
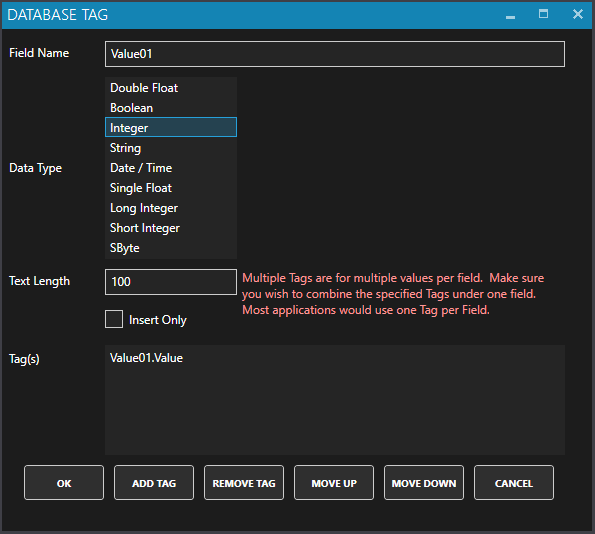
Select OK.
Select the Add Field button.
Select the Tag and Parameter Value02.Value.
Change the Field Name to Value02.
Change the Data Type to Integer.
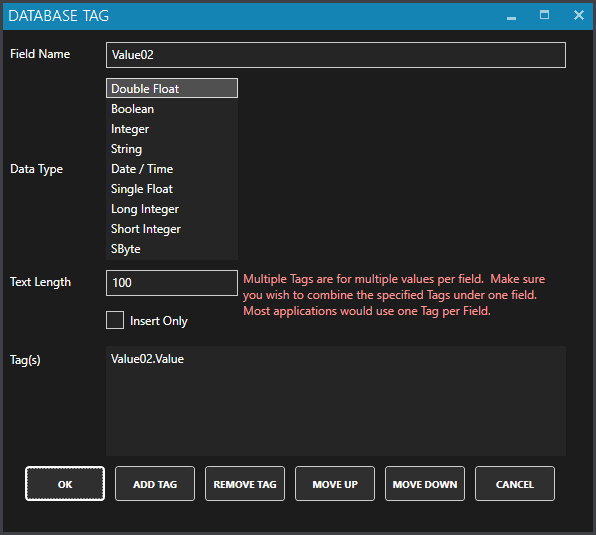
Select OK.
Aggregate SQL Functions
You can use aggregate functions MIN, MAX, AVG, SUM, COUNT, STDEV, STDEVP, VAR, VARP, COUNT_BIG, GROUPING, GROUPING_ID, and CHECKSUM_AGG.
Set the Field Name to the function with the table field. Example = MIN(FieldName)
Dynamic Tag Aliasing
Dynamic Tag Name Aliasing is possible with one or more of the 3 alias types. This is typically used with queries that will return multiple rows, but can used also with just a single row returned.
The alias definition is encapsulated with # and is replaced entirely with the value for the database, zero based row number, or field name.
DB-Value: Changes the Tag Name based on the field value returned for the column name and data type specified.
#DB-Value:FieldName:DBType:TextFormat#
DBType = Integer, Double, Boolean, Date/Time, Single, Long, Short, SByte, String, NChar, Varchar, or NVarchar
TextFormat is optional and is used to convert the native value from the database to a text string
Example = #DB-Value:FieldName:Integer:0000#
DB-Row: Changes the Tag Name based on the zero row number returned from the query.
#DB-Row:TextFormat#
Example = #DB-Row:0000#
DB-Field: Changes the Tag Name based on the field name defined.
#DB-Field#
TAG-Value: Changes the Tag Name based on the tag value of a local tag. Please note this feature does not currently support remote network tags.
#TAG-Value:TagName.Variable:TextFormat#
TextFormat is optional and is used to format the conversion the native tag value to a text string
Example = #TAG-Value:TagName.Value:0000#
Full example using dynamic tag aliasing: #DB-FIELD#Row#DB-ROW:0000#id#DB-VALUE:id:Integer:0000#.Value
The tag name will be changed to Value1Row0000#id1234.Value for row 0 if the field name is Value1, and the value of Integer id column is 1234
The tag name will be changed to Value1Row0001#id5678.Value for row 1 if the field name is Value1, and the value of Integer id column is 5678
Stored Procedures
When obtaining values from Stored Procedure set the Field Name to the Stored Procedure Return Name.
Step 12
Select the Database Tab.

Define the proper database connection.
Enable the property Set Query String with Tag and set to Query String.Value.
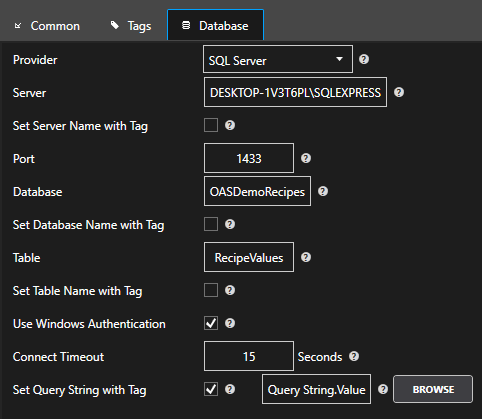
Note: A View can be used in replace of the Table.
Step 13
Select the Add button in the lower left to add the Recipe.
![]()
Step 14
Select the Save button on the toolbar at the top.

Save the file RecipeExample.Recipes in the directory OASDemo.
Go to Configure-Options and select the Default Files tab and set the default Recipe Configuration file to the file you just saved.
To track details of recipe execution go to Configure-Options and select the System Logging tab to enable Log Recipe Transactions and specify where the recipe transactions will be save.
Step 15
At this point you are ready to execute the recipe which you can do with Configure-Tags to set the Lot to A, B, or C, then set the Trigger Value from False to True.
You can then see that the Confirmation Tag will be set to True and Value01 and Value02 update if the Recipe is successful or the Error Code Tag will be a positive number if there is an error. Review the Recipe Transaction Log for details of the transaction.