Getting Started – WPF Visual Studio
NOTE: If you want to visualize your data in a desktop or mobile browser with zero programming, you may be interested in the OAS Open UIEngine .
The UIEngine is a robust no-code web application and HMI builder for developing rich user interfaces in a browser-based development environment.
See the UIEngine Documentation to learn more.
The following steps can be used to add visualization to a C#, or Visual Basic.NET application. Refer to the VB.NET example for programmatic interface of using the OPC Controls components. All properties are programmatically accessible.
Note: Visual Studio 2022 design time properties no longer support custom property editors for WPF applications. Use Visual Studio 2019 to develop WPF applications.
If you do not have a copy of Visual Studio 2019 you can download a free version of Visual Studio Community Edition for VB and C# from https://visualstudio.microsoft.com/vs/older-downloads/. If you have no experience with either Visual Basic or C# choose Visual Basic, no programming is required to use WPF HMI .NET or WinForm HMI.
- 00:00 – Introduction
- 00:14 – OAS Download
- 00:40 – Build a visual studio app
- 01:11 – Install OAS
- 01:54 – View Box
- 02:48 – Properties Window
- 03:07 – Demo Tag Configuration
- 03:28 – Tag Refencing Examples
- 03:39 – Value Property
- 03:53 – Add a Button to the window
- 04:05 – Set content tag in the properties window
- 04:34 – Change the color of the button
- 05:06 – Radio gauge
- 05:46 – Control Visualization
- 06:15 – More Information
The following example demonstrates the use of OAS WPF HMI .NET with no code required:
Step 1
Load the default DemoTags Tag configuration if you have replaced your tag configuration with your own tags.
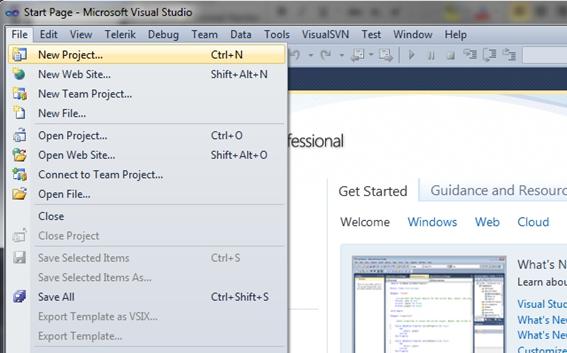
Start Visual Studio and select File->New->Project to create a new C#, or VB.
Step 2
Select WPF App (.NET Framework) as the project type.
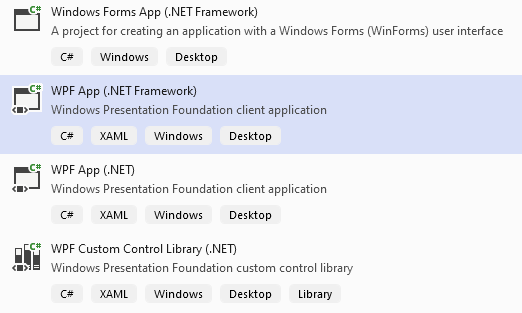
Set the Target Framework to 4.6.1 or greater.
Step 3
If you have installed Open Automation Software after installing Visual Studio you should see the Open Automation Software group in your toolbox. If you see the tools, you can skip this step.
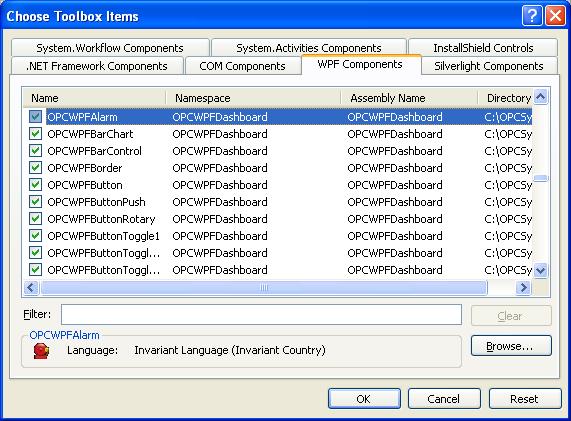
Note: If you have installed Visual Studio after Open Automation Software you can either Browse and include the OPCWPFDashboard.dll assembly from C:\Program Files\Open Automation Software\OAS\Controls\NetFramework\ or uninstall Open Automation Software and reinstall to register the OPCWPFDashboard.dll assembly with Visual Studio.
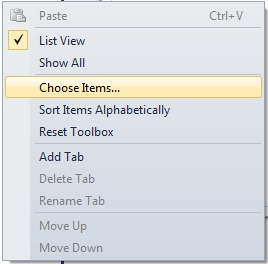
From the WPF Components select all of the OPCWPFDashboard Controls components and then select OK. For 4.0 Framework solutions use OPCWPFDashboard Namespace controls.
Step 4
If you want to make your Window adjustable for different screen resolutions and a sizeable Window with all controls automatically scaling specify a View Box.
When you create a WPF application by default the first container in the window is a Grid. Each container has an opening and closing statement in the XAML file.
For example:
<Window x:Class="MainWindow"
    xmlns="http://schemas.microsoft.com/winfx/2006/xaml/presentation"
    xmlns:x="http://schemas.microsoft.com/winfx/2006/xaml"
    Title="MainWindow" Height="350" Width="525">
    <Grid>
        .....
    </Grid>
</Window>
All of your content will be in the grid.
To create a window with resizeable content add a ViewBox to the window and put the grid in the ViewBox.
Example:
<Window x:Class="MainWindow"
    xmlns="http://schemas.microsoft.com/winfx/2006/xaml/presentation"
    xmlns:x="http://schemas.microsoft.com/winfx/2006/xaml"
    Title="MainWindow" Height="350" Width="525">
    <Viewbox>
        <Grid>
              ....
        </Grid>
    </Viewbox>
</Window>
Select the view box and set the stretch property the way you want the application to respond. The options are None, Fill, Uniform and Uniform to Fill. The default is Uniform. I find it easiest to develop with it set to None and change it to Uniform when I am done.
Step 5
Add an OPCWPFLabel component onto the Window.

Right click on the OPCWPFLabel and select Properties.
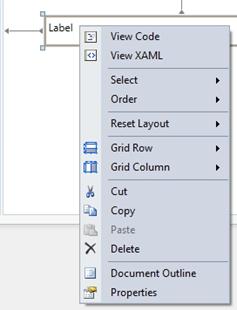
Select the Content_Tag property and use the browse button at the right to set the Open Automation Software Tag to Ramp.Value.

Note: If you wish to run this application on remote PCs make sure to include the Network Node or IP Address of the OAS Engine. Select your Network Node or IP Address in the Browse Tags window.
Value is the most commonly used Variable. See Tag Variables for a complete list of all variables possible.
Local Tag
myGroup.myTag.Value
\\192.168.0.1\myGroup.myTag.Value
Live Data Cloud Networking from local OAS Engine
RemoteSCADAHosting.myLiveDataCloudNode.myGroup.myTag.Value
Live Data Cloud Networking though remote OAS Engine
\\192.168.0.1\RemoteSCADAHosting.myLiveDataCloudNode.myGroup.myTag.Value
The following is an example of accessing an element of an array as a read only variable.
myGroup.myTag.Value[0]
Note: All Tag names are case sensitive. Ramp.Value is valid, ramp.value is not.
Step 6
Add an OPCWPFButton to the Form.

Set the Content_Tag to Pump.Value. If the Pump Tag does not exist create a Boolean Tag using Configure-Tags with the name Pump.
Set the Format fields as defined below…

Set the Background01_Tag to Pump.Value.
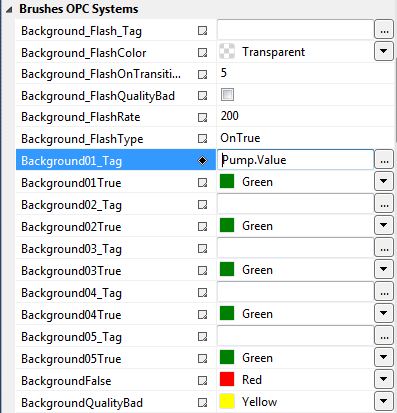
Set the SetValue_Tag to Pump.Value.

Step 7
Add an OPCWPFTextBox to the Form.

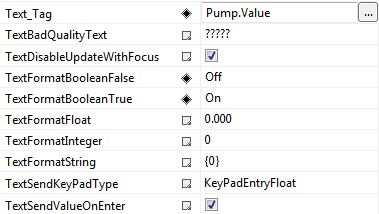
Set the Text_Tag property to Pump.Value. The Format properties for Boolean to Off and On.
Step 8
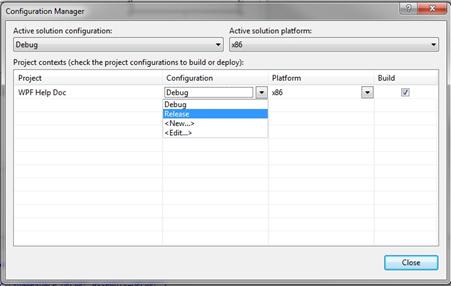
Select the Configuration Manager from the Build Menu.
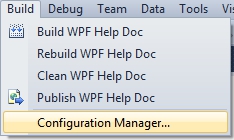
Set the compile mode in the Configuration Manager to Release.
Step 9
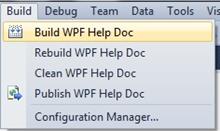
Select Build from the VS menu and select to Build the application.
Step 10
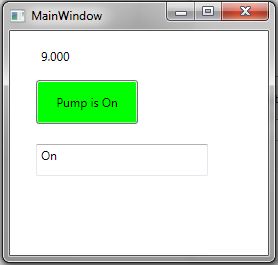
Use Windows Explorer to browse for the application located in the bin\Release directory and run the application.
Step 11
To deploy the application to remote nodes first make sure the Tags as described in Steps 4, 5, and 6 are set to a Network Node or IP Address. Then simply copy the files in the bin\Release directory to the target systems or follow the Smart Client deployment section in this help file to deploy your application using Click Once Deployment.
Note: You can also use the OPCWPFNetworkNodes component and assign a network node alias to change all “localhost” tags to the desired remote node. This is done with the AddNetworkNodeAlias method. Refer to the WinForm Example Code on the exact syntax of how to use this method. Notice how all controls data sources for a particular node can be reassigned to a remote node with one simple call.
Step 12
There are many different properties to each control. In WPF you can convert graphics to an Image Brush. The Image Brush can then be used as a background in most OPCWPF and OPCWPFDashboard Controls.
The OPC WPF Data component can be used to access data via code with very simple methods. Refer to the .NET Real Time Data Access Programmatic Interface.

