Getting Started – Node Red
OAS provides a simple and easily interface to move data between Allen Bradley, Siemens, Modbus, OPC UA/DA Servers, Databases, .Net applications and Node Red.
For a complete list of Data Sources and Data Destinations that the OAS MQTT Broker interfaces with, see the links below:
The video below is a complete tutorial on creating a Node Red Flow and Dashboard utilizing the OAS MQTT Broker:
- 0:00 – Introduction
- 0:09 – How to Integrate the OAS MQTT Broker with Node Red
- 0:21 – Pull data from a wide variety of data sources
- 0:46 – Instructions installing node red
- 0:52 – Node Red Dashboard installing instructions
- 1:00 – Open up Browser and go to your node red editor
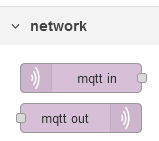
- 1:14 – Network Section
- 1:22 – OAS as an MQTT Broker
- 1:30 – Properties Menu
- 2:44 – Add Debug Node to the flow and connect to OAS MQTT in node
- 3:05 – Standard JSON Format
- 3:15 – Separate the message out into individual values
- 4:08 – Result
- 5:16 – Level Displayed in Real Time
- 5:28 – Write Back to OAS
- 5:52 – Pull an MQTT out Node onto the flow to write back to OAS
- 6:18 – Dashboard Automatically Updates
- 6:22 – Pump Tag
- 7:09 – More Information
Step 1
Set up the OAS MQTT Broker: /data-destinations/mqtt-broker/mqtt-broker/.
Step 2
Open the Node Red Editor and start a new flow. To read data from the OAS MQTT broker pull an MQTT In icon out onto the flow. To write data to the MQTT Broker pull an MQTT Out icon out onto the flow.
Step 3
Double-click the MQTT In or MQTT Out node to bring up the properties window. Select Add new mqtt-broker from the Server dropdown and then click the pencil icon next to it.
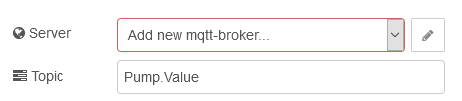
In the server properties box, enter the OAS MQTT Broker Name and IP address. You can add a Client ID or leave it blank to auto generate an ID. Select Update when complete.

Step 4
You are now back to the MQTT Node.
Select the server you created in Step 3.
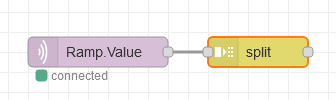
Enter an OAS Tag as the Topic and select a parsed JSON object as the output.
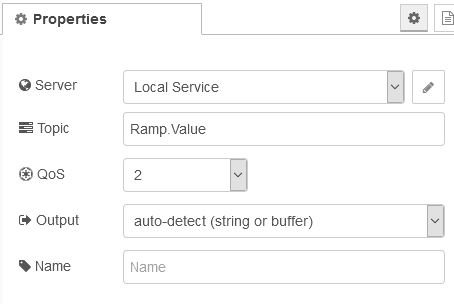

To access OAS tags set your topic to the OAS standard naming convention. A few examples below.
- Read the value from the Ramp tag on the local OAS service. Topic = Ramp.Value
- Read the Description from the Ramp tag on the local OAS Service. Topic = Ramp.Description
- Read the value of Alarms Not Acked tag in the subgroup Alarms on the local OAS service. Topic = Alarms.Active Not Acked.Value
Read the value of the Ramp tag from a remote OAS service. Topic = \Domain or IP address\Ramp.Value
\\192.168.0.1\Ramp.Value
Live Data Cloud Networking from local OAS Engine:
RemoteSCADAHosting.myLiveDataCloudNode.Ramp.Value
Live Data Cloud Networking through remote OAS Engine:
\\192.168.0.1\RemoteSCADAHosting.myLiveDataCloudNode.Ramp.Value
For more information on Tag naming conventions, please see the Tag Variables section of the Knowledge Base.
Step 5
OAS sends tag data in a standard JSON format that includes the value, time stamp and data quality.
A sample message is below.
Example Payload for Ramp.Value: {“Value”:84.0,”TimeStamp”:”2020-07-22T12:59:44-04:00″,”Quality”:true}
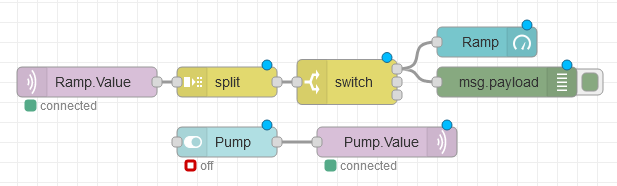
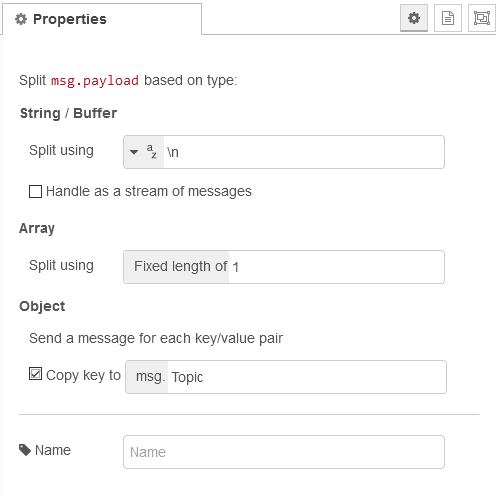
To segregate the payload in to separate messages add a split node to your project.
Check the Copy key to box and change it to msg.Topic as shown below.
Step 6
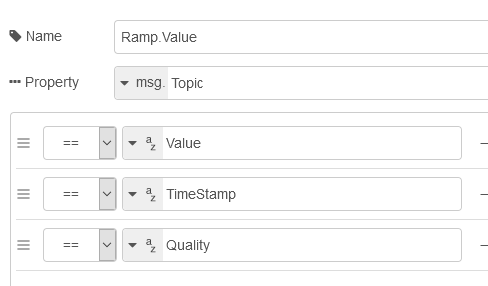
Now that you have separate messages add a switch node to access each message or the specific messages you want.

A complete Node Red Flow can be downloaded here.