Getting Started – Alarm Logging
The following guide provides instructions on setting up Alarm Logging for OAS.
In order to log alarms to a database or CSV file you must first define the Tag Alarm Limits.
For a list of the most common Alarm Logging properties refer to the OAS Configuration – Alarm Logging section in this help file.
Step 1: Check .NET Alarm or Web Alarm License

To use Alarm Logging the product feature Alarm .NET or Web Alarm needs to be enabled, it is included with either of these product features.
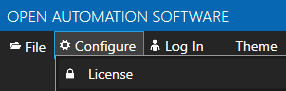
Start the Configure OAS application from the program group Open Automation Software.
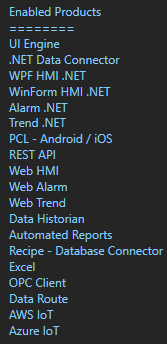
Select Configure-License and verify that Alarm .NET or Web Alarm is one of the enabled products in the lower left of the form. If you do not see either Alarm .NET or Web Alarm enabled email support@oasiot.com to update your license.
NOTE: To configure remote OAS Engines enter the IP Address or node name in the Network Node field and click on Select.

Step 2: Configure Alarm Logging
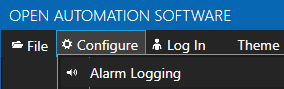
Select Configure-Alarm Logging.
In the Common tab enter a unique Logging Group Name.

Check Logging Active in the Common Properties Tab.

Step 3: Set Alarm Filters
In the Filters tab specify what types of alarms to log along with which alarm groups and alarm priorities. Leave the ALARM GROUPS list blank to log all alarm groups.
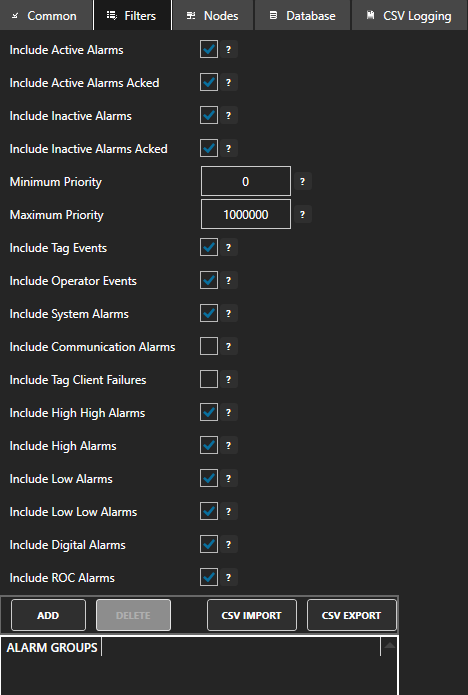
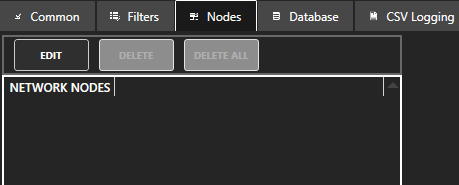
In the Nodes tab specify which OAS Engines to receive alarms from. Leave the list blank or specify localhost to log alarms from the local OAS Engine.
Step 4: Log Alarms to a Database
Select the Database tab to log the alarms to a database table.

Enable Log to Database.

Select the database Provider to use.
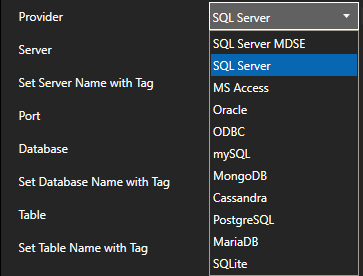
NOTE: MS Access is not supported on Linux or Docker deployments.
NOTE: When logging to SQL Azure use the SQL Server Provider and view the following guide to setup Microsoft Azure: Windows Azure Setup
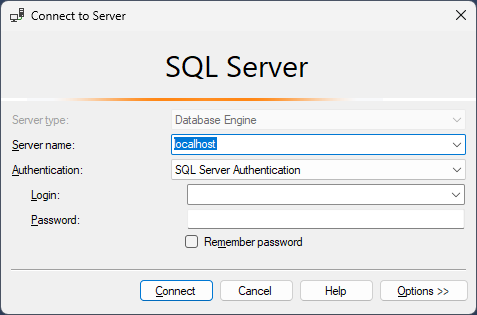
Specify the database Server to connect with.

NOTE: Not applicable for MS Access and SQLite.
When logging to SQL Server the Server name can be copied from SQL Server Management Studio when connecting to the database engine.
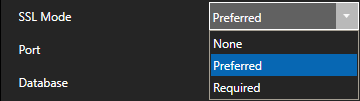
When logging to mySQL set the SSL Mode.
When logging to MongoDB use Add Srv if +srv option needs to be added to the Server.

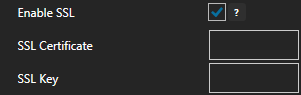
When logging to PostgreSQL select Enable SSL to specify a certificate.
Set the Database to log to.

When using SQLite or Microsoft Access specify the full path of the database. Example: C:\DatabaseName.mdb for older versions of Access and C:\DatabaseName.accdb for Access 2007 and greater.
Set the Table to log to.

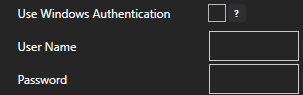
When logging to SQL Server uncheck Use Windows Authentication to specify SQL User Name Password. Leave enabled to connect using Windows Authentication.
Enable Log One Record Per Alarm if you want to insert only one record for each alarm instance. Leave disabled to log a new record for every change in alarm state, return to normal and acknowledged.

When enabled there will only be one record for each occurrence of an alarm. If the alarm returns the normal start or acknowledged the existing record will be updated with the new information. If it is a new occurrence of an alarm a new record will be created.
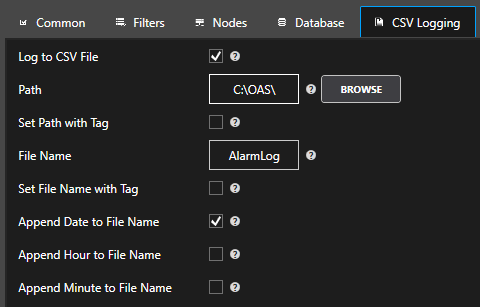
Step 5: Log Alarms to a CSV File
Use the following configuration for CSV text logging:
NOTE: There is no historical replay to alarm windows with CSV logging.
Step 6: Add Alarm Logging Group
Select the Add Group button to add the Alarm Logging group.

Step 7: Save Alarm Logging Configuration
Select the Save button on the toolbar at the top.

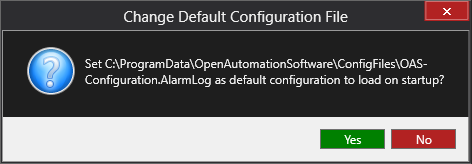
Enter a file name to be saved in C:\ProgramData\OpenAutomationSoftware\ConfigFiles directory on Windows or ConfigFiles subdirectory on Linux.
When prompted to set the file as the default configuration to load on startup select Yes.
Alarm records should now be recorded for alarms that match the filter criteria in the Filters tab.