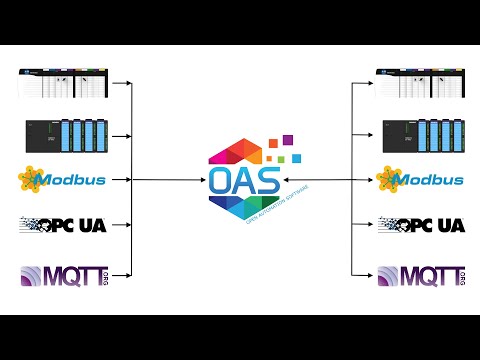
Data Route
Use OAS Data Route when you need to transfer data from one OAS Tag value to another Tag, MQTT Broker, Azure IoT Data Hub or IoT Edge. The Tags can be local or remote. When a Tag is set as a Destination values will be written to the Data Source defined in that Tag.
View the following video for a demonstration of transferring a value from one tag to another:
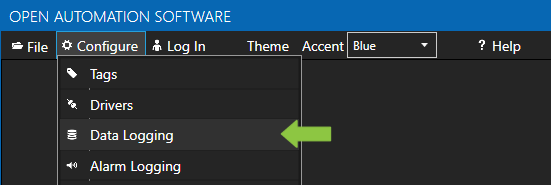
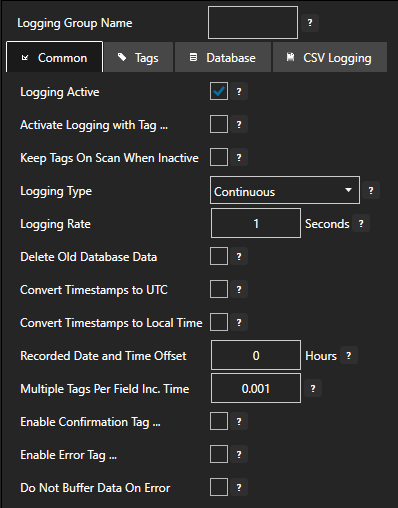
Data Logging
You can log data to SQL Server, Oracle, Access, MySQL, PostgreSQL, Cassandra, MongoDB, MariaDB, SQLite, InfluxDB, and CSV files based on event, continuously, time of day, or on data change.
View the following video for a demonstration of setting up Data Logging:
Alarm Logging
You can log alarms to SQL Server, Oracle, Access, mySQL, PostgreSQL, Cassandra, MongoDB, MariaDB, SQLite, and CSV files based on event, continuously, time of day, or on data change.
View the following for a quick tutorial on alarm logging:
Alarm Notification
Send alarms via e-mail SMS Text or Voice to users matching specific filter criteria.
View the following to see how to setup alarm limits in real-time tag configuration:
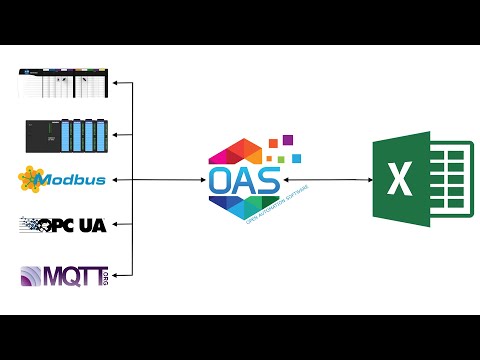
Excel
The OAS Excel Connector product provides connectivity to Microsoft Excel Workbooks for both read and write functionality.
View the following video to learn a simple setup for read and write functions in Microsoft Excel:
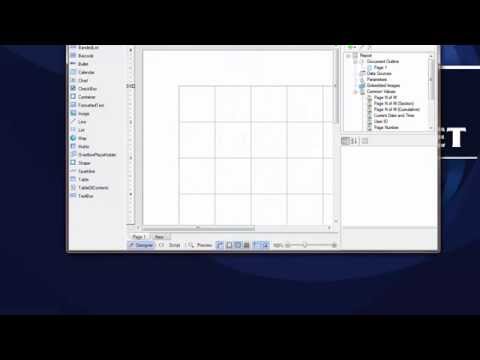
Reports
The OAS Report Product can generate reports for HTML web pages, Acrobat Reader PDF files, Microsoft Word RTF files, Graphic TIF files, text files, or even directly to the default system printer.
View the following to learn how to setup automated reports:
OPC Client
The OPC Client Connector product enables unlimited local and remote OPC Clients to communicate with a licensed OAS Service.
View the following video to learn how to connect third party OPC Clients for both local and Internet connections.:
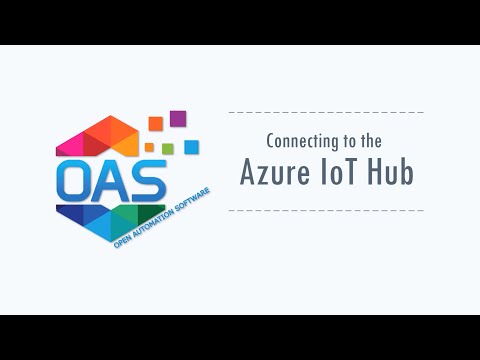
Azure IoT
View the following video for a complete demonstration of how to send live data to Azure IoT Data Hub:
.NET WPF User Interface
The WPF HMI .NET product provides Human Machine Interface .NET controls and real-time data communications components for Windows Presentation Foundation applications.
View the following video to learn how to create graphic operator interface applications with OPCWPFHMI.NET and Expression Blend:
.NET WinForm User Interface
The OPC .NET WinForm HMI .NET product provides Human Machine Interface (HMI) .NET controls and real-time data communications components. The product includes the Windows Services to read and write OPC Items and Tag Parameters and process data to unlimited local and remote applications developed with the OPC Controls components.
View the following video to learn how to create classic WinForm HMI applications using OPCWindowsHMI.NET:
.NET Trend
The OAS .NET Trend product provides real-time trending for WinForm and WPF applications and historical trending when combined with the product feature OAS Data Log.
View the following video to learn how to add a trend window to WPF or WinForm application for local and remote connections:
.NET Alarm
The OAS Alarm .NET product provides the features of viewing real-time and historical alarms on unlimited local and remote systems, alarm logging, alarm notification, and alarm statistics.
View the following video to learnh how to add alarm windows to WPF and WinForm applications for local and remote connections:
Smart Client Deployment
Applications developed with 100% managed components can be executed on remote systems without installing the application itself on the remote systems. This makes application updates extremely simple and provides a better user experience than web applications provide.
View the following video for an overview of Smart Client HMI applications and how they work:
Trend and Alarm Dashboard
View the following video to learn how how to use the Trend and Alarm Historian container. Pre-built application to run locally and remotely:
One Click HMI
Automatically setup Tags, Alarm Limits, Data Logging, Trending, Alarming, and HMI Smart Client in one step:
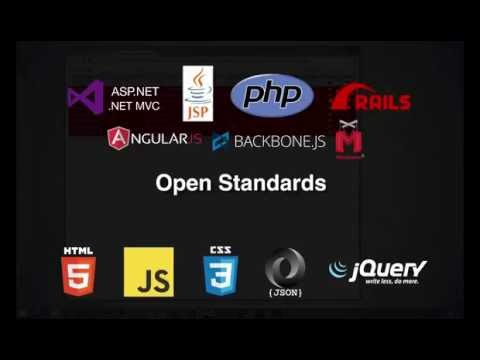
Web User Interface
The OAS Web HMI provides a flexible, platform-independent way to integrate with Open Automation Software Servers.
View the following video for a demonstration of Web HMI for live data using HTML5, CSS, Javascript, JQuery, and JSON:
Web Alarm
The Alarm Control allows you to retrieve and interact with real time and historical alarms from the OPC Server.
View the following video for a demonstration of HTML5 Web Alarm window for live and historical alarms:
Web Trend
Web Trend allows you to retrieve and interact with real time and historical trend data from the OAS Server.
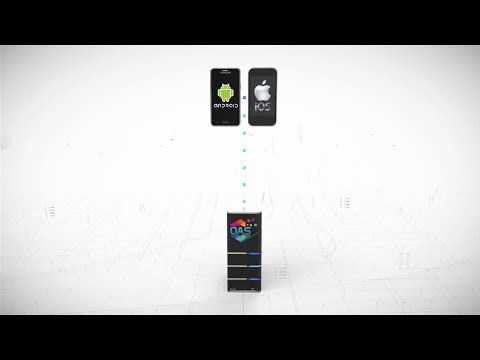
IOS and Android User Interface
Build iOS, Android, Windows Phone and Universal Windows Platform (UWP) apps in a familiar .NET environment – all with a single shared code base.
View the following video to learn how to create iOS and Android Native Apps for live data read and write access:
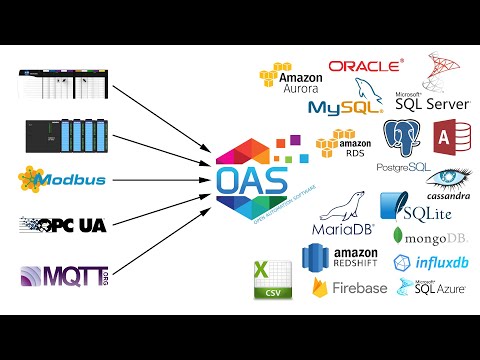
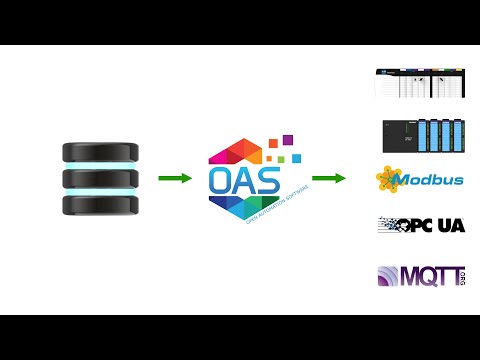
CHOOSE CONNECTORS
OAS connects to all commonly used industrial and business data sources. Select a data source to learn more about its setup:
- Configure AWS IoT Driver Interface
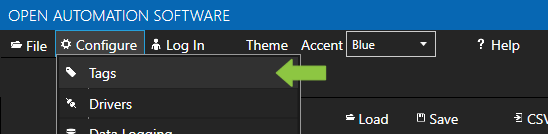
- Configure Tags
Connect to OPC Clients like WinCC Cimplicity, RS View etc. by making OAS tags available as OPC items. Sample client Add OPC items from OPC Server Our OPC server makes OPC items to connect to
Connect OAS local and remote tags to OPC UA Clients.
Use the OAS Excel Tag Browser application to browse OAS tags and enable OAS read / write values from/to an Excel workbook
Use the Configure Recipes interface to configure data transfer from databases to OAS data sources. The data target can be from local or remote OAS Services of Tag Parameter Values. Execution can be continuous or event driven from a Tag Parameter value, or at a specific time of day. The database providers can be SQL Server, Access, Oracle, mySQL, PostgreSQL, InfluxDB, MongoDB, MariaDB, SQLite, and more.
Add real-time read data to a C#, C++, or Visual Basic.NET WPF, WinForm, or Windows Service application. It is a very powerful method to make any data from a .NET application become a realtime data source.
Read local and remote data from the Open Automation Software realtime database tags where the data source is a web application or web service. You can make use of the OAS products Web HMI, Web Trend, Web Alarm or for greater control use the OAS REST API or the HTTP API.
Create cross platform communication drivers to deploy locally or remotely with custom configuration and optional automated setup.
Connectors are configured using the OAS Configuration tool or the OAS APIs.
Connectors Overview
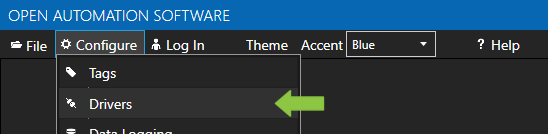
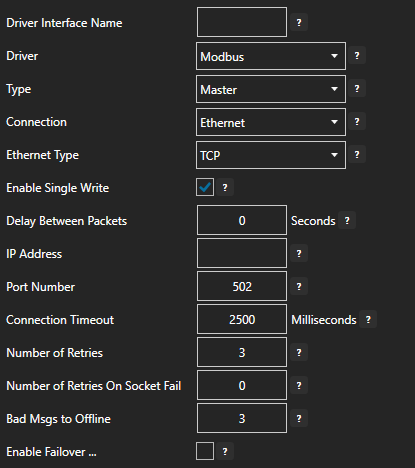
Modbus Data Source
If your data source is a Modbus slave device with either Ethernet or Serial physical interface with Modbus TCP, Modbus RTU, or Modbus ASCII protocol use Configure-Drivers and Configure-Tags to setup communications to the devices.
Refer to Getting Started Modbus under System Configuration-Tags for a quick guide on how to set it up.
Allen Bradley Data Source
If your data source is an Allen Bradley controller use Configure-Drivers and Configure-Tags to setup communications to the devices.
Refer to Getting Started Allen Bradley under System Configuration-Tags for a quick guide on how to set it up.
Siemens Data Source
If your data source is a Siemens controller use Configure-Drivers and Configure-Tags to setup communications to the devices.
Refer to Getting Started Siemens under System Configuration-Tags for a quick guide on how to set it up.
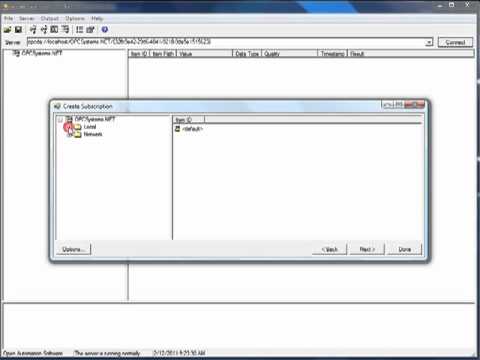
MQTT Data Source
If your data source is MQTT use Configure-Drivers and Configure-Tags to setup communications to the devices.
Refer to Getting Started MQTT under System Configuration-Tags for a quick guide on how to set it up.
Sparkplug B Data Source
If your data source is a Sparkplug B Edge of Network Node use Configure-Drivers and Configure-Tags to setup communications to the devices.
Refer to Getting Started Sparkplug B Host App under System Configuration-Tags for a quick guide on how to set it up.
Note: OAS can also act as an Edge of Network Node as a data destination to publish data to a Host and receive Metric values with a NCMD or DCMD command.
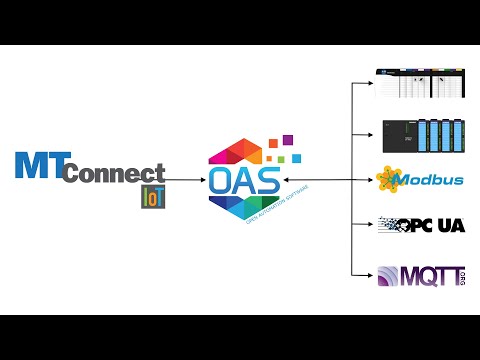
MTConnect Data Source
If your data source is MTConnect use Configure-Drivers and Configure-Tags to setup communications to the devices. The MTConnect driver will automatically generate OAS Tags based on the MTConnect device information received from the Live Data Url.
Refer to Getting Started MTConnect under System Configuration-Tags for a quick guide on how to set it up.
OPC Server Data Source
If your data source is an OPC Server use Configure-Tags to define a Tag with a Data Source of OPC Item or you can use DirectOPC from the database.
For a detailed presentation of connecting to OPC Servers view the following video:
View Getting Started OPC Server and also the reference for Tags in this help file.
OPC UA Server Data Source
If your data source is an OPC UA Server use Configurat-Drivers and Configure-Tags to define a Tag with a Data Source of OPC UA.
View Getting Started OPC UA Server and also the reference for Tags in this help file.
OPC Clients Data Source
If your data will be coming directly from an OPC Client you can implement the OPC Client Connector product feature which supports local and remote OPC Clients without DCOM.
View the following 4 minute video on OPC Client Connector:
View the OPC Client Connector Quick Start and reference on OPC Client Connector in this help file.
OPC UA Clients Data Source
If your data will be coming directly from an OPC UA Client you can implement the OPC Client Connector product feature which supports local and remote OPC UA Clients to connect to local and remote OAS Tags.
View the Getting Started – OPC UA Client reference.
Microsoft Excel Data Source
You can use Microsoft Excel as a data source for Open Automation Software with the product feature OAS Excel Connector.
View the following video on OAS Excel Connector:
View Getting Started OAS Excel Connector and reference on OAS Excel Connector in this help file.
Databases Data Source
You can use SQL Server, Oracle, Access, and MySQL as a data source for Open Automation Software with the product feature Recipe.NET.
View the following 27 minute video on Recipe.NET:
View the Getting Started Recipe.NET and reference on Recipe.NET in this help file.
.NET Applications Data Source
By implementing a Windows Service, WinForm application, HTML application and WPF application as a data source the type data to be able to share with Open Automation Software is almost unlimited. This is implemented with the data component from OPC .NET WinForm HMI .NET.
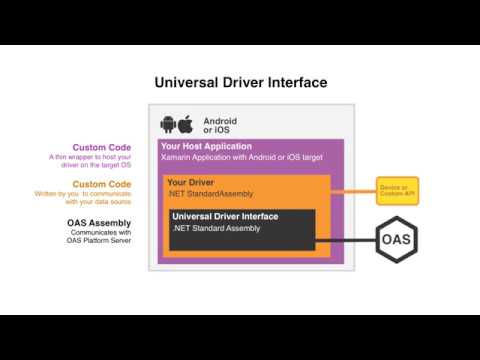
Universal Driver Interface
Create your own driver for OAS that can be deployed either locally or remotely, even for cross platform support.
See the UDI Technical Overview for an introduction and follow the Create a Driver help topic for step by step instructions.
For an overview of a UDI example view the following video:
Calculations
How to setup math equations and logic as a Data Source with the built-in Calculation engine for all products.
Data Route – Data Transfer
How to setup automated data transfer from one source to another locally or over on your LAN, WAN, and Internet.
OAS communicates with HTML-based applications using JSON over HTTP/S.
API Access
OAS provides the following API access for integrating with custom clients and for full programmatic access to live and historical data:
- REST API – The OAS REST API exposes functionality for reading and writing real-time and historical Tag Data, Trend Data, and Alarms. Additionally, the API can be used for managing OAS Server configurations.
- HTTP API – Make HTTP calls using JSON data structures
The .NET Data Connector product can be implemented to turn your .NET code variables into live data for the OAS Engine. The WriteTags method is used to pass in an array of tag name, array of values to write, and optionally timestamps to maintain 100 nanosecond resolution to the final destination from the OAS Engine.
The OASData.dll assembly is a .NET Standard 2.0 assembly which enables read and write access to all OAS Engines running locally or remotely.
Applications can target the following frameworks.
- .NET 5
- .NET Core 2.o or greater
- .NET Framework 4.61 or greater
- Xamarin.iOS 10.14 or greater
- Xamarin.Android 8.0 or greater
- UWP 1.0.0.16299 or greater
The same access can also be provided in the legacy assemblies for Framework 4.6 or less using the legacy assembly OPCSystemsDataConnector.dll.
The OAS Example Service Code is a working example of reading and writing tags synchronously and asynchronously. This includes example projects for both C# and VB for .NET Core Console App to run on all operating systems including…
- Linux
- Windows
- Mac
- Android
- iOS
There is also C# and VB projects to run as a Windows Service. The code examples in all 4 projects are the same to show adding tags programmatically and the asynchronous and synchronous methods for reading and writing data.
Refer to .NET Realtime Data Access for details on all methods supported