This guide shows how to create web based visualizations/HMIs using the OAS Web HMI product.

STEPS
Follow the links to the OAS Help articles:
Make sure Open Automation Software is installed and the OAS Service is running
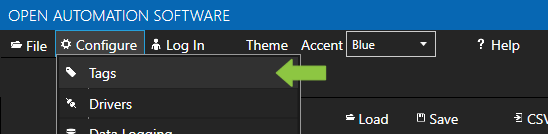
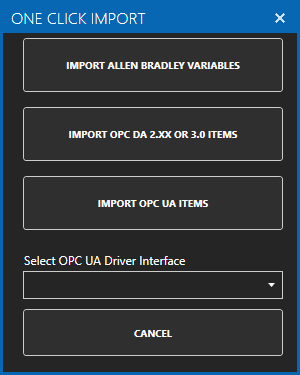
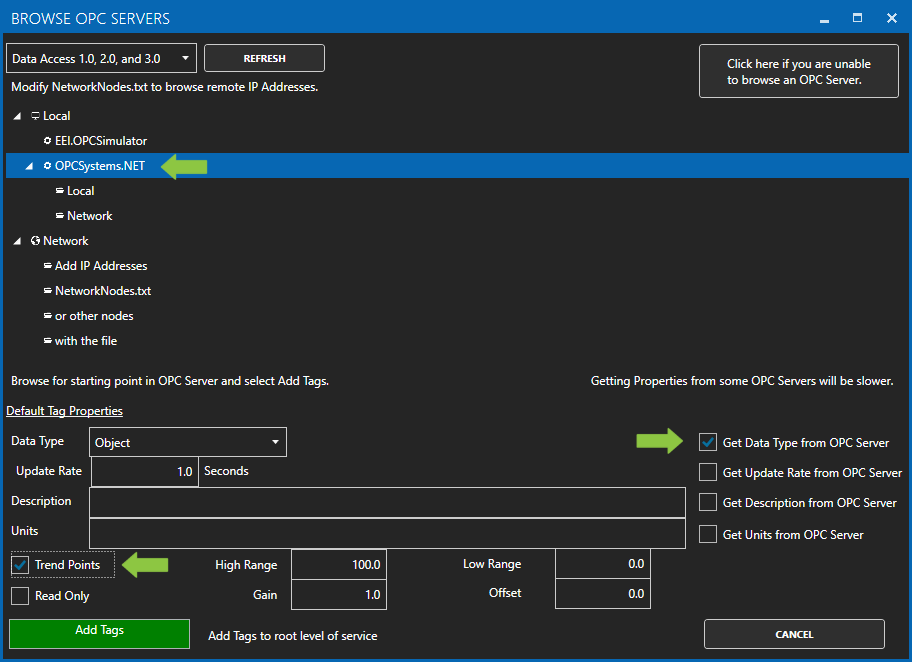
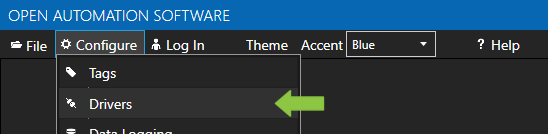
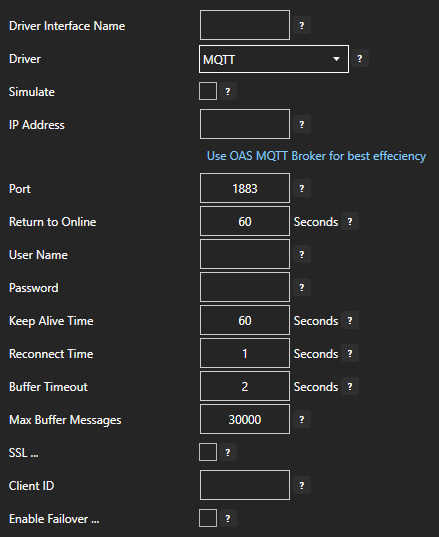
Configure your data source
Create web pages to display HMI. Use the Web HMI Wizard to quickly generate HTML code.
SEE ALSO:
- Getting Started – REST API
- Getting Started – Web HMI
- Web HMI Wizard
- Web HMI Graphics
- HTML Common Terms
- Programming Reference – Web HMI
- Installation and Configuration
- Authentication
- Other Configuration Options
- Marking up HTML Elements
- Top Level Classes – JSON Type Reference
- HTML Attribute Reference
- Client Script Library Reference
- Videos – Web HMI
- Frequently Asked Questions – Web HMI
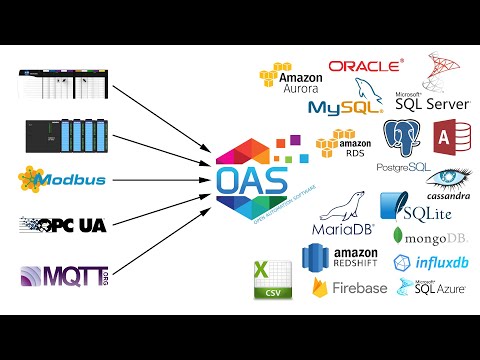
- Other Data Sources
- Universal Driver Interface – Use C# or VB.NET to integrate your own data model into OAS for realtime data access.
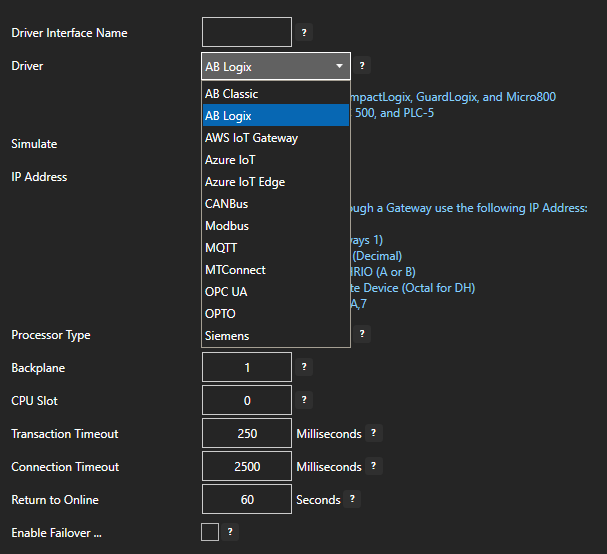
- Allen Bradley – Use the Allen Bradley IoT Driver to connect to ControlLogix, CompactLogix, GuardLogix, Micro800, MicroLogix, SLC 500, and PLC-5. Add Allen Bradley Data Historian to log data to industry standard databases.
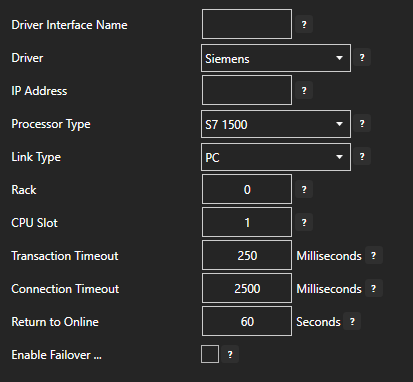
- Siemens – Use the Siemens IoT Driver to connect to S7-200, S7-300, S7-400, S7-1200, and S7-1500. Add Siemens Data Historian to log data to industry standard databases.
- Modbus – Use the Modbus IoT Driver to connect to Modbus TCP, Modbus RTU, and Modbus ASCII all supported on Ethernet, RS-232 Serial, and RS-485 Serial. Add Modbus Data Historian to log data to industry standard databases.
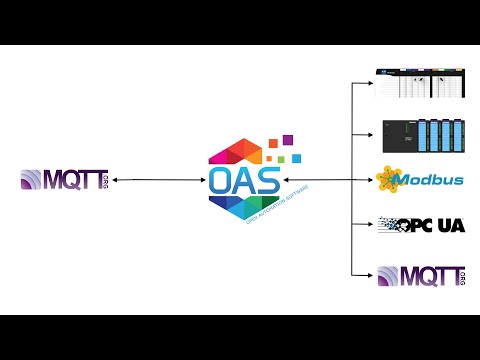
- MQTT – With the MQTT IoT Connector you can subscribe to MQTT Brokers.
- Amazon Web Services – With the AWS IoT Gateway driver you can subscribe to AWS for live data updates.
- .NET Applications – The .NET Data Connector provides read and write access to data programmatically via C# or VB code in a .NET application.
- Excel – Use the Excel Connector to use Microsoft Excel as data source
- Industry Standard Databases – Use the Recipe Connector to connect to SQL Server, Oracle, Access, mySQL and SQL Azure databases
- Industry Standard SCADA Systems – Use the Universal Data Connector to connect to Wonderware, WinCC, RSView and Cimplicty
- OPC Client – Use the OPC Client Connector to connect to third party OPC Clients
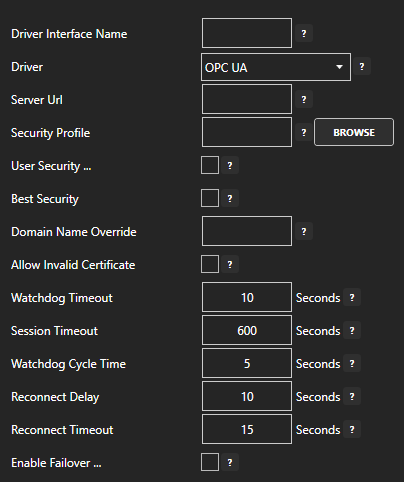
- OPC Servers – Connect to OPC DA 2.x, 3.0, OPC UA, OPC A&E, and OPC UA Alarm and Conditions. Use the OPC Tunnel Connector to automatically transfer data from any Data Source to third party OPC Servers
- Javascript – With the HTTP API Connector you can connect to jQuery and JSON data sources
- REST – With the REST API Connector you can connect to data sources via the REST API
- iOS and Android Apps – Use PCL for Android and iOS to connect to data on iOS and Android devices.
- Other Data Destinations
- .NET Applications – The .NET Data Connector provides read and write access to data programmatically via C# or VB code in a .NET application.
- .NET WPF HMI Applications – Use WPF HMI .NET to create HMI visualizations for WPF Smart Clients
- .NET WinForm HMI Applications – Use WinForm HMI .NET to create HMI visualizations for WinForm Smart Clients
- .NET Trending Application – Use Trend .NET for real-time trending for WinForm and WPF applications and historical trending when combined with OAS Data Historian.
- .NET Alarming Applications – Use Alarm .NET for real-time alarming for WinForm and WPF applications and historical alarming with alarm notification via email, SMS text, and voicemail.
- Javascript – With the HTTP API Connector you can connect to jQuery and JSON data sources
- REST – With the REST API Connector you can connect to data sources via the REST API
- Web-based HMI Applications – Use Web HMI to create cross-platform HMI apps
- Web-based Trending Aplicatons – Use Web Trend to create cross-platform trending apps
- Web-based Alarming Applications – Use Web Alarm to create cross-platform alarm apps
- iOS and Android HMI Apps – Use PCL for Android and iOS to create iOS and Android applications for live data.
- Data Historian – With OAS Data HIstorian you can log data to SQL Server, Oracle, Access, mySQL, SQL Azure and CSV files.
- Reports – With OAS Reports you can create reports from OAS data logging products or other databases. Generate reports as Word, Excel, PDF, HTML or Email.
- Universal Driver Interface – Use C# or VB.NET to integrate your own data model into OAS for realtime data access.
- Allen Bradley – Use the Allen Bradley IoT Driver to connect to ControlLogix, CompactLogix, GuardLogix, Micro800, MicroLogix, SLC 500, and PLC-5. Add Allen Bradley Data Historian to log data to industry standard databases.
- Siemens – Use the Siemens IoT Driver to connect to S7-200, S7-300, S7-400, S7-1200, and S7-1500. Add Siemens Data Historian to log data to industry standard databases.
- Modbus – Use the Modbus IoT Driver to connect to Modbus TCP, Modbus RTU, and Modbus ASCII all supported on Ethernet, RS-232 Serial, and RS-485 Serial. Add Modbus Data Historian to log data to industry standard databases.
- MQTT – With the MQTT IoT Connector you can subscribe to MQTT Brokers.
- Amazon Web Services – With the AWS IoT Gateway driver you can subscribe to AWS for live data updates.
- Excel – Use the Excel Connector to use Microsoft Excel as data source
- Industry Standard Databases – Use the Recipe Connector to connect to SQL Server, Oracle, Access, and mySQL databases
- Industry Standard SCADA Systems – Use the Universal Data Connector to connect to Wonderware, WinCC, RSView and Cimplicty
- OPC Client – Use the OPC Client Connector to connect to third party OPC Clients
- OPC Servers – Connect to OPC UA and Classic OPC DA 2.0 and 3.0 OPC Servers. Use the OPC Tunnel Connector to automatically transfer data from any Data Source to third party OPC Server or OAS IoT Driver.
- Microsoft Azure – Use the SQL Azure Data Logging and SQL Azure Alarm Logging products to connect to Microsoft Azure SQL Databases
- Microsoft Azure IoT Data Hub – Transfer any Data Source to Azure IoT Data Hub using the OPC Tunnel Connector