How to Transfer Data from MQTT to Snowflake
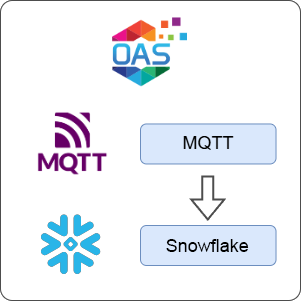
Open Automation Software can be used to transfer data from a MQTT broker to a Snowflake table, locally or over a network. Rows are written continuously using the Snowpipe Streaming REST API, with no staging files, no COPY INTO job and no warehouse running for ingestion.
This guide walks you through downloading and installing OAS, configuring a MQTT data source and a tag, preparing your Snowflake account, and streaming that tag into a Snowflake table.
For the purposes of this guide the MQTT source is the public HiveMQ broker, but any broker you can reach will work the same way.
For this guide on how to transfer data from an MQTT source to Snowflake you will need:
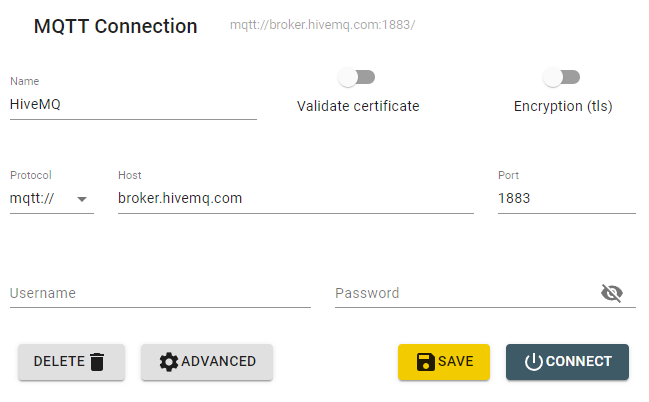
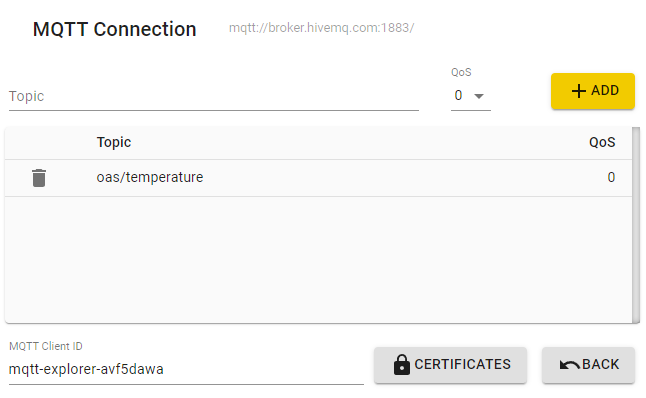
- To install MQTT Explorer or a similar tool for publishing messages to a MQTT broker and subscribing to messages in a MQTT broker
- An OAS installation licensed for the Snowflake option
- A Snowflake account with Snowpipe Streaming available
- Access to a Snowflake administrator holding
ACCOUNTADMIN, to create the user, role and table
Info
Snowflake is a write-only destination for OAS. The driver streams tag data into a table and never reads back from it, so Snowflake appears as a destination in these guides and never as a source.
For the full description of every driver field, see the Snowflake Config Reference.
1 - Download and Install OAS
If you have not already done so, you will need to download and install the OAS platform.
Fully functional trial versions of the software are available for Windows, Windows IoT Core, Linux, Raspberry Pi and Docker on our downloads page.
On Windows, run the downloaded setup.exe file to install the Open Automation Software platform. For a default installation, Agree to the End User License Agreement and then click the Next button on each of the installation steps until it has completed.
If you'd like to customize your installation or learn more, use the following instructions:
The OAS Service Control application will appear when the installation finishes on Windows.
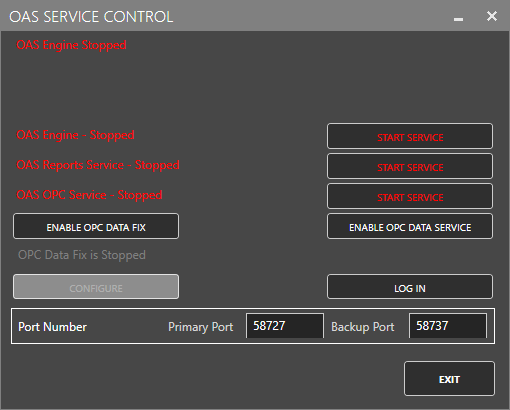
Click on each START SERVICE button to start each of the three OAS services.
2 - Configure OAS
Web Configuration Application
Configuration of the OAS server is performed from the built-in Web Configuration Application. This is the main application for accessing any settings within the OAS server and is completely self-contained within the server.

You can reach this by opening your browser to:
http://<your server>:58725/app/config
If you are browsing from the OAS machine itself, you can use localhost, otherwise use the IP address of the machine. You will also need to ensure port 58725 is open on both the client and the server or you may not be able to reach the application.
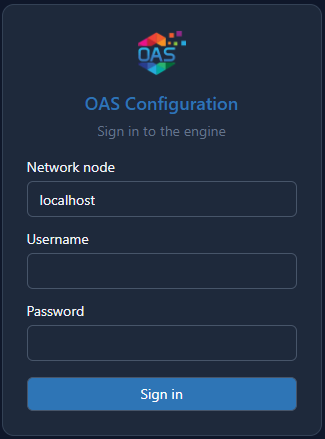
On a new installation the OAS engine has no accounts yet, so the first screen you see is Create Admin Account. Once the administrator account exists that screen is not shown again, and browsing to the application displays the sign in screen instead.
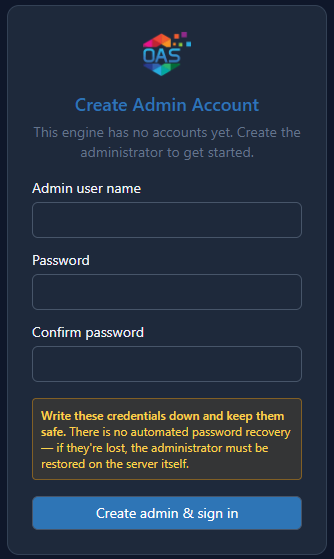
Enter a name for the administrator in the Admin user name field. Typically you would use
admin, but you can use whatever name you choose.Enter a password in the Password field, then enter the same password again in the Confirm password field.
Click on the Create admin & sign in button. The account is created and you are signed in to the engine.
Warning
Write these credentials down and keep them safe. There is no automated password recovery. If they are lost, the administrator must be restored on the server itself.
To sign in from then on, enter the Network node of the OAS engine, then the Username and Password of your account, and click on the Sign in button.
Info
In this guide you will use the Web Configuration Application to configure the local Node which by default is localhost.
If you have installed OAS on a remote instance you can also connect to the remote instance by setting the relevant IP address or host name in the Node field.
Important
Eventually the Legacy Desktop Configuration Application will be retired, but it is currently still available and shipped with the OAS product installation. If you choose to use it, instructions for accessing it are below. Documentation in the Knowledge Base will be replaced with the Web Application when it is retired.
Legacy Configuration Application
From your operating system start menu, open the Configure OAS application.
Select the Configure > Tags screen.
Important
If this is the first time you have installed OAS, the AdminCreate utility will run when you select a screen in the Configure menu. This will ask you to create a username and password for the admin user. This user will have full permissions in the OAS platform.
For further information see Getting Started - Security.
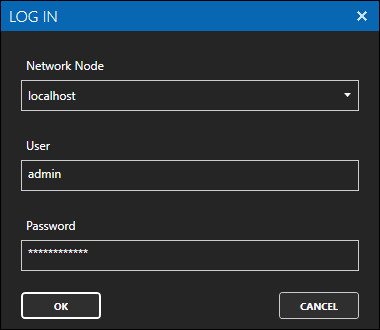
If this is the first time you are logging in, you will see the AdminCreate utility. Follow the prompts to set up your admin account. Otherwise, select the Log In menu button and provide the Network Node, username and password.

3 - Configure MQTT Data Source
In the following steps you will create and configure a MQTT Connector to connect to a third party broker so that tags will be able to subscribe to a topic. For the purposes of this guide, you will connect to the public HiveMQ broker.
Select Drivers in the sidebar.
Click + Add, enter a meaningful Driver Interface Name to give this driver interface instance a unique name, and click Create. Once created, the driver interface name should appear in the list of drivers.
Ensure the following parameters are configured:
- Driver: MQTT
- IP Address: broker.hivemq.com
- Port: 1883
- Client ID: OAS_Client_123
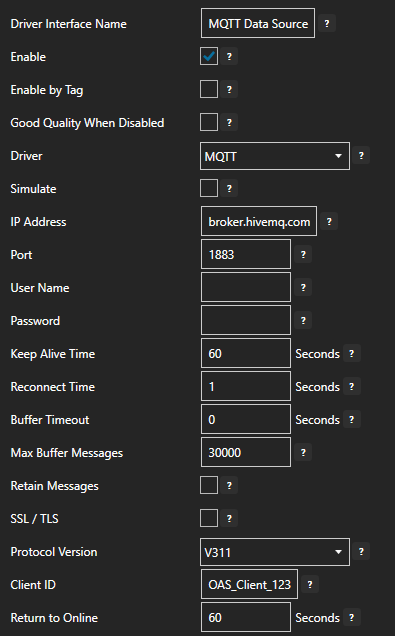
The app flags the empty User Name and Password fields. The public HiveMQ broker accepts anonymous connections, so leave them blank here. Fill them in if the broker you are connecting to requires authentication.
Tips
If you are having trouble reading a value in later steps, try to change the Client ID to something else as each client ID connecting to the broker must be unique.
Turn on Enable and click on the Apply changes button. The driver interface is not active until it is enabled and the changes are applied.
4 - Add Tags
In this step you will add two tags. One tag to represent a JSON payload coming from an external data source and a second Tag to represent the sensor value.
Select Tags in the sidebar.
If you want to add a Tag at the root of the tag list, make sure no Tag Group is selected and click on the + button, then choose Add tag.
If you want to add a Tag to a Tag Group, select the Tag Group first and then click on the + button and choose Add tag here.
You can also add Tag Groups by choosing Add group.
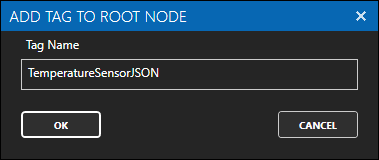
Enter TemperatureSensorJSON as the Tag name and click the Create button.
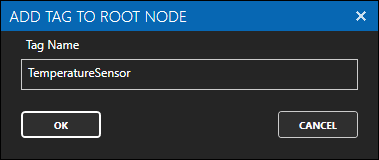
Repeat the above two steps and add another Tag with the name TemperatureSensor.
5 - Assign MQTT as Tag Data Source
You will now set the Tag's data source to the MQTT driver interface that you created previously.
At the end of this section you will need to use a tool like MQTT Explorer to publish a value to your Tag.
Select the Tag that will source data from the MQTT data source.
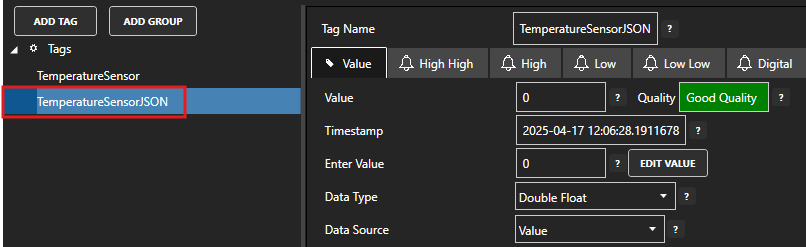
Set the following properties:
- Data Type: JSON
- Data Source: MQTT
- Select Driver Interface: MQTT Data Source
- Topic: oas/temperature
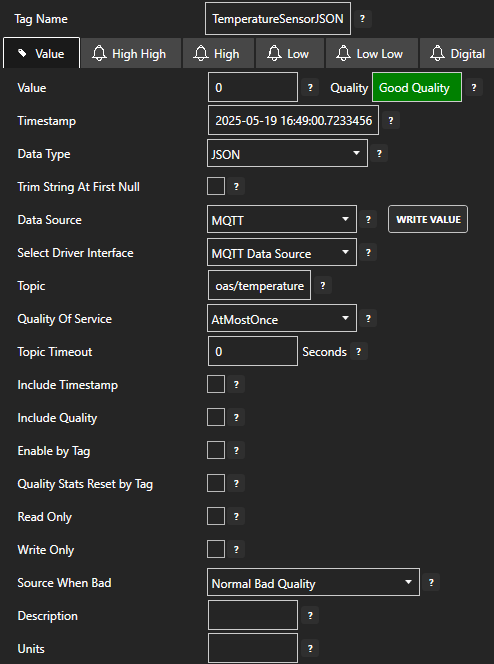
Click on the Apply changes button to apply the changes.
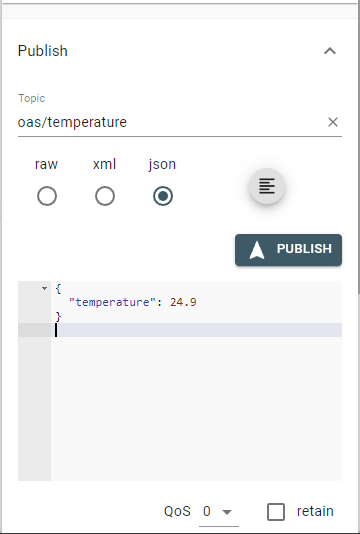
Using an MQTT testing tool to publish messages, such as MQTT Explorer, publish a JSON message to the oas/temperature topic.
{
    "temperature": 24.9
}
Check that the quality status is Good and you can see the JSON value.

6 - Prepare Your Snowflake Account
Snowflake is a hosted service, so it has to be prepared before OAS can write to it. These steps are performed in Snowflake, by a Snowflake administrator. OAS does not browse or create objects in your account.
Important
The names used below are examples. Substitute your own, and keep them consistent — the grants have to name the same objects the driver is pointed at.
| Example name | What it is |
|---|---|
abcdefg-xy12345 | The account identifier. Yours will be different, and using this one will fail |
OAS_SVC | The Snowflake user the driver authenticates as |
OAS_STREAM_ROLE | The role holding the grants |
OAS_DB / OAS_DATA / OAS_TAG_VALUES | The database, schema and table the rows are written to |
Find your account identifier. It is the whole subdomain of your Snowflake URL — everything before
.snowflakecomputing.com. In Snowsight, go to Admin > Accounts, open the...menu on your account and choose Manage URLs.Important
Do not use the LOCATOR column on the Accounts page. It looks like an identifier, it is right there on screen, and it does not work — authentication fails with a bare
401that explains nothing.Create a user and a role in a Snowsight worksheet, as
ACCOUNTADMIN.CREATE ROLE IF NOT EXISTS OAS_STREAM_ROLE; CREATE USER IF NOT EXISTS OAS_SVC DEFAULT_ROLE = OAS_STREAM_ROLE MUST_CHANGE_PASSWORD = FALSE; GRANT ROLE OAS_STREAM_ROLE TO USER OAS_SVC; ALTER USER OAS_SVC SET TYPE = SERVICE;Info
If you already have a service user and role for OAS, skip this and use them. Nothing here is specific to this driver — any user whose default role holds the grants below will work. Note the user name for the driver's User field and move on.
The driver never sends a role. The role that applies is the user's default role, which is why it is set above.
Create the target table.
CREATE DATABASE IF NOT EXISTS OAS_DB;
CREATE SCHEMA   IF NOT EXISTS OAS_DB.OAS_DATA;

CREATE TABLE IF NOT EXISTS OAS_DB.OAS_DATA.OAS_TAG_VALUES (
    id         STRING,
    value      VARIANT,
    quality    BOOLEAN,
    timestamp  TIMESTAMP_NTZ
);
These four columns match the driver's built-in Default column mapping, so a table created this way streams with no mapping work at all. If the table already exists, leave it alone and make the column mapping match its columns instead.
Grant the role its privileges.
GRANT USAGE  ON DATABASE OAS_DB                         TO ROLE OAS_STREAM_ROLE;
GRANT USAGE  ON SCHEMA   OAS_DB.OAS_DATA                TO ROLE OAS_STREAM_ROLE;
GRANT INSERT ON TABLE    OAS_DB.OAS_DATA.OAS_TAG_VALUES TO ROLE OAS_STREAM_ROLE;
Info
Those three grants are the entire permission surface for streaming. No warehouse, no
CREATE PIPE, noOPERATE, and the driver never issuesDROPorALTER.
7 - Configure Snowflake Driver
In the following steps you will create and configure a Snowflake Driver. This driver streams the Tags you select into the table you created in the previous step. All screenshots and options in this guide will be using the built-in OAS Web Configuration interface.
Log into the interface using the credential created after installing OAS. The application can be found by opening your browser to the address of your OAS installation. If you are accessing it from the machine running OAS, just use
localhost, otherwise the IP address of the server:http://<server address>:58725/app/configIn the sidebar menu, select Drivers.
Click
+ Addin the sidebar to create a new Driver, then set the Driver Interface Name to Snowflake Stream to give this driver interface instance a unique name.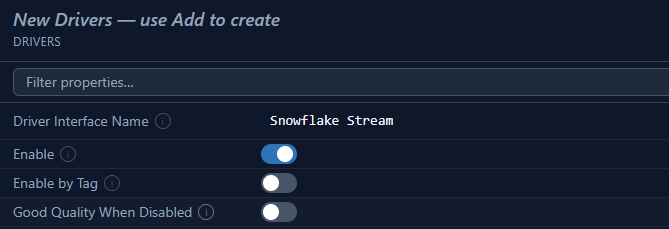
Info
The driver interface name appears in system errors, in the driver log file name, and in the automatically generated Snowflake channel name. Choose something you will recognise later.
Ensure the following parameters are configured:
- Driver: Snowflake
- Account Identifier: your account subdomain, for example abcdefg-xy12345
- Authentication Type: Key Pair JWT
- User: OAS_SVC
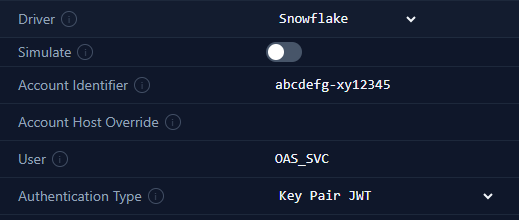
Leave Account Host Override and Ingest Host Override blank. Snowflake assigns each account a separate host for streaming and the driver discovers it on every connect.
Supply the private key. If you do not already have a key pair, click the GENERATE KEY button beside the Private Key Path field.
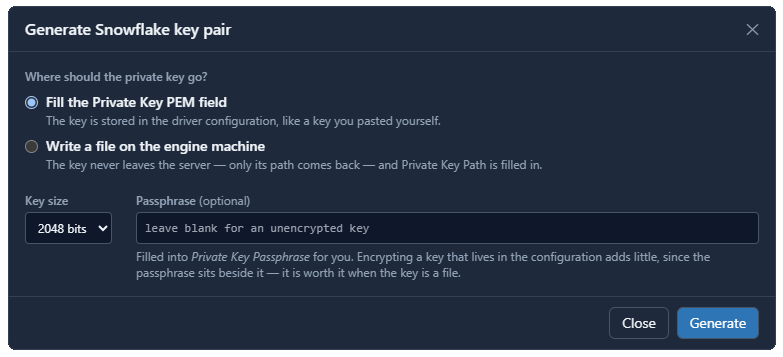
Choose whether to fill the Private Key PEM field or write a file on the engine machine, pick a key size, and optionally set a passphrase.
Important
OAS does not register the key in Snowflake for you. The dialog shows an
ALTER USERstatement with the public key already in it — copy it and run it in a Snowsight worksheet asACCOUNTADMIN. Until you do, authentication fails.The statement is shown once. Copy it before closing the dialog.
If you already have a key pair, paste the private key into Private Key PEM or point Private Key Path at the
.p8file, and fill in Private Key Passphrase if the key is encrypted.Set the target table:
- Database: OAS_DB
- Schema: OAS_DATA
- Table: OAS_TAG_VALUES
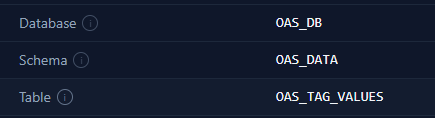
Leave Pipe and Channel Name blank. Snowflake creates a default pipe for every table, and a channel name is generated from the node and driver interface names.
Important
Two OAS engines using the same channel name against the same pipe will disconnect each other. Leave Channel Name blank unless you have a specific reason not to.
Turn on Enable, then click Apply changes to temporarily save the settings you have entered to this point. The driver interface is not active until it is enabled and the changes are applied.
8 - Test the Snowflake Connection
Before selecting Tags, confirm that OAS can authenticate. Select the Snowflake Stream driver in the list and click the TEST CONNECTION button.
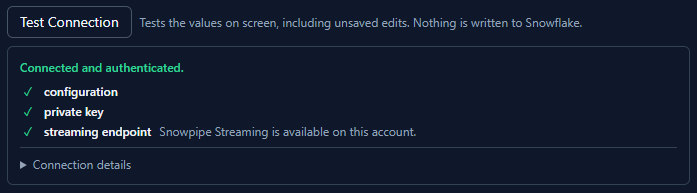
The test performs three checks in order and reports the first one that fails:
| Check | What it proves |
|---|---|
| Configuration | The required fields are filled in and the account identifier is well formed |
| Private key | The key parses, the passphrase is correct, and Snowflake accepts the signed token |
| Streaming endpoint | The account has Snowpipe Streaming and the ingest host was discovered |
Info
Test Connection does not touch the database, schema or table. A successful test means OAS can sign in as OAS_SVC; it does not mean the grants you applied in Snowflake are correct. Those are exercised when rows are first written.
Important
A 401 from the test almost always means one of three things: the ALTER USER statement was never run, the account identifier is wrong, or the User field does not match the Snowflake user the key was registered against.
9 - Map Tag Data to Table Columns
The column mapping decides what a row looks like. The table you created in the Prepare Your Snowflake Account section has four columns, and the driver's Default preset matches them exactly.
Click the Edit… button on the Column Mapping row of the Snowflake driver configuration.
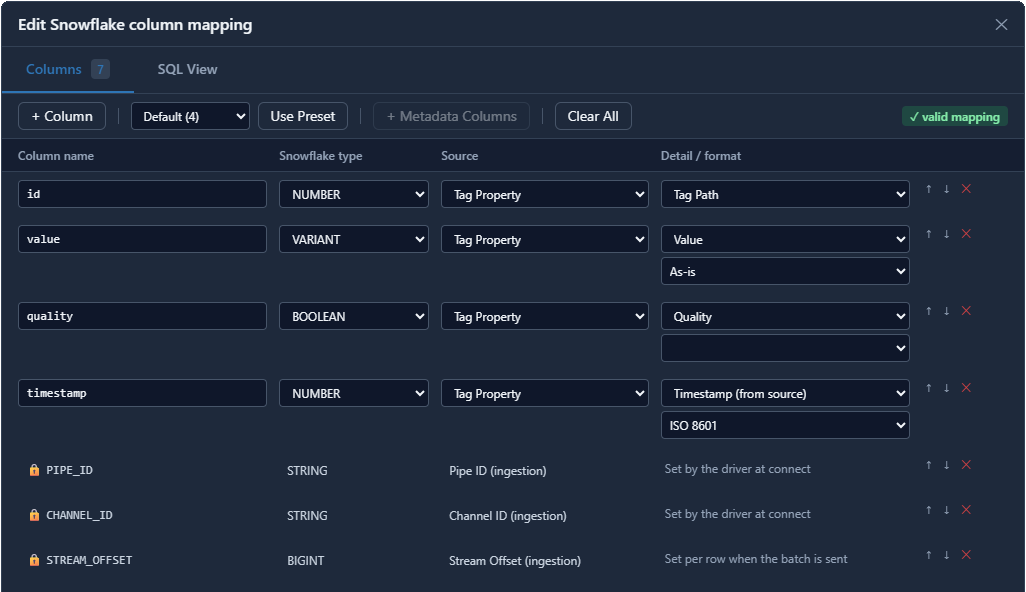
Click Use Preset and choose Default (4). Four columns appear:
Column Type Source idSTRING Tag Property → Tag Path valueVARIANT Tag Property → Value, as-is qualityBOOLEAN Tag Property → Quality timestampTIMESTAMP_NTZ Tag Property → Timestamp, ISO 8601 The other preset, ISA-95 Lite, produces 24 columns with the ISA-95 hierarchy flattened one column per level. It needs a different table, so use it only if you created the table from its SQL View.
Optionally click + Metadata Columns to add
PIPE_ID,CHANNEL_IDandSTREAM_OFFSET. These let you prove in SQL that no rows were lost. If you add them here, add the matching columns to the Snowflake table as well.Info
A preset is a starting point, not a mode. Once applied you can add, edit and remove columns freely.
Click SQL View to see the
CREATE TABLEstatement your mapping describes. This is the same statement the driver would use, so it is worth comparing against the table you actually created.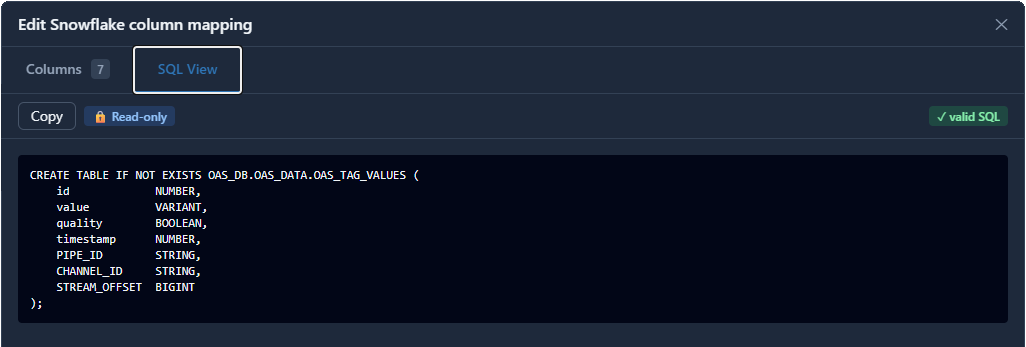
Important
The mapping has to match the table. The Snowflake type dropdown drives the generated DDL only — it does not change what is sent, and changing it will not fix a value that is arriving in the wrong shape. Change the column's source for that.
OAS never alters an existing table. If your table differs from the preset, edit the mapping to match the table rather than editing the table.
Click OK to return to the driver configuration, Apply changes and then Save the driver so that it will be restored when the OAS server is ever restarted.
10 - Select the Tags to Publish in Snowflake
On the Snowflake driver configuration, find the Tags to Publish table and add the Tag you created earlier (for example TemperatureSensor).
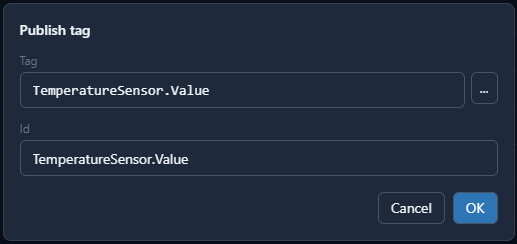
Important
Every Tag in this list is written to the same table using the same column mapping. Leaving the list empty is a configuration error, not an idle driver — the driver has nothing to send and will report it.
Set Publish Type to Continuous with the Publish Interval set to the default of 10 seconds. This will ensure data will be published on the interval, whether the value changed or not.
Click Enable, Apply changes and then Save the driver so that it will be restored with the OAS server is ever restarted.
11 - Verify Rows are Arriving in Snowflake
In a Snowsight worksheet, query the table:
SELECT * FROM OAS_DB.OAS_DATA.OAS_TAG_VALUES
ORDER BY TIMESTAMP DESC
LIMIT 20;
Rows normally become visible five to seven seconds after OAS sends them. That delay is Snowpipe Streaming's commit interval, not the driver waiting.
If you added the metadata columns to the mapping, you can also prove that nothing was dropped. This query returns rows only where the offset sequence skipped:
SELECT STREAM_OFFSET,
       LAG(STREAM_OFFSET) OVER (PARTITION BY PIPE_ID, CHANNEL_ID
                                ORDER BY STREAM_OFFSET) AS previous_offset
FROM   OAS_DB.OAS_DATA.OAS_TAG_VALUES
QUALIFY STREAM_OFFSET <> previous_offset + 1;
An empty result means every row the driver sent arrived exactly once.
If no rows appear at all:
| Symptom | Likely cause |
|---|---|
| Test Connection passes, no rows | The role is missing INSERT on the table, or USAGE on the database or schema |
| Rows appear, one column always null | That column's source in the mapping does not match the tag property you expected |
| Rows appear only after a restart | The Tag was not changing value — with Publish Latest Value Only off, a static Tag produces no rows |
| Nothing in the table, errors in the log | Check Configure > System Errors for the driver interface name Snowflake Stream |
While the connection is down, values are held by Store and Forward and delivered oldest first once it recovers, so a network outage delays rows rather than losing them.
12 - Save Changes
Once you have successfully configured your OAS instances, make sure you save your configuration.
On each configuration page that has a Save button, click on it.
If this is the first time you are saving the configuration, or if you are changing the name of the configuration file, OAS will ask you if you want to change the default configuration file.
If you select Yes then OAS will make this configuration file the default and if the OAS service is restarted then this file will be loaded on start-up.
If you select No then OAS will still save your configuration file, but it will not be the default file that is loaded on start-up.
Important
Each configuration screen has an independent configuration file except for the Tags and Drivers configurations, which share the same configuration file. It is still important to click on the Save button whenever you make any changes on those screens.
The Security, Users and Options screens have no Save button. Changes you make there are written to disk as soon as you make them, so there is nothing further to save.
For more information see: Save and Load Configuration
Info
- On Windows the configuration files are stored in C:\ProgramData\OpenAutomationSoftware\ConfigFiles.
- On Linux the configuration files are stored in the ConfigFiles subfolder of the OAS installation path.
Ready to get started?
See how OAS fits your environment, or get pricing for your project.