OAS System Requirements

The system requirements for running OAS are highly dependent on the number of tags, features and the number of connected clients.

OAS Versions

For best performance use a 64-bit operating system. If you need to run on a 32-bit system you will have to use OAS version 17.0 or less.

Any system with more than 100,000 is required to use the 64-bit version.

All versions of OAS support Windows. The latest OAS versions require .NET 6.0. You can also deploy to Windows 10 IoT Core.

If you would like to run on a Linux operating system you will have to use OAS version 14.0 or greater.

Linux Compatibility

The following table lists compatibility of various Linux distributions and the corresponding minimum OAS versions:

OSVersionArchitecturesNotes
Red Hat Enterprise Linux6+x64Microsoft support policy
Red Hat Enterprise Linux
CentOS
Oracle Linux
7+x64Red Hat support policy
CentOS lifecycle
Oracle Linux lifecycle
Fedora31+x64Fedora lifecycle
Debian9+x64, ARM32, ARM64Debian lifecycle
Ubuntu16.04+x64, ARM32, ARM64Ubuntu lifecycle
Linux Mint18+x64Linux Mint end of life announcements
openSUSE15+x64OpenSUSE lifecycle
SUSE Enterprise Linux (SLES)12 SP2+x64SUSE lifecycle

For any Linux installation, general knowledge of Linux server configuration is required. This includes managing files, users, permissions, and configuring services (daemons in systemd).

Raspberry Pi Compatibility

OAS can be installed on the Raspberry Pi 4+ boards, however the default Raspbian OAS is not supported. You will need to install the server (not desktop) version of one of the above listed Linux distributions. Extensive testing with Ubuntu Server has proven to be the most reliable and simplest to configure.

Dotnet

OAS includes the .NET 6.0 framework and runs as a self-contained application so there is no need to separately install .NET Core.

OAS also includes .NET Framework 4.6.1 assemblies for backwards compatibility and will run on:

  • Windows 11 – 64 bit
  • Windows Server 2022 – 64 bit
  • Windows 10 – 32 bit and 64 bit
  • Windows 10 IoT Enterprise 64 bit
  • Windows Server, version 2004 – 64 bit
  • Windows 8.1 – 32 bit and 64 bit
  • Windows 8 – 32 bit and 64 bit
  • Windows 7 SP1 – 32 bit and 64 bit
  • Windows Server 2019- 64 bit
  • Windows Server, version 2004 – 64 bit
  • Windows Server, version 1909 – 64 bit
  • Windows Server, version 1809 – 64 bit
  • Windows Server, version 1803 – 64 bit
  • Windows Server, version 1709 – 64 bit
  • Windows Server 2016 – 64 bit
  • Windows Server 2012 R2 – 64 bit
  • Windows Server 2012 – 64 bit
  • Windows Server 2008 R2 SP1 – 64 bit

Development

When developing applications you have a choice of using Dotnet Standard libraries or Dotnet Framework libraries.

The Dotnet Standard libraries include:

  • OASAlarms
  • OASConfig
  • OASData
  • OASTrends
  • Universal Driver Interface

The Dotnet Framework libraries include:

  • OPCAlarmControl
  • OPCAlarmDataOnly
  • OPCControls
  • OPCGauge
  • OPCSystems
  • OPCSystemsDataConnector
  • OPCTrendControl
  • OPCTrendDataOnly
  • OPCWPFDashboard
  • Universal Driver Interface

Hardware Requirements

Number of Processors

Open Automation Software will take advantage of multiple processors and will evenly distribute processing of the service functions across all processors that are available.

  • It is recommended to allocate 2 processors for every 100,000 tags running in the service.
  • Allocate 1 additional processor for each set of 25,000 tags to be logged at a 1 second frequency.
  • Allocate 1 additional processor for every 50,000 tags to be trended at a 1 second rate for 1 hour of time frame.
  • Allocate an additional processor for each 25 clients or more connected to the service.

Memory

  • Allocate 4GB of memory for every 100,000 tags running in the service.
  • Allocate 4GB of memory for each set of 25,000 tags to be logged at a 1 second frequency.
  • Allocate 4GB of memory for every 50,000 tags to be trended at a 1 second rate for 1 hour of time frame.
  • Allocate 4GB of memory for each 25 Smart Clients connected to the service.

Database Engine Requirements

If the database engine is to run on the same server as OAS then database engine requirements must be considered in addition to the OAS requirements. For data logging, historical replay to trends, and reports the database engine will be the most resource intensive execution.

For each 100,000 tags to be logged at a frequency of 1 second you should allocate 16GB of RAM for the performance of the database engine.

Trending

The number of different time frames for real-time trending combined with the number of tags enabled for trending will impact the resources required to cache and perform trending.

Allocate a processer and 4GB of RAM for every 50,000 tags to be trended at a 1 second frequency over 1 hour time frame. If there are multiple timeframe and sample rate combinations allocate more processers and more RAM.

Use Configure > Options > Trending to set the Longest Realtime Time Frame setting to limit the real-time trend cache.

For client applications running on remote machines, the capability of the graphics card can improve resource intensive trending .

Client Performance

Number of Clients for HMI, Trending, and Alarming

Allocate 1 processor and 4GB of RAM for each set of 25 clients connected to the service. For example if 100 client systems will be communicating to the service an additional 4 processors with an additional 16GB of RAM will be required.

Web Applications

Web applications are more server intensive that Smart Client applications. For Web applications that display a lot of data for more than 25 clients at a time load balancing across multiple servers may be required for web applications. For smaller web application allocate a server for each 100 clients.  For larger web applications allocate a server for each 25 concurrent clients.

Windows Presentation Foundation (WPF) HMI

For client applications that are using Windows Presentation Foundation (WPF) components the best performance is on Windows 10, 8, 7, and Vista. Windows Server 2008, Server 2003, and Windows XP using OAS version 11 or older can also run WPF client applications, but there may be a higher CPU load for more graphic intensive animations.  Windows 2000 Professional cannot run WPF client applications.

Cross-Platform HMI

For client applications to run on both Windows 10 and Linux the OAS Cross-Platform HMI can be utilized to build one application that serves both Windows and Linux operating systems.

Start Service

To run OAS as a service on Linux view how to Setup OAS Engine as a Linux Service or Daemon.

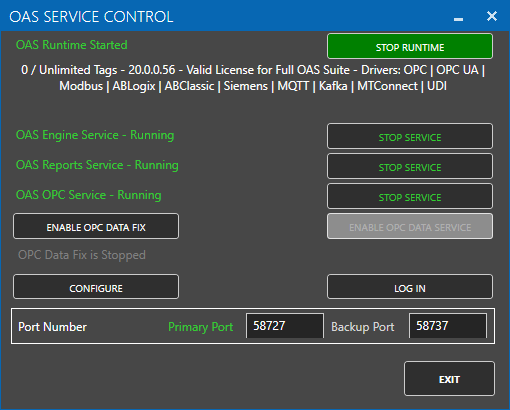
After you install the Windows version of OAS use the OAS Service Control application to start the OAS Service, OAS Data Service, and OAS Database Service if they are not already started.

These services will automatically start when you restart your computer unless you set the startup type to Manual for each of the services.

OAS Service Control

You can optionally Start Runtime here also or later in the example. All modifications are allowed during Runtime except loading a Tag configuration file.

You can add, delete, and modify Tags, Data Logging Groups, Alarm Logging Groups, Alarm Notification Groups, Recipes, Reports, Security Groups, and Security Users during Runtime.

Quick Start Example

Use this Quick Start Section to become familiar with the product features of Open Automation Software. Each section walks you through a very basic setup and use of the product features. Feel free to skip sections that do not pertain to your application needs.

Consider both your Data Sources and what you would like to perform with the data to determine which of the following steps in the Quick Start you would like to implement.  Modbus, Allen Bradley, Siemens, and OPC UA are the most popular device interfaces.  Data Route, Data Logging, and Open UIEngine are the most popular features used to transport and interface with data.

  • Security: How to setup user security to restrict configuration changes and real-time and historical data access.
  • License: How to activate a software license for Open Automation Software.
  • Tags: How to setup Open Automation Software Tags manually, using CSV files, or programmatically.
  • Modbus: How to setup communications to Modbus devices for Modbus TCP, RTU, and ACSII.
  • Allen Bradley: How to setup communications to ControlLogix, CompactLogix, GuardLogix, Micro800, MicroLogix, SLC 500, and PLC-5.
  • Siemens: How to setup communications to S7-200, S7-300, S7-400, S7-1200, and S7-1500.
  • Database: How to setup access to databases.
  • OPC DA Servers: How to setup communications to Classic OPC DA Servers.
  • OPC DA Clients: How to access Open Automation Software tag values from a Classic OPC DA Client.
  • OPC UA Servers: How to setup communications to OPC UA Servers.
  • OPC UA Clients: How to access Open Automation Software tag values from an OPC UA Client.
  • MQTT Client: How to setup communications to MQTT brokers for communications to MQTT devices and software.
  • MQTT Broker: How to access OAS tag values from MQTT clients with OAS MQTT Broker.
  • Sparkplug B EoN Node: How to host data as Sparkplug B Edge of Network Node.
  • Sparkplug B Host App: How to access Sparkplug B devices.
  • AWS IoT Gateway: How to setup communications to Amazon Web Services IoT Gateway.
  • Azure IoT Data Hub: How to publish data to Azure IoT Data Hub.
  • Azure Event Hubs: How to publish data to Azure Event Hubs.
  • Kafka Consumer: How to setup communications to Kafka as a Consumer.
  • Kafka Producer: How to setup communications to Kafka as a Producer.
  • Data Route: How to setup automated data transfer.
  • Data Logging: How to setup data logging to SQL Server, Oracle, Access, mySQL, and CSV files.
  • Alarm Logging: How to setup data logging to SQL Server, Oracle, Access, mySQL, and CSV files.
  • Alarm Notification: How to setup alarms to be sent via email, voice message, or text message.
  • Reports: How to setup reports to be automatically generated to pdf, html, Word, and Excel.
  • Recipes: How to setup data transfer from SQL Server, Oracle, Access, and mySQL to Open Automation Software Tags.
  • Options: How to setup the Open Automation Software service settings for common attributes.
  • Open UIEngine: No code cross-platform user interface.
  • .NET WPF HMI: How to create a WPF HMI application.
  • .NET WinForm HMI: How to create a WinForm HMP application.
  • .NET Trend: How to add trending to a WPF or WinForm application.
  • .NET Alarm: How to add alarming to a WPF or WinForm application.
  • Web HMI: How to create a Web HMI application.
  • Web Trend: How to create a Web trending application.
  • Web Alarm: How to create a Web alarming application.
  • Excel: How to add realtime data access to Microsoft Excel.
  • Networking: Videos and syntax on how to best implement networking and the different ways that is possible.
  • Programmatic Interface: Examples on how to access Configurations and Real-time data via programmatic interface using .NET or REST API.
  • Universal Driver Interface: How to create a communication driver for OAS.
  • Redundancy: Best practices for implementing redundant systems.
  • How To Articles: A list of guides for data transport and interface.
  • Videos: A complete list of all training videos.
  • Support: Contact information for obtaining sales or technical product assistance.

View the Getting Started with Open Automation Software Video to familiarize yourself with installation, setting up Tags, selecting Data Sources and Destinations, and implementing Networking and Security.

  • 00:00 – Introduction
  • 00:13 – Video Topics
  • 00:25 – Where to download OAS
  • 01:26 – Activate a new license
  • 01:52 – What’s a Tag in OPC Terminology?
  • 02:03 – How to Configure Tags
  • 02:16 – Ways to Add Tags in OAS
  • 02:22 – Add Tags Manually
  • 02:27 – Add tags using csv import export
  • 02:36 – Add tags one click import for AB, OPC UA or OPC DA
  • 02:56 – Add Tags Programmatically
  • 03:16 – Adding a tag manually
  • 07:07 – Saving Tag Configuration
  • 07:48 – OAS as a service-oriented architecture
  • 07:58 – Data Sources
  • 08:07 – Built In Drivers
  • 08:18 – OPC & OPC UA
  • 08:25 – One Click OPC
  • 08:34 – MQTT
  • 08:47 – AWS IoT Gateway
  • 09:02 – Recipe Product
  • 09:13 – .NET Data Connector
  • 09:29 – Universal Driver Interface
  • 09:53 – Data Destination
  • 10:02 – Data Historian
  • 10:39 – Web Alarm & Alarm.NET
  • 10:51 – Alarm Notification
  • 11:00 – Web HMI
  • 11:19 – Web Trend
  • 11:30 – Programmatic Interface
  • 12:02 – .NET WPF HMI
  • 12:17 – .NET Trend
  • 12:24 – .NET Alarm
  • 12:30 – Data route
  • 12:45 – Reports
  • 12:55 – Excel
  • 13:11 – Networking
  • 13:32 – Basic Networking
  • 13:53 – Security
  • 14:12 – More Information

Evaluation Guide

Steps to Evaluate Open Automation Software

Try Open Automation Software for free. Using the instructions below, you can download a fully-functional 30-day trial of the OAS Platform.

Step 1 – Download and Install

  • Install Open Automation Software.
    • Note: All products and communication drivers are included with this one setup.

Step 2 – Install other required applications (optional)

  • Visual Studio: If you plan to develop .NET applications and you will need Microsoft Visual Studio. If you do not have a copy of Visual Studio visit Microsoft Visual Studio Community page (formerly known as Visual Studio Express) and select to download Visual Studio Community and install.  This is a free version of Visual Studio.
    • Note: If you install Visual Studio after Open Automation Software uninstall Open Automation Software and reinstall.
  • SQL Server Express: If you plan to implement Data Logging or Alarm Logging and need a free database engine visit Microsoft’s SQL Server Express product page and select Download SQL Server Express and install. This is a free version of SQL Server.
    • Note: Open Automation Software also works with Oracle, MySQL, MongoDB, InfluxDB, SQLite, PostgreSQL, MariaDB, Amazon RDS, Aurora, Redshift, Google Firebase, and CSV files.  Also classic MS Access in the Windows version only.

Step 3

Make use of the support resources:

  • This online help: View the Contents section of this file for a list of easy to follow guides in setting up the most common features of Open Automation Software.
  • View the Videos section of this file for a list of online video training. You can follow along while watching the video while you learn quickly and also see other important aspects.
  • The Basic Start Video is a good video that demonstrates some of the most commonly used features of Open Automation Software with a .NET application.
  • Review the FAQ: In each section there is a Frequently Asked Questions section which is all listed in the common Frequently Asked Questions.

Step 4

Contact Support if you have questions about any of the products or steps to implement Open Automation Software.

1-303-679-0898

support@oasiot.com

Windows Installation

Default Installation

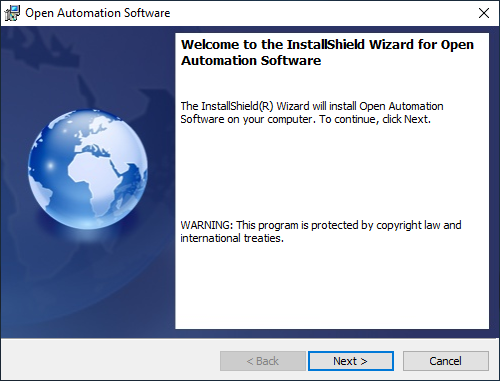
  1. Once you have downloaded the OAS installer, run the setup.exe file.
  2. The first screen is a Welcome screen. Click Next to continue.

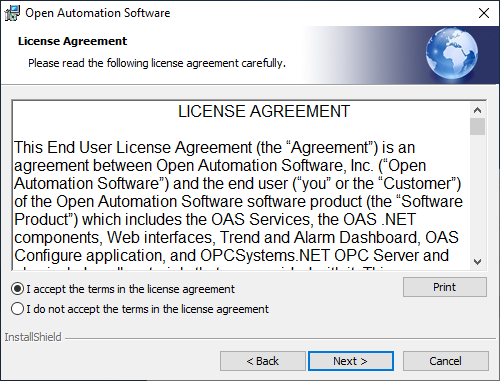
  1. The next screen is the License Agreement. If you accept the terms click on “I accept the terms in the license agreement” and click Next.

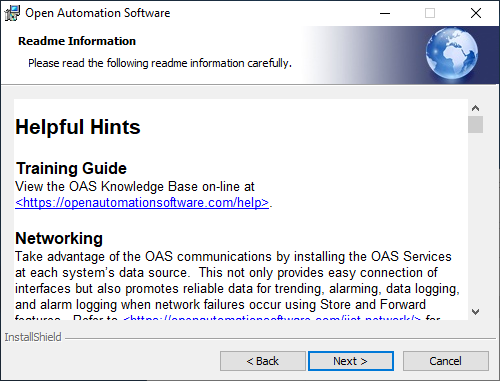
  1. The next screen provides some helpful hints and other information. You will find this information in the Knowledge Base as well. Click Next to continue.

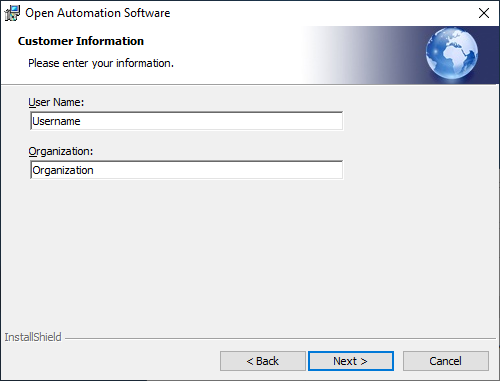
  1. Provide your customer information and then click Next to continue.

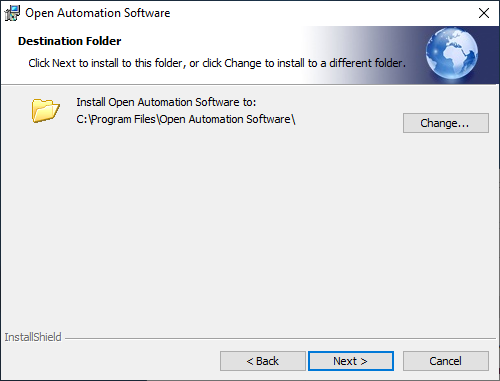
  1. The OAS platform will be installed in the C:\Program Files\Open Automation Software folder by default. It is recommended to use the default installation folder, but you can change it if this is a requirement by clicking on the Change button.

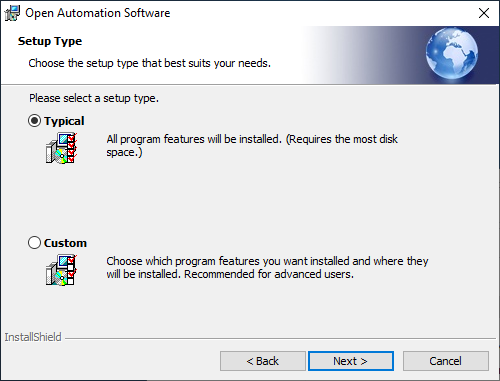
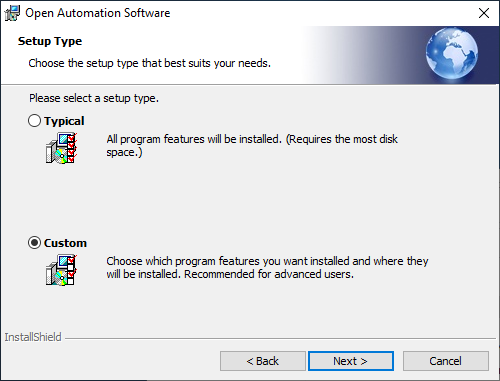
  1. On the next screen the installer will ask you if you want a Typical or Custom installation. The typical installation will install all features. If you select a custom installation, you will be able to choose the features you want to install. See the Custom Installation section if you want to customize your installation. Click Next to continue.

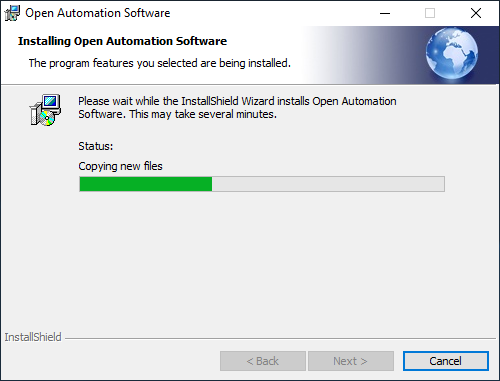
  1. The installer will now install the OAS platform. This may take a few minutes depending on the resources available on your system.

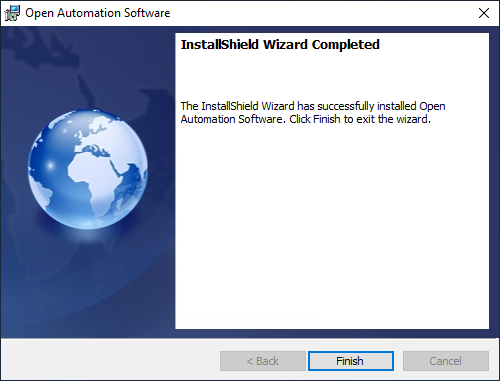
  1. Once the installation is complete you will see the success screen. Click on Finish to close the installer.

  1. You will now see a Getting Started screen and the OAS Service Control.

Starting Services

The OAS Service Control application will automatically appear after the OAS platform has been successfully installed. Use this application to start the OAS Services. If this is the first time installing OAS, the platform will automatically enter Runtime mode with an example Tag Configuration.

If you restart the computer the OAS Service will automatically start. You can change the start mode of the OAS Service using the Service Control Manger in your Windows operating system.

Custom Installation

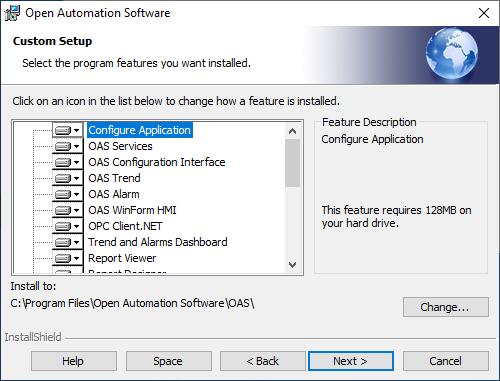
In Step 6 of the above installation instructions you can choose a Custom installation type. This will give you the option to select the features that you want to choose.

You can use a custom installation if you want to reduce how much storage space is required by the OAS platform by removing features you will not be using. You can also use the custom feature if you only want to install some specific features. For example, if the target system will only be used to host the Configure OAS application but no the OAS services.

Click Next to continue to the selection screen.

On the selection screen you can individually include or exclude features by right clicking on a feature.


Other Platforms

For installation in Linux or Docker, see the following:

Getting Started with OAS

This knowledge base will help you get started with OAS and learn how to use OAS features to visualizecontroltransform, and transport data between virtually any industrial automation device or platform.

With OAS, you can move data from an Allen Bradley PLC to a Siemens PLC, or from a PLC to a database, or from a database into a visualization. This flexibility is the hallmark of the OAS Platform. Once connected, data moves seamlessly within the OAS Platform.

If you are a developer and you want to create custom applications or integrations you can leverage the OAS configuration and data APIs. This allows you to configure all aspects of OAS and access all of the tag, alarm and trend data.

The OAS Knowledge Base is designed to help you with your OAS platform learning journey through technical documentation, How-to guides, videos and FAQs.

Download and Install

You can download and leverage a fully-featured, OAS demo installation with unlimited tags for 30 days. This will allow you to learn about the OAS features that you need and build a proof of concept. If you need more than 30 days you can always contact your OAS sales partner or support to request an extension.

Configure

At the core of the OAS platform are your Tags, which represent your data model. Learn more about how to configure OAS, how to manage and organize tags, licensing and how to work with security, networking and redundancy.

Technical Resources and Support

Use the following links to access additional technical resources. If you can’t find what you are looking for, or
you have a problem, please feel free to reach out and contact support.

Product Features

The OAS platform has a number of core features that are used to move, transform, store, visualize and access your data. Keep reading for a high-level description of each of these features. You will find links in each section where you can find more detailed information.

Connectors

When building your solution, one of the first considerations are the devices and systems that you want to connect to. This will allow you to move your data in and out of the OAS platform. OAS supports various device protocols and integrations ranging from traditional PLCs to Cloud connections to database integrations and custom development.

Coupled with the OAS Distributed Network Architecture (DNA), you can achieve many different architectures for moving data from devices into databases, from your industrial systems into the Cloud and between devices with differing protocols.

Data Connectors

Database Connectors

Device Connectors

IoT Connectors

Custom Drivers

Data Logging

Data storage and retrieval is an important component of any data driven system. Data logging can be implemented very easily by creating a new data logging group configuration and adding some tags. OAS handles all of the rest.

The OAS platform allows you to persist your Tag data to many supported database providers as well as flat CSV files. You can choose from narrow and wide data tables, customize column names and choose from different data logging triggers.

The data logging feature is required if you wish to search for historical data using a defined date/time range in OAS .NET or Web trend, using the OAS Data SDK or using REST API.

Data Transformation and Transport

Tags represent your units of data and are at the heart of the OAS platform. Using Tags and Tag Groups you can organize your data to mimic your real-world processes and assets. Using the build in data transformation features you can post-process your data and track statistics using features such as Calculations, Time On and Counts and Total.

For seamless integration with MQTT based protocols you can use JSON features to parse and create JSON based payloads.

  • Calulations – write a function to output a Tag value using references to other Tag values and built in functions such as math, trig, comparison, limit, logical, text, statistics, date and JSON.
  • Time On and Counts – keep track of how long a boolean value is ON based on a specified period
  • Total – sum data at a specified rate
  • JSON – parse and generate string based JSON payloads
  • Data Route – move data between Tags based on trigger events and mapping definition
Alarming

The OAS alarming feature allows you to create High, Low and Rate of Change setpoints for any of your Tags. It supports customizing and dynamically defining properties such as the alarm message, priority, alarm group, deadband, and more.

The alarming feature is available in a .NET version and a Web version. Each of these supports setting alarm limits, logging alarms to databases and CSV files and creating Email, SMS and Voice alarm notifications. The main difference is that the .NET version is designed for .NET desktop development and the Web version is designed for web-based integration with HTML and JavaScript as well as the Open UIEngine.

Visualization

The OAS Platform provides for range of visualization options ranging from the no-code Open UIEngine HMI design tool to desktop and web-based controls to custom applications using REST API and the OAS Data SDK.

  • Open UIEngine – build dashboards and HMI screens without writing any code
  • Web HMI – read and write your Tag data using HTML/Javascript component integration
  • Web Alarm and Trend – use ready-made alarm and trending components in your HTML/Javascript web and mobile applications
  • .NET Alarm and Trend – use ready-made alarm and trending components in your WinForms and WPF desktop applications
  • .NET WinForms – read and write your Tag data using ready-made WinForms components in your desktop applications
  • .NET WPF – read and write your Tag data using ready-made WPF components in your desktop applications

Web and Mobile

Desktop

Networking

Move your data between OAS instances and your client applications using the OAS Platform networking features. The Distributed Network Architecture (DNA) allows you to reference tags in local and remote OAS instances – even behind private IP addresses. OAS handles the data routing, encryption and compression for secure and efficient data transfer.

To host your data on a public facing server whilst protecting your backend processes, use the Live Data Cloud feature.

To move data from a safety critical network into another network use the Unidirectional Network Gateway feature.

Redundancy

The OAS platform supports redundancy features at various levels of the configuration.

  • Data Source Redundancy – the ability to source a tag from another local or remote tag if the quality is bad
  • Interface Redundancy – the ability to specify an alternative set of connection properties for a driver
  • Database Logging Override – the ability to specify database hosts, database names and table names dynamically based on tag or failure conditions
  • Data Log Buffering – the ability for OAS to automatically buffer logging data to disk if a database connection is offline and resume logging after connection is restored
  • Dynamic Feature Activation – the ability to enable or disable data logging, alarm notification, alarm logging, recipes and connectors based on other tags or failure conditions
  • Application Redundancy – the ability for multiple clients to monitor the same instances and tags in case one fails
  • Application Fallback – the ability to specify a backup OAS instance in case the primary connection fails
APIs and SDKs

The OAS platform supports a number of programmatic interfaces for both .NET integration and Web integration using REST API.

The Configuration APIs allow you to manage all aspects of the OAS Platform programmatically (except Security and Users) using both .NET and REST API calls. This is included in all OAS licenses.

The Data APIs allow you to read and write Tag data and read Alarm and Trend data programmatically using .NET or REST API calls. The .NET and Web versions of the Alarm and Trend features are licensed separately.

The Universal Driver Interface allows you to write your own custom interface drivers for protocols that the OAS platform does not natively support. This is included in all OAS licenses.

Product Features

API Documentation

Frequently Asked Questions – License

How can I see how many tags are currently in use for my license?
Select Configure-System Status using the Configure application and view the Totals section of the information provided.
Why do I get a warning my tag count license is exceeded?
There is a default demo Tag configuration file that is set to load under Configure-Options.  If you are not using these tags remove this default file or create your own only with your own tags and restarted the 3 OAS Services using the OAS Service Control.
How do I license the software?
Use Configure-License with the Configure application with one of the methods listed in the System Configuration – License section of this help file.
What happens when I exceed the tag limit?
  • A warning appears when you use the Configure application.
  • Also the Runtime will not start if you have too many Open Automation Software Tags loaded.
  • If you are using DirectOPC once you reach the tag limit no other DirectOPC Items will be added.
  • You can see how many tags you are using under Configure-System Status in the Totals section.
Do I need to reinstall the software after I purchase a license?
No, the one common download of Open Automation Software contains all of the products, drivers, and is activated with a Serial Number with an Internet connection, or with a License Key without an Internet connection.
I just purchased a 100 tag license and now I get a message that the tag limit is exceeded?
There are more than 100 tags in the demo tag configuration. Delete the demo tags and set the default tag configuration file under Configure Option Default Files.
Do I need to Kill a license if I am upgrading the version of Open Automation Software?
No, the license will remain active while you uninstall and reinstall Open Automation Software.
How do I move a license from one computer to another?
If you software license is up to date with a current maintenance use the steps in Moving a Software License.
Do I need to kill or backup the license when I uninstall and reinstall the software?
No the license will remain, but do not delete any files from C:\Program Files\Open Automation\OAS\ or C:\ProgramData\OpenAutomationSoftware\ after you uninstall Open Automation Software.
What will make my license stop working?
  • If you upgrade your software to the latest version without an active maintenance plan that covers that version.
  • If you change the CPU mother board. This includes cloning the image of the drive and restoring to a new PC.
  • If you remove all of the hard disks from the system that were present when the software was licensed.
  • With older OAS version 9 or less if you remove all of the Ethernet cards from the system that were present when the software was licensed.

License Properties

License Code

This string is unique for the system since the last time a License Key (see below) has been saved.

Copy Code

Use this button to copy the contents of the License Code to send to OAS Support to receive an updated  License Key for manual activation.

License Key

This is the unique string for the local system to save to the Licensing to enable features of the software. The License Key may be just a short term extension to the demonstration period or a full activation for the License.

Save Key

Use this button to save the License Key to the local or remote system. A verification will be performed on the License Key to insure that the License Key is proper for the License Code. Once the License Key is properly saved the License Code will change to prevent unauthorized duplication of licenses.

Update Maintenance Button

Use this button to update the expiration date for the software maintenance.  If you wish to update your maintenance expiration without an Internet connection use the Copy Code button and email the License Code to support at openautomationsoftware.com.

Electronic Activation Button

Use this button to activate a license with the Serial Number that was provided with the order when you have an Internet connection is available.

Manual Activation Button

Use this button to copy the License Code to a form to send to License Code to support at openautomationsoftware.com.  Include the Serial Number that was provided with the order.  Alternatively you can use the Manual License Key Generation Tool here.

Move – Kill License

Use this button to delete a License to show a Kill Code to be given to Open Automation Software to validate that a License has been removed from the local system. Use this button only to remove a valid License and to verify with OAS that the License has been removed.

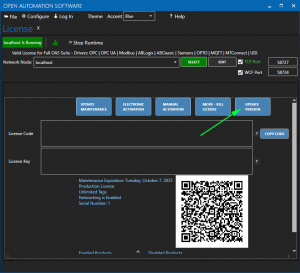
Update Software Version

You can update your version of Open Automation Software to the latest version provided your system is under a current maintenance plan.

Before updating your software save all configurations to files.

Am I eligible for an update?

To check if you can update to the latest version of OAS us the Configure OAS application and select Configure-License and select the OAS Engine to check.

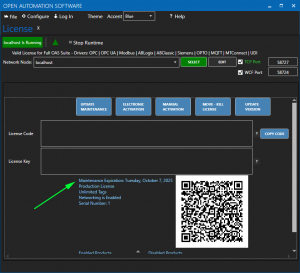
Review the Maintenance Expiration date under the License Key field.

If it is current you can proceed with the update.  If the maintenance is expired click on the UPDATE MAINTENANCE button and check the Maintenance Expiration again.  If expired copy the License Code found under Configure-License and email to support@oasiot.com to receive an updated License Key.

Once the maintenance is up to date you can proceed with either Automated Update or Manual Update.

Automated Update

The automated update process has the advantage of remote system update without the need to login to the remote operating system.  The update process is available for local and remote Windows systems and remote Linux systems.

The downtime will be minimal as the OAS Engine will be left running during the download process.

OAS Configuration App Version

The OAS Configuration.exe file must be version 16.00.0087 or greater in order to access the OAS file server.  If your local OAS version is older than 16.00.0087 use the following special download.

  • Download https://filedownloads.openautomationsoftware.com/config-oas/V16.00.0087/config-oas.zip.
  • Right click on the zip file that you have downloaded and select Properties. Check the Unblock checkbox for security and click Apply.
  • Extract files to any new directory (not OAS installation directory) and run OAS Configuration.exe in Administrator mode.
  • Select-Configure-License and select the local or remote system to update.
  • Select the UPDATE VERSION button and follow the suggested prompts.

Requirements

  • OAS service version 15.00.0014 or greater support automated update.  To check your current version of the OAS Engine select Configure-System Status.
  • OAS Configuration application must be version 16.00.0087 or greater.  If older see special step above for OAS Configuration.
  • The system where the Configure OAS application is running must have an Internet connection.  If updating a remote OAS Engine the remote system does not need an Internet connection.
  • The Configure OAS application must be running in Administrative mode.
  • If the OAS Engine default security has Update OAS Version disabled login is required with a user that has the privilege for updating.

Save all configuration files, the OAS Engine will be stopped in the update process.

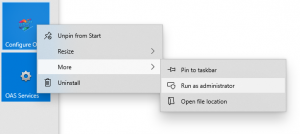
Right click on the Configure OAS shortcut and select to Run-As-Administrator.

Select-Configure-License and select the local or remote system to update.

Select the UPDATE VERSION button and follow the suggested prompts.

Note: If you receive the error message Could not access download server from Internet follow the steps above for OAS Configuration App Version.

Do not stop the OAS Engine or Configure application during the update process, the latest version files will be first downloaded before the OAS Engine is automatically stopped.  If updating the local system on Windows the Configure application and other OAS applications will closed automatically so they also can be updated.

If there is a failure during the update process the cause of the error will appear under Configure-System Errors of the Configure OAS application.

Once the update is completed the OAS Engine will automatically be restarted.

Manual Update

To update OAS manually first download the latest version of OAS.

Windows

Save all configuration files, the OAS Engine will be stopped in the update process.

Use Add / Remove Programs to uninstall Open Automation Software.

Run the downloaded setup.exe file.

Start the OAS Services when prompted at the finish of installation.

Linux or Win-Core

Stop the OASEngine app. Extract the contents from oas-linux.zip or oas-win.zip and copy the contents over the existing deployment directory.  Leave the ConfigFile subdirectory and its contents.

Start the OASEngine app.