Getting Started Kafka Consumer

OAS is both a consumer and producer of Kafka messages.  If you want to send data to Kafka please see the Getting Started Kafka Producer guide.

You can view the Getting Started with Kafka Video to familiarize yourself with the following steps to setup OAS as a producer and consumer of Kafka.

  • 00:00 – Introduction
  • 01:20 – Kafka Producer
  • 09:07 – Kafka Consumer
  • 10:20 – Save Configuration
  • 11:00 – Transaction Logging
  • 11:45 – Publish 100,000 Values per Second
  • 15:50 – Contact Us

Configure a Kafka Driver

The following steps can be used to setup direct communications to receive messages from local or remote a Kafka Broker.

Step 1

OASStart Configure OAS application from the program group Open Automation Software.


Step 2

Select Configure-License and verify that Kafka is one of the available Drivers in the lower left of the form.  If you do not see the Kafka driver available contact support@oasiot.com to update your license.

Menu Configure License

Enabled Drivers

Note: You will need to be running Open Automation Software Version 18.0.0.4 or greater to support Kafka communications.  You can download the latest version at www.openautomationsoftware.com/downloads/open-automation-software/

Step 3

Select Configure-Drivers.

Configure Drivers

Step 4

Select localhost or the remote service you wish to modify with the Select button to the right of the Network Node list.

Network Node

Note: Optionally select the Live Data Cloud node if you are hosting data over the Internet with a standard Internet connection.

Step 5

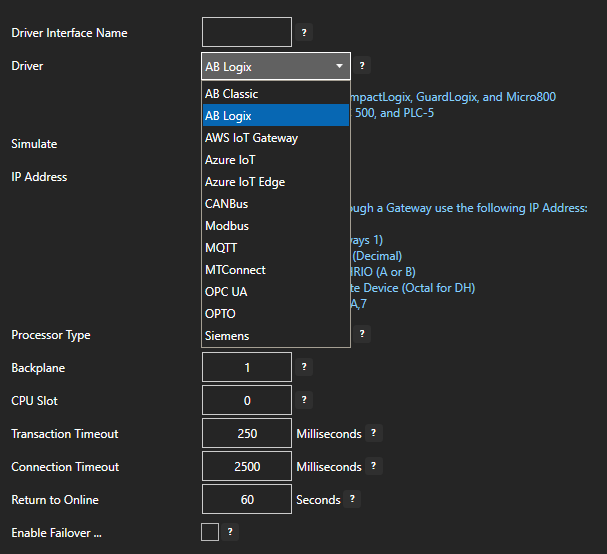
Enter a meaningful Driver Interface Name that you will refer to this connection and define the properties.

Set the driver to Kafka. Set the Bootstrap Servers of the brokers you wish to publish to.

Kafka localhost

If sending data to the cloud set the appropriate Security Protocol.

When connecting with Confluent Cloud set the SASL Username with the provided API Key and the SASL Password with the Secret Key.

Kakfa Sasl Ssl

Step 6

Select the Add Driver button in the lower part of the form to add the Driver Interface.

Add Driver

Note: If you need to define several Driver Interfaces you can use the CSV Export and CSV Import on the toolbar in the upper right together with Microsoft Excel.


Reading Data from Kafka Broker

Step 1

Select Configure-Tags.

Menu Configure Tags

Select localhost or the remote service you wish to modify with the Select button to the right of the Network Node list.

Network Node

Note: Optionally select the Live Data Cloud node if you are hosting data over the Internet with a standard Internet connection.

Step 2

Select to Add a Tag.

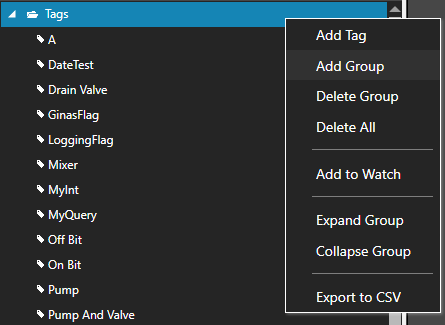
Note: You can also add organizational Groups as many levels deep as you prefer and add tags to groups.  To do this first add a Group to Tags Group at the root level, then right click on the Group in the right window to add additional Groups or Tags.

Add Group

Step 3

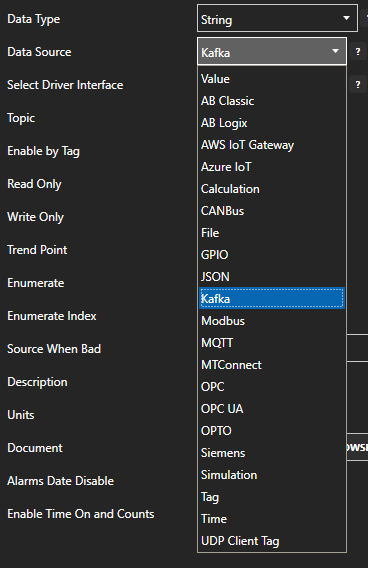
Change the Data Type property to String or JSON.

Change the Data Source Tag property to Kafka.

Kafka Data Source

Step 4

Select the correct Driver Interface from the Driver Interface pull down list.

Kafka Driver Interface

Step 5

Enter the topic.

Kafka Topic

Step 6

Select Apply Changes to begin monitoring the topic from the Kafka Broker.

Apply Changes

Step 7

To define multiple tags use the CSV Export and CSV Import on the toolbar in the upper right together with Microsoft Excel.

Note: You can also programmatically define Tags using the free to use OASConfig .NET Standard assembly,  OPCSystems .NET Framework 4 assembly, or REST API.

Step 8

Select the Save button on the toolbar at the top.

Save Button

Step 9

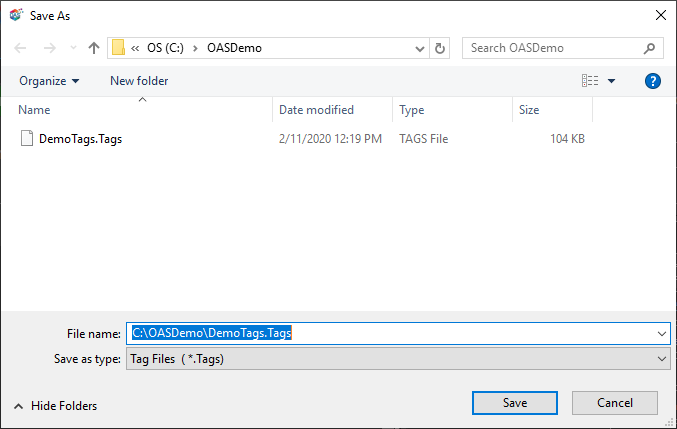
Create a directory on the local C: drive with the name OASDemo.

Save the file DemoTags.tags in the directory C:\OASDemo or the correct path for Linux.

Save Tags

Step 10

Under Configure – Options set the Default Tag Configuration File so when the computer restarts the tag file will automatically be loaded.

View Post

Getting Started Kafka Producer

OAS is both a consumer and producer of Kafka messages.  If you want to receive data from Kafka please see the Getting Started Kafka Consumer guide.

You can view the Getting Started with Kafka Video to familiarize yourself with the following steps to setup OAS as a producer and consumer of Kafka.

  • 00:00 – Introduction
  • 01:20 – Kafka Producer
  • 09:07 – Kafka Consumer
  • 10:20 – Save Configuration
  • 11:00 – Transaction Logging
  • 11:45 – Publish 100,000 Values per Second
  • 15:50 – Contact Us

Configure a Kafka Driver

OAS tag values from both local and remote OAS Engines can be published to local or cloud Kafka brokers.  The following steps can be used to setup direct communications with a Kafka Broker.

Step 1

OASStart Configure OAS application from the program group Open Automation Software.


Step 2

Select Configure-License and verify that Kafka is one of the available Drivers in the lower left of the form.  If you do not see the Kafka driver available contact support@oasiot.com to update your license.

Menu Configure License

Enabled Drivers

Note: You will need to be running Open Automation Software Version 18.0.0.4 or greater to support Kafka communications.  You can download the latest version at www.openautomationsoftware.com/downloads/open-automation-software/

Step 3

Select Configure-Drivers.

Configure Drivers

Step 4

Select localhost or the remote service you wish to modify with the Select button to the right of the Network Node list.

Network Node

Note: Optionally select the Live Data Cloud node if you are hosting data over the Internet with a standard Internet connection.

Step 5

Enter a meaningful Driver Interface Name that you will refer to this connection and define the properties.

Set the driver to Kafka. Set the Bootstrap Servers of the brokers you wish to publish to.
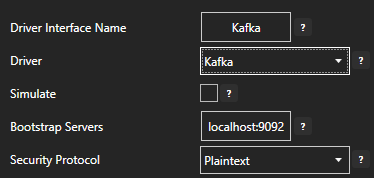
Kafka localhost

If sending data to the cloud set the appropriate Security Protocol.

When connecting with Confluent Cloud set the SASL Username with the provided API Key and the SASL Password with the Secret Key.
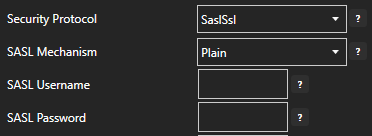
Kakfa Sasl Ssl

Step 6

Select the Add Driver button in the lower part of the form to add the Driver Interface.

Add Driver

Note: If you need to define several Driver Interfaces you can use the CSV Export and CSV Import on the toolbar in the upper right together with Microsoft Excel.

Publish Selected Tags to Kafka Broker

There are 2 ways to publish data from OAS to a Kafka Broker.  Both require Tags to be setup first for the data sources you want to transfer.

View the following video for a complete demonstration of how to publish data to Kafka Brokers, MQTT Brokers, Azure IoT, and AWS IoT Gateway.

Step 1

Enable Publish Selected Tags at the bottom of the Driver configuration.

Step 2

Select to publish data continuously at a specified interval, based on event, or at a specific time of day.

IoT Publish Type

If Event Driven browse for a local or remote OAS tag that will trigger the publish.  Select a Boolean tag that will change state from false to true, true to false, or both.  Or choose an Integer tag that trigger a publish anytime the value changes other than 0.
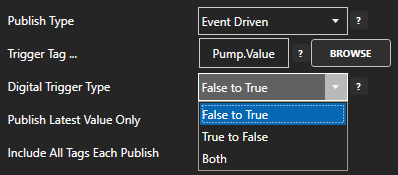
IoT Publish by Event

Step 3

Enable Publish Latest Value Only to send only the latest value of each tag when published or disable to send all value changes since the last time a publish occurred.

Enabled Include All Tags Each Publish to send at least the latest value of each tag when published or disable to only send the tags that have changed since the last publish.

Enable Publish All Tags As One Topic to publish all tag values as one topic or disable to send each tag as its own topic.

IoT Publish Options

See examples in Step 6 below for each selectable option.

Step 4

Specify the Publish Topic Id if choosing to Publish All Tags As One Topic.

When publishing as one topic to optimize communications with Kafka multiple messages are sent for each publish when the number of tag value changes exceeds the Max Tags Per Publish limit.

Max Tags per Publish

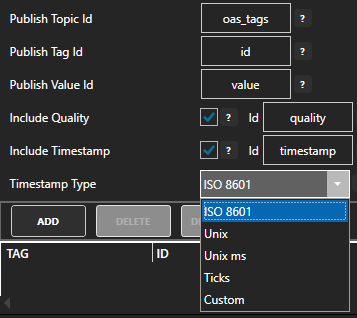
Specify the Tag Id, Value Id, an optional Quality Id, and Timestamp Id for each tag value that is sent.
IoT Publish Ids

When including the Timestamp Id also specify the timestamp format, use Custom to specify your own date and time format.

Step 5

Specify local and remote OAS tag variables to include in each publish and specify the Id.  Value is the current value from the data source or you can select any of the over 600 tag variables of each tag to publish.

IoT Publish Tags

Optionally use CSV Export and CSV Import buttons to set up additional tags to publish using Microsoft Excel.

When selecting remote tags use Basic Networking syntax or Live Data Cloud syntax in the tag path.

Step 6

Select Apply Changes to begin publishing to the Kafka brokers.  Select Save to save the new driver configuration within the tag file.

Examples:

Examples of publishing every 2 seconds with each tag value changing every second:

IoT Publish Options

Topic: oas_tags
{
  “values”: [
    {
      “id”: “Ramp”,
      “value”: 39,
      “quality”: true,
      “timestamp”: “2022-03-21T08:55:39.000Z”
    },
    {
      “id”: “Sine”,
      “value”: 0.8090169943749475,
      “quality”: true,
      “timestamp”: “2022-03-21T08:55:39.000Z”
    },
    {
      “id”: “Random”,
      “value”: 10,
      “quality”: true,
      “timestamp”: “2022-03-21T08:55:39.000Z”
    }
  ]
}
 
IoT Publish All Value Chagnes
 
Topic: oas_tags
{
  “values”: [
    {
      “id”: “Ramp”,
      “value”: 16,
      “quality”: true,
      “timestamp”: “2022-03-21T09:03:36.000Z”
    },
    {
      “id”: “Sine”,
      “value”: 0.587785252292473,
      “quality”: true,
      “timestamp”: “2022-03-21T09:03:36.000Z”
    },
    {
      “id”: “Random”,
      “value”: 96,
      “quality”: true,
      “timestamp”: “2022-03-21T09:03:36.000Z”
    },
    {
      “id”: “Ramp”,
      “value”: 17,
      “quality”: true,
      “timestamp”: “2022-03-21T09:03:37.000Z”
    },
    {
      “id”: “Sine”,
      “value”: 0.6691306063588583,
      “quality”: true,
      “timestamp”: “2022-03-21T09:03:37.000Z”
    },
    {
      “id”: “Random”,
      “value”: 26,
      “quality”: true,
      “timestamp”: “2022-03-21T09:03:37.000Z”
    }
  ]
}
 
IoT Publish Tag Id Topics
 
Topic: Ramp
{
  “value”: 35,
  “quality”: true,
  “timestamp”: “2022-03-21T09:07:15.000Z”
}
Topic: Sine
{
  “value”: -1,
  “quality”: true,
  “timestamp”: “2022-03-21T09:07:15.000Z”
}
Topic: Random
{
  “value”: 83,
  “quality”: true,
  “timestamp”: “2022-03-21T09:07:15.000Z”
}
 

Use Data Route to Send Data to Kafka

Step 1

See Getting Started – Data Route to define a Target tag in any source tag.

Reading Data from Kafka Broker

Step 1

Select Configure-Tags.

Menu Configure Tags

Select localhost or the remote service you wish to modify with the Select button to the right of the Network Node list.

Network Node

Note: Optionally select the Live Data Cloud node if you are hosting data over the Internet with a standard Internet connection.

Step 2

Select to Add a Tag.

Note: You can also add organizational Groups as many levels deep as you prefer and add tags to groups.  To do this first add a Group to Tags Group at the root level, then right click on the Group in the right window to add additional Groups or Tags.

Add Group

Step 3

Change the Data Type property to String or JSON.

Change the Data Source Tag property to Kafka.

Kafka Data Source

Step 4

Select the correct Driver Interface from the Driver Interface pull down list.

Kafka Driver Interface

Step 5

Enter the topic.

Kafka Topic

Step 6

Select Apply Changes to begin monitoring the topic from the Kafka Broker.

Apply Changes

Step 7

To setup automated data transfer of any OAS Tag to the Kafka topic see Getting-Started – Data Route and set the Target Destination to Tag with the newly created tag Value as the destination.

Step 8

To define multiple tags use the CSV Export and CSV Import on the toolbar in the upper right together with Microsoft Excel.

Note: You can also programmatically define Tags using the free to use OASConfig .NET Standard assembly,  OPCSystems .NET Framework 4 assembly, or REST API.

Step 9

Select the Save button on the toolbar at the top.

Save Button

Step 10

Create a directory on the local C: drive with the name OASDemo.

Save the file DemoTags.tags in the directory C:\OASDemo or the correct path for Linux.

Save Tags

Step 11

Under Configure – Options set the Default Tag Configuration File so when the computer restarts the tag file will automatically be loaded.

View Post

Troubleshooting – Networking

WINNAT Blocking Port

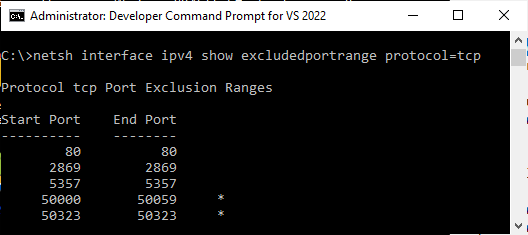
On Windows only the WINNAT service may be reserving a port range on your system that includes one or more of the ports that OAS uses.

To check your system use the Windows Command Prompt running in Administrator mode and type the following.

netsh interface ipv4 show excludedportrange protocol=tcp

WINNAT Show Exclusions

If any of the OAS ports are listed in in the exclusions type the following.

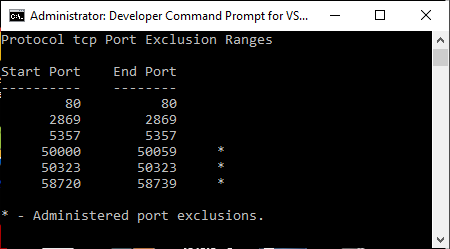
netsh int ipv4 add excludedportrange protocol=tcp startport=58720 numberofports=20

Ports 58720 to 58739 should now have an asterisk listed showing that range of ports is now allowed in the WINNAT service.

WINNAT Exclusions


Remote OAS Service Access

The OAS Service must be started to be accessed by a local or remote OPC client component or application.  Use the OAS Service Control application to Start the Service.

If you are using a Firewall make sure to open up TCP port 58727 for both inbound and outbound traffic. You can find what port number is used under Configure-Options-Networking in the service, 58727 is the current default port number.

You can check if the TCP port is open using the Windows Command Prompt with the following command on the same computer as the OAS Service.

netstat -an | find "58727"

netstat

If the service is not started or the port is not open then the command will just return without any results.

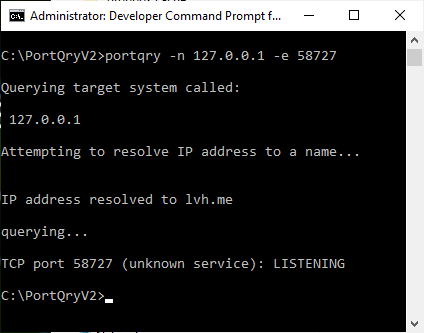
To check a remote computer port use PortQry from Microsoft.

Download PortQry from Microsoft.

Run PortQryV2.exe to extract to desired directory.

Use the Windows Command Prompt from the PortQryV2 directory with the following command.  Replace 127.0.0.1 with the IP address of the remote system where the OAS Engine is running.

portqry -n 127.0.0.1 -e 58727

If this test fails check the network connection to the remote system and open the TCP port for incoming and outbound traffic in the firewall and antivirus software.

Troubleshooting – OPC DA

Troubleshoot Bad Data

How to identify and resolve communications errors with data sources.

  • 0:00 - Introduction
  • 0:40 - Bad Tags
  • 3:30 - System Errors
  • 4:20 - Watch Window
  • 6:20 - Error Logging
  • 7:20 - Troubleshooting Guides
  • 8:55 - Contact Us

I am unable to browse and OPC Server or get good data quality for the OPC Items?

View the OPC Communications - Troubleshooting section in this file on how to resolve all OPC Server communication errors.

Networking OPC Data
The best way to network to remote OPC Servers is to install the OAS Engine on the remote PCs where the OPC Server is running and use the built in network features of Open Automation Software. Remote OPC DA Server Networking How to network all products to central service using a fixed IP Address or registered domain name for the Internet.
If you decide you still want to use remote DCOM to connect to remote OPC Servers use the Configure-OAS application and go to Configure-Options-Networking to define the available IP addresses of the remote OPC server nodes in the Network Nodes list. These steps listed here are also in the video above.
Configure Options
Networking Nodes
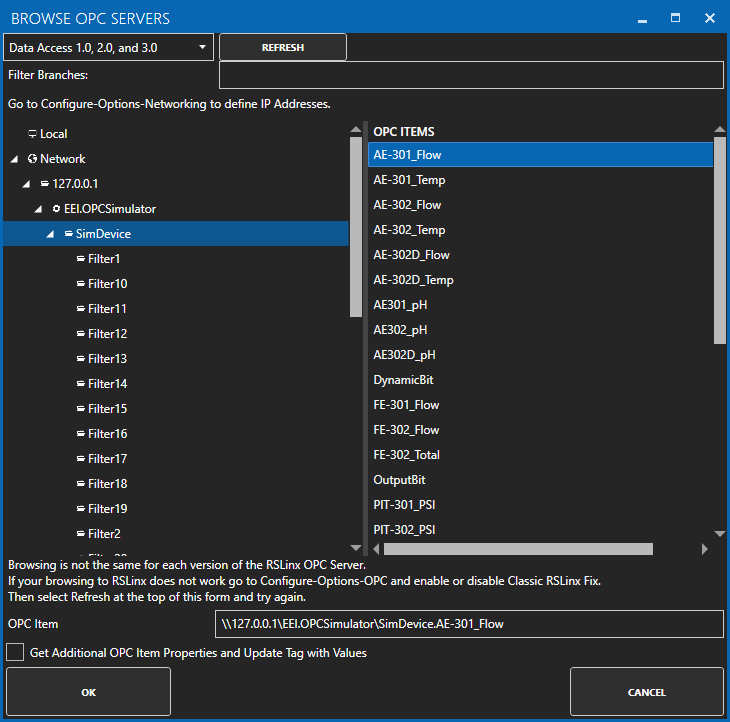
You will then be able to browse the remote systems under the Network Nodes with browsing for OPC servers. Network OPC Browse
Remote OPC Servers
Connecting to Data Access OPC Servers is best implemented when the OAS Service is installed where the OPC Servers you are connecting to are. View Getting Started - Networking on how to enable easy remote networking from the client applications to a service without using remote DCOM.
If you prefer to use remote DCOM without OAS networking view Networking OPC Data troubleshooting topic on how to define the IP Address of remote systems under Configure-Options-Networking.
If you are having trouble connecting to a local or remote OPC Server try setting the Service Logon to a proper local User Account or use the OPC Data Fix which can be enabled using the OAS Services control application.
OPC Server Identity
If you can obtain data from one OPC Client, but not other OPC Clients at the same time verify that the OPC Server identity is set to Interactive User in the DCOM Configurator. View the steps listed below.

Step 1

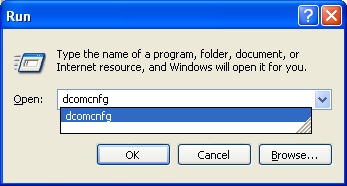
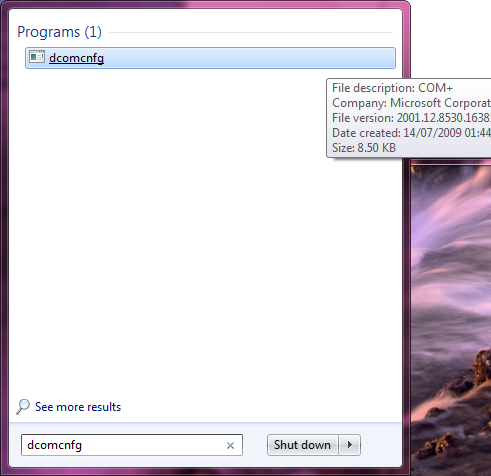
Start the DCOM configurator by selecting run and type DCOMCNFG and select OK. OPC Server Identity 542

Step 2

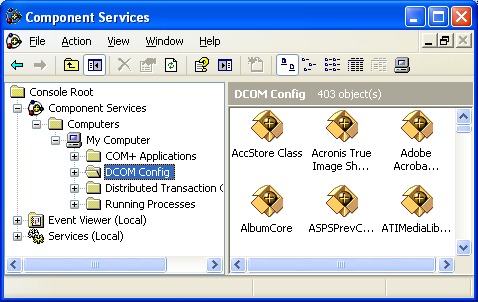
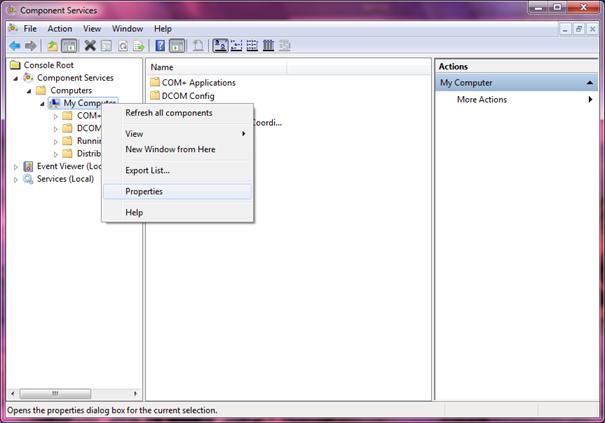
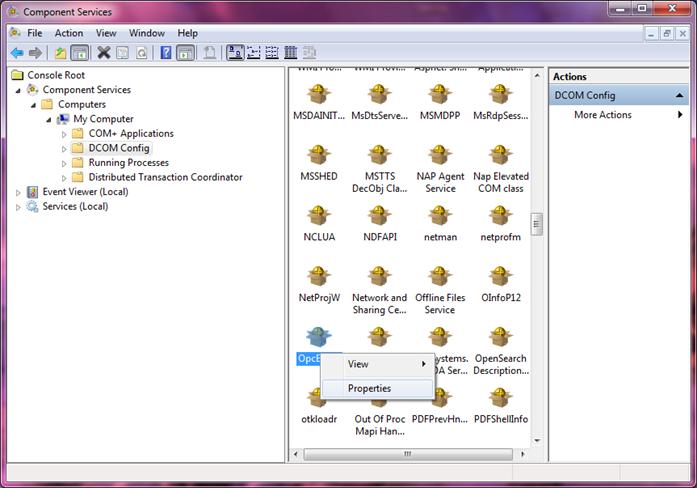
Select Component Services, Computers, My Computer, and DCOM Config. OPC Server Identity 543

Step 3

Select the OPC Server you are connecting to in the right window and right click to select Properties. OPC Server Identity 544

Step 4

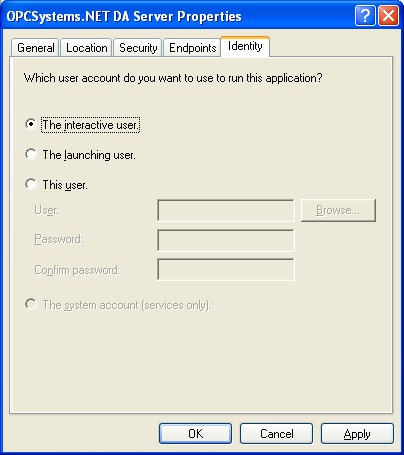
Select the Identity tab and select the option “The interactive user.” OPC Server Identity 545

Step 5

Restart the system and verify using the Task Manager under Processes that only one instance of the OPC Server runs with multiple clients connected to it.
DCOM Security Configuration
If both Open Automation Software and the OPC Foundation Sample Client are unable to access data from OPC Servers and the OPC Foundation Core components are installed use the following section to setup the DCOM Security of the operating system.

Registry

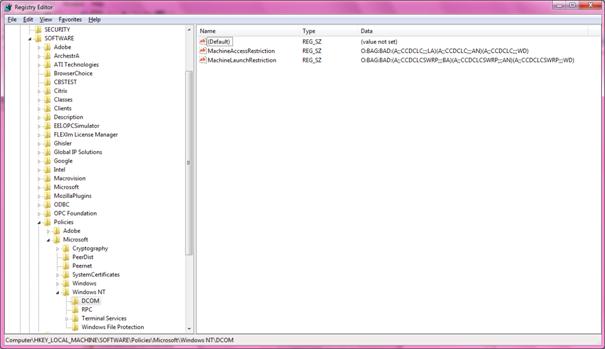
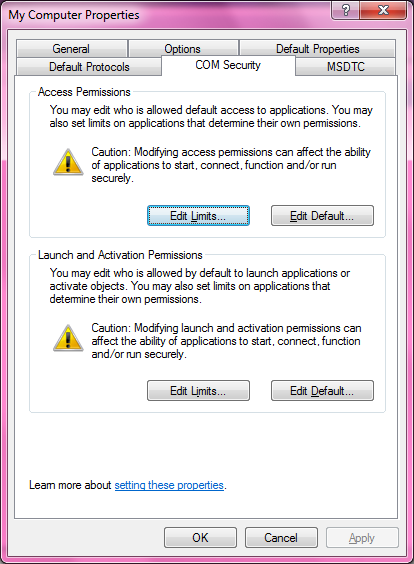
If it is not possible to edit limits in DCOM (buttons Edit Limits grayed, not like below): DCOM Security Configuration 504
With regedit delete the 2 restrictions MachineAccessRestriction and MachineLaunchRestriction, in HKEY_LOCAL_MACHINESOFTWAREPoliciesMicrosoftWindows NTDCOM
DCOM Security Configuration 505

System Wide Configuration

dcomcnfg => System wide configuration DCOM Security Configuration 506
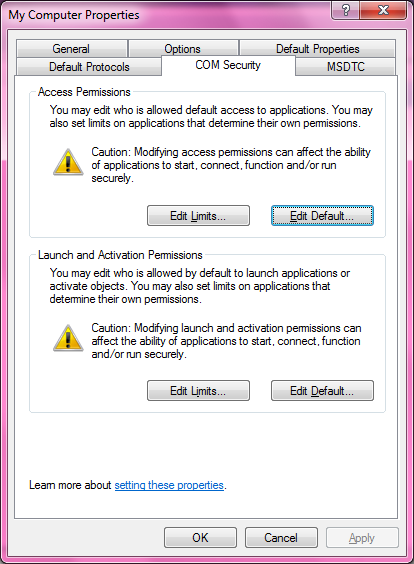
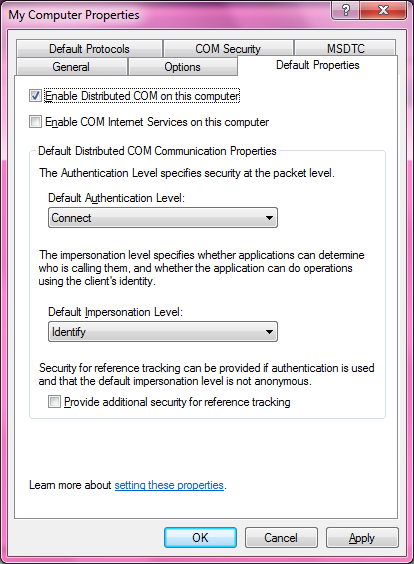
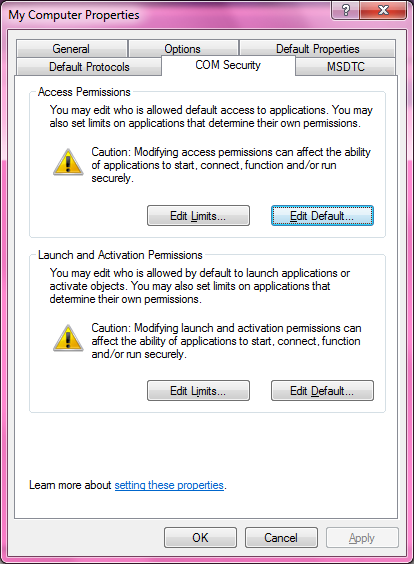
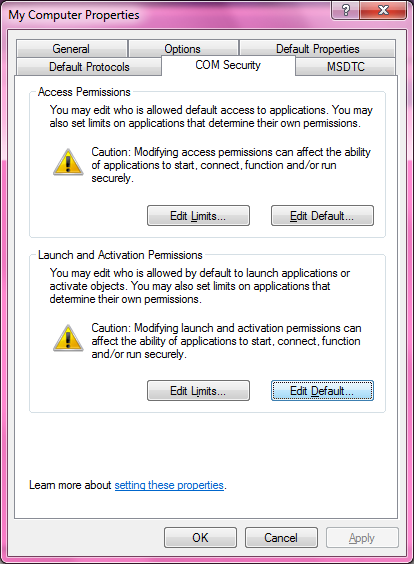
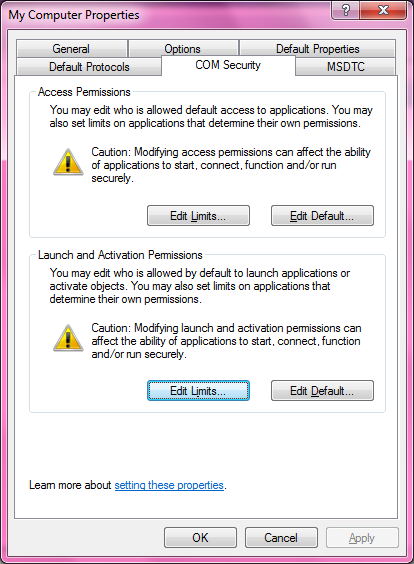
My Computer => Properties
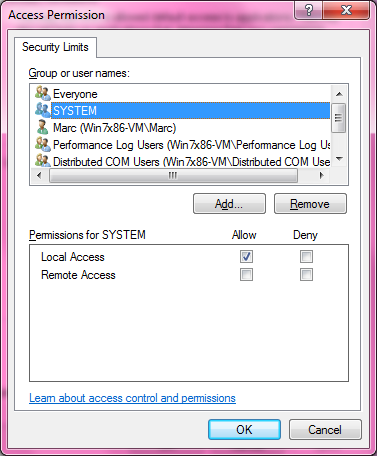
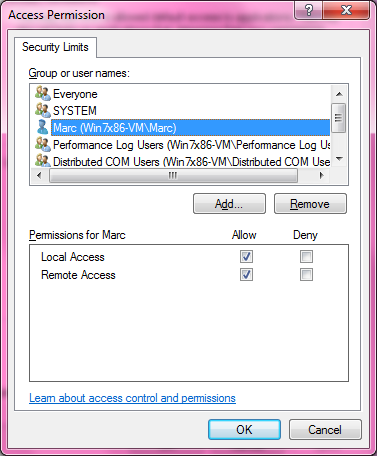
DCOM Security Configuration 507 DCOM Security Configuration 508 DCOM Security Configuration 509 DCOM Security Configuration 510 DCOM Security Configuration 511 DCOM Security Configuration 512
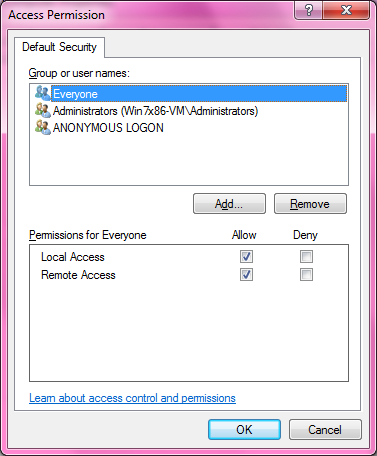
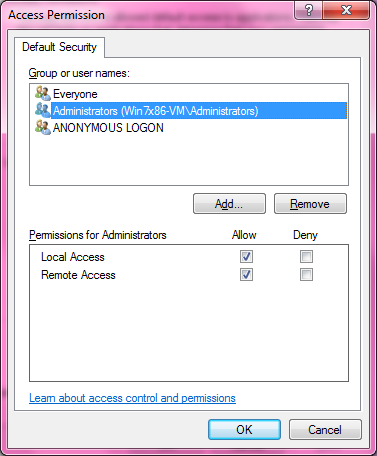
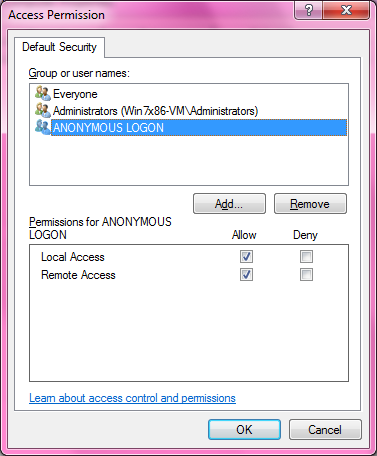
Access Permissions => Click Edit Default
DCOM Security Configuration 513 DCOM Security Configuration 514 DCOM Security Configuration 515 DCOM Security Configuration 516
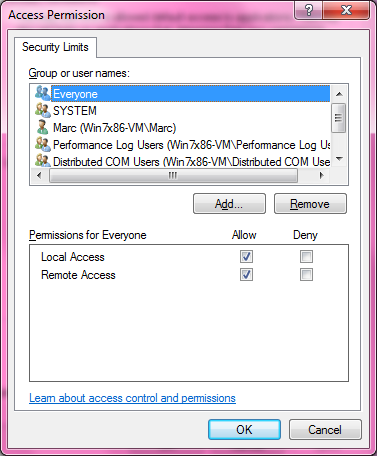
Access Permissions => Click Edit Limits
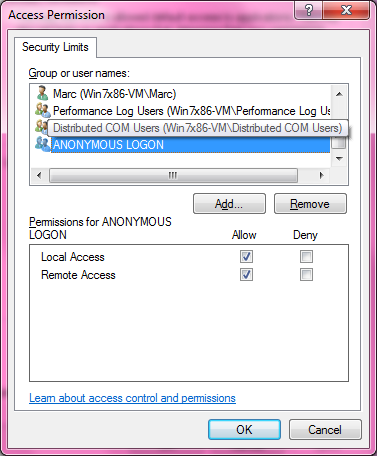
DCOM Security Configuration 517 DCOM Security Configuration 518 DCOM Security Configuration 519 DCOM Security Configuration 520 DCOM Security Configuration 521
Performance… and Distribute COM…  same settings as ANONYMOUS
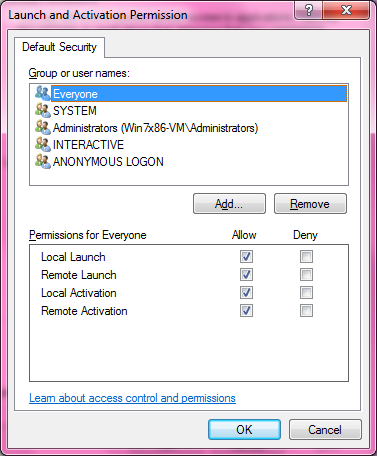
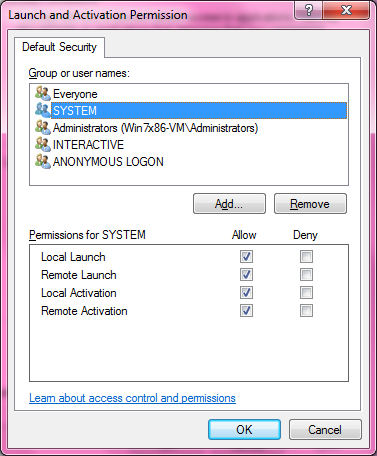
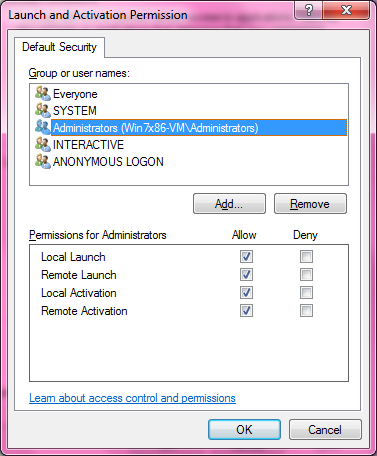
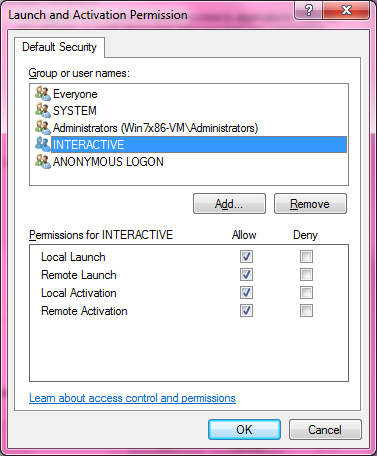
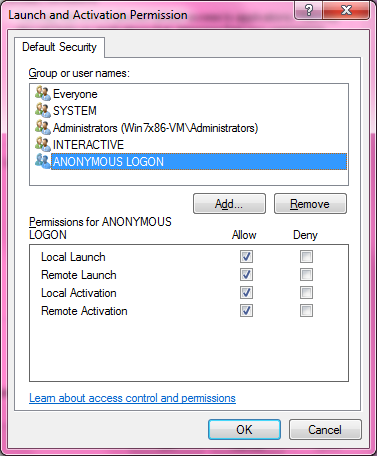
Launch and Activation Permissions => Click Edit Default…
DCOM Security Configuration 522 DCOM Security Configuration 523 DCOM Security Configuration 524 DCOM Security Configuration 525 DCOM Security Configuration 526 DCOM Security Configuration 527
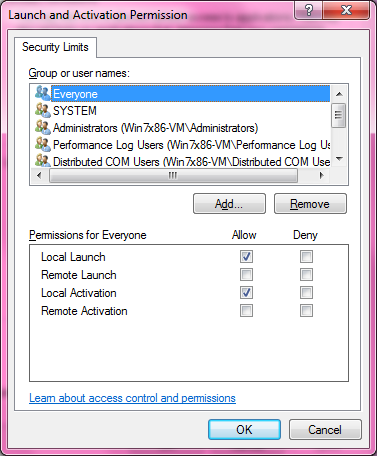
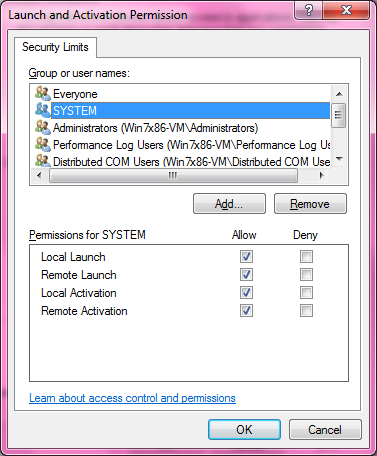
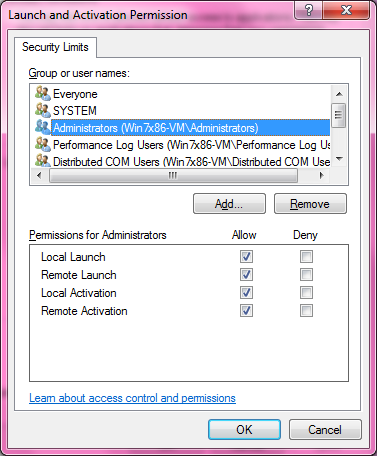
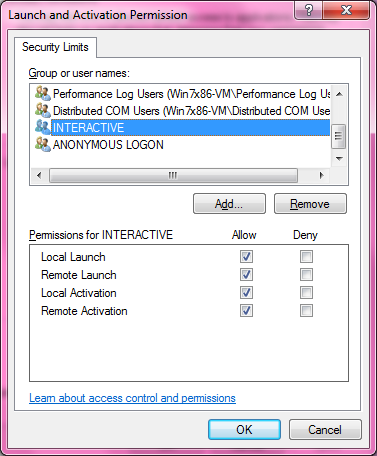
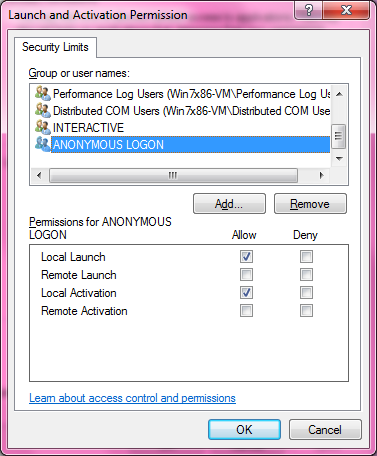
Launch and Activation Permissions => Click Edit Limits…
DCOM Security Configuration 528 DCOM Security Configuration 529 DCOM Security Configuration 530 DCOM Security Configuration 531 DCOM Security Configuration 532 Performance... and Distributed COM…  same settings as INTERACTIVE DCOM Security Configuration 533
SYSTEM WIDE CONFIGURATION => ADD A USER IN COM security
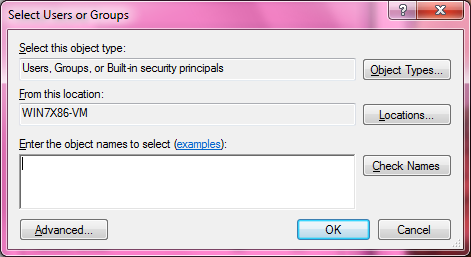
If it is necessary to add a user click Add
DCOM Security Configuration 534
Click Advanced
DCOM Security Configuration 535
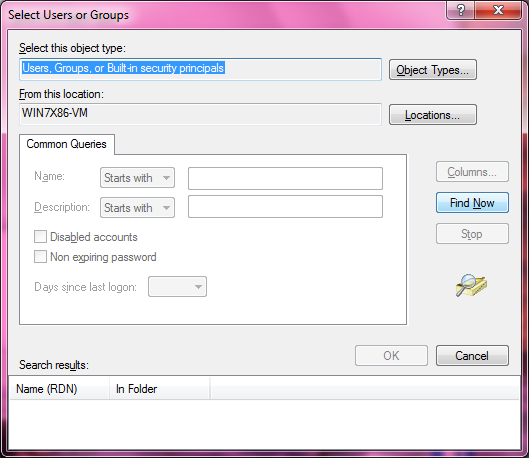
Click Find Now
COM APPLICATION WIDE CONFIGURATION
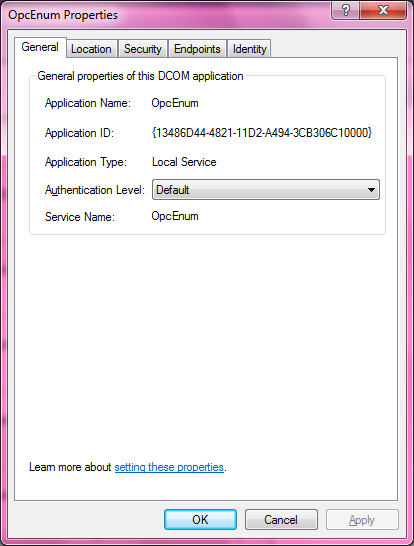
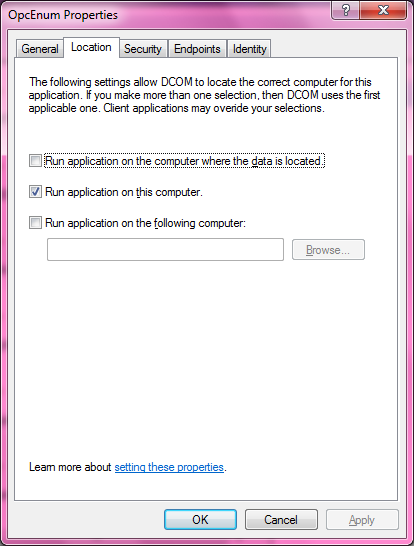
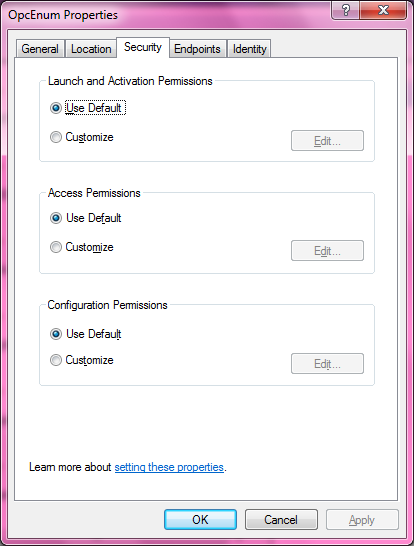
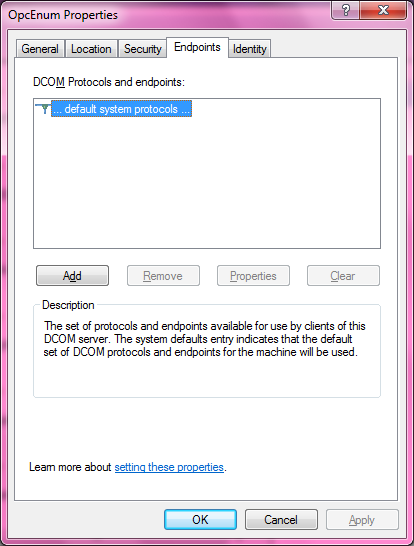
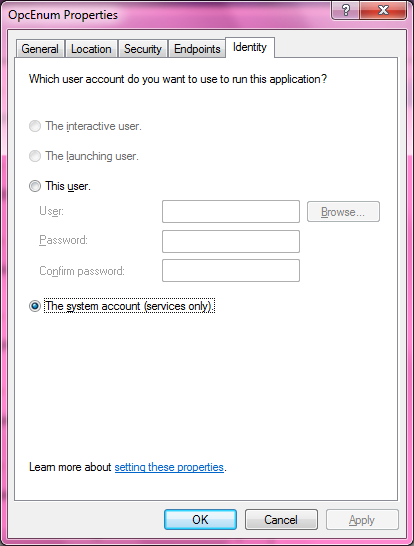
OPC enum service DCOM configuration
DCOM Security Configuration 536 DCOM Security Configuration 537 DCOM Security Configuration 538 DCOM Security Configuration 539 DCOM Security Configuration 540 DCOM Security Configuration 541
OPC Server Does Not Run as a Service
If the OPC server does not run as a Windows Service and OAS cannot connect to the server or is receiving bad data quality due to DCOM security permissions implement the OPC Data Fix or set the OAS Data Service LogOn to a local user account.
RS-Linx OPC Server
The RS-Linx installation corrupts the OPC Foundation Core component and puts in an older version of the OPC Foundation Core components. Download them and reinstall them and restart the operating system if receive an RCW dll messing error.
Download: https://filedownloads.openautomationsoftware.com/tools/OPCCoreComponentsRedistributable(x86).zip If you are having trouble browsing RS-Linx go to Configure-Options-OPC and enable or disable the Classic RSLinx Fix for Browsing errors and select Apply Changes.
Also some versions of RS-Linx require you to select the + next to each branch first before selecting the branch to show the items.
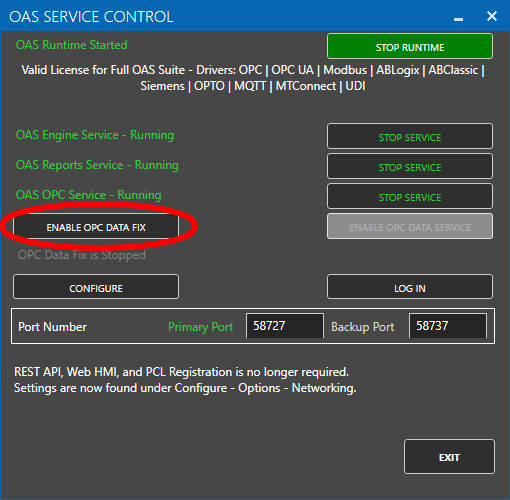
OPC Data Fix
The OPC Data Fix is an easy solution to connect to OPC Servers that do not run as a Windows Service and require a Desktop Account permission to connect to the OPC Server. First verify with the OPC Foundation Sample Client if the OPC Server is working properly with Desktop account permission.

Step 1

Start the OAS Services control manager under the program group Open Automation Software. OAS Services Shortcut

Step 2

Select the Enable OPC Data Fix button. OPC Data Fix Enable
OPC Foundation Sample Client
You can verify if the OPC Server is working correctly with the OPC Foundation Sample Client with the following steps. If the value comes in from the OPC Foundation Sample Client by not Open Automation Software try enabling the OPC Data Fix using the OAS Service control manager.

Step 1

Start the OPC Foundation Sample Client under the program group Open Automation Software.

Step 2

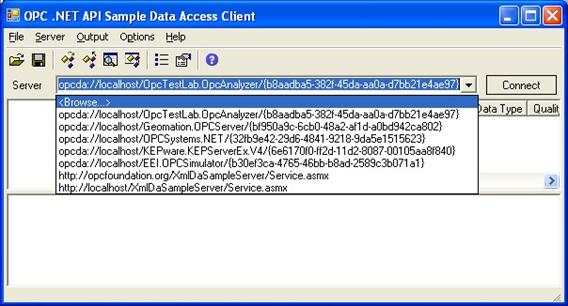
From the Server pull down list select Browse. Getting Started-OPC Client 435

Step 3

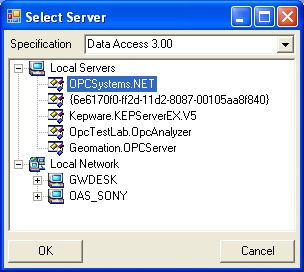
Select the local OPC Server that you want to connect to.
Getting Started-OPC Client 436
If the OPC Server is now shown under Data Access 3.00 change the Specification to 2.XX.
Select the OK button when highlighted on the OPC Server.

Step 4

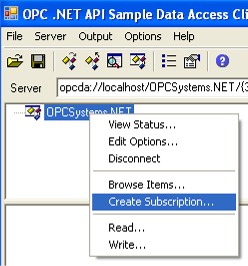
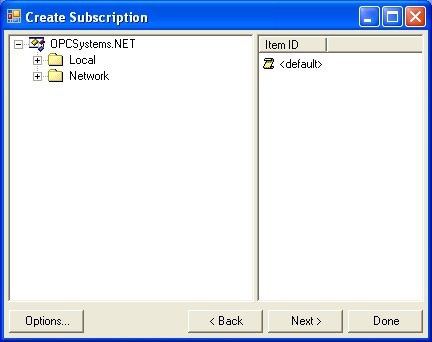
Create a group subscription by right clicking on the OPC Server and select Create Subscription.
Getting Started-OPC Client 437
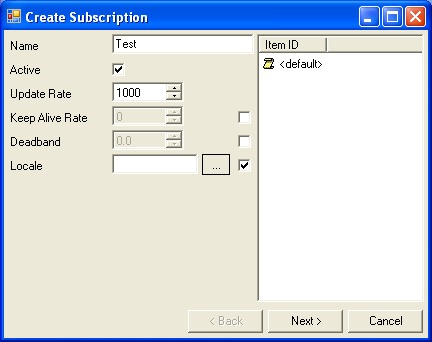
Enter a Name for the subscription and select Next. Getting Started-OPC Client 438

Step 5

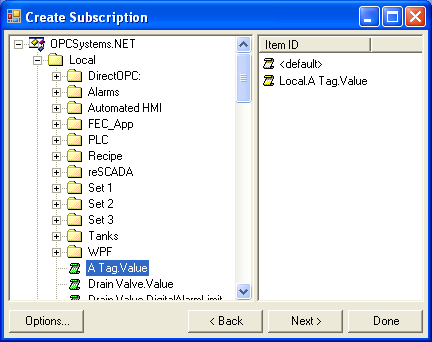
Browse for the items you want to connect to. Getting Started-OPC Client 439

Step 6

Double click on the items you want to monitor. Getting Started-OPC Client 440

Step 7

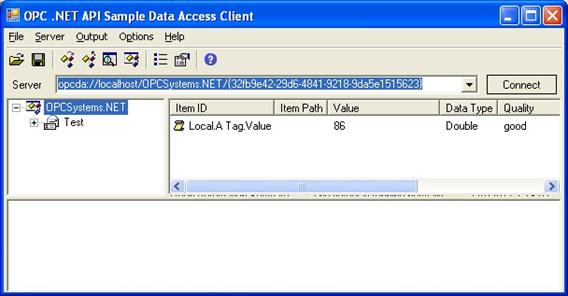
Select Next and then Done and the value of the remote item will appear. Getting Started-OPC Client 441 If the value comes in from the OPC Foundation Sample Client by not Open Automation Software try enabling the OPC Data Fix using the OAS Service control manager.
RCW DLL Missing
If you receive an error that a RCW component is missing while browsing or connecting to any OPC Server install the OPC Foundation Core Components and restart the system. You can download the OPC Foundation Core Components from: https://filedownloads.openautomationsoftware.com/tools/OPCCoreComponentsRedistributable(x86).zip.
Overview - Troubleshooting OPC Communications
View the appropriate sub section for resolving communication problems with OPC Servers.

Troubleshooting – .NET Data

Bad Data Quality in .NET Application.
Below are some possible reasons your .NET application is not able to read OAS tag values.

Data Source Quality

Use Configure-Tags to verify that the data quality of the source tags is "Good Quality". Menu Configure Tags
Quality Good

Security

The Default security group on either the local or remote OAS Engine may have Disable All Tags from Reading checked under the Read Tags Tab.  See Restrict Tag Access of Security setup to see how read, write, and browse access can be restricted. View how to Implement User Credentials in Client Applications to provide log in method for each user in the .NET application.

Network

.NET applications can be defined to communicate to remote OAS Engines.  See Network Communications Troubleshooting to verify that port 58727 is allowing both incoming and outgoing traffic through your firewall.

Tag Path

The full tag path would include the full tag name including its parent groups and the variable of the Tag.
MyGroup.MyTag.Value
Tag names are case sensitive and the current value of a tag would be .Value as the most common variable.
If the tag is from a remote OAS Engine see Basic Networking for standard remote tag syntax or Live Data Cloud Networking if the OAS Engine system has a dynamic IP address.
\\192.168.0.1\TagName.Value

License

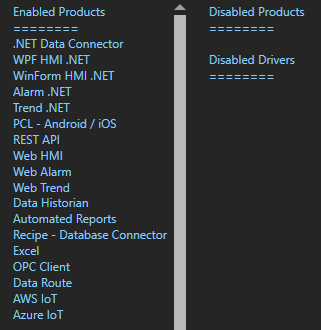
Use Configure-License to verify that a product feature .NET Data Connector, WinForm HMI, or WPF HMI is enabled on the data source system where the tags are located. Menu Configure License
Enabled Products

Target Framework for WPF and WinForm Applications

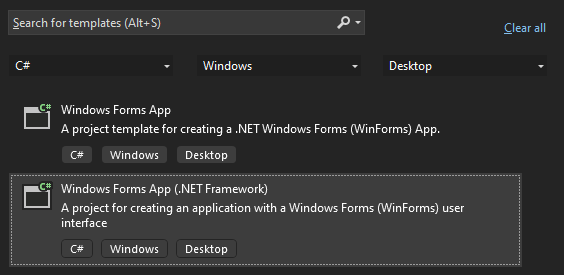
The project type for WinForm and WPF applications should be set to include (.NET Framework) and target .NET Framework 4.6.1 or greater. WinForm Target Framework See the correct project type for WinForm above that is listed as Windows Forms App (.NET Framework) while Windows Forms App would not be the correct project type.

Assembly References

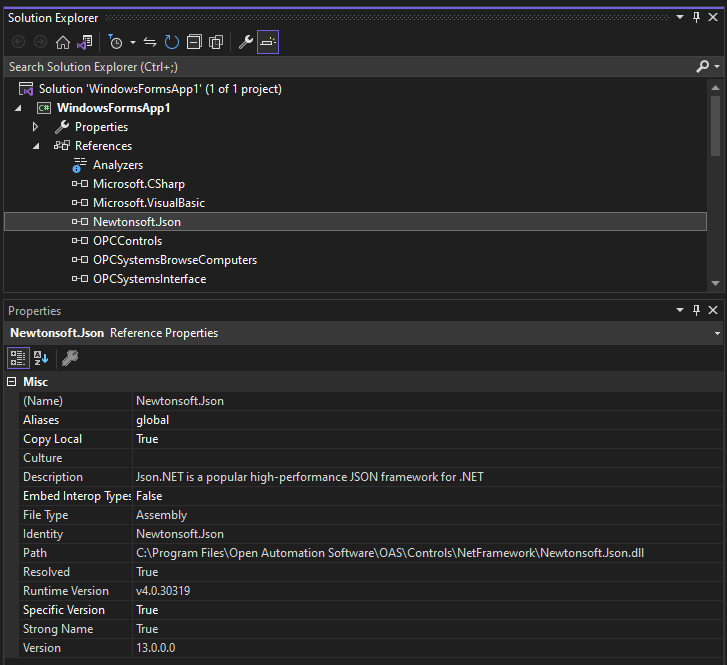
Visual Studio on some operating systems will assign a legacy assembly to the project causing an incompatibility due to an older version of the reference assembly.  A common assembly that can be incorrect is Newtonsoft.Json that has been registered in the GAC by another software product. Select Newtonsoft.Json under the Project References to verify the correct path and version as 13.0.0.0.
Newtonsoft.Json Assembly Reference If the Path does not reference the OAS installation directory remove the reference and select to Add Reference and browse for dll from the respective directory for the specific product feature. For .NET Framework applications include the .dlls located in C:\Program Files\Open Automation Software\OAS\Controls\NetFramework\. The Target Framework set for the VS project must be .NET Framework 4.6.1 or greater. For .NET Standard supporting the following targets include the. dlls located in C:\Program Files\Open Automation Software\OAS\Controls\NetStandard\. See a list of locations for the correct type in the troubleshooting type After updating to OAS Version 17 the project no longer compiles for a list of correct project reference paths for each type of Visual Studio Project.

.NET Assembly is Blocked

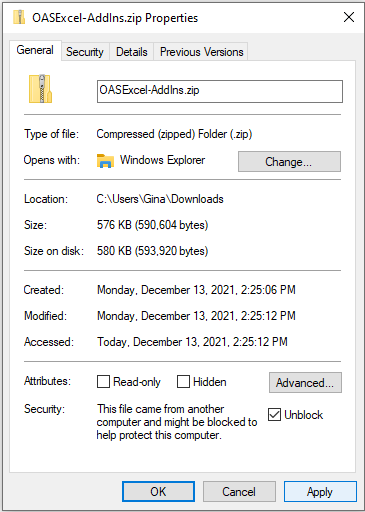
If you have copied an application or project to another computer you may need to Unblock one or more the .dll files. Right click on the .dll file that you have downloaded. Check the Unblock checkbox for security as shown in the example below, then click Apply or OK. Excel Add-In

Legacy .NET Application with OAS Version 17

 If the OAS .NET assemblies are from OAS version 16 or less contact support@oasiot.com for compatibility instructions.
After updating to OAS Version 17 the project no longer compiles

OAS version 17 implements an improved network interface which requires some additional assemblies.

All dependent .dlls are located in the relative subdirectory of the Controls directory of the OAS installation directory, typically C:\Program Files\Open Automation Software\OAS\Controls\.

To add a reference to a Visual Studio project right click on References in the Solution Explorer.

Add Reference

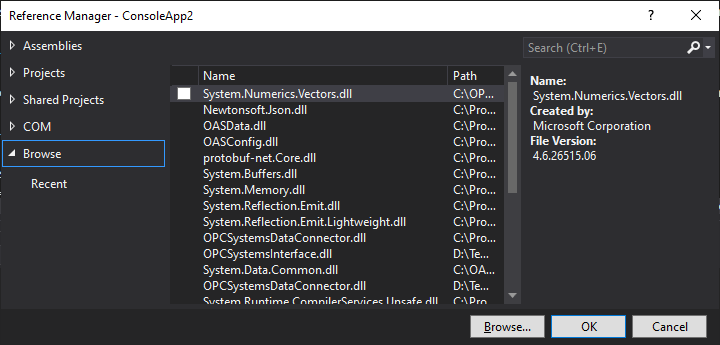
Select Browse to browse the directory for each application feature.

Browse Assemblies

Include all .dlls files in the respective directory for the specific product feature.

For .NET Framework applications include the .dlls located in C:\Program Files\Open Automation Software\OAS\Controls\NetFramework\.

The Target Framework set for the VS project must be .NET Framework 4.6.1 or greater.

For .NET Standard supporting the following targets include the. dlls located in C:\Program Files\Open Automation Software\OAS\Controls\NetStandard\.

  • .NET 5 or greater
  • .NET Core 2.0 or greater
  • .NET Framework 4.61 or greater
  • Xamarin.iOS 10.14 or greater
  • Xamarin.Android 8.0 or greater
  • UWP 1.0.0.16299 or greater

WPF HMI Assemblies

  • C:\Program Files\Open Automation Software\OAS\Controls\NetFramework\OPCWPFDashboard\

WinForm HMI Assemblies

  • C:\Program Files\Open Automation Software\OAS\Controls\NetFramework\OPCControls\

Alarm .NET Assemblies

  • C:\Program Files\Open Automation Software\OAS\Controls\NetFramework\OPCAlarmControl\
  • C:\Program Files\Open Automation Software\OAS\Controls\NetFramework\OPCAlarmDataOnly\
  • C:\Program Files\Open Automation Software\OAS\Controls\NetStandard\OASAlarms\

Trend .NET Assemblies

  • C:\Program Files\Open Automation Software\OAS\Controls\NetFramework\OPCTrendControl\
  • C:\Program Files\Open Automation Software\OAS\Controls\NetFramework\OPCTrendDataOnly\
  • C:\Program Files\Open Automation Software\OAS\Controls\NetStandard\OASTrends\

.NET Data Connector Assemblies

  • C:\Program Files\Open Automation Software\OAS\Controls\NetFramework\OPCSystemsDataConnector\
  • C:\Program Files\Open Automation Software\OAS\Controls\NetStandard\OASData\

Server Configuration Assemblies

  • C:\Program Files\Open Automation Software\OAS\Controls\NetFramework\OPCSystems\
  • C:\Program Files\Open Automation Software\OAS\Controls\NetStandard\OASConfig\
 

Troubleshooting – .NET WinForm HMI

Bad Data Quality in .NET Application.
Below are some possible reasons your .NET application is not able to read OAS tag values.

Data Source Quality

Use Configure-Tags to verify that the data quality of the source tags is "Good Quality". Menu Configure Tags
Quality Good

Security

The Default security group on either the local or remote OAS Engine may have Disable All Tags from Reading checked under the Read Tags Tab.  See Restrict Tag Access of Security setup to see how read, write, and browse access can be restricted. View how to Implement User Credentials in Client Applications to provide log in method for each user in the .NET application.

Network

.NET applications can be defined to communicate to remote OAS Engines.  See Network Communications Troubleshooting to verify that port 58727 is allowing both incoming and outgoing traffic through your firewall.

Tag Path

The full tag path would include the full tag name including its parent groups and the variable of the Tag.
MyGroup.MyTag.Value
Tag names are case sensitive and the current value of a tag would be .Value as the most common variable.
If the tag is from a remote OAS Engine see Basic Networking for standard remote tag syntax or Live Data Cloud Networking if the OAS Engine system has a dynamic IP address.
\\192.168.0.1\TagName.Value

License

Use Configure-License to verify that a product feature .NET Data Connector, WinForm HMI, or WPF HMI is enabled on the data source system where the tags are located. Menu Configure License
Enabled Products

Target Framework for WPF and WinForm Applications

The project type for WinForm and WPF applications should be set to include (.NET Framework) and target .NET Framework 4.6.1 or greater. WinForm Target Framework See the correct project type for WinForm above that is listed as Windows Forms App (.NET Framework) while Windows Forms App would not be the correct project type.

Assembly References

Visual Studio on some operating systems will assign a legacy assembly to the project causing an incompatibility due to an older version of the reference assembly.  A common assembly that can be incorrect is Newtonsoft.Json that has been registered in the GAC by another software product. Select Newtonsoft.Json under the Project References to verify the correct path and version as 13.0.0.0.
Newtonsoft.Json Assembly Reference If the Path does not reference the OAS installation directory remove the reference and select to Add Reference and browse for dll from the respective directory for the specific product feature. For .NET Framework applications include the .dlls located in C:\Program Files\Open Automation Software\OAS\Controls\NetFramework\. The Target Framework set for the VS project must be .NET Framework 4.6.1 or greater. For .NET Standard supporting the following targets include the. dlls located in C:\Program Files\Open Automation Software\OAS\Controls\NetStandard\. See a list of locations for the correct type in the troubleshooting type After updating to OAS Version 17 the project no longer compiles for a list of correct project reference paths for each type of Visual Studio Project.

.NET Assembly is Blocked

If you have copied an application or project to another computer you may need to Unblock one or more the .dll files. Right click on the .dll file that you have downloaded. Check the Unblock checkbox for security as shown in the example below, then click Apply or OK. Excel Add-In

Legacy .NET Application with OAS Version 17

 If the OAS .NET assemblies are from OAS version 16 or less contact support@oasiot.com for compatibility instructions.
After updating to OAS Version 17 the project no longer compiles

OAS version 17 implements an improved network interface which requires some additional assemblies.

All dependent .dlls are located in the relative subdirectory of the Controls directory of the OAS installation directory, typically C:\Program Files\Open Automation Software\OAS\Controls\.

To add a reference to a Visual Studio project right click on References in the Solution Explorer.

Add Reference

Select Browse to browse the directory for each application feature.

Browse Assemblies

Include all .dlls files in the respective directory for the specific product feature.

For .NET Framework applications include the .dlls located in C:\Program Files\Open Automation Software\OAS\Controls\NetFramework\.

The Target Framework set for the VS project must be .NET Framework 4.6.1 or greater.

For .NET Standard supporting the following targets include the. dlls located in C:\Program Files\Open Automation Software\OAS\Controls\NetStandard\.

  • .NET 5 or greater
  • .NET Core 2.0 or greater
  • .NET Framework 4.61 or greater
  • Xamarin.iOS 10.14 or greater
  • Xamarin.Android 8.0 or greater
  • UWP 1.0.0.16299 or greater

WPF HMI Assemblies

  • C:\Program Files\Open Automation Software\OAS\Controls\NetFramework\OPCWPFDashboard\

WinForm HMI Assemblies

  • C:\Program Files\Open Automation Software\OAS\Controls\NetFramework\OPCControls\

Alarm .NET Assemblies

  • C:\Program Files\Open Automation Software\OAS\Controls\NetFramework\OPCAlarmControl\
  • C:\Program Files\Open Automation Software\OAS\Controls\NetFramework\OPCAlarmDataOnly\
  • C:\Program Files\Open Automation Software\OAS\Controls\NetStandard\OASAlarms\

Trend .NET Assemblies

  • C:\Program Files\Open Automation Software\OAS\Controls\NetFramework\OPCTrendControl\
  • C:\Program Files\Open Automation Software\OAS\Controls\NetFramework\OPCTrendDataOnly\
  • C:\Program Files\Open Automation Software\OAS\Controls\NetStandard\OASTrends\

.NET Data Connector Assemblies

  • C:\Program Files\Open Automation Software\OAS\Controls\NetFramework\OPCSystemsDataConnector\
  • C:\Program Files\Open Automation Software\OAS\Controls\NetStandard\OASData\

Server Configuration Assemblies

  • C:\Program Files\Open Automation Software\OAS\Controls\NetFramework\OPCSystems\
  • C:\Program Files\Open Automation Software\OAS\Controls\NetStandard\OASConfig\
 
The .NET controls do not appear in the Toolbox after selecting to add them to the Toolbox.
If you right click Toolbox and Choose to Add Items and select the OPCControls components, yet they do not appear in the Toolbox you may have installed Visual Studio after Open Automation Software. If so uninstall Open Automation Software and reinstall it.  It will then register correctly with Visual Studio for adding the controls.
After updating Open Automation Software with the incremental update the project no longer compiles or the application no longer works.
Make sure to Unblock the dlls before copying to C:\Program Files\Open Automation Software\OAS\Controls\NetFramework\.
To Unblock the files copy to a trusted location for your system, Desktop works well, then right click on the file and select Properties to select Unblock. Then copy from your Desktop to the correct directory in C:\Program Files\Open Automation Software\OAS\Controls\.
.

Troubleshooting – Alarm Logging

MS Access Error microsoft.ace.oledb.12.0 provider is not registered
MS Access Class not Registered System Error

For Office 2010, the following update will correct this issue.
https://www.microsoft.com/en-us/download/details.aspx?id=39664

For Office 365 (please note, by default Office365 installs the 32-bit version regardless of your system), use:

https://www.microsoft.com/en-us/download/details.aspx?id=54920

Security Login Error occurs with Open or Create routines.
View the Database Security Login topic on how to setup security logins and access writes to create, open, and read and write to the database.
The database engine language is different than the Regional Language settings of the Data Logging and / Alarm Logging Service. Data Logging updates, Alarm Logging updates, trend history, and / alarm history is not working due to invalid date format.
Go to Configure-Options-History and Enable History Date Format. Examples: yyyy-MM-dd HH:mm:ss MM/dd/yyyy HH:mm:ss

Troubleshooting – Recipe

MS Access Error microsoft.ace.oledb.12.0 provider is not registered
MS Access Class not Registered System Error

For Office 2010, the following update will correct this issue.

https://www.microsoft.com/en-us/download/details.aspx?id=39664

For Office 365 (please note, by default Office365 installs the 32-bit version regardless of your system), use:

https://www.microsoft.com/en-us/download/details.aspx?id=54920

Troubleshooting – License

What will make my license stop working?
  • If you upgrade your software to the latest version without an active maintenance plan that covers that version.
  • If you change the CPU mother board. This includes cloning the image of the drive and restoring to a new PC.
  • If you remove all of the hard disks from the system that were present when the software was licensed.
  • With older OAS version 9 or less if you remove all of the Ethernet cards from the system that were present when the software was licensed.