Getting Started – Database Tag

You can view the Getting Started with Database Data video to familiarize yourself with the following steps to setup a database interface.

  • 00:00 – Introduction
  • 01:01 – Example Data
  • 01:38 – Configure Connection
  • 03:53 – Save Configuration
  • 04:27 – Configure Tags
  • 05:12 – Read
  • 05:54 – WHERE String
  • 09:26 – Write
  • 09:55 – Examples Tags
  • 10:57 – Watch Window
  • 11:34 – User Interface
  • 13:53 – Data Route
  • 16:03 – Modbus
  • 19:44 – OPC UA
  • 22:33 – Knowledge Base
  • 24:30 – Remote Database
  • 25:15 – Networking
  • 25:48 – Device Drivers
  • 26:10 – UIEngine
  • 26:35 – Getting Started Guide
  • 27:22 – Alarm Limits
  • 28:18 – OpenAutomationSoftware.com
 

The following guide will demonstrate how to set up a local or remote database connection to enable OAS Tags to access values by column name with static or dynamic table name, WHERE statement, and ORDER BY query.

NOTE: Database Tags require the Data Logging license to write values to a database and the Recipe – Database Connector license to read values from a database.

In the steps that follow a connection will be established to a SQL Server database engine to read and write data to a table called Orders that has the following structure.

Production Data Example Design

The values in the example table Orders are as follows.

Example Database Values

Step 1

OAS

Start the Configure OAS application if it is not already running.

Step 2

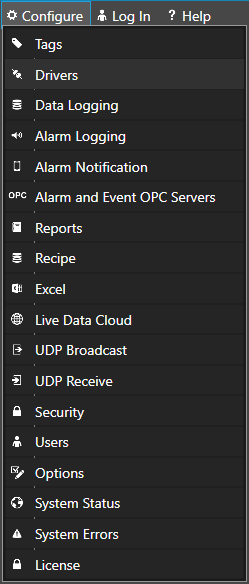
Select Configure-Drivers to define a database connection.

Configure Drivers

Define a Driver Interface Name that will be used to identify this database connection.

Driver Interface Name

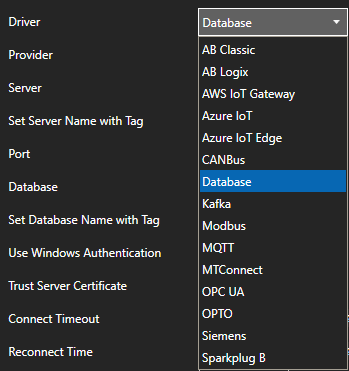
Set the Driver type to Database.

Database Driver

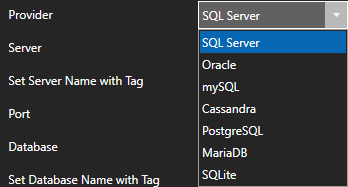
Set the database Provider to the desired selection.

Database Provider

Set the Server property to the local or remote database server. (Not required for SQLite)

Database Server

Set the Database property to the name of the database to connect to. For SQLite this is set as the file path of the existing database.

Database Property

If using SQL Server provider Use Windows Authentication or uncheck to specify User Name and Password for the connection.

Database Authentication

To allow writing to the database when a tag is written to enable the property Allow Writing Values.

Allow Database Write

Note: When tags are written to with a Data Source of Database all records matching the WHERE string of the tag are update. This can result in multiple records being updated from a single write based on the value of the WHERE string of the tag.

Select ADD DRIVER at the left of the list of driver interfaces.

Add Driver

Driver interface is now active in the system and ready for tags to be assigned to the connection.

Select Save on the menu bar to save the configuration changes to the .Tags file.

Save Button

Step 3

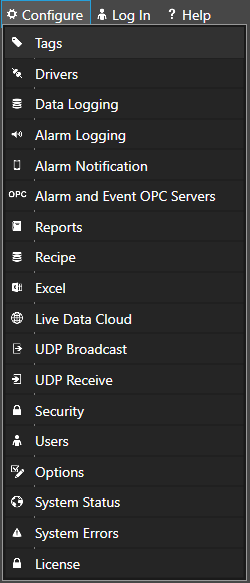
Select Configure-Tags to specify which tables and columns to read and update values.

Menu Configure Tags

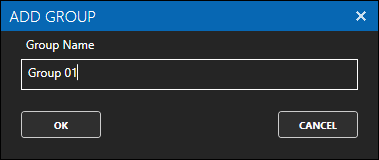
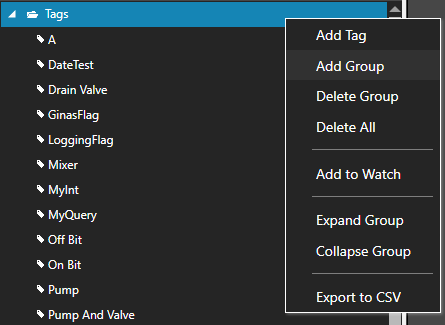
Select ADD GROUP to optionally define a group where new tags will be added.

Add Group

In this example we will use the new group name Orders.

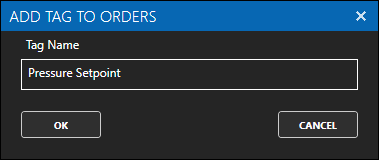
Select ADD TAG to add the tag Pressure Setpoint which will be used to access the values from the PressureSetpoint column.

Add Tag Button
Add Pressure Setpoint

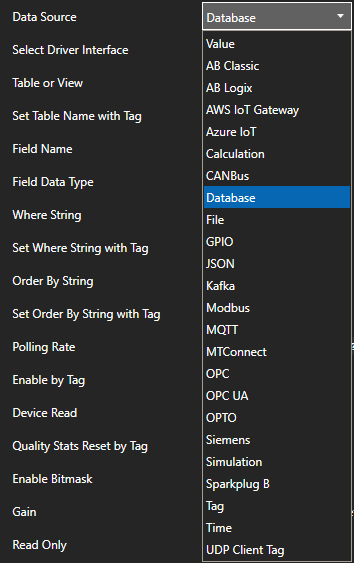
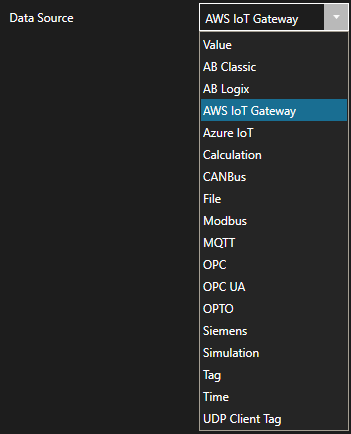
Set the tag Data Source to Database.

Database Data Source

Set the Table or View property to Orders.

Database Table or View

Set the Field Name property to PressureSetpoint.

Database Field Name

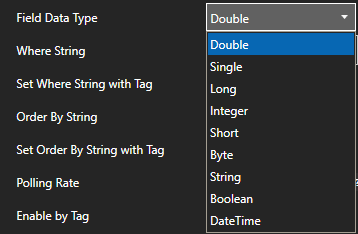
If the field will be updated with a write to the tag set the Field Data Type to the data type of the database column.

Database Data Type

Set the Where String property to WHERE BatchNumber = 1.

Database WHERE String

Note: The value of the Where String property determines which record will be obtained from the table or view. It also determines which record(s) will be updated when a write to the tag occurs.

Select the Apply Changes button to activate the changes to the tag.

Apply Changes

The current value of the PressureSetpoint column in the Orders table where the BatchNumber equals 1 will now appear in the tag Value.

Database Tag Value

Select Save on the menu bar to save the configuration changes to the .Tags file.

Save Button

Additional Tag Properties

The Order By String property is another property that can be used to determine what record is used to read the value from the database. It is not used in updating records on a write.

Order By String

The Table or View, Where String, and Order By String properties can optionally be set dynamically from a string tag. The properties Set Table Name with Tag, Set Where String with Tag, and Set Order by String with Tag control the ability to set the respective property values dynamically from another string tag. These properties allow for the determination of which table and record are accessed for reading and updating from other tag values.

Set Table Name with Tag
Set Where String with Tag
Set Order by String with Tag

The Polling Rate determines the frequency that data is read from the database.

Polling Rate

The Enable by Tag property allows control of polling by the value of a Boolean tag; true is enabled, and false is disabled.

Enable by Tag

The Device Read property enables reading from the database by event instead of continuously. When enabled the Boolean tag that is defined to the Device Read will trigger a read with a value transition from false to true.

Device Read

Getting Started Sparkplug B Edge of Network Node

OAS is can act as a Sparkplug B Edge of Network Node and Host Application.

The following guide are the steps to define OAS as a Sparkplug B EoN Node to enable OAS Tags as Metric values to Sparkplug B clients acting as a Host Application for Edge Node and Device control and client applications to send and receive tag values of any OAS Data Source.

If you would like OAS to act as a Host Application to control and send and receive data from other Edge of Network Node Devices see the Getting Started Sparkplug B Host Application guide.

You can view the Getting Started with Sparkplug B Video to familiarize yourself with the following steps to setup Sparkplug B communications.

Step 1 – Check MQTT License

OAS

Start the Configure OAS application from the program group Open Automation Software.

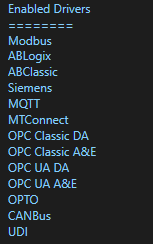
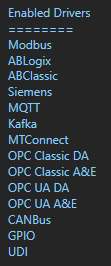
Select Configure-License and verify that MQTT is one of the available Drivers in the lower left of the form.  If you do not see the MQTT driver available contact support@oasiot.com to update your license.

NOTE: To configure remote OAS Engines enter the IP Address or node name in the Network Node field and click on Select.

Network Node
Enabled Drivers

NOTE: You will need to be running Open Automation Software Version 19.0.0.54 or greater to support Sparkplug B communications.  Use Configure-Options-System Status to check the version of the running OAS Engine.  You can download the latest version at www.openautomationsoftware.com/downloads/open-automation-software/ or use the Update Version button under Configure-License to update to the latest version of OAS.

Step 2 – Configure Sparkplug B Edge of Network Node Driver

Select Configure-Drivers.

Configure Drivers

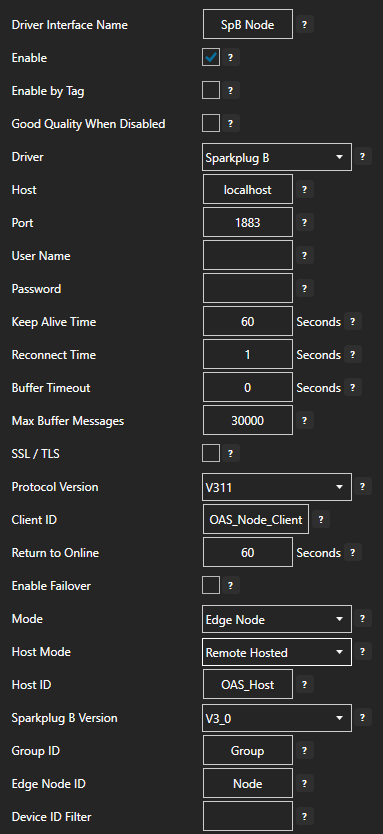
Define the properties for the desired Sparkplug B Edge Node.

Enter a meaningful Driver Interface Name.

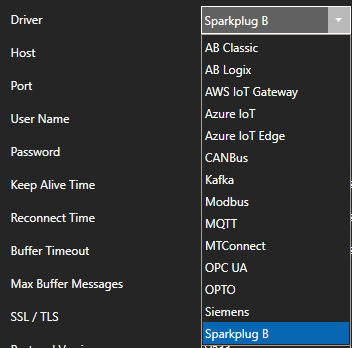
Set the Driver property to Sparkplug B.

Enter the Host property to the IP Address of the of the host broker or just use localhost for a local broker. 

Set the Port property of the host broker to connect to.  The default port is 1883 or 8883 for SSL.

Note: The OAS MQTT Broker can be used to host data locally.  To use another broker on the default ports on the same computer change the OAS MQTT Broker Port under Configure-Options-MQTT Broker.

Enter the User Name and Password if required.

Keep Alive Time – Default is 60 Seconds.

Reconnect Time – Default 1 Second. If the connection to the broker is lost the Reconnect Time determines how long to wait before attempting to reconnect.

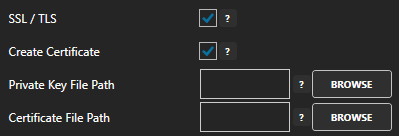
To connect with Transport Layer Security enable the property SSL / TLS.

Specify the Private Key File and Certificate File to use.

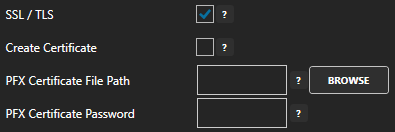
Uncheck the property Create Certificate to specify a PFX Certificate File and PFX Certificate Password.

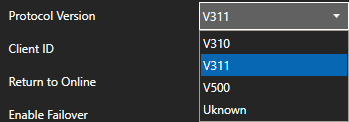
Set the MQTT Protocol Version to V311 or V500.

Set the Client ID to a unique value, each driver interface must have a specific value different than all other clients connecting to the host.

Optionally define a secondary failover Host Broker if the primary Host Broker fails with the property Enable Failover.

If both the primary and secondary broker are offline the Return to Online settings determines the retry frequency.

View Driver Interface Failover for more information and and video demonstrating communications failover.

Set the Mode to Edge Node.

Set the Hode Mode to Remote Hosted if a Host Application to control the state of this Edge Node including another OAS driver set as Host App.  Set to Self Hosted to have this OAS driver control the state of the Edge Node.

Set the Host ID to the specific value that the Edge of Nodes will be using as the Host Application ID.

Set the Sparkplug B Version to 2.2 or 3.0.

Set the Group ID and Edge Node ID that defines this EoN Node.

NOTE: This Group ID and Edge Node ID values will be used to define which OAS tags will be enabled for hosting values in the next step to Define OAS Tags as EoN Node using the Host Group ID and Host Edge Node ID tag properties.

Optionally set the Device ID Filter to include only a specific device defined by the Tag property Host Device ID.  Leave blank to include all tags with all Host Device IDs defined with same Group ID and Edge Node ID.

Select the Add Driver button in the left part of the window to add the Driver Interface as an available selection when defining Tags in the next step.

Add Driver

NOTE: If you need to define several Driver Interfaces you can use the CSV Export and CSV Import on the toolbar in the upper right together with Microsoft Excel.

CSV Import and Export

You can also programmatically define drivers using the .NET OASConfig assembly or OAS REST API.

Step 3 – Configure OAS Tags as Sparkplug B EoN Node and Device Metrics

Select Configure-Tags.

Menu Configure Tags

Select an existing tag or add a new tag.

To update an existing tag jump to the step to specify the Host Group ID and Host Edge Node ID.

To add a new tag select Add Group to add a group to place tags in.

Add Group
Add Tag Group

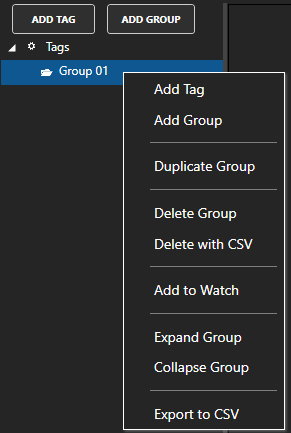
NOTE: You can add organizational Groups as many levels deep as you prefer and add tags to groups.  To do this first add a Group to the root level, then right click on the Group in the right window to add additional Groups or Tags.

Tag Group Options

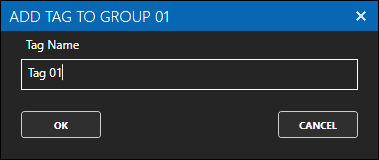
Select Add Tag to add a tag to the group selected.

Add Tag
Add Tag to Group

The Data Source can be any OAS Data Source including Allen Bradley PLCs, Siemens controllers, Modbus devices or masters, OPC UA servers and clients, OPC DA servers and clients, MQTT brokers and clients, MTConnect, Calculations, Simulation, or other Sparkplug B Node Metrics.

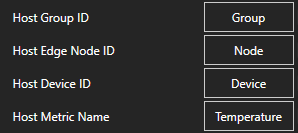
Specify the Host Group ID and Host Edge Node ID to match the Group ID and Edge Node ID defined in the Edge Node Driver Interface.

Set the Host Device ID and Host Metric Name to any value you desire.  Optionally leave the Host Device ID blank if you want the Metric to appear directly in the Edge Node.  Each OAS tag must have a unique combination of Host Group ID, Edge Node ID, Device ID, and Metric Name.  Two or more tags cannot share the same combination.

Select Apply Changes and the OAS tag value will be published to the specified Host anytime the tag value changes. 

Apply Changes

The value can also be updated with a NCMD or DCMD command to the specific Metric Name.  If the OAS Tag is defined to another Data Source the value will be written to that source.

To define multiple tags use the CSV Export and CSV Import on the toolbar in the upper right together with Microsoft Excel.

CSV Import and Export

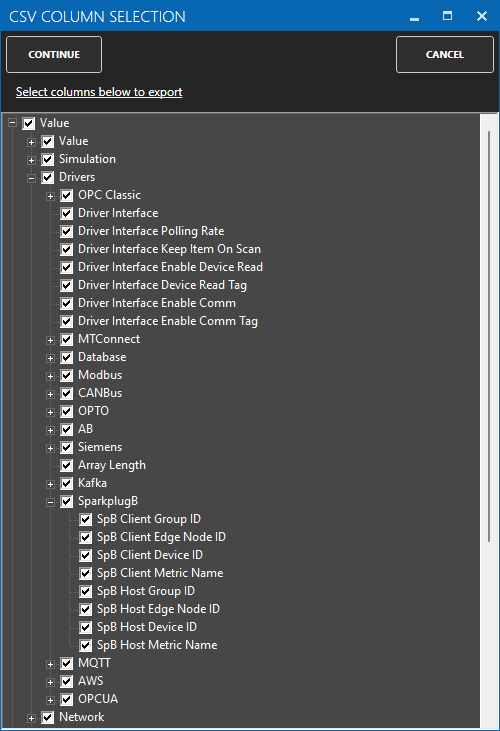
When exporting tags choose which columns to include in the CSV file. There are over 800 properties available for use in each tag and reducing the amount of data can help to focus on the properties of interest.

Sparkplug B CSV Export

NOTE: You can also programmatically define Tags using the free to use .NET OASConfig assembly or OAS REST API.

Step 4 – Save Sparkplug B Tags and Drivers

Select the Save button on the toolbar at the top.

Load and Save

Enter a file name to be saved in C:\ProgramData\OpenAutomationSoftware\ConfigFiles directory on Windows or ConfigFiles subdirectory on Linux.

When prompted to set the file as the default configuration to load on startup select Yes.

Set Default Tag File

NOTE: The tags and and drivers are both saved into one file.

The tags defined are now ready for use in all OAS features like Data Logging, Data Route, and Open UIEngine.

Getting Started Sparkplug B Host Application

OAS is can act as a Sparkplug B Edge of Network Node and Host Application.

If you would like OAS to act as an Edge of Network Node view the Getting Started Sparkplug B EoN Node setup guide.

The following guide are the steps to define OAS as a Sparkplug B Host Application to receive and update Edge Node Metric values.  The interface can control the online state of each Edge of Node or just act as a client.

You can view the Getting Started with Sparkplug B Video to familiarize yourself with the following steps to setup Sparkplug B communications.

  • 00:00 – Introduction
  • 01:10 – Download OAS
  • 01:46 – Quick Start
  • 02:08 – Edge of Network Node
  • 05:52 – EoN Tags
  • 07:04 – Host Application
  • 09:20 – SpB Client Tags
  • 10:22 – Programatic Interface
  • 10:59 – CSV Export / Import
  • 12:27 – Multiple Metric Tags
  • 13:46 – Modbus
  • 16:10 – DCMD Metric Write
  • 17:00 – Data Route
  • 17:58 – Networking
  • 18:17 – Save Configuration
  • 18:56 – OAS Platform

Step 1 – Check MQTT License

OAS

Start Configure OAS application from the program group Open Automation Software.

Select Configure-License and verify that MQTT is one of the available Drivers in the lower left of the form.  If you do not see the MQTT driver available contact support@oasiot.com to update your license.

NOTE: To configure remote OAS Engines enter the IP Address or node name in the Network Node field and click on Select.

Network Node
Enabled Drivers

NOTE: You will need to be running Open Automation Software Version 19.0.0.54 or greater to support Sparkplug B communications.  Use Configure-Options-System Status to check the version of the running OAS Engine.  You can download the latest version at www.openautomationsoftware.com/downloads/open-automation-software/ or use the Update Version button under Configure-License to update to the latest version of OAS.

Step 2 – Configure Sparkplug B Host Driver

Select Configure-Drivers.

Configure Drivers

Define the properties for the desired Sparkplug B Host.

Enter a meaningful Driver Interface Name that you will refer to this physical connection when defining Tags with Sparkplug B source.

Set the Driver property to Sparkplug B.

Enter the Host property to the IP Address of the of the host broker or just use localhost for a local broker. 

Set the Port property of the host broker to connect to.  The default port is 1883 or 8883 for SSL.

Note: The OAS MQTT Broker can be used to host data locally.  To use another broker on the default ports on the same computer change the OAS MQTT Broker Port under Configure-Options-MQTT Broker.

Enter the User Name and Password if required.

Keep Alive Time – Default is 60 Seconds.

Reconnect Time – Default 1 Second. If the connection to the broker is lost the Reconnect Time determines how long to wait before attempting to reconnect.

To connect with Transport Layer Security enable the property SSL / TLS.

Specify the Private Key File and Certificate File to use.

Uncheck the property Create Certificate to specify a PFX Certificate File and PFX Certificate Password.

Set the MQTT Protocol Version to V311 or V500.

Set the Client ID to a unique value, each driver interface must have a specific value different than all other clients connecting to the host.

Optionally define a secondary failover Host Broker if the primary Host Broker fails with the property Enable Failover.

If both the primary and secondary broker are offline the Return to Online settings determines the retry frequency.

View Driver Interface Failover for more information and and video demonstrating communications failover.

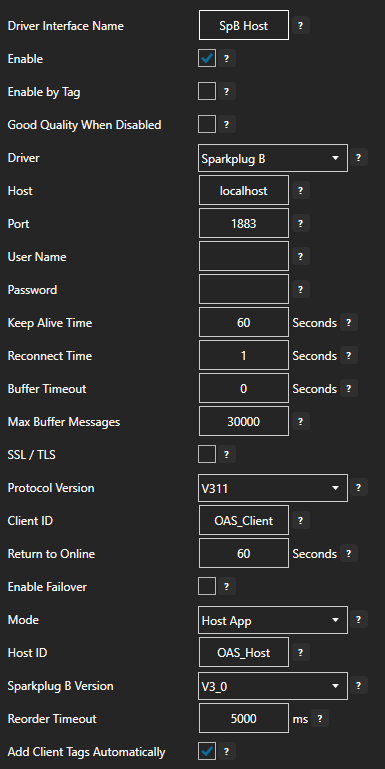
Set the Mode to Host App for OAS to control the online state of each Edge of Node defined to the shared Host Application ID.

Note: To enable a communication interface to Edge of Nodes, but not set the state of the Host ID set the mode to Client App.

Set the Host ID to the specific value that the Edge of Nodes will be using as the Host Application ID.

Set the Sparkplug B Version to 2.2 or 3.0.

To automatically add tags for each Metric from the matching Group, Edge of Nodes, and Devices enable the property Add Client Tags Automatically.

When enabled optionally set the Filter Groups, Edge Nodes, and Devices that tags should be added from for each of their Metrics.  Leave the Filter fields blank to include all Edge of Nodes publishing data to the broker.

Select the Add Driver button in the left part of the form to add the Driver Interface as an available selection when defining Tags in the next step.

Add Driver

NOTE: If you need to define several Driver Interfaces you can use the CSV Export and CSV Import on the toolbar in the upper right together with Microsoft Excel.

CSV Import and Export

You can also programmatically define drivers using the .NET OASConfig assembly or OAS REST API.

Step 3 – Configure Tags to Define Metric Data from Edge Nodes

Select Configure-Tags.

Menu Configure Tags

NOTE: If the Driver Interface property Add Client Tags Automatically was enabled tags will be created for you, you can skip this step to add tags manually.

Select Add Group.

Add Group
Add Tag Group

NOTE: You can add organizational Groups as many levels deep as you prefer and add tags to groups.  To do this first add a Group to the root level, then right click on the Group in the right window to add additional Groups or Tags.

Tag Group Options

Select Add Tag to add a tag to the group selected.

Add Tag
Add Tag to Group

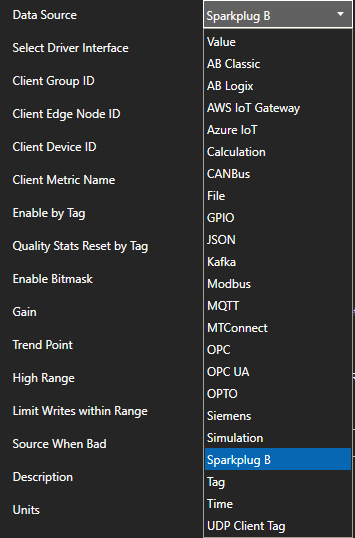
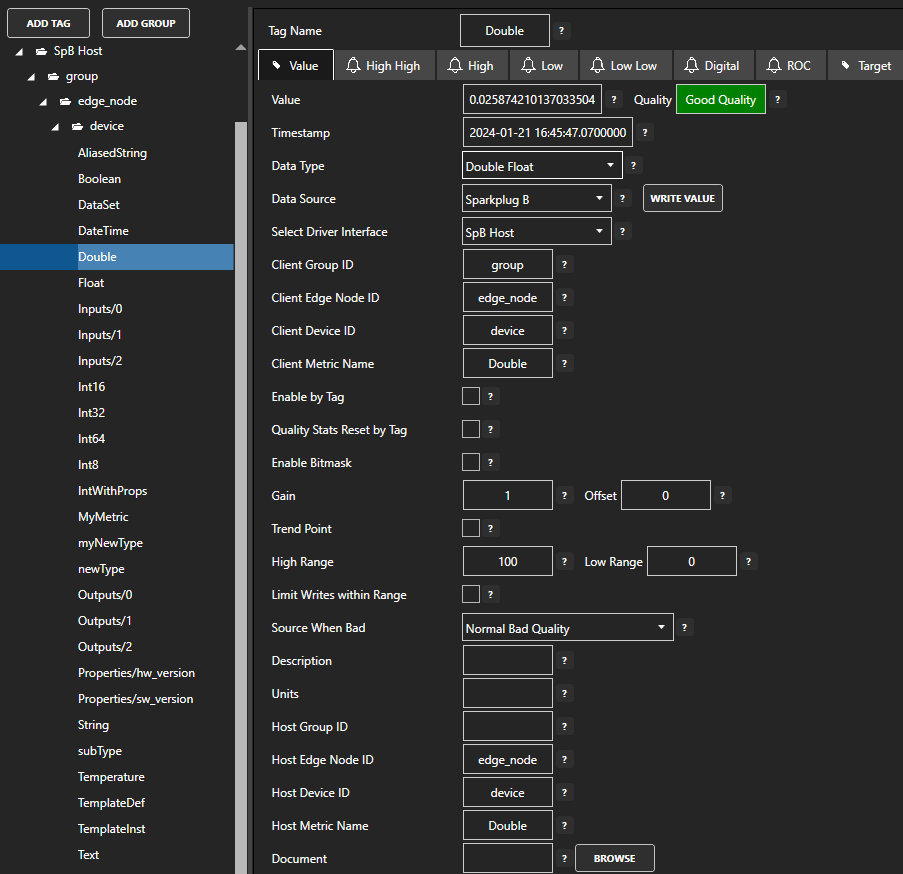
Change the Data Source Tag property to Sparkplug B.

Select the correct Driver Interface from the Driver Interface pull down list.

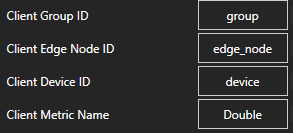
Specify the Client Group ID, Client Edge Node ID, Client Device ID, and Client Metric Name for the Edge of Node Metric value to read and write.

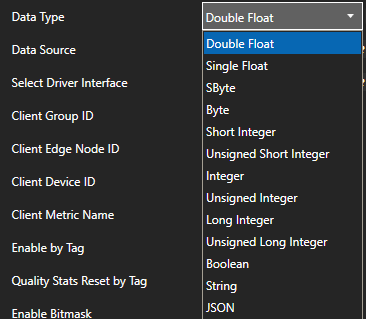
Select the Data Type of the Tag to match the data type of the Metric.

Select Apply Changes and the current value for the Metric should appear with Good Quality.

Apply Changes

NOTE: The above tag was automatically created using the Sparkplug B Test Compliance Kit as an Edge of Node source.

To define multiple tags use the CSV Export and CSV Import on the toolbar in the upper right together with Microsoft Excel.

CSV Import and Export

When exporting tags choose which columns to include in the CSV file. There are over 800 properties available for use in each tag and reducing the amount of data can help to focus on the properties of interest.

Sparkplug B CSV Export

NOTE: You can also programmatically define Tags using the free to use .NET OASConfig assembly or OAS REST API.

Step 4 – Save Sparkplug B Tags and Drivers

Select the Save button on the toolbar at the top.

Load and Save

Enter a file name to be saved in C:\ProgramData\OpenAutomationSoftware\ConfigFiles directory on Windows or ConfigFiles subdirectory on Linux.

When prompted to set the file as the default configuration to load on startup select Yes.

Set Default Tag File

NOTE: The tags and and drivers are both saved into one file.

The tags defined are now ready for use in all OAS features like Data Logging, Data Route, and Open UIEngine.

To setup automated data transfer of any OAS Tag to and from the Sparkplug B Tags see Getting-Started – Data Route.

Getting Started Azure Event Hubs

View the following video on how to setup publishing data to Azure Event Hubs.

  • 00:00 – Introduction
  • 00:45 – Getting Started Guide
  • 01:10 – Create Event Hub
  • 01:44 – Azure Portal
  • 02:25 – Setup Driver
  • 04:00 – Publish Select Tags
  • 07:15 – Save Configuration
  • 08:00 – Monitor Data
  • 10:20 – IoT Publish

Create an Event Hub

You need to create an Event Hub for your device to connect to. The following steps show you how to complete this task using the Azure portal:

Step 1

Sign in to the Azure portal.

Step 2

From the left menu, click Create a resource, then click Analytics, and then click Event Hubs.
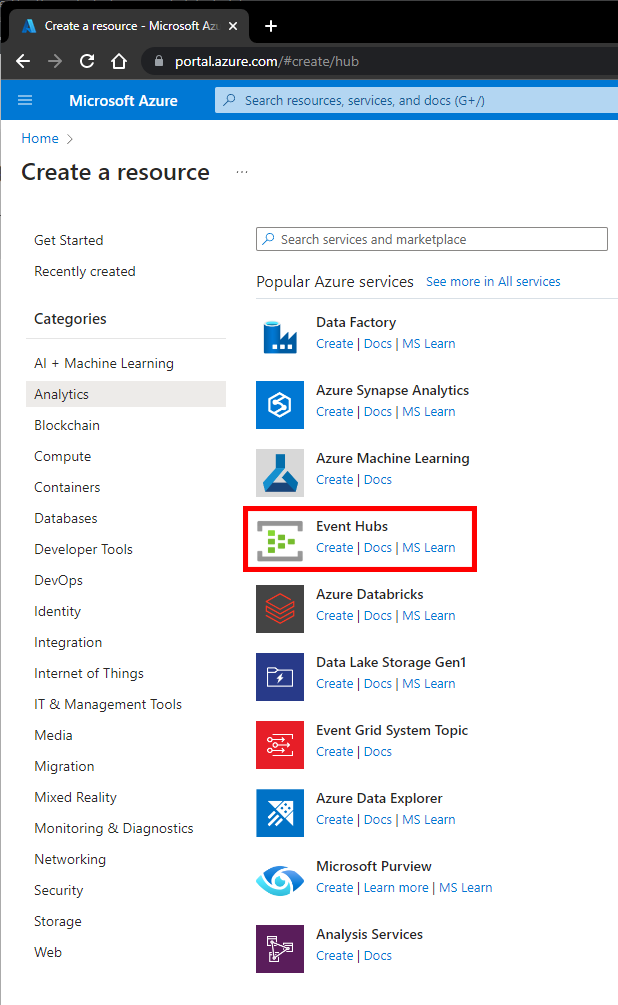
Create Azure Event Hub

Step 3

On the Basic tab of the Create Namespace step that appears enter your Project Details.
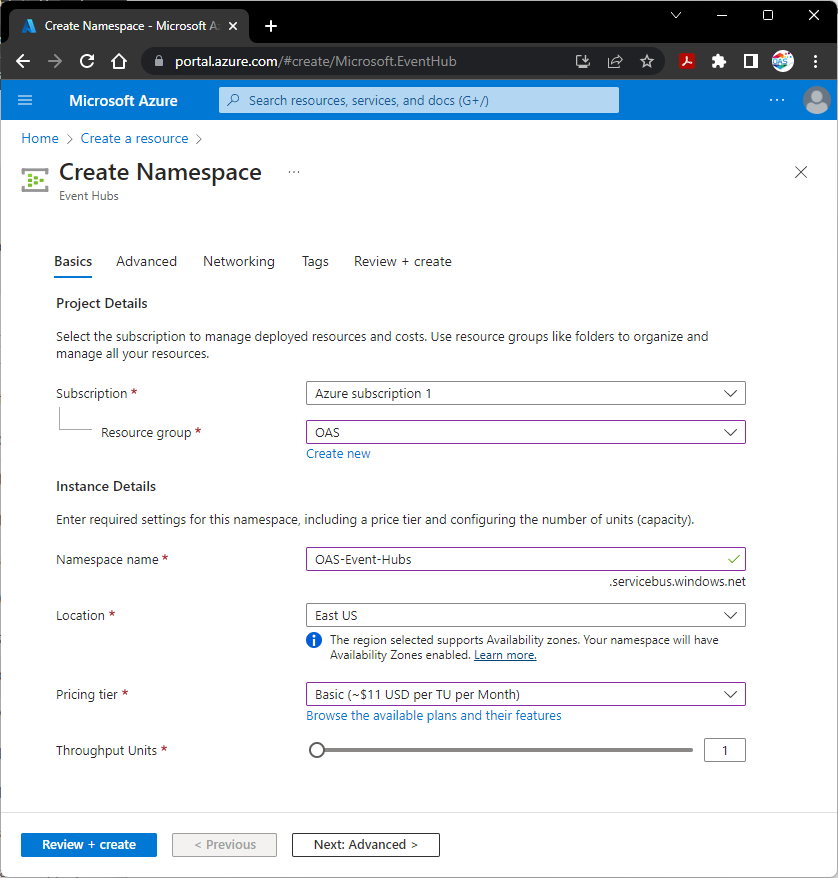
Create Azure Namespace

  • Select the Azure Subscription to use for the Event Hub.
  • Select existing or create a a new Resource group.
  • Enter a Namespace name.
  • Select Location.
  • Select a Pricing tier.
  • Set the Throughput Units.

Select Review + create
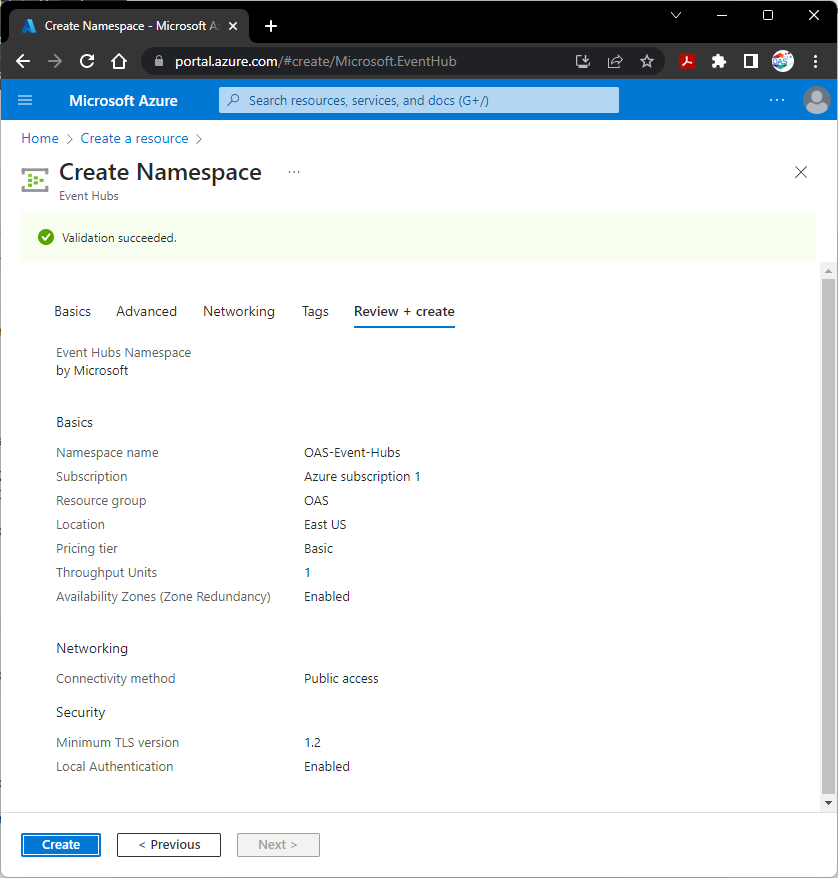
Azure Namespace Validation

Then the Create button after the Validation succeeded.

You will see Deployment is in progress for a minute, then when finished you will see Your deployment is complete and the resource will be ready for use.
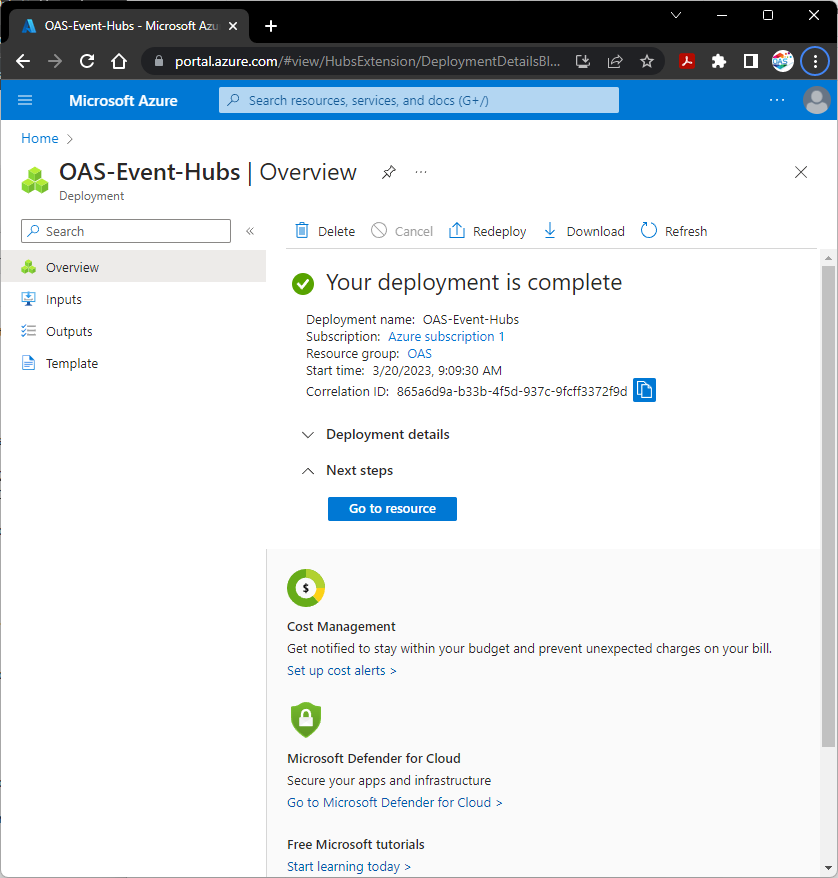
Azure Event Hub Deployment

Select Go to resource.

Step 4

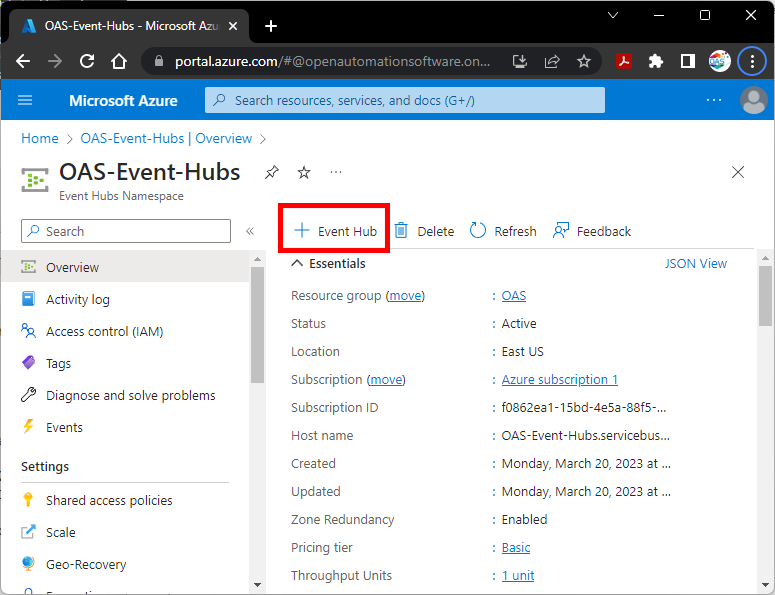
Add Azure Event Hub

In Event Hubs Namespace select + Event Hub to add an Event Hub to publish data to.
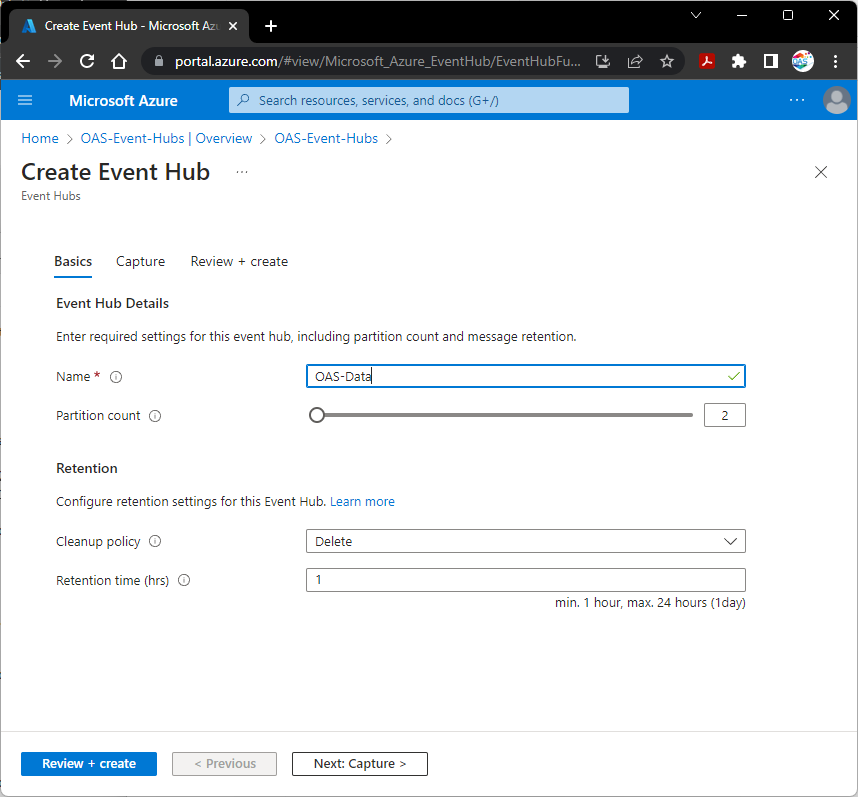
Azure Event Hub Settings

Set the Event Hub Name and select Review + create.
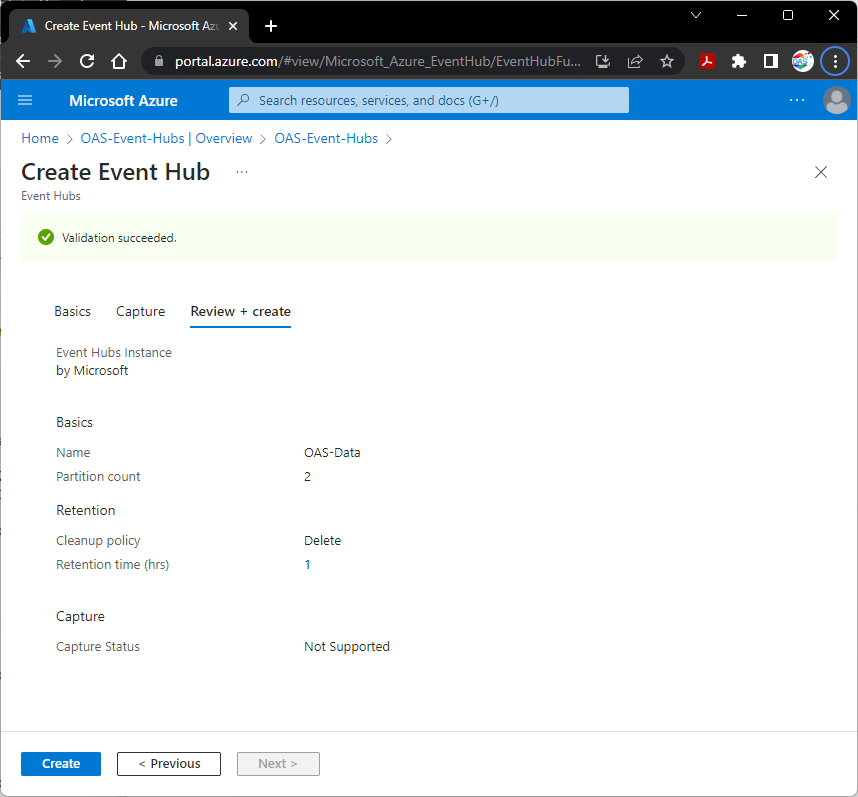
Azure Event Hub Validation

Select Create when the prompt of Validation succeeded appears.

The Event Hub is now ready for use with OAS to publish data to.

Step 5

Next click Shared access policies from the left menu.  In the pane that appears to the right, click RootManageSharedAccessKey or use + Add to create a new key.
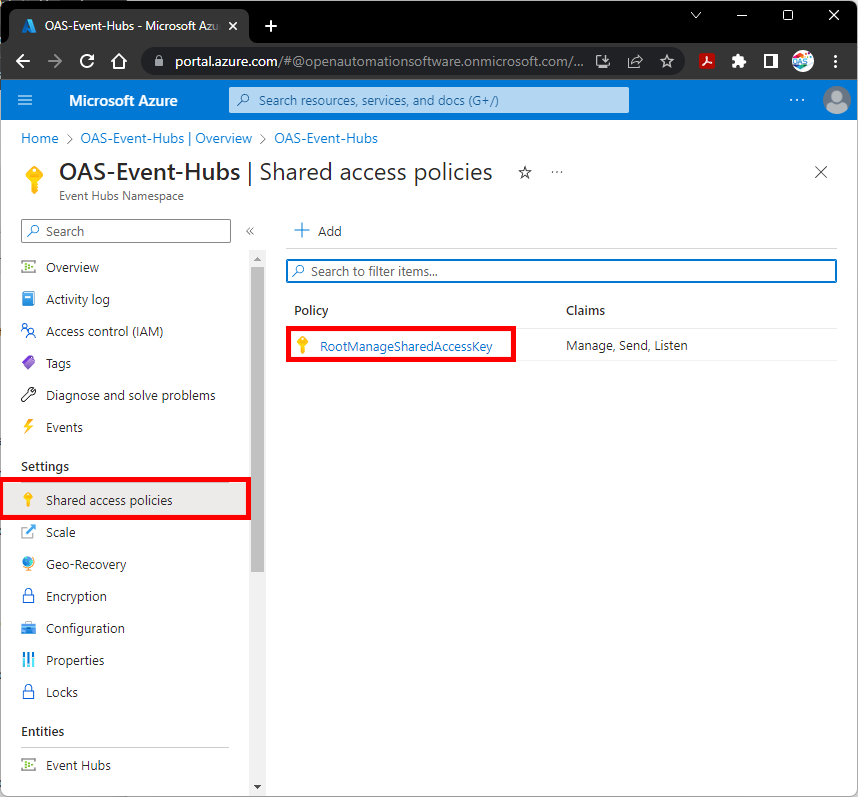
Azure Shared Access Policies

In the panel that appears to the right, select the Copy to clipboard icon next to Connection string – primary key.  Save this as well, you will need it later.
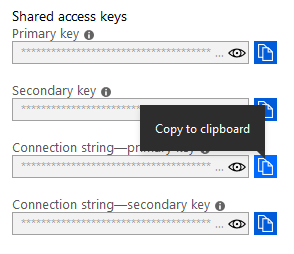
You have now created your Event Hub the connection string you need to complete the rest of this tutorial.

Step 6 (Optional Schema)

If you wish to transfer data with an Avro schema define a Schema Group in the Schema Registry.  Azure Event Hub Schemas provide a serialization to reduce the message size during transmit.  Note: Schemas are not available for use in a Basic Azure Event Hubs account, a Standard, Premium, or Dedicated account is required to use schemas.

It is important to note that the data type in the schema definition must match the value data type of the tag.

Following is example.  

{
    “namespace”: “com.oasiot.oas-data”,
    “type”: “record”,
    “name”: “oas-data”,
    “fields”: [
        {
            “name”: “Ramp”,
            “type”: “double”
        },
        {
            “name”: “Sine”,
            “type”: “double”
        },
        {
            “name”: “Pump”,
            “type”: “boolean”
        },
        {
            “name”: “Status”,
            “type”: [
                “string”,
                “null”
            ],
            “default”: null
        }
    ]
}

Notice the Status field that include a definition of both the data type and null to allow transfer if the data quality is bad.

“type”: [
                “string”,
                “null”
            ]
 
In the example above if Ramp, Sine, or Pump is bad quality the complete message will be rejected and not transfer.  While the tag defined to the Status field could be bad quality.

Create an Azure IoT Driver

Step 1

Open Configure OAS application.

Step 2

Select Configure – Drivers from the top menu.

Configure Drivers

Step 3

Select your Network Node, either localhost or remote.

Step 4

Enter the Driver Interface Name you wish to use.

Select Azure IoT from the Driver combo box.
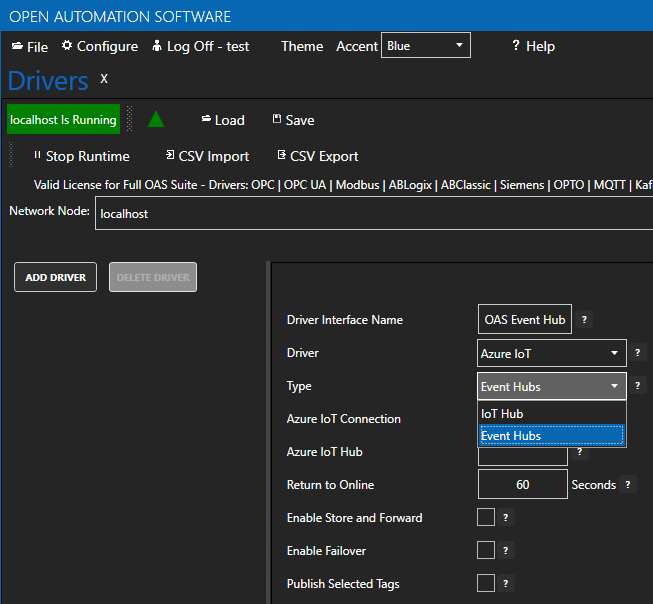
OAS Azure Type Event Hubs

Select Event Hubs from the Type combo box.
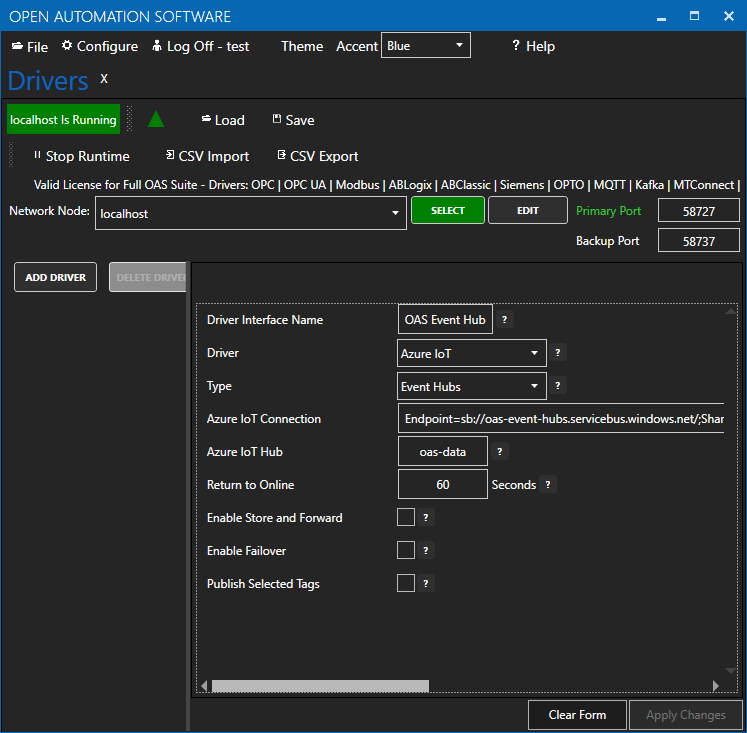
OAS Azure Event Hub Settings

Copy the Connection string – primary key previously save from the Azure portal and past in the Azure IoT Connection property.  This typically begins with Endpoint=sb://.

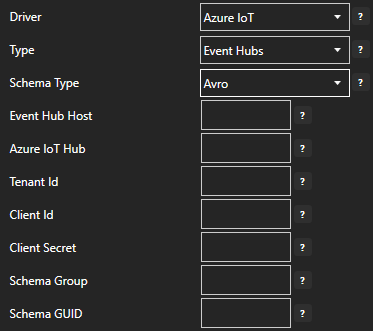
(Optional) Schema Type: Avro

Note: If Avro Schema is to be used for serialization the following connection properties are required instead of the Azure IoT Connection.

  • Event Hub Host
  • Tenant Id
  • Client Id
  • Client Secret
  • Schema Group
  • Schema GUID

Azure Event Hubs Schema Driver Properties

Set the Azure IoT Hub property to the Event Hub Name previously defined.

Step 5

To enable data buffering when communication failure occurs check Enable Store and Forward. Values will be stored in the directory specified under Configure >> Options >> Store and Forward.

Step 6

Optionally define a secondary failover Connection and Hub if the primary server fails with the property Enable Failover.

If both the primary and secondary servers are offline the Return to Online settings determines the retry frequency.

View Driver Interface Failover for more information and and video demonstrating communications failover.

Step 7

Click Add Driver on the top left.

Add Driver

Publish Live Data to your Azure IoT Hub.

There are 2 ways to publish data from OAS to Azure IoT Hub.  Both require Tags to be setup first for the data sources you want to transfer.

Option 1 – Publish Selected Tags to your Azure Event Hub.

View the following video for a complete demonstration of how to publish data to Azure IoT Data Hub.

  • 00:00 – Introduction
  • 00:23 – Set up Tags in OAS
  • 00:41 – Configure Azure IoT
  • 01:53 – Publish Selected Tags
  • 05:31 – Visual Studio Code
  • 08:00 – Step by step instructions
  • 08:12 – Bulk Publish to AWS IOT
  • 09:21 – Step by step instructions / Publish Data to AWS IOT Gateway
  • 09:33 – Bulk Publish to mqtt broker
  • 10:29 – MQTT Explorer
  • 11:20 – Step by step instructions/ Getting Started MQTT
  • 11:34 – Save button of the OAS Configuration tool

Step 1

Enable Publish Selected Tags at the bottom of the Driver configuration.

Step 2

Select to publish data continuously at a specified interval, based on event, or at a specific time of day.

IoT Publish Type

If Event Driven browse for a local or remote OAS tag that will trigger the publish.  Select a Boolean tag that will change state from false to true, true to false, or both.  Or choose an Integer tag that trigger a publish anytime the value changes other than 0.
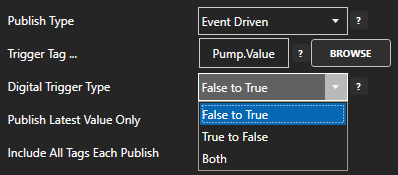
IoT Publish by Event

Step 3

Enable Publish Latest Value Only to send only the latest value of each tag when published or disable to send all value changes since the last time a publish occurred.

Enabled Include All Tags Each Publish to send at least the latest value of each tag when published or disable to only send the tags that have changed since the last publish.

Enable Publish All Tags As One Topic to publish all tag values as one topic or disable to send each tag as its own topic.

IoT Publish Options

See examples in Step 6 below for each selectable option.

Step 4

Specify the Publish Topic Id if choosing to Publish All Tags As One Topic.

Specify the Tag Id, Value Id, an optional Quality Id, and Timestamp Id for each tag value that is sent.
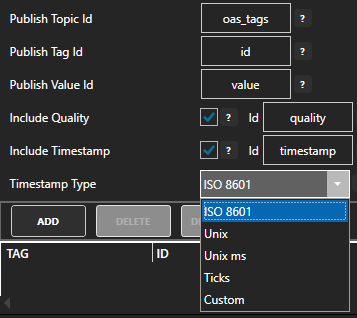
IoT Publish Ids

When including the Timestamp Id also specify the timestamp format, use Custom to specify your own date and time format.

Step 5

Specify local and remote OAS tag variables to include in each publish and specify the Id.  Value is the current value from the data source or you can select any of the over 600 tag variables of each tag to publish.

IoT Publish Tags

Optionally use CSV Export and CSV Import buttons to set up additional tags to publish using Microsoft Excel.

When selecting remote tags use Basic Networking syntax or Live Data Cloud syntax in the tag path.

Step 6

Select Apply Changes to begin publishing to Azure Event Hub.  Select Save to save the new driver configuration within the tag file.

Examples:

Examples of publishing every 2 seconds with each tag value changing every second:

IoT Publish Options

{

  “deviceId”: “OASIOT”,
  “topic”: “oas_tags”,
  “values”: [
    {
      “id”: “Ramp”,
      “value”: 39,
      “quality”: true,
      “timestamp”: “2022-03-21T08:55:39.000Z”
    },
    {
      “id”: “Sine”,
      “value”: 0.8090169943749475,
      “quality”: true,
      “timestamp”: “2022-03-21T08:55:39.000Z”
    },
    {
      “id”: “Random”,
      “value”: 10,
      “quality”: true,
      “timestamp”: “2022-03-21T08:55:39.000Z”
    }
  ]
}
 
IoT Publish All Value Chagnes

{

  “deviceId”: “OASIOT”,
  “topic”: “oas_tags”,
  “values”: [
    {
      “id”: “Ramp”,
      “value”: 16,
      “quality”: true,
      “timestamp”: “2022-03-21T09:03:36.000Z”
    },
    {
      “id”: “Sine”,
      “value”: 0.587785252292473,
      “quality”: true,
      “timestamp”: “2022-03-21T09:03:36.000Z”
    },
    {
      “id”: “Random”,
      “value”: 96,
      “quality”: true,
      “timestamp”: “2022-03-21T09:03:36.000Z”
    },
    {
      “id”: “Ramp”,
      “value”: 17,
      “quality”: true,
      “timestamp”: “2022-03-21T09:03:37.000Z”
    },
    {
      “id”: “Sine”,
      “value”: 0.6691306063588583,
      “quality”: true,
      “timestamp”: “2022-03-21T09:03:37.000Z”
    },
    {
      “id”: “Random”,
      “value”: 26,
      “quality”: true,
      “timestamp”: “2022-03-21T09:03:37.000Z”
    }
  ]
}
 
IoT Publish Tag Id Topics

{

  “deviceId”: “OASIOT”,
  “id”: “Ramp”,
  “value”: 35,
  “quality”: true,
  “timestamp”: “2022-03-21T09:07:15.000Z”
}
{
  “deviceId”: “OASIOT”,
  “id”: “Sine”,
  “value”: -1,
  “quality”: true,
  “timestamp”: “2022-03-21T09:07:15.000Z”
}
{
  “deviceId”: “OASIOT”,
  “id”: “Random”,
  “value”: 83,
  “quality”: true,
  “timestamp”: “2022-03-21T09:07:15.000Z”
}
 

Option 2 – Use Data Route to Send Data to Azure Event Hub

Step 1

Select Configure >> Tags from the top menu.

Step 2

Select your Network Node, either local or remote.
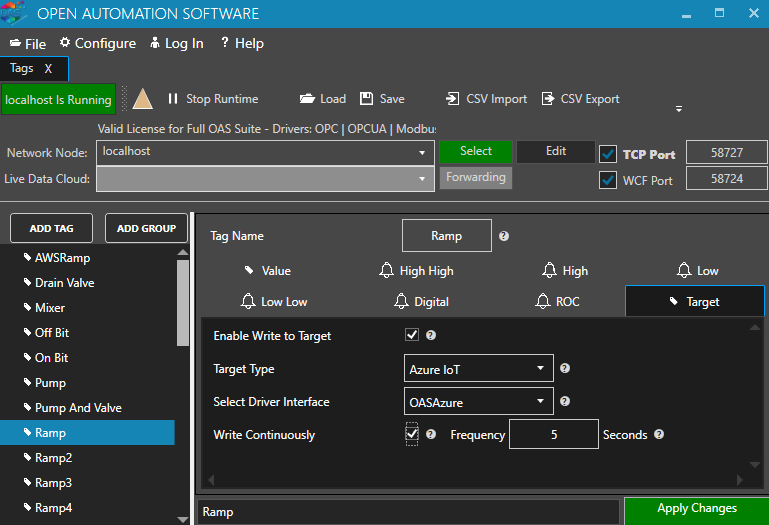
Step 2

From the demo tags select the Ramp Tag.

Step 3

Select the Target tab.

Step 4

Enable Write to target.

Step 5

Select the Azure IoT in the Target Type dropdown.

Step 6

Select the Driver interface you created.

Step 7

Apply the Changes and you should now be writing to your Event Hub.

Step 8

The message is formatted as follows.

{“deviceId”:”myFirstDevice”,”TagName”:”Ramp”,”Value”:66,”DataType”:”DoubleFloat”,”Quality”:true,”TimeStamp”:”2016-04-11T14:38:53.7125255″}

Use Visual Studio Code to Monitor Events.

Visual Studio Code can be used to monitor the events published to Azure Event Hubs.

Sign in to your Azure account and connect Visual Studio to your Azure account.

Visual Studio Code Azure Event Hubs Monitor

Select View-Command-Palette to select EventHub: Select Event Hub.

When prompted select your subscription, namespace, and Event Hub.

Select View-Command-Palette to select EventHub: Start Monitoring Event Hub Message.
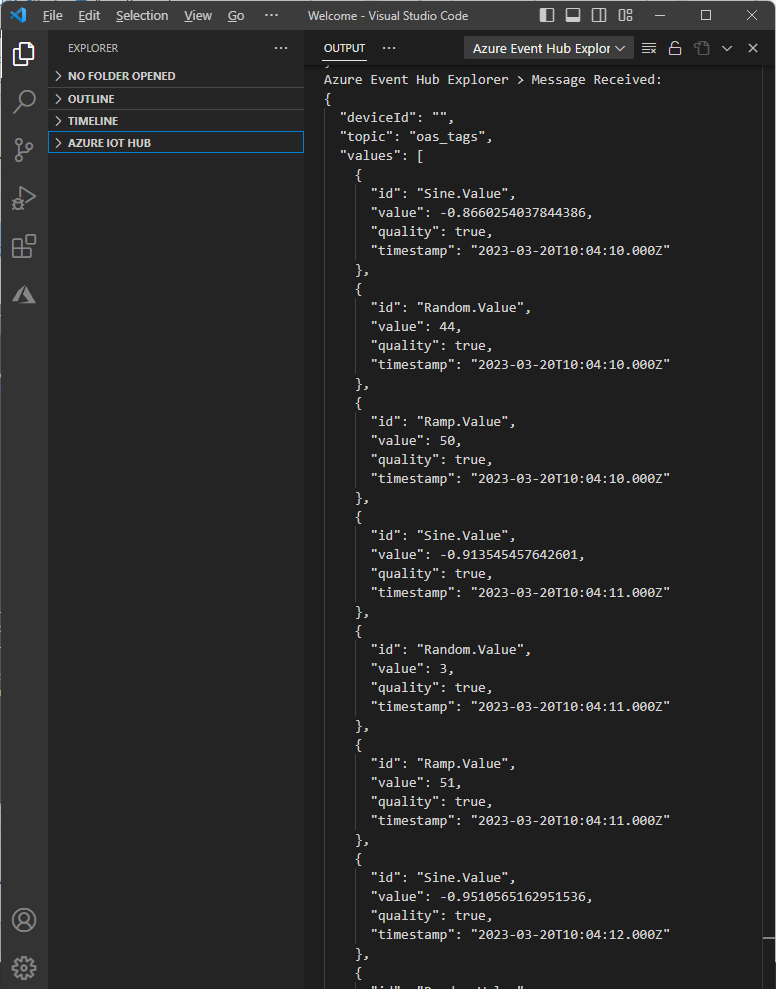
Azure Event Hub Data


Restrict Tag Access

Access to tag data and the ability to see what tags are available can be restricted by user authentication or prevent unauthorized access.  The Security features can be used to designate tag groups or individual tags per organization, customer, or designation on how you determine to allocate users in OAS.

Before proceeding first follow the steps in the Getting Started – Security guide to create an Admin user.

When adding tags to OAS organizing the tags in groups by area or organization will make the security restriction easy to designate tags that start with a character string.

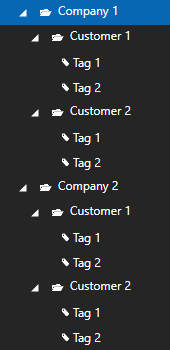
In the following steps we will use the example tag configuration demonstrate access to tags organized by company and customer.

Company-Customer-Tags

To restrict access to read, write, and browse tags use the Security group tab Tags, Read Tags, and Write Tags of the Default security group and allow access to the designated security group defined to each user.

Read Tags

Use Configure-Security to list all currently defined Security Groups.

Configure Security

Select the Default security group and uncheck Enable All Features.

Uncheck Enable All Features

Under the Read Tags tab check Disable All Tags From Reading.

Disable Read Tags

Note: This will prevent all applications including remote OAS Engines to receive live values from this OAS Engine.

You can optionally enable specific tags or tags start with a matching string for read access without authentication required.
Enable Read Tags

Select Apply Changes to update the Default security group.

Apply Changes

Next create security groups for customers, companies, administrators full access privileges.

The first example create a security group for Customer 1 of Company 1.

Change the Group Name property of the security group, the group name can be anything you like, we will use Company 1-Customer 1 in this example.

In the Read Tags tab leave Disable All Tags From Reading unchecked.

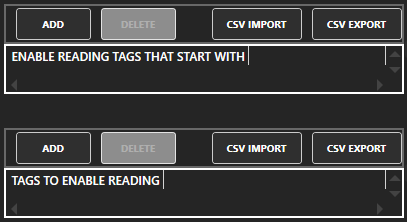
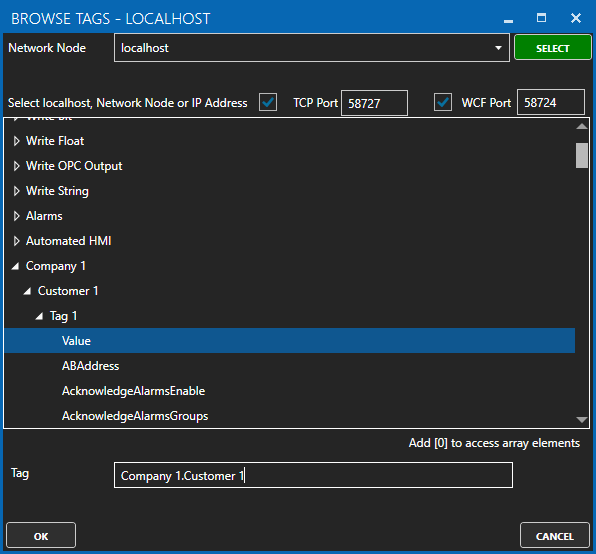
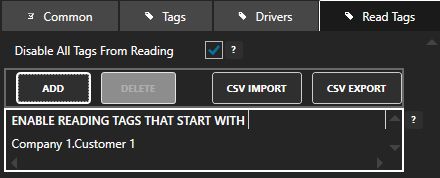
Select ADD in the list to Enable Reading Tags that Start With to browse for a tag within the Company 1.Customer 1 group and remove the tag portion of the string and select OK.

Browse Company Customer

This security group will allow read access to tags that start with Company 1.Customer 1.

Allow Read Tags Company and Customer

Note: If you wanted to provide company wide access to all customers set the string that starts with to Company 1.  If you want to provide read access to all tags in the configuration uncheck Disable All Tags From Reading.

You can also designate tags by complete name with the list Tags To Enable Reading.  This is a way to include specific tags within a tag group, but not all tags in the group.

Select Add Group.

Add Group

From the top menu select Configure-Users to define one or more users to the Company 1-Customer 1 group.

Configure Users

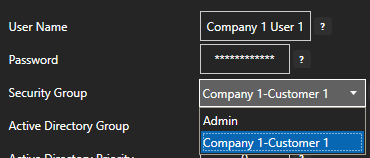
Enter a User Name and Password for the user that will have access to read tag from Company 1.Customer 1 tag group.

Use the Security Group pull down to select the security group you have defined for the Company 1.Customer 1 group.

Company Customer User

Select Add User.

Add User

Repeat the above steps for each customer in each company.

Note: To define multiple security groups and users you can use CSV Export / Import.

CSV Import and Export

Write Tags

To restrict write access to tags per user use the same steps above as listed for Read Tags and use the Write Tags tab of the security groups.

In the Default security group check Disable All Tags From Writing.

Disable Write Tags

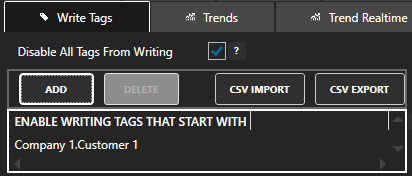
In each additional security group select ADD in the list to Enable Writing Tags that Start With to browse for a tag within the Company 1.Customer 1 group and remove the tag portion of the string and select OK.

This security group will allow write access to tags that start with Company 1.Customer 1.

Enable Write Tags

Note: If you wanted to provide company wide access to all customers set the string that starts with to Company 1.  If you want to provide write access to all tags in the configuration uncheck Disable All Tags From Writing.

You can also designate tags by complete name with the list Tags To Enable Writing.  This is a way to include specific tags within a tag group, but not all tags in the group.

Browse Tags

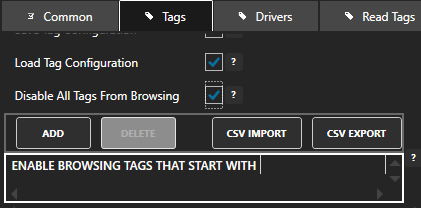
To restrict browse access to tags use the same steps above as listed for Read Tags and use the property Disable All Tags from Browsing in the Tags tab of the security groups.

Check Disable All Tags From Browsing in the Default security group in the Tags tab and select Apply Changes.

Disable Browsing

Select Apply Changes to update the Default security group.

Apply Changes

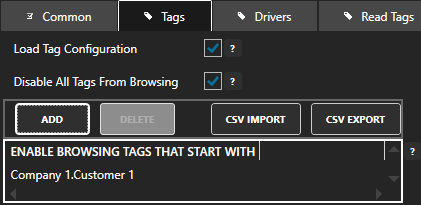
In each additional security group select ADD in the list to Enable Browsing Tags that Start With to browse for a tag within the Company 1.Customer 1 group and remove the tag portion of the string and select OK.

This security group will allow browse access to tags that start with Company 1.Customer 1.

Enable Browse

Note: If you wanted to provide company wide access to all customers set the string that starts with to Company 1.  If you want to provide browse access to all tags in the configuration uncheck Disable All Tags From Browsing.

View how to Implement User Credentials in Client Applications to provide log in method for each user.


Publish Data to AWS IoT Gateway

View the following video for a complete demonstration of how to publish data to AWS IoT Gateway, Azure IoT, and MQTT Brokers.

  • 00:00 – Introduction
  • 00:23 – Set up Tags in OAS
  • 00:41 – Configure Azure IoT
  • 01:53 – Publish Selected Tags
  • 05:31 – Visual Studio Code
  • 08:00 – Step by step instructions
  • 08:12 – Bulk Publish to AWS IOT
  • 09:21 – Step by step instructions / Publish Data to AWS IOT Gateway
  • 09:33 – Bulk Publish to mqtt broker
  • 10:29 – MQTT Explorer
  • 11:20 – Step by step instructions/ Getting Started MQTT
  • 11:34 – Save button of the OAS Configuration tool

Create an IoT Driver

Step 1

Open Configure OAS.

Step 2

Select Configure >> Drivers from the top menu.

Step 3

Select your Network Node, either local or remote.

Step 4

Enter the Driver Interface Name you wish to use.

Step 5

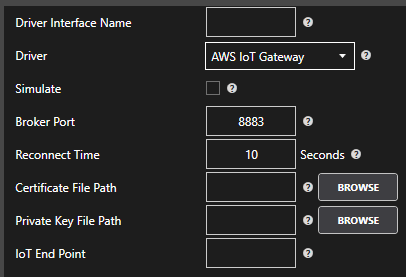
Select AWS IoT Gateway from the Driver combo box.

Use the Browse buttons to select you Certificate File Path and the Private Key File Path. These are created in your AWS Management Console.

Enter the IoT End Point. This is also found in your AWS Management Console.

AWS IoT Driver Configuration

If you would like to define a secondary AWS end point if the primary server fails, check Enable Failover checkbox and enter it’s physical properties. If both the primary and secondary servers are offline the Return to Online settings determines the retry frequency.

View Driver Interface Failover for more information and and video demonstrating communications failover.

Note: Data that is to be published to the AWS IoT Gateway can be buffered during network failures by setting the Enable Store and Forward property to true. Define the path for the buffer files under Configure-Options-Store and Forward.

Step 6

Click Add Driver on the top left.

Publish Live Data to AWS IoT Gateway.

There are 2 ways to publish data from OAS to AWS IoT Gateway.  Both require Tags to be setup first for the data sources you want to transfer.

Note: If you wish to receive data from AWS IoT Gateway see Getting Started – AWS IoT Gateway under the Data Sources.

Option 1 – Publish Selected Tags to AWS IoT Gateway.

Step 1

Enable Publish Selected Tags at the bottom of the Driver configuration.

Step 2

Select to publish data continuously at a specified interval, based on event, or at a specific time of day.

IoT Publish Type

If Event Driven browse for a local or remote OAS tag that will trigger the publish.  Select a Boolean tag that will change state from false to true, true to false, or both.  Or choose an Integer tag that trigger a publish anytime the value changes other than 0.

IoT Publish by Event

Step 3

Enable Publish Latest Value Only to send only the latest value of each tag when published or disable to send all value changes since the last time a publish occurred.

Enabled Include All Tags Each Publish to send at least the latest value of each tag when published or disable to only send the tags that have changed since the last publish.

Enable Publish All Tags As One Topic to publish all tag values as one topic or disable to send each tag as its own topic.

IoT Publish Options

See examples in Step 6 below for each selectable option.

Step 4

Specify the Publish Topic Id if choosing to Publish All Tags As One Topic.

Specify the Tag Id, Value Id, an optional Quality Id, and Timestamp Id for each tag value that is sent.

IoT Publish Ids

When including the Timestamp Id also specify the timestamp format, use Custom to specify your own date and time format.

Step 5

Specify local and remote OAS tag variables to include in each publish and specify the Id.  Value is the current value from the data source or you can select any of the over 600 tag variables of each tag to publish.

IoT Publish Tags

Optionally use CSV Export and CSV Import buttons to set up additional tags to publish using Microsoft Excel.

When selecting remote tags use Basic Networking syntax or Live Data Cloud syntax in the tag path.

Step 6

Select Apply Changes to begin publishing to AWS IoT Gateway.  Select Save to save the new driver configuration within the tag file.

Examples:

Examples of publishing every 2 seconds with each tag value changing every second:

IoT Publish Options

Topic: oas_tags
{
  “values”: [
    {
      “id”: “Ramp”,
      “value”: 39,
      “quality”: true,
      “timestamp”: “2022-03-21T08:55:39.000Z”
    },
    {
      “id”: “Sine”,
      “value”: 0.8090169943749475,
      “quality”: true,
      “timestamp”: “2022-03-21T08:55:39.000Z”
    },
    {
      “id”: “Random”,
      “value”: 10,
      “quality”: true,
      “timestamp”: “2022-03-21T08:55:39.000Z”
    }
  ]
}
IoT Publish All Value Chagnes
Topic: oas_tags
{
  “values”: [
    {
      “id”: “Ramp”,
      “value”: 16,
      “quality”: true,
      “timestamp”: “2022-03-21T09:03:36.000Z”
    },
    {
      “id”: “Sine”,
      “value”: 0.587785252292473,
      “quality”: true,
      “timestamp”: “2022-03-21T09:03:36.000Z”
    },
    {
      “id”: “Random”,
      “value”: 96,
      “quality”: true,
      “timestamp”: “2022-03-21T09:03:36.000Z”
    },
    {
      “id”: “Ramp”,
      “value”: 17,
      “quality”: true,
      “timestamp”: “2022-03-21T09:03:37.000Z”
    },
    {
      “id”: “Sine”,
      “value”: 0.6691306063588583,
      “quality”: true,
      “timestamp”: “2022-03-21T09:03:37.000Z”
    },
    {
      “id”: “Random”,
      “value”: 26,
      “quality”: true,
      “timestamp”: “2022-03-21T09:03:37.000Z”
    }
  ]
}
IoT Publish Tag Id Topics
Topic: Ramp
{
  “value”: 35,
  “quality”: true,
  “timestamp”: “2022-03-21T09:07:15.000Z”
}
Topic: Sine
{
  “value”: -1,
  “quality”: true,
  “timestamp”: “2022-03-21T09:07:15.000Z”
}
Topic: Random
{
  “value”: 83,
  “quality”: true,
  “timestamp”: “2022-03-21T09:07:15.000Z”
}

Option 2 – Use Data Route to send data to AWS IoT Gatway.

Step 1

See Getting Started – Data Route to define a Target tag in any source tag.

Getting Started – AWS IoT Gateway

View the following video for a complete demonstration of how to publish data to AWS IoT Gateway, Azure IoT, and MQTT Brokers.

The following steps can be used to setup direct driver communications with AWS.

Step 1

OASStart the Configure OAS application from the program group Open Automation Software.


Step 2

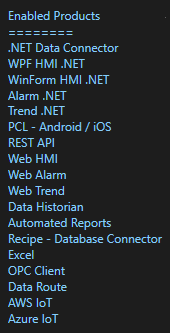
Select Configure-License from the top menu and verify that AWS IoT is listed under Enabled Products.  If not, contact support@oasiot.com to update your license.

Enabled Products

Note: You will need to be running Open Automation Software Version 10.0.0.22 or greater to support AWS communications.  You can download the latest version at www.openautomationsoftware.com/downloads/open-automation-software/

Step 3

Select Configure-Drivers.

Configure Drivers

Step 4

Select localhost or the remote service you wish to modify with the Select button to the right of the Network Node list.  Optionally select the Live Data Cloud node if you are hosting AWS data over the Internet with a standard Internet connection.

Step 5

Enter a meaningful Driver Interface Name that you use to to refer to this physical connection when defining Tags with an AWS Source.

Note: You may need to Set Default Network Adapter for Driver Interfaces of the operating system.

Set the Driver dropdown to AWS IoT Gateway. The default Broker Port is 8883.

Use the Browse buttons to select you Certificate File Path and the Private Key File Path. These are created in your AWS Management Console.

Enter the IoT End Point. This is also found in your AWS Management Console.

AWS IoT Driver Configuration

If you would like to define a secondary AWS end point if the primary server fails, check Enable Failover checkbox and enter it’s physical properties. If both the primary and secondary servers are offline the Return to Online settings determines the retry frequency.

View Driver Interface Failover for more information and and video demonstrating communications failover.

Note: Data that is to be published to the AWS IoT Gateway can be buffered during network failures by setting the Enable Store and Forward property to true. Define the path for the buffer files under Configure-Options-Store and Forward.

Step 6

Select the Add button in the lower part of the form to add the Driver Interface as an available selection when defining Tags in the next step.

Add Driver

Note: If you need to define several Driver Interfaces you can use the CSV Export and CSV Import on the toolbar in the upper right together with Microsoft Excel.

To publish data to AWS IoT Gateway see Getting Started – Publish Data to AWS IoT Gateway.

Follow the steps below to read data from AWS IoT Gateway.

Step 7

Select Configure-Tags.

Configure Tags

Select localhost or the remote service you wish to modify with the Select button to the right of the Network Node list.

Save

Note: Optionally select the Live Data Cloud node if you are hosting AWS data over the Internet with a standard Internet connection.

Step 8

Select to Add a Tag.

Note: You can also add organizational Groups as many levels deep as you prefer and add tags to groups.  To do this first add a Group to the Tags Group at the root level, then right click on the Group in the right window to add additional Groups or Tags.

Add Group

Step 9

Set the appropriate Data Type.
Note: if you will be receiving data from your Thing set the Data Type to String otherwise set the Data Type to the desired data type.

Step 10

Change the Data Source Tag property to AWSIoTGateway.

AWS Data Source

Step 11

Select the correct Driver Interface from the Driver Interface pull down list.

ASW Driver

Step 12

Enter the Topic.

Getting Started MQTT 5

Topic

Step 13

Set the Topic Timeout – 0 = Topic will never timeout. Any number greater than 0 will cause the data to be Bad Data Quality if the broker does not publish within the time frame specified.

AWS Topic Timeout

Step 14

Select to include Timestamp and or Data Quality to the topic.

This will publish to the specified topic above OAS/Items Sent/Timestamp  and or OAS/ItemsSent/Quality.

AWS Settings

Step 15

To define multiple tags use the CSV Export and CSV Import on the toolbar in the upper right together with Microsoft Excel.

Note: You can also programmatically define Tags using the free to use OPC Systems component as demonstrated in the Form FormConfigureCSV in the WinForm Example Code application that installs with Open Automation Software in the Program Group Open Automation Software.  This component can be used in any .NET application includes Web Services, Windows Services, WPF Applications, and ASP.NET or .NET MVC Web Applications.

Step 16

Select the Save button on the toolbar at the top.

Save

Step 17

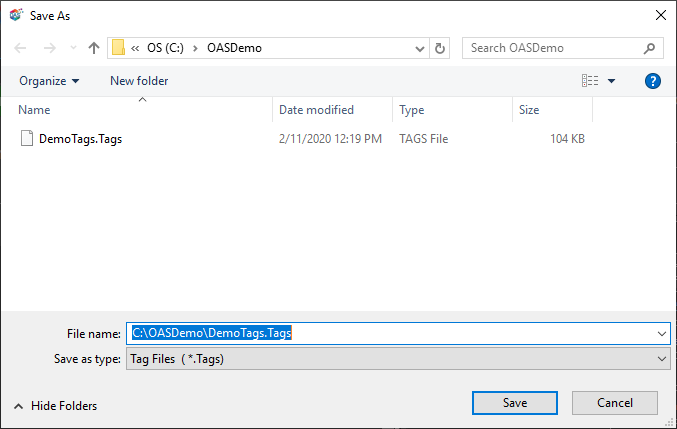
Create a directory on the local C: drive with the name OASDemo.

Save the file DemoTags.tags in the directory C:\OASDemo\.

Save Tags

Step 18

Under Configure – Options set the Default Tag Configuration File so when the computer restarts the tag file will automatically be loaded.

Review the Data Route product feature to move data from another tag to AWS

Getting Started Raspberry Pi GPIO

The Open Automation Software platform has a built in communication driver for General Purpose Input / Output when deployed on a Raspberry Pi 4.  Tags can be defined to read or write to GPIO pins.

You can view the OAS GPIO Setup Video to familiarize yourself with the following steps to setup GPIO communications on your Raspberry Pi 4.

  • 00:00 – Introduction
  • 00:11 – GPIO Driver
  • 00:16 – Written tutorial
  • 00:28 – Download and Install OAS on the Raspberry Pi
  • 00:53 – OAS for Linux Download
  • 01:06 – Set Up Access to the GPIO Driver
  • 01:48 – Reboot the System
  • 01:55 – Configure the Pins
  • 03:05 – Configure more tags options
  • 03:32 – Knowledge Base
  • 03:45 – Save changes to tag configuration
  • 04:24 – Transfer data
  • 05:07 – Learn More

The following steps can be used to setup communications with the GPIO pins.

Step 1 – Installation

Download and install OAS onto Raspberry Pi 4 device.  View the Raspberry Pi Installation guide for an easy to following video instructions or use the Linux Installation guide for step by step instructions to use the simple install script.

Step 2 – Set Access Level

Setup access to gpiomem for the user account the OASEngine is running under.  The default is oasuser.

This is achieved by adding a rules file to etc/udev/rules.d/.

Log in to the root account and change directory to etc/udev/rules.d/.

ssh ubuntu@<ip address of Raspberry Pi>
cd /etc/udev/rules.d/

Create a file oas-gpio.rules with an editor with the following contents, then save the file.

SUBSYSTEM=="gpio*", PROGRAM="/bin/sh -c 'chown -R root:oasuser /dev/gpiomem && chmod -R 660 /dev/gpiomem'"

To create and edit the file you can use nano.

sudo nano oas-gpio.rules

Reboot the system.

sudo reboot

Step 3 – Configure Tags

OAS

From a Windows system start Configure OAS application from the program group Open Automation Software.

Select Configure-Tags.

Menu Configure Tags

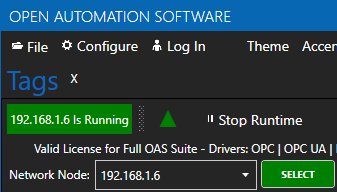
Enter the IP Address of the Raspberry Pi device and click Select.

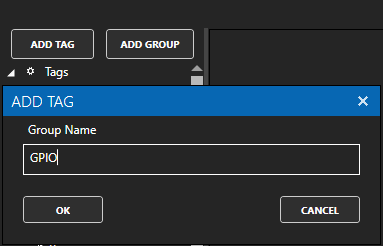
Select ADD GROUP to add the group GPIO and click OK.  The group name can be anything you like, in this example it will be GPIO.

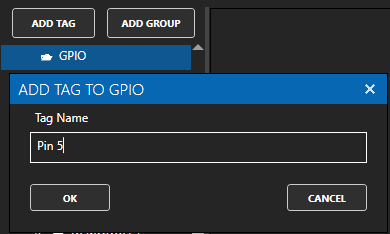
With the GPIO group selected click on ADD TAG to a tag with the name Pin 5.  The tag name can be anything you desire.  In this example we are assigning to GPIO Pin 5 so we will name it Pin 5.

Change the Data Type of the tag to Boolean.

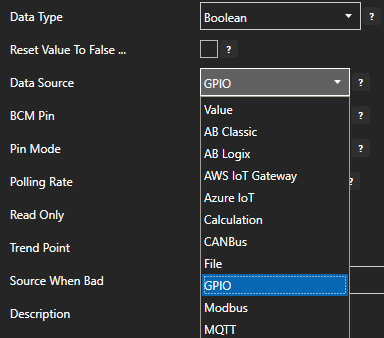
Change Data Source Tag property to GPIO.

Set the Pin Mode to one of the following.

Input: Read Only – Configures the GPIO pin in floating mode, with high impedance.
InputPullDown: Read Only – Configures the GPIO pin as high impedance with a pull-down resistor to ground.
InputPullUp: Read Only – Configures the GPIO pin as high impedance with a pull-up resistor to the voltage charge connection (VCC).
Output: Write Only – Configures the GPIO pin in strong drive mode, with low impedance.

Note: A pin cannot be set to both Input and Output.  Inputs are read only.  Outputs are write only.

When defining the pin as an input set the desired Polling Rate for the update speed.

Select Apply Changes to activate the pin communications.

Apply Changes

To define multiple tags use the CSV Export and CSV Import on the toolbar in the upper right together with Microsoft Excel.

CSV Import and Export

NOTE: Tags can also be programmatically assigned with the OAS REST API or .NET Server Configuration interface.

Step 4 – Save GPIO Tags

Select the Save button on the toolbar at the top.

Load and Save

Enter a file name to be saved in C:\ProgramData\OpenAutomationSoftware\ConfigFiles directory on Windows or ConfigFiles subdirectory on Linux.

When prompted to set the file as the default configuration to load on startup select Yes.

Set Default Tag File

The tags defined are now ready for use in all OAS features like Data Logging, Data Route, and Open UIEngine.

Getting Started – Node Red

OAS provides a simple and easily interface to move data between Allen Bradley, Siemens, Modbus, OPC UA/DA Servers, Databases, .Net applications and Node Red.

For a complete list of  Data Sources and Data Destinations that the OAS MQTT Broker interfaces  with, see the links below:

The video below is a complete tutorial on creating a Node Red Flow and Dashboard utilizing the OAS MQTT Broker:

  • 0:00 – How to Integrate the OAS MQTT Broker with Node Red
  • 0:52 – Node Red Dashboard installing instructions
  • 1:14 – Network Section
  • 1:22 – OAS as an MQTT Broker
  • 2:44 – Add Debug Node to the flow and connect to OAS MQTT in node
  • 3:05 – Standard JSON Format
  • 3:15 – Separate the message out into individual values
  • 5:16 – Level Displayed in Real Time
  • 5:28 – Write Back to OAS
  • 5:52 – Pull an MQTT out Node onto the flow to write back to OAS
  • 6:18 – Dashboard Automatically Updates
  • 6:22 – Pump Tag
  • 7:09 – More Information

Step 1

Set up the OAS MQTT Broker: /data-destinations/mqtt-broker/mqtt-broker/.

Step 2

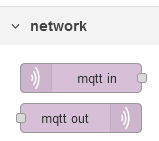
Open the Node Red Editor and start a new flow.  To read data from the OAS MQTT broker pull an MQTT In icon out onto the flow. To write data to the MQTT Broker pull an MQTT Out icon out onto the flow. 

Step 3

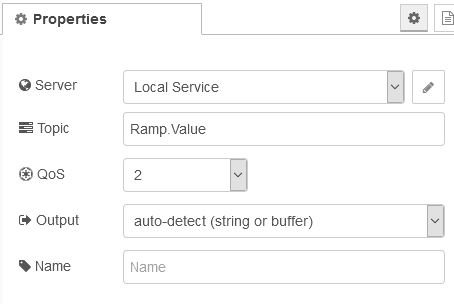
Double-click the MQTT In or MQTT Out node to bring up the properties window.  Select Add new mqtt-broker from the Server dropdown and then click the pencil icon next to it.

In the server properties box, enter the OAS MQTT Broker Name and IP address. You can add a Client ID or leave it blank to auto generate an ID. Select Update when complete.

Step 4

You are now back to the MQTT Node.

Select the server you created in Step 3.

Enter an OAS Tag as the Topic and select a parsed JSON object as the output.

To access OAS tags set your topic to the OAS standard naming convention. A few examples below.


  • Read the value from the Ramp tag on the local OAS service. Topic = Ramp.Value
  • Read the Description from the Ramp tag on the local OAS Service. Topic = Ramp.Description
  • Read the value of Alarms Not Acked tag in the subgroup Alarms on the local OAS service. Topic = Alarms.Active Not Acked.Value


Read the value of the Ramp tag from a remote OAS service. Topic = \Domain or IP address\Ramp.Value

Basic Networking:

\\192.168.0.1\Ramp.Value

Live Data Cloud Networking from local OAS Engine:

RemoteSCADAHosting.myLiveDataCloudNode.Ramp.Value

Live Data Cloud Networking through remote OAS Engine:

\\192.168.0.1\RemoteSCADAHosting.myLiveDataCloudNode.Ramp.Value

For more information on Tag naming conventions, please see the Tag Variables section of the Knowledge Base.

Step 5

OAS sends tag data in a standard JSON format that includes the value, time stamp and data quality.

A sample message is below.

Example Payload for Ramp.Value: {“Value”:84.0,”TimeStamp”:”2020-07-22T12:59:44-04:00″,”Quality”:true}

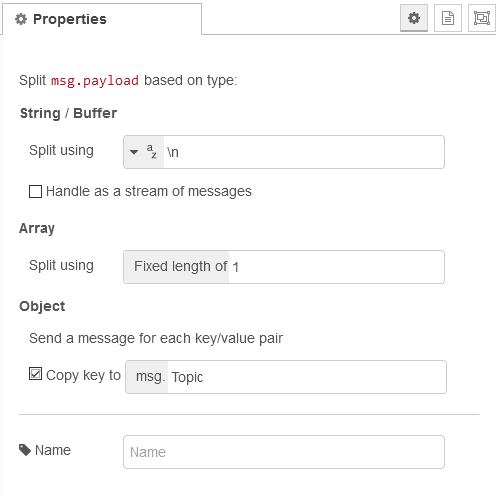
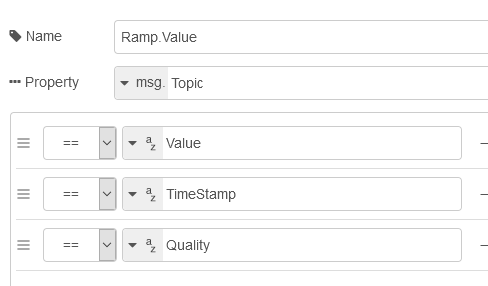
To segregate the payload in to separate messages add a split node to your project.

Check the Copy key to box and change it to msg.Topic as shown below.

Step 6

Now that you have separate messages add a switch node to access each message or the specific messages you want.

A complete Node Red Flow can be downloaded here.

MQTT Broker

OAS is both a MQTT Client and MQTT Broker.

To interface with another MQTT Broker please see the Getting Started MQTT guide.

To send and receive data to a Sparkplug B Edge of Network Nodes see the Getting Started Sparkplug B Host App guide.

To enable OAS as a Sparkplug B EoN Node to interface with Host and Client Applications see the Getting Started Sparkplug B EoN Node guide.

The Open Automation Software MQTT Broker is built into the OAS Engine which can be deployed on both Windows and Linux operating systems.  MQTT Broker support was added to OAS version 15.00.0001 and does require a license of the MQTT driver to enable read and write functionality.

The OAS MQTT Broker supports reading, and writing to all local and remote OAS Tags, including Live Data Cloud.

You can view the MQTT Broker Video to familiarize yourself with the following steps to interface with local and remote OAS Tags.

  • 0:00 – Introduction – OAS as MQTT Broker
  • 0:15 – OAS as MQTT Client and MQTT Broker
  • 0:20 – MQTT Client
  • 0:40 – MQTT Protocol
  • 0:44 – What’s MQTT Broker
  • 0:58 – Where is built MQTT Broker
  • 1:07 – What MQTT Broker support and requires
  • 1:29 – How to Interface MQTT Client with OAS as an MQTT Broker
  • 1:41 – How to verify if you have a valid license for MQTT
  • 2:07 – Set up OAS as a MQTT Broker
  • 3:23 – Set up to Subscribe to OAS MQTT Broker
  • 5:54 – Sending a JSON message to the OAS MQTT Broker from MQTT Client
  • 7:08 – More information

The following guide demonstrates how to interface an MQTT Client with OAS as a MQTT Broker.

Step 1

After installing Open Automation Software the verify you have a license of MQTT on OAS Engine that the MQTT Client will connect with.

Use the Configure OAS application and go to Configure-License and use Select to check the OAS Engine that MQTT appears in the Enabled Drivers list.

Drivers

Step 2

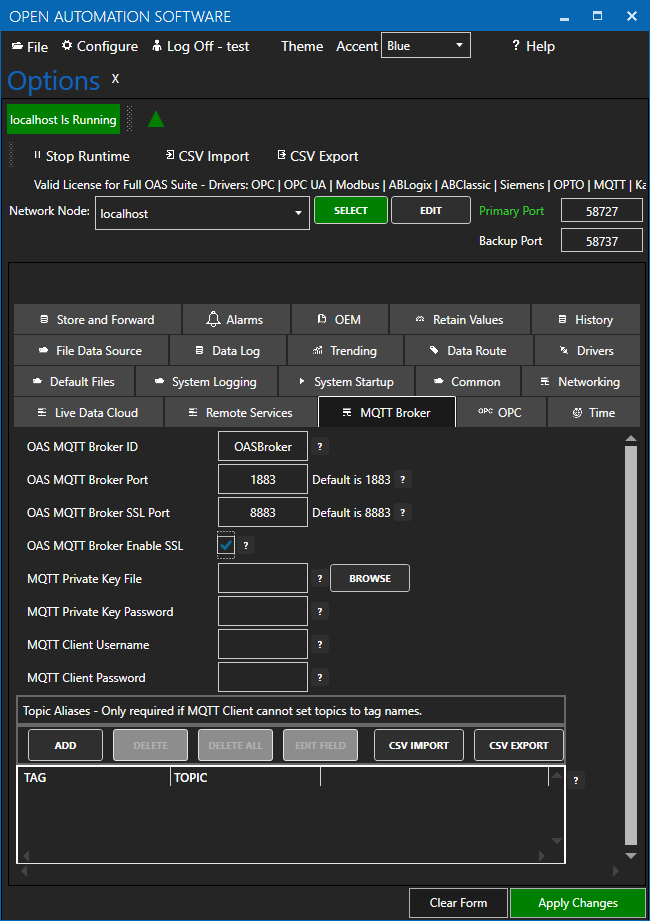
To setup the OAS MQTT Broker go to Configure-Options and select the MQTT Broker tab.

MQTT Broker Options

  • Enter the ID you want to use for the OAS Broker in the OAS MQTT Broker field.
  • Choose either the default broker port (1883) or enter a new port into the OAS MQTT Broker Port field.
  • For SSL/TLS, choose either the default broker SSL port (8883) or enter a new port into the OAS MQTT Broker SSL Port field.
  • If you want to use SSL/TLS, Check the box for OAS MQTT Broker Enable SSL.
    • In the MQTT Private Key File field select Browse and select your private key file.
    • If you have a password assigned to the private key enter it into the MQTT Private Key Password field.
  • Enter the username in the MQTT Client Username field to require MQTT Clients to connect using a specific username.
  • Enter the password in the MQTT Client Password field to require MQTT Clients to connect using a specific password.
  • Optionally enter Topic Aliases to map topic names to OAS tag names.  This is only required if the MQTT client cannot define the topics to interface with.

Step 3

If security is left to the Default to Enable All Features in all OAS Engines you can proceed to Step 4.

If Security has been setup on any of the OAS Engines to restrict Reading Tags or Writing Tags go to Configure-Options and select the Remote Services tab.

OAS Service User

Set the Security User Name and Security Password to user to gain access to the remote OAS Engine for read and write access to the tags to be monitored and set by the MQTT Broker.

Step 4

The OAS MQTT Broker is now ready for use.

Naming Conventions

To access OAS tags set your topic to the OAS standard naming convention. A few examples below.

  • Read the value from the Ramp tag on the local OAS service. Topic = Ramp.Value
  • Read the Description from the Ramp tag on the local OAS Service. Topic = Ramp.Description
  • Read the value of Alarms Not Acked tag in the subgroup Alarms on the local OAS service. Topic = Alarms.Active Not Acked.Value
  • Read the value of the Ramp tag from a remote OAS service. Topic = \\Domain or IP address\Ramp.Value

Basic Networking:

\\192.168.0.1\TagName.Value

Live Data Cloud Networking from local OAS Engine:

RemoteSCADAHosting.myLiveDataCloudNode.TagName.Value

Live Data Cloud Networking through remote OAS Engine:

\\192.168.0.1\RemoteSCADAHosting.myLiveDataCloudNode.TagName.Value

The payload is in standard JSON format and includes the Value, Timestamp, and Quality.

Example Payload for Ramp.Value: {“Value”:84.0,”TimeStamp”:”2020-07-22T12:59:44-04:00″,”Quality”:true}

To Write to an OAS Tag use the same topic format as described above.

You can publish to any existing Tag.

You can create tags with the Data Type set to JSON in OAS to be able to publish extended meta data on OAS Tags. Using the JSON Handling in OAS you can parse the JSON message for extended functionality.

Wildcards

The following wildcards are supported with OAS version 18.00.0041 or greater.

  • # – Subscribe to all tags from the OAS Engine for the .Value variable of each tag.
  • +/<tag variable> – Subscribe to all tags from the OAS Engine for the tag variable specified.  Example: +/DigitalAlarmActive

Deployment

You can deploy the OAS Engine to multiple servers on Windows or Linux using standard deployment or Docker containerized deployment, each OAS MQTT Broker supports communications to any OAS Engine.