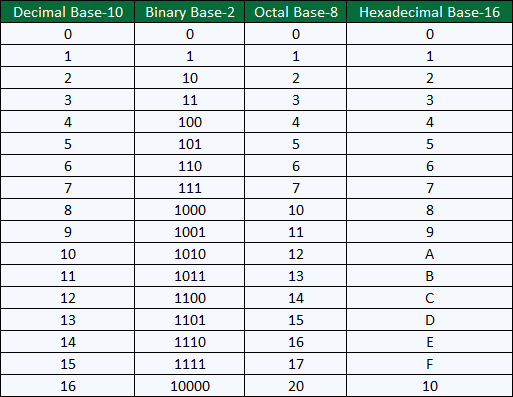
How Do I Address AB Classic Output Registers?
Please use the chart below for conversion.
Please use the chart below for conversion.
Please use the chart below for conversion.
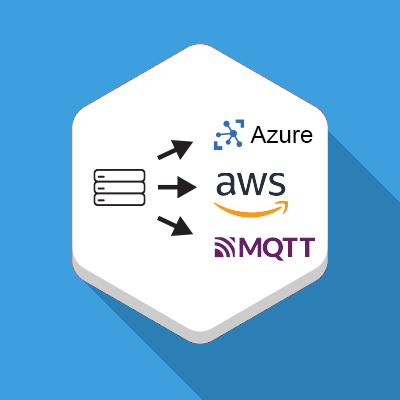

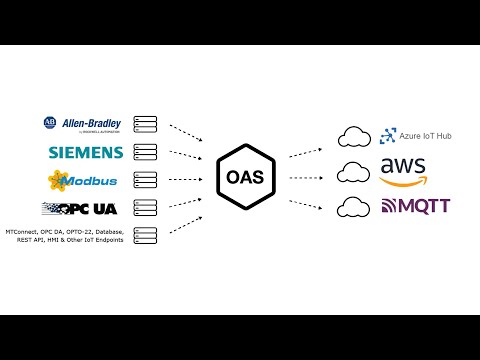
With Open Automation’s IoT Publish you can configure tags from a single or multiple data sources in OAS and publish them to Azure IoT, AWS IoT Gateway or an MQTT Broker. Tags can be published to a single topic or to multiple topics (one for each tag). Publishes can be scheduled to happen at a certain time of day, be event driven with a trigger tag and can also be continuous. The configurable publish interval setting allows you to publish at a specified rate.
Data is sent to Azure, AWS or MQTT as JSON packets which include device id, topic, tag id, quality and timestamp. Options are available to change the key names and to send without quality and/or timestamp. Timestamp can be formatted in ISO 8601, Unix seconds or milliseconds, Ticks or you can customize your own. Additional options are available to publish the latest value only and to include all tags in each publish or only those whose value has changed.
The Store and Forward feature of OAS can be turned on to prevent data loss in case of communication failure. If a communication failure occurs, OAS will buffer the data on your hard drive in the directory that you specify until communication is restored. Then it parses the data out to your destination.
For step by step instructions for the IoT Publish, watch the video below:
Supported Data Sources
| Publish All Values as One Topic | Publish Latest Value Only as One Topic | Publish Each Tag as a Separate Topic |
|
{ “deviceId”: “OASIOT”, “topic”: “oas_tags”, “values”: [ { “id”: “Ramp”, “value”: 16, “quality”: true, “timestamp”: “2022-03-21T09:03:36.000Z” }, { “id”: “Sine”, “value”: 0.587785252292473, “quality”: true, “timestamp”: “2022-03-21T09:03:36.000Z” }, { “id”: “Random”, “value”: 96, “quality”: true, “timestamp”: “2022-03-21T09:03:36.000Z” }, { “id”: “Ramp”, “value”: 17, “quality”: true, “timestamp”: “2022-03-21T09:03:37.000Z” }, { “id”: “Sine”, “value”: 0.6691306063588583, “quality”: true, “timestamp”: “2022-03-21T09:03:37.000Z” }, { “id”: “Random”, “value”: 26, “quality”: true, “timestamp”: “2022-03-21T09:03:37.000Z” } ] } |
{ “deviceId”: “OASIOT”, “topic”: “oas_tags”, “values”: [ { “id”: “Ramp”, “value”: 39, “quality”: true, “timestamp”: “2022-03-21T08:55:39.000Z” }, { “id”: “Sine”, “value”: 0.8090169943749475, “quality”: true, “timestamp”: “2022-03-21T08:55:39.000Z” }, { “id”: “Random”, “value”: 10, “quality”: true, “timestamp”: “2022-03-21T08:55:39.000Z” } ] } |
{ “deviceId”: “OASIOT”, “id”: “Ramp”, “value”: 35, “quality”: true, “timestamp”: “2022-03-21T09:07:15.000Z” } { “deviceId”: “OASIOT”, “id”: “Sine”, “value”: -1, “quality”: true, “timestamp”: “2022-03-21T09:07:15.000Z” } { “deviceId”: “OASIOT”, “id”: “Random”, “value”: 83, “quality”: true, “timestamp”: “2022-03-21T09:07:15.000Z” } |


Open Automation Software Tags can be defined to interface with AWS IoT Gateway with the built in AWS IoT Gateway Driver Interface. This tutorial walks you though downloading and installing OAS, configuring an AWS IoT Gateway driver, configuring tags and storing them as JSON packets. You may want to start by reading our What is JSON article.
If you have not already done so, you will need to download and install the OAS platform. Fully functional trial versions of the software are available for Windows, Windows IoT Core, Linux, Raspberry Pi and Docker on our downloads page.
On Windows run the downloaded Setup.exe file to install one or more of the Open Automation Software features. Select the default Typical installation if you are not sure what features to use or the Custom installation if you want to save disk space on the target system. When prompted agree to the End User License Agreement to continue the installation.
For more detailed instructions and video tutorials, visit the installation guide for your system:
Windows Installation | Linux Installation | Raspberry Pi Installation | Dockers Installation
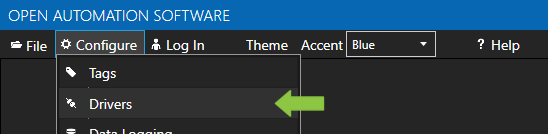
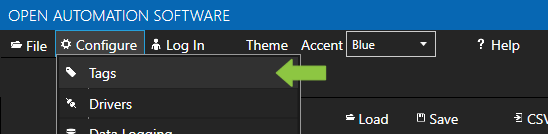
The OAS Service Control application will appear when the installation finishes on Windows. Use this application to start the 3 Services. Run the Configure OAS application on Windows and select Configure-Tags; if the first time running, the AdminCreate utility will run to create an Administrator login as shown in Step 1 of Getting Started – Security.

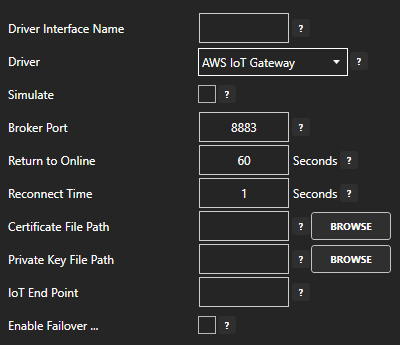
For more detailed instructions on configuring your AWS IoT Gateway data source, click here to see our Getting Started AWS IoT Gateway tutorial.
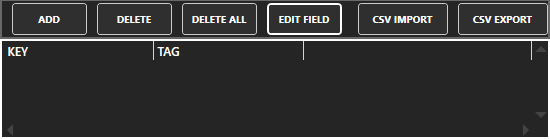
To add a Tag manually:


For more detailed instructions on configuring your tags, click here to see our Getting Started Tags tutorial.
Create a new tag and set it’s Data Type and Data Source to JSON. Click Ok.

Click the Edit Value button next to the Structure input field.

Enter in your JSON structure.
{
"pump": false,
"tanks": [
{
"room": 1,
"level": null,
"flowrate": null,
},
{
"room": 2,
"level": null,
"flowrate": null,
}
]
}
Click the Add button.
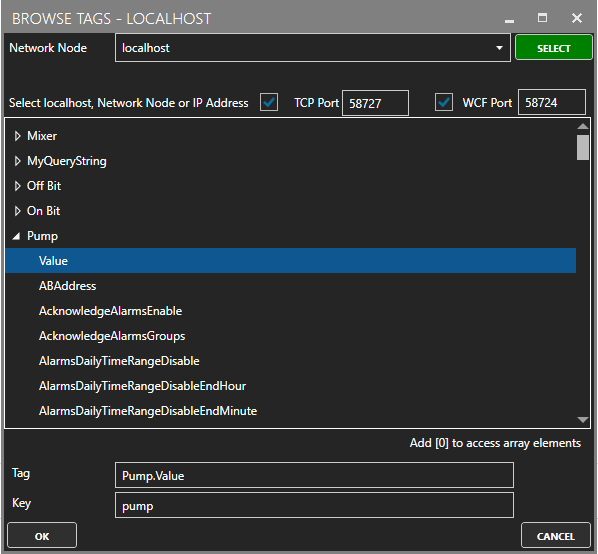
The tag browser will open. Select your Network Node. Select the tag and it’s property that you want to fill your key/value pair with. In the Key field enter the key you want to reference. Do this for each key/value pair that you want to fill.
After you are done adding your tags, your results will look like:

Click Apply Changes.
For more detailed instructions, see the JSON Data Source article in our knowledge base.

Open Automation Software Tags can be defined to connect to OPC UA Servers with the built in OPC UA Driver Interface. This tutorial walks you though downloading and installing OAS, configuring an OPC UA driver, configuring tags and storing them as JSON packets. You may want to start by reading our What is JSON article.
If you have not already done so, you will need to download and install the OAS platform. Fully functional trial versions of the software are available for Windows, Windows IoT Core, Linux, Raspberry Pi and Docker on our downloads page.
On Windows run the downloaded Setup.exe file to install one or more of the Open Automation Software features. Select the default Typical installation if you are not sure what features to use or the Custom installation if you want to save disk space on the target system. When prompted agree to the End User License Agreement to continue the installation.
For more detailed instructions and video tutorials, visit the installation guide for your system:
Windows Installation | Linux Installation | Raspberry Pi Installation | Dockers Installation
The OAS Service Control application will appear when the installation finishes on Windows. Use this application to start the 3 Services. Run the Configure OAS application on Windows and select Configure-Tags; if the first time running, the AdminCreate utility will run to create an Administrator login as shown in Step 1 of Getting Started – Security.
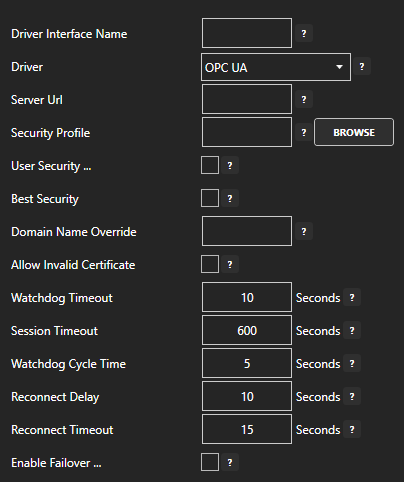
For more detailed instructions on configuring your OPC DA data source, click here to see our Getting Started OPC UA tutorial.
To add a Tag manually:
For more detailed instructions on configuring your tags, click here to see our Getting Started Tags tutorial.
Create a new tag and set it’s Data Type and Data Source to JSON. Click Ok.
Click the Edit Value button next to the Structure input field.
Enter in your JSON structure.
{
"pump": false,
"tanks": [
{
"room": 1,
"level": null,
"flowrate": null,
},
{
"room": 2,
"level": null,
"flowrate": null,
}
]
}
Click the Add button.
The tag browser will open. Select your Network Node. Select the tag and it’s property that you want to fill your key/value pair with. In the Key field enter the key you want to reference. Do this for each key/value pair that you want to fill.
After you are done adding your tags, your results will look like:
Click Apply Changes.
For more detailed instructions, see the JSON Data Source article in our knowledge base.

Open Automation Software Tags can be defined to connect to Classic OPC Data Access 2.xx and 3.0 Servers with the built in OPC Interface. This tutorial walks you though downloading and installing OAS, configuring tags from your OPC Server and and storing them as JSON packets. You may want to start by reading our What is JSON article.
If you have not already done so, you will need to download and install the OAS platform. Fully functional trial versions of the software are available for Windows, Windows IoT Core, Linux, Raspberry Pi and Docker on our downloads page.
On Windows run the downloaded Setup.exe file to install one or more of the Open Automation Software features. Select the default Typical installation if you are not sure what features to use or the Custom installation if you want to save disk space on the target system. When prompted agree to the End User License Agreement to continue the installation.
For more detailed instructions and video tutorials, visit the installation guide for your system:
Windows Installation | Linux Installation | Raspberry Pi Installation | Dockers Installation
The OAS Service Control application will appear when the installation finishes on Windows. Use this application to start the 3 Services. Run the Configure OAS application on Windows and select Configure-Tags; if the first time running, the AdminCreate utility will run to create an Administrator login as shown in Step 1 of Getting Started – Security.


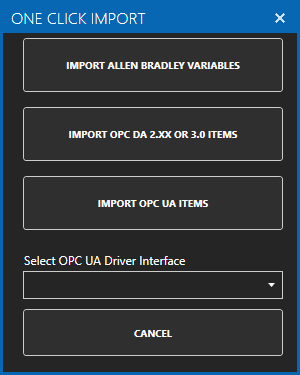
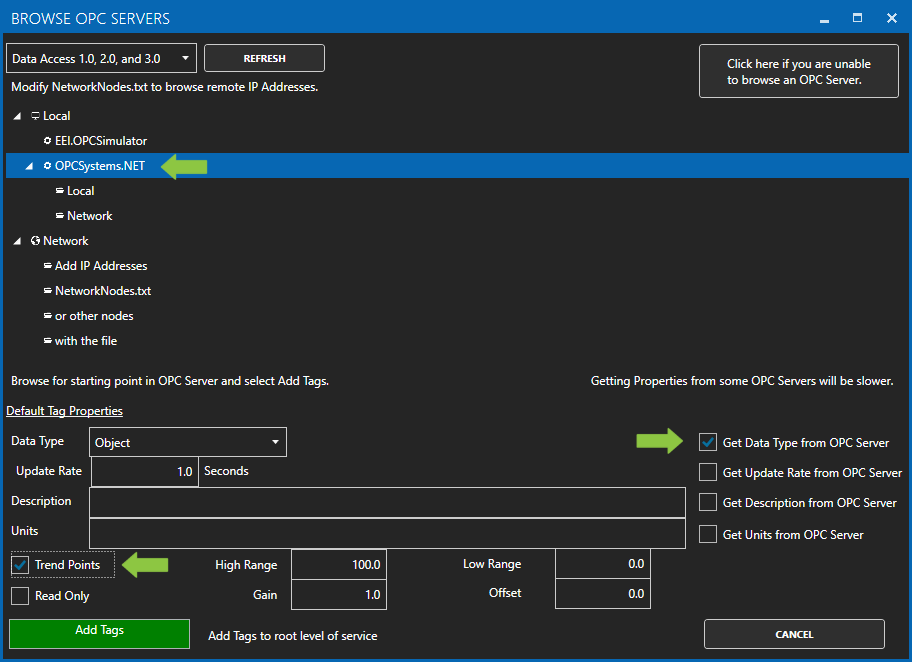
For more detailed instructions on Configuring OPC Server Tags, visit our Getting Started OPC tutorial or the One Click OPC tutorial or watch the video tutorial below:
Create a new tag and set it’s Data Type and Data Source to JSON. Click Ok.
Click the Edit Value button next to the Structure input field.
Enter in your JSON structure.
{
"pump": false,
"tanks": [
{
"room": 1,
"level": null,
"flowrate": null,
},
{
"room": 2,
"level": null,
"flowrate": null,
}
]
}
Click the Add button.
The tag browser will open. Select your Network Node. Select the tag and it’s property that you want to fill your key/value pair with. In the Key field enter the key you want to reference. Do this for each key/value pair that you want to fill.
After you are done adding your tags, your results will look like:
Click Apply Changes.
For more detailed instructions, see the JSON Data Source article in our knowledge base.

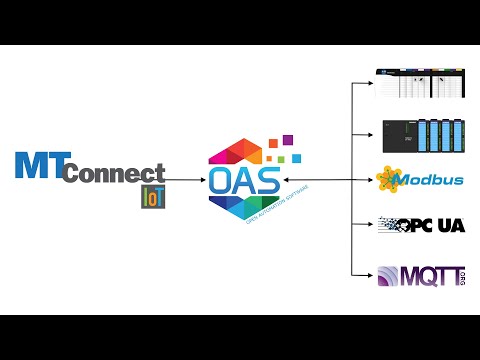
Open Automation Software Tags can be defined to connect to MTConnect Servers with the built in MTConnect Driver Interface. This tutorial walks you though downloading and installing OAS, configuring an MTConnect driver, configuring tags and storing them as JSON packets. You may want to start by reading our What is JSON article.
If you have not already done so, you will need to download and install the OAS platform. Fully functional trial versions of the software are available for Windows, Windows IoT Core, Linux, Raspberry Pi and Docker on our downloads page.
On Windows run the downloaded Setup.exe file to install one or more of the Open Automation Software features. Select the default Typical installation if you are not sure what features to use or the Custom installation if you want to save disk space on the target system. When prompted agree to the End User License Agreement to continue the installation.
For more detailed instructions and video tutorials, visit the installation guide for your system:
Windows Installation | Linux Installation | Raspberry Pi Installation | Dockers Installation
The OAS Service Control application will appear when the installation finishes on Windows. Use this application to start the 3 Services. Run the Configure OAS application on Windows and select Configure-Tags; if the first time running, the AdminCreate utility will run to create an Administrator login as shown in Step 1 of Getting Started – Security.
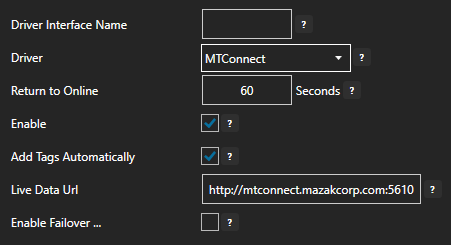
For more detailed instructions on configuring your MTConnect data source, click here to see our Getting Started MTConnect tutorial or watch the video tutorial below:
To add a Tag manually:
For more detailed instructions on configuring your tags, click here to see our Getting Started Tags tutorial.
Create a new tag and set it’s Data Type and Data Source to JSON. Click Ok.
Click the Edit Value button next to the Structure input field.
Enter in your JSON structure.
{
"pump": false,
"tanks": [
{
"room": 1,
"level": null,
"flowrate": null,
},
{
"room": 2,
"level": null,
"flowrate": null,
}
]
}
Click the Add button.
The tag browser will open. Select your Network Node. Select the tag and it’s property that you want to fill your key/value pair with. In the Key field enter the key you want to reference. Do this for each key/value pair that you want to fill.
After you are done adding your tags, your results will look like:
Click Apply Changes.
For more detailed instructions, see the JSON Data Source article in our knowledge base.

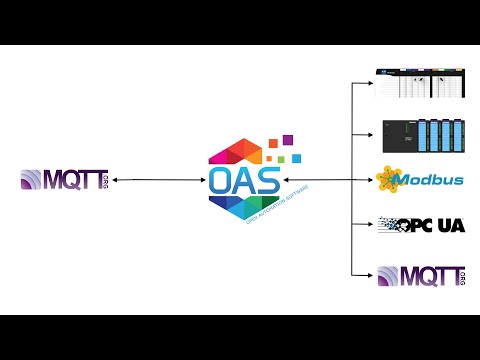
Open Automation Software Tags can be defined to connect to MQTT devices and software brokers with the built in MQTT Driver Interface. If you want to interface OAS with another MQTT Client please see the Getting Started MQTT Broker guide. This tutorial walks you though downloading and installing OAS, configuring an MQTT driver, configuring tags and storing them as JSON packets. You may want to start by reading our What is JSON article.
If you have not already done so, you will need to download and install the OAS platform. Fully functional trial versions of the software are available for Windows, Windows IoT Core, Linux, Raspberry Pi and Docker on our downloads page.
On Windows run the downloaded Setup.exe file to install one or more of the Open Automation Software features. Select the default Typical installation if you are not sure what features to use or the Custom installation if you want to save disk space on the target system. When prompted agree to the End User License Agreement to continue the installation.
For more detailed instructions and video tutorials, visit the installation guide for your system:
Windows Installation | Linux Installation | Raspberry Pi Installation | Dockers Installation
The OAS Service Control application will appear when the installation finishes on Windows. Use this application to start the 3 Services. Run the Configure OAS application on Windows and select Configure-Tags; if the first time running, the AdminCreate utility will run to create an Administrator login as shown in Step 1 of Getting Started – Security.
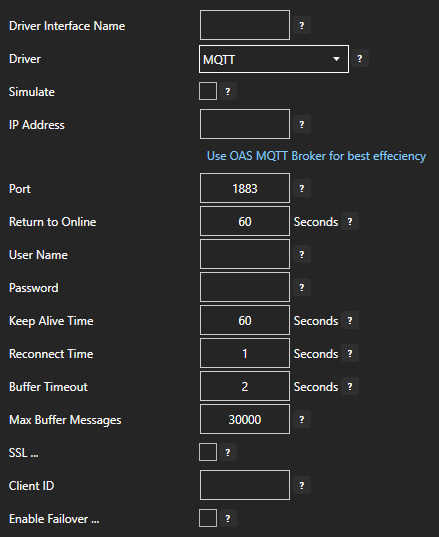
For more detailed instructions on configuring your MQTT data source, click here to see our Getting Started MQTT tutorial or watch the video tutorial below:
To add a Tag manually:
For more detailed instructions on configuring your tags, click here to see our Getting Started Tags tutorial.
Create a new tag and set it’s Data Type and Data Source to JSON. Click Ok.
Click the Edit Value button next to the Structure input field.
Enter in your JSON structure.
{
"pump": false,
"tanks": [
{
"room": 1,
"level": null,
"flowrate": null,
},
{
"room": 2,
"level": null,
"flowrate": null,
}
]
}
Click the Add button.
The tag browser will open. Select your Network Node. Select the tag and it’s property that you want to fill your key/value pair with. In the Key field enter the key you want to reference. Do this for each key/value pair that you want to fill.
After you are done adding your tags, your results will look like:
Click Apply Changes.
For more detailed instructions, see the JSON Data Source article in our knowledge base.

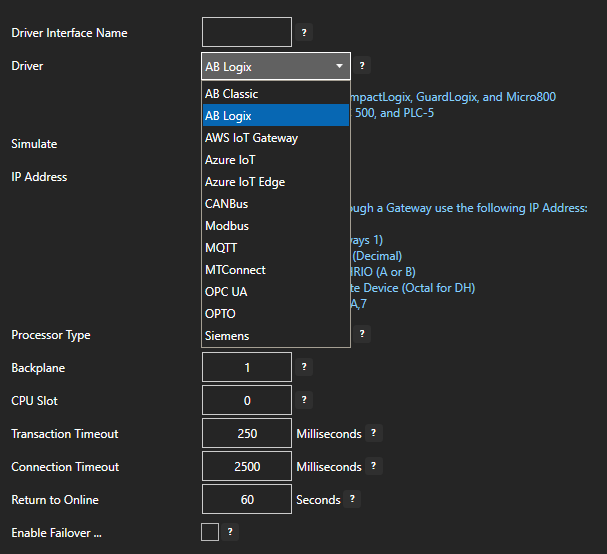
Open Automation Software Tags can be defined to connect directly to Allen Bradley controllers with the built in ABLogix and ABClassic Driver Interfaces which support communications over Ethernet to ControlLogix, CompactLogix, GuardLogix, and Micro800 with the ABLogix driver, and MicroLogix, SLC 500, and PLC-5 with the ABClassic driver. This tutorial walks you though downloading and installing OAS, configuring an Allen Bradley driver, configuring tags and storing them as JSON packets. You may want to start by reading our What is JSON article.
If you have not already done so, you will need to download and install the OAS platform. Fully functional trial versions of the software are available for Windows, Windows IoT Core, Linux, Raspberry Pi and Docker on our downloads page.
On Windows run the downloaded Setup.exe file to install one or more of the Open Automation Software features. Select the default Typical installation if you are not sure what features to use or the Custom installation if you want to save disk space on the target system. When prompted agree to the End User License Agreement to continue the installation.
For more detailed instructions and video tutorials, visit the installation guide for your system:
Windows Installation | Linux Installation | Raspberry Pi Installation | Dockers Installation
The OAS Service Control application will appear when the installation finishes on Windows. Use this application to start the 3 Services. Run the Configure OAS application on Windows and select Configure-Tags; if the first time running, the AdminCreate utility will run to create an Administrator login as shown in Step 1 of Getting Started – Security.
For more detailed instructions on configuring your Allen Bradley data source, click here to see our Getting Started Allen Bradley tutorial.
To add a Tag manually:
For more detailed instructions on configuring your tags, click here to see our Getting Started Tags tutorial.
Create a new tag and set it’s Data Type and Data Source to JSON. Click Ok.
Click the Edit Value button next to the Structure input field.
Enter in your JSON structure.
{
"pump": false,
"tanks": [
{
"room": 1,
"level": null,
"flowrate": null,
},
{
"room": 2,
"level": null,
"flowrate": null,
}
]
}
Click the Add button.
The tag browser will open. Select your Network Node. Select the tag and it’s property that you want to fill your key/value pair with. In the Key field enter the key you want to reference. Do this for each key/value pair that you want to fill.
After you are done adding your tags, your results will look like:
Click Apply Changes.
For more detailed instructions, see the JSON Data Source article in our knowledge base.

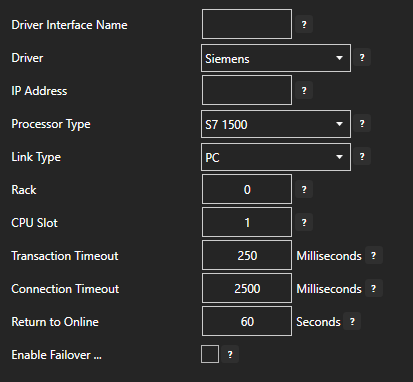
Open Automation Software can connect directly to Siemens controllers with the built in Siemens Driver Interfaces which support communications over Ethernet to S7-200, S7-300, S7-400, S7-1200, and S7-1500. This tutorial walks you though downloading and installing OAS, configuring a Siemens driver, configuring tags and storing them as JSON packets. You may want to start by reading our What is JSON article.
If you have not already done so, you will need to download and install the OAS platform. Fully functional trial versions of the software are available for Windows, Windows IoT Core, Linux, Raspberry Pi and Docker on our downloads page.
On Windows run the downloaded Setup.exe file to install one or more of the Open Automation Software features. Select the default Typical installation if you are not sure what features to use or the Custom installation if you want to save disk space on the target system. When prompted agree to the End User License Agreement to continue the installation.
For more detailed instructions and video tutorials, visit the installation guide for your system:
Windows Installation | Linux Installation | Raspberry Pi Installation | Dockers Installation
The OAS Service Control application will appear when the installation finishes on Windows. Use this application to start the 3 Services. Run the Configure OAS application on Windows and select Configure-Tags; if the first time running, the AdminCreate utility will run to create an Administrator login as shown in Step 1 of Getting Started – Security.
For more detailed instructions on configuring your Siemens data source, click here to see our Getting Started Siemens tutorial.
To add a Tag manually:
For more detailed instructions on configuring your tags, click here to see our Getting Started Tags tutorial.
Create a new tag and set it’s Data Type and Data Source to JSON. Click Ok.
Click the Edit Value button next to the Structure input field.
Enter in your JSON structure.
{
"pump": false,
"tanks": [
{
"room": 1,
"level": null,
"flowrate": null,
},
{
"room": 2,
"level": null,
"flowrate": null,
}
]
}
Click the Add button.
The tag browser will open. Select your Network Node. Select the tag and it’s property that you want to fill your key/value pair with. In the Key field enter the key you want to reference. Do this for each key/value pair that you want to fill.
After you are done adding your tags, your results will look like:
Click Apply Changes.
For more detailed instructions, see the JSON Data Source article in our knowledge base.