Because the OAS Service runs under the SYSTEM Account it is not using the Regional Language settings. In some operating systems when you change the Regional Language the SYSTEM account is not updated. To correct this go to Region and Language under Control Panel, and select the Administrative tab.
Select Copy settings and select the option to Copy your current settings to: Welcome screen and system accounts and select OK.
Restart the OAS Services or restart the operating system.
The CSV export and import will now use your decimal separator selected for the operating system.
Tags can also be used without a data source with a static value to update from programmatically from a .NET application or REST API or from a user interface.
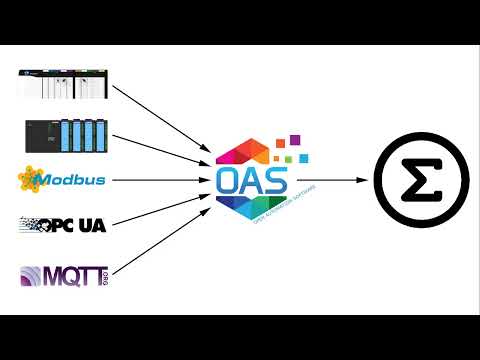
Calculation can be another source for tags with values from other local or remote tags.
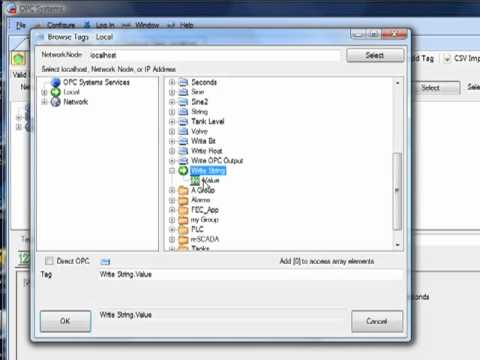
The following section is how to manually add and define Tags using the Configure OAS application. Tags can also be added and modified using the CSV Import and Export selections using the Configure-Tags application to use Excel or other third party Comma Separated Variable editor.
To learn how to programmatically add or modify Tags from your own Visual Studio application refer to the following article on how to add and define multiple tags with one method:
Please view the Getting Started with Open Automation Software Video to familiarize yourself with installation, setting up Tags, selecting Data Sources and Destinations, and implementing Networking and Security.
Step 1 – Start Configure App
Start Configure OAS application from the program group Open Automation Software.
Select Configure-Tags.
NOTE: The Configure application can be used to connect to remote systems using the network node name or IP address of the remote node the OAS Service is running on. Simply enter the IP Address or network node name of the remote OAS Service you wish to connect to and click on the Select key.
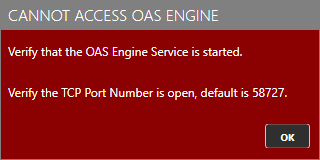
When selecting a service if you receive a warning dialog that the service cannot be retrieved make sure the OAS Engine is started.
If you already have the default Demo Tags loaded you can right in the Tags root and select Delete All Tags.
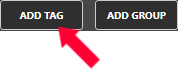
Step 2 – Add Tags
Click on the Add Tag button located at the top of the Tag browser.
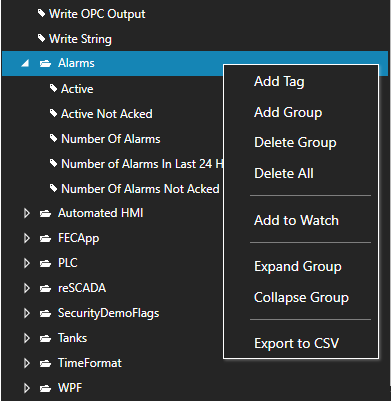
NOTE: You can also add organizational Groups as many levels deep as you prefer and add tags to groups. To do this first add a Group to the root level, then right click on the Group in the right window to add additional Groups or Tags.
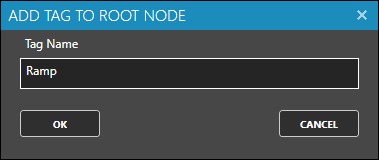
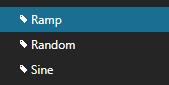
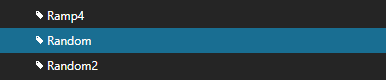
Enter the Tag name Ramp in the Add Tag dialog box.
Repeat Steps 4 and 5 with Tag name Sine.
Repeat Steps 4 and 5 with Tag name Random.
Step 3 – Modify Tags
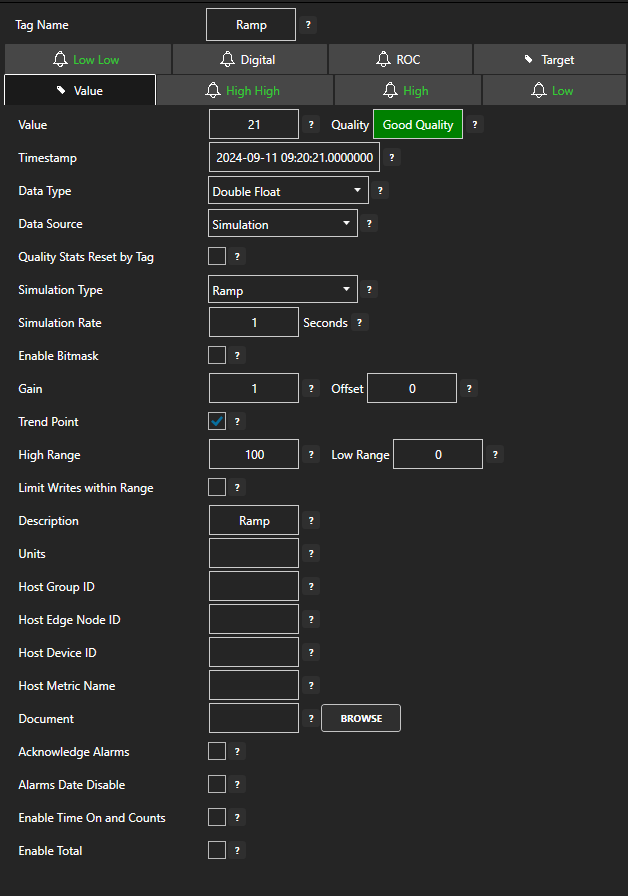
Select Tag Ramp in the right Tag window.
All Tag properties will appear in the lower window.
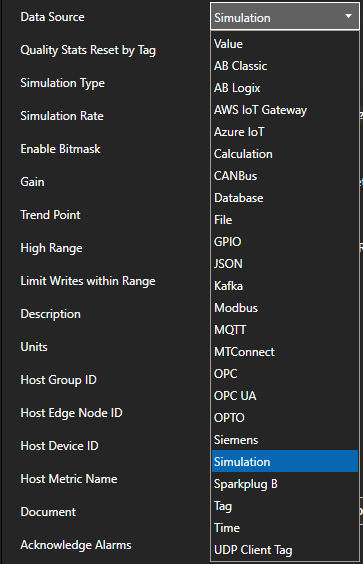
For the Value Parameter set the Data Source to Simulation.
If you plan to use trending on this point enable the Trend Point option.
Set the Description field to Ramp.
Select the High High Parameter and set the Value field to 80 and enable the High High alarm.
Select the High Parameter and set the Value field to 60 and enable the High alarm.
Select the Low Parameter and set the Value field to 40 and enable the Low alarm.
Select the Low Low Parameter and set the Value field to 20 and enable the Low Low alarm.
Select the Apply Changes button in the lower right corner.
Select Tag Random and the Value Parameter.
For the Value Parameter set the Data Source to Simulation.
Set the Simulation Type to Random
If you plan to use trending on this point enable the Trend Point option.
Select Tag Sine and the Value Parameter.
For the Value Parameter set the Data Source to Simulation.
Set the Simulation Type to Sine
If you plan to use trending on this point enable the Trend Point option.
Set High Range to 1 and Low Range to -1.
Step 4 – Save Configuration
Select the Save button on the toolbar at the top.
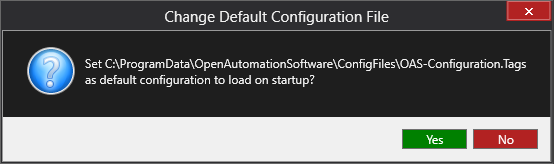
Enter a file name to be saved in C:\ProgramData\OpenAutomationSoftware\ConfigFiles directory on Windows or ConfigFiles subdirectory on Linux.
When prompted to set the file as the default configuration to load on startup select Yes.
The default file can be changed under Configure-Options-Default Files.
Can I access a bit of an Integer value of an Open Automation Software Tag?
Yes, set the Data Type of the Open Automation Software Tag to Signed Byte, Unsigned Byte, Short Integer, Unsigned Short Integer, Integer, Unsigned Integer, Long, or Unsigned Long. When browsing for a Tag in a client application Bit00 up to Bit63 will be available selection immediately under the Value property.
myTag.Bit00 is an example of providing read and write access to bit 0 of an integer value.
A CSV Export and Import does not work when running on a system with Regional Language settings use a comma as a decimal holder.
Because the OAS Service runs under the SYSTEM Account it is not using the Regional Language settings. In some operating systems when you change the Regional Language the SYSTEM account is not updated. To correct this go to Region and Language under Control Panel, and select the Administrative tab.
Select Copy settings and select the option to Copy your current settings to: Welcome screen and system accounts and select OK.
Restart the OAS Services or restart the operating system.
The CSV export and import will now use your decimal separator selected for the operating system.
We have accumulative value and we want to take Delta for this accumulative value at end of each hour. For example value at start of the hour is 100 and at the end of the hour it is 150, so Delta is 50 for this specific hour. How we can use calculation tag option to achieve it?
First create a String Tag called DateTime with the Data Source of DateTimeString.
Next create a Double Tag called InitialValue with the Data Source of Calculation and the following Calculation.
IF(SUBSTR([DateTime.Value],STRLEN([DateTime.Value])-5,5) = “00:00”,[SourceTag.Value],[InitialValue.Value])
Then you have a second Double Calculation Tag called TheDifference with the following Calculation.
[SourceTag.Value]-[InitialValue.Value]
A third Calculation Tag called LastHour can be used to hold the last hour’s result.
IF(SUBSTR([DateTime.Value],STRLEN([DateTime.Value])-5,5) = “59:59”,[TheDifference.Value],[LastHour.Value])
I want to create a Calculation that gives a result of a sum over 15 minutes and then resets to 0.
Create a Calculation Tag with the following Calculation.
AVG(IF(MOD([SumCalcs.TotalSeconds.Value],900)=0,-987654321,[SumCalcs.Input.Value]),900)*MOD([SumCalcs.TotalSeconds.Value],900)
How to display hours, minutes, and seconds as a string from Time On of a Tag.
Select the OAS Service that you desire to import a CSV file to the Tag configuration and click the CSV Import button on the top menu to import a Comma Separated Variable file.
Use the Export CSV feature to generate a CSV file. You can then use Microsoft Excel or other CSV compatible application to add or modify Tags. Only the Tag name is the required field.
You can select to include or exclude all other fields. Only those fields that are found in the header will be used to update the properties of the Tags. If a Tag already exists it will be updated. If the Tag does not exist it will be created. Existing Tags that are not specified in the CSV file will not be updated or deleted.
The same tag parameter structure can be used to programmatically define tags with the TagCSVImport method on the free to use OASConfig and OPCSystems components. This is demonstrated in .NET Server Configuration-CSV Import and Export example.
Export CSV
Select the OAS Service that you desire to extract the Tag configuration from and select click the CSV Export button to generate a Comma Separated Variable file.
You can then use Microsoft Excel or other CSV compatible application to add or modify Tags. Use the Import CSV feature to then import the modified CSV file.
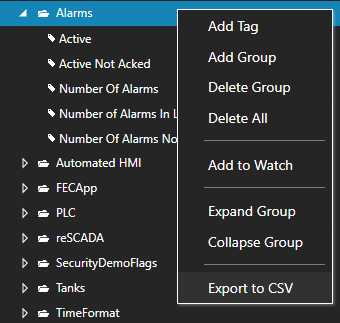
If you wish to just export a particular Tag Group, right click on the Tag Group and select Export to CSV.
For a quick tutorial on configuring tags view the Quick Start Example – Configure Tags section or view the following video:
Getting Started OAS (Legacy)
The following video was created from earlier versions of OAS, but is still applicable for those data sources shown in the video to familiarize yourself with installation, setting up Tags, selecting Data Sources and Destinations, and implementing Networking and Security.
One Click OPC
Automatically setup the realtime database from OPC Servers in one step.
One Click Allen Bradley
How to automatically import Allen Bradley variables to Open Automation Software.
OPC Servers
How to connect to OPC Servers for all products. Refer to One Click OPC for automated setup.
OPC Server to OPC Server
How to setup automatic data transfer from OPC Server to OPC Server on your LAN, WAN, and Internet.
Calculations
How to setup math equations and logic as a Data Source with the built Calculation engine for all products.
Alarm Limits
How to setup alarm limits in real-time tag configuration.
00:00 – How to set up alarms limits
00:24 – Programmatically Configure Tags
01:34 – Another way to adjust the alarm limit
02:17 – Alarms Group
02:52 – Alarm Priority
03:07 – Time Delay
03:18 – Alarm Text
04:55 – Alarm Tracking
05:29 – Alarms Limits
06:26 – Boolean Signals
06:34 – Example Applications Videos
07:07 – More Questions
Time On and Counts
Monitor how many times a value or alarm transitions and how long it has been active.
Total
Summation for total values.
Watch Window
View multiple tag values, timestamps, and data quality using the Watch Window.
Select the OAS Service that you desire to import a CSV file to the Tag configuration and click the CSV Import button on the top menu to import a Comma Separated Variable file.
Use the Export CSV feature to generate a CSV file. You can then use Microsoft Excel or other CSV compatible application to add or modify Tags. Only the Tag name is the required field.
You can select to include or exclude all other fields. Only those fields that are found in the header will be used to update the properties of the Tags. If a Tag already exists it will be updated. If the Tag does not exist it will be created. Existing Tags that are not specified in the CSV file will not be updated or deleted.
The same tag parameter structure can be used to programmatically define tags with the TagCSVImport method on the free to use OASConfig and OPCSystems components. This is demonstrated in .NET Server Configuration-CSV Import and Export example.
Export CSV
Select the OAS Service that you desire to extract the Tag configuration from and select click the CSV Export button to generate a Comma Separated Variable file.
You can then use Microsoft Excel or other CSV compatible application to add or modify Tags. Use the Import CSV feature to then import the modified CSV file.
If you wish to just export a particular Tag Group, right click on the Tag Group and select Export to CSV.