Step 1
 Start Configure OAS application from the program group Open Automation Software on the system where the license currently resides (old computer).
Note: Each OAS Serial Number license is associated with the computer it is activated on. If your system crashes (hard drive failure or other reason) do not throw away the computer. Call or email OAS Support to recover your license if the Serial Number maintenance is current.
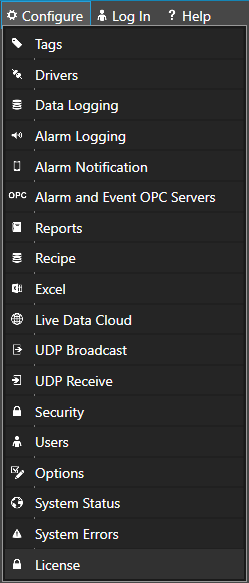
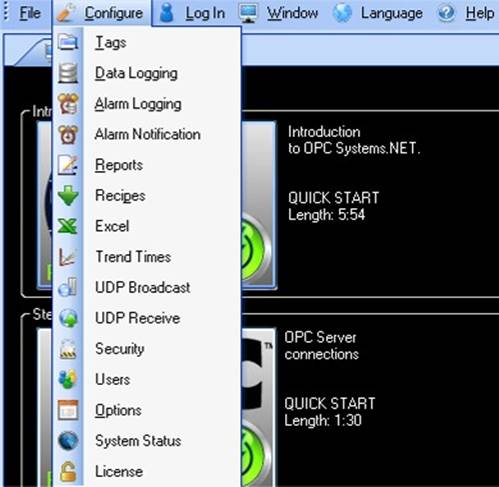
Select Configure-License.
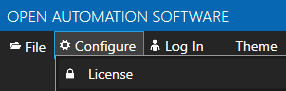
NOTE: The Configure application can be used to connect to remote systems using the network node name or IP address of the remote node the OAS Service is running on. Simply enter the IP Address or network node name of the remote OAS Service you wish to connect to and click on the Select key.
![]()
Verify that the Maintenance Expiration is current. If it is out of date please copy the License Code from the License Code field and email it to Support.
Do not proceed further unless the maintenance is current.
Record the License Code from the License Code field.

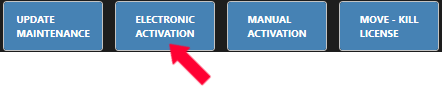
Select the Move License button.

Record the Kill Code provided.
Step 2
Start Configure OAS application from the program group Open Automation Software on the new system where the license will be moved to (new computer).
Select Configure-License.
NOTE: The Configure application can be used to connect to remote systems using the network node name or IP address of the remote node the OAS Service is running on. Simply enter the IP Address or network node name of the remote OAS Service you wish to connect to and click on the Select key.
![]()
Record the License Code from the License Code field.
Step 3
E-mail the License Code and Kill Code of the old system, the License Code of the new system to Support along with the Serial Number that was provided with your order. Do not restart your system while a new License Key is generated and returned.
Step 4
When the License Key is received enter the Key into the License Key field on the new system and select the Save Key button.

Verify the status of the license is correct for the maintenance expiration, number of tags, networking, enabled products, and enabled drivers.
If the license is incorrect email the License Code (not License Key) to Support along with the Serial Number provided with your order.