How To Read and Write Live Data with the OAS REST API

How To Read and Write Live Data with the OAS REST API


We are going to discuss how to read and write live data with the OAS REST API. The interface below is what we will be building. You can see the live version of it here: http://www.opcweb.com/examples/restexamples/realtimedata.htm.

Getting Started

To use the OAS REST API you must make sure that the OAS HTTP service is listening on the correct port. To do this, open the OAS Configuration application and select Configure > Options, then select the network node (localhost if working on the local machine) and click Select. Under the Networking tab, locate the field for REST API/WebHMI Port Number. The default is 58725 but can be changed. If you are accessing the server from a remote client, you will also need to make sure your machine and/or company firewalls allow TCP traffic on the selected port.

You can find full documentation for the OAS REST API here: http://restapi.openautomationsoftware.com as well as a link to open it in Postman.

Setting up the Page

<!DOCTYPE html>
<html lang="en">
<head>
<meta charset="utf-8"/>
    <title>REST Example | Real Time Data</title>
    <link rel="stylesheet" href="client.css">
    <script src="https://code.jquery.com/jquery-3.1.1.min.js"></script>
    <script type="text/javascript">

Above is the start of the head tag and a link to the jQuery library. We will be using jQuery for this tutorial.

        var networkNode = "http://www.opcweb.com:58725";
        var clientid =  ""; // holds the client id from authorization
        var token =  "";    // holds the token from authorization
        var drawheader = true; // flag for whether the table header needs to be drawn
        var polling = null; // variable for setInterval function    
        var pumpval = null; // holds the last pump value
        var currentlist = {
            "tags":[
                {"path": "Pump.Value"},
                {"path": "Ramp.Value"},
                {"path": "Sine.Value"}
            ]
        };

Next we declare some variables that we will use later. The networkNode is the URL for where the OAS Service you are calling is located. The clientid and the token are variables that we will use to hold the authentication credentials that will be returned in our first call. Next, polling is a variable we will use to hold the setInterval function for our repeat calls to the API to get the tag data. The pumpval boolean holds the pump tags value on the page so that we can update it without asking for it’s current value first. The currentlist object starts out with the tag array that we are going to send in the requests to create and update the tag list, we will add to it later.

        // function to clear out variables for a reset
        function clearvariables(){
            delete currentlist.id;
            clearInterval(polling);
            polling = null;
            $('#diverror').empty();
            $('#divtaglistid').empty();
            $('#displaythis').empty();
            $("#createtaglist").prop("value", "Create Tag List");
            $("#dopolling").prop("value", "Start Polling");
        }
        

The clearvariables() function above does just that. We will call it later in our application to reset our button text and reset our variables when needed.

        // function to display error messages 
        function displaymessage(mess, fnc){
            clearInterval(polling); // in the event of an error we stop the polling
            switch(mess) {
                case 401:
                    $('#diverror').html("Authentication required.");
                    break;
                case 404:
                    if((fnc == "delete")||(fnc == "update")){
                        $('#diverror').html("Tag List not found.");
                    }else{
                        $('#diverror').html("404"); 
                    }
                    break;
                default:
                    $('#diverror').html(mess);
                }                       
        }

The displaymessage() function is called when our API request returns with an error. It will display the message on the page.

Authenticate

$("#doauth").click(function(){ // click funtion for authenticatation
    clearvariables(); // clear out the old variables, we are starting over   
    // api call for authenticatation
    $.ajax({
        url: networkNode + "/OASREST/v2/authenticate",
        type: "POST",
        contentType: "application/json; charset=utf-8", 
        crossDomain: true,
        dataType: "json",
        data: '{"username": "", "password": ""}',
        success: function(r) {
            clientid = r.data.clientid; // store the client id for later calls
            token = r.data.token;  // store the token for later calls      
            $('#divid').html(clientid); // display the client id
            $('#divtoken').html(token); // display the token
        },
        error: function (e) {
            displaymessage(e.status, "auth"); // in case of error, display the error         
        }
    });
});

The first call you will always need to make is to Authenticate. This will create a session and return a clientid and token that you will send in the header of all of your subsequent calls. The API call above is inside of a click function that handles the click event for the Authenticate button. The first thing we do is call the clearvariable() function in case the user has been using the application already. When the session is created it creates a new clientid and token. Anything that may have been done previously on the page will be tied to the old session and no longer be accessible so we clear out the old display as well.

We are using the jQuery ajax() method to send an asynchronous HTTP request to the server. The first parameter url specifies the address we are sending our request to. The networkNode we set above is used here. The Authenticate call is a POST which we specify in the type parameter. Next, contentType: application/json; charset=utf-8 designates the content to be in JSON format, encoded in the UTF-8 character encoding. The crossDomain parameter is set to true, allowing us to send our request to a resource that is outside of our own domain. The dataType parameter is set to “json”, letting the server know we expect the response to come back in JSON format. In out data parameter, what we are sending to the server, we have two variables: username and password. In this example, they are empty strings which will allow us to create a session in the default security group. For more information about security groups, see the Getting Started – Security tutorial in our knowledge base.

If we were to run the Authenticate function successfully here is what would be returned:

{
    "status": "OK",
    "data": {
        "clientid": "e90c8ae8-6b12-4690-a02b-f35ad03b3d2d",
        "token": "f16c3098-b295-4572-9a6b-f53ee984d21b"
    },
    "messages": [
        "Default credential provided - access to data and operations may be limited"
    ]
}

In which case, we process the return inside of our success function. We set the clientid page variable to the clientid property of the data object of the return object and the token page variable to the token property. If an error were to be returned, we handle it in our error function where we send the message to the displaymessage() function.

Create and Delete the Tag List

// click function to create or delete tag list 
$("#createtaglist").click(function(){
    // if there is no id, create one
    if (!currentlist.id){ 
        // api call to create the tag list
        $.ajax({
            url: networkNode + "/OASREST/v2/taglists",
            type: "POST",
            contentType: "application/json; charset=utf-8", 
            crossDomain: true,
            dataType: "json",
            headers: {"clientid": clientid, "token": token},
            data: JSON.stringify(currentlist),
            success: function(r) {
                currentlist.id = r.data.id;
                $('#diverror').empty();
                $('#divtaglistid').html(currentlist.id);
                $("#createtaglist").prop("value", "Delete Tag List"); // toggle button
            },
            error: function (e) {
                displaymessage(e.status, "create"); // in case of error, display the error    
            }
        });
    // if there is an id, delete it
    }else{
        clearInterval(polling); // stop the polling and clear out the variable                   
        polling = null;
        $("#dopolling").prop("value", "Start Polling"); // toggle polling button
        // api call to delete the tag list
        $.ajax({
            url: networkNode + "/OASREST/v2/taglists/" + currentlist.id,
            type: "DELETE",
            contentType: "application/json; charset=utf-8", 
            crossDomain: true,
            dataType: "json",
            headers: {"clientid": clientid, "token": token},
            success: function(r) {
                if(currentlist.tags.some(el => el.path === "Random.Value")){  // if the random tag has been added, remove it to reset to original list
                    currentlist.tags.pop(); 
                }
                delete currentlist.id; 
                $('#divtaglistid').empty();  //empty the displays
                $('#displaythis').empty();
                $("#createtaglist").prop("value", "Create Tag List"); // toggle button
            },
            error: function (e) {
                displaymessage(e.status, "delete"); // in case of error, display the error   
            }
        });
    }
});

Next we have a click function, $(“#createtaglist”).click(function(), that handles creating and deleting the tag list. We will toggle it’s value back and forth based on the existence of the currentlist.id that we will add to our data object variable after it is returned from our API call.

Let’s look first at the Create Tag List call, it is also a “POST”. In this call we have added a header parameter, which passes in our clientid and token. In the data parameter, we pass in the tag list array that we created at the top of the page in our currentlist object. Before we pass the tag array in, we format it with the JSON.stringify() method that converts a JavaScript object or value to a JSON string. In the function that handles a successful call, we set the currentlist.id to the returned tag list id, display it on the page, clear out the error display since we were successful and toggle the button text.

If a tag list already exists, the click function will delete it. First we stop the polling of the data, set the polling variable to null and toggle the button text. In the Delete Tag List call, we add the currentlist.id to the end of the url so the API knows which list we want to delete. The type is changed to “DELETE” here. Again, we pass the clientid and token in the header. In the success function, the first the we do is check to see the Random tag has been added to our list via the Add Random button. If it has, we want to delete it with currentlist.tags.pop() so that our list is back to it’s original state and it doesn’t get added twice. Next, we delete the currentlist.id from our object with delete currentlist.id. Finally, we clear out the displays and toggle the button text. In the event of an error, we display the message.

Get Tag List

// api call to get the latest tag values for the list
function getthetags(){
    $.ajax({
        url: networkNode + "/OASREST/v2/taglists/" + currentlist.id,
        type: "GET",
        contentType: "application/json; charset=utf-8", 
        crossDomain: true,
        dataType: "json",
        headers: {"clientid": clientid, "token": token},
        success: function(r) {
            pumpval = r.tags[0].value; // hold onto the pump value so we can update it
            $('#displaythis').empty(); // empty out old display
            $.each(r.tags, function(key,tag) {
                $('#displaythis').append(tag.path + ': ' + tag.value + "<br>");               
            });              
        },
        error: function (e) {
            displaymessage(e); // in case of error, display the error    
        }
    }); 
}

// click event to toggle polling
$("#dopolling").click(function(){
    if (!currentlist.id){  // if no list exists, display message, exit
        displaymessage("Tag List not found", "poll");
        return;
    }
    if (polling == null){ // if polling exists, stop it
        polling = setInterval("getthetags()", 1000);  // start the polling 
        $("#dopolling").prop("value", "Stop Polling"); // toggle button
    } else { //if polling doesn't exist, start it
        clearInterval(polling);  // stop the polling and clear the variable
        polling = null;
        $("#dopolling").prop("value", "Start Polling"); // toggle button
    }
});

Now that we have created the tag list, we want to get the tag data. We will also use the JavaScript setInterval function to repeatedly poll the data. When the user clicks the Start Polling button the $(“#dopolling”).click(function() fires. First we check to see if a tag list exists, if it doesn’t we display an error message and exit the function. Next, we check to see if we are already polling. If we are, we know the user has clicked the Stop Polling button. In this case, we clear use clearInterval(polling) to stop the polling, set it to null and toggle the button text. If we aren’t already polling we know the user has clicked the Start Polling button. In this case, we use the setInterval function to call our getthetags() function once every second and then toggle the button text.

In the getthetags() function, we launch our API call. At the end of the url we add the currentlist.id so the server knows which tag list we want. The request type is “GET” and we send the clientid and token in the header. Below is the data that comes back:

{
    "id": "664c93ed-2f29-460c-9691-f4730c04ce40",
    "tags": [
        {
            "path": "Pump.Value",
            "value": "False",
            "quality": true,
            "type": "boolean"
        },
        {
            "path": "Ramp.Value",
            "value": "37",
            "quality": true,
            "type": "float"
        },
        {
            "path": "Sine.Value",
            "value": "-0.296687960624695",
            "quality": true,
            "type": "float"
        }
    ]
}

In our success function, we set the pumpval page variable to r.tags[0].value which is the value of the Pump tank as it is the first tag in our tag list array. We are storing the value in case the user clicks the Toggle Pump button. Next we use the jQuery .each() function to iterate through the returned tags array to display the data on the page. In case of error, we display the error message.

Update Tag List

// click event for adding random tag
$("#updatetaglist").click(function(){
    if (currentlist.id == ""){ // if no list exists, exit
        displaymessage("Tag List not found", "update");
        return;
    }
    if(!currentlist.tags.some(el => el.path === "Random.Value")){  // check to see if it is already there, if it's not add it
        currentlist.tags.push({"path": "Random.Value"});
        // api call to update the tag list
        $.ajax({
            url: networkNode + "/OASREST/v2/taglists",
            type: "PUT",
            contentType: "application/json; charset=utf-8", 
            crossDomain: true,
            dataType: "json",
            headers: {"clientid": clientid, "token": token},
            data: JSON.stringify(currentlist),
            success: function(r) {
            },
            error: function (e) {
                displaymessage(e.status, "update");  // in case of error, display the error                  
            }
        });
    }
}); 

The Update Tag List call is inside of our $(“#updatetaglist”).click(function() and fired when the user clicks the Add Random button. Again, we check to make sure the currentlist.id exists and exit the function if it does not. Next we check the tags array to see if the Random tag has been added previously, we don’t want to add it twice. If it is there, we skip over this function, otherwise, we add it to the array and make our API call. The request type is “PUT” and we pass the clientid and the token in the header. In the data parameter we use the JSON.stringify function to format our current list object which now includes the currentlist.id and the Random tag as a JSON string. This tells the server to use this updated tag list for the tag list we have already created. We don’t have to do anything in our success function here, we are already polling and our getthetags() function can handle the addition. In case of error, we display the error.

Set Tag Values

// click event to toggle the pump value
$("#togglepump").click(function(){
    if (currentlist.id == ""){ // if no list exists, exit
        displaymessage("Tag List not found", "toggle");
        return;
    }
    var flagpump = false;
    if (pumpval == "False"){ // see what the current stored pump value is and flip it
        flagpump = true;
    }
    // api call to update the pump value
    $.ajax({
        url: networkNode + "/OASREST/v2/taglists/set",
        type: "POST",
        contentType: "application/json; charset=utf-8", 
        crossDomain: true,
        dataType: "json",
        headers: {"clientid": clientid, "token": token},
        data: '{"values":[{"path": "Pump.Value", "value": "' + flagpump + '"}]}',
        success: function(r) {
        },
        error: function (e) {
            displaymessage(e.status, "update");  // in case of error, display the error                          
        }
    });
});

The Toggle Pump button fires the click $(“#togglepump”).click(function(). Inside of this function, we first check to see if the currentlist.id exists. If it does not, we exit the function. Otherwise, we get evaluate our current pumpval page variable and flip it. Our API call here is a “POST” and we send the clientid and the token in the header. Our data parameter contains an array of objects containing the path to the tag and parameter we want to update, along with the new value. Our array has only one object, the Pump, but we could send in multiple tags to update with this call. Again we don’t have to do anything in our success function here, we are already polling. In case of error, we display the error.

An optional parameter that can be sent in this call is timestamp. Use this method if implementing a custom data source. The timestamp field is a numeric representation of the number of ticks since 1/1/1970. In JavaScript this can be retrieved from a Date object using the .GetTime() method. It would look like this:

{ "values": 
    [ 
    { "path": "Pump.Value", "value": true, "timestamp": 1490110444474 }, 
    { "path": "Ramp.Value", "value": 37, "timestamp": 1490110444474 } 
    ] 
}

All Together Now…

<!DOCTYPE html>
<html lang="en">
<head>
<meta charset="utf-8"/>
    <title>REST Example | Real Time Data</title>
    <link rel="stylesheet" href="client.css">
    <script src="https://code.jquery.com/jquery-3.1.1.min.js"></script>
    <script type="text/javascript">

        var networkNode = "http://www.opcweb.com:58725";
        var clientid =  ""; // holds the client id from authorization
        var token =  "";    // holds the token from authorization       
        var polling = null; // variable for setInterval function    
        var pumpval = null; // holds the last pump value
        var currentlist = {
            "tags":[    
                {"path": "Pump.Value"},
                {"path": "Ramp.Value"},
                {"path": "Sine.Value"}
            ]
        };

        // function to clear out variables for a reset
        function clearvariables(){
            delete currentlist.id;
            clearInterval(polling);
            polling = null;
            $('#diverror').empty();
            $('#divtaglistid').empty();
            $('#displaythis').empty();
            $("#createtaglist").prop("value", "Create Tag List");
            $("#dopolling").prop("value", "Start Polling");
        }
        
        // function to display error messages 
        function displaymessage(mess, fnc){
            clearInterval(polling); // in the event of an error we stop the polling
            switch(mess) {
                case 401:
                    $('#diverror').html("Authentication required.");
                    break;
                case 404:
                    if((fnc == "delete")||(fnc == "update")){
                        $('#diverror').html("Tag List not found.");
                    }else{
                        $('#diverror').html("404"); 
                    }
                    break;
                default:
                    $('#diverror').html(mess);
                }                       
        }
        
        // api call to get the latest tag values for the list
        function getthetags(){
            $.ajax({
                url: networkNode + "/OASREST/v2/taglists/" + currentlist.id,
                type: "GET",
                contentType: "application/json; charset=utf-8", 
                crossDomain: true,
                dataType: "json",
                headers: {"clientid": clientid, "token": token},
                success: function(r) {
                    console.log(r);
                    pumpval = r.tags[0].value; // hold onto the pump value so we can update it
                    $('#displaythis').empty(); // empty out old display
                    $.each(r.tags, function(key,tag) {
                        $('#displaythis').append(tag.path + ': ' + tag.value + "<br>");               
                    });              
                },
                error: function (e) {
                    displaymessage(e); // in case of error, display the error    
                }
            }); 
        }
        
        $(document).ready(function() {
            
            $("#doauth").click(function(){ // click funtion for authorization
                clearvariables(); // clear out the old variables, we are starting over   
                // api call for authorization
                $.ajax({
                    url: networkNode + "/OASREST/v2/authenticate",
                    type: "POST",
                    contentType: "application/json; charset=utf-8", 
                    crossDomain: true,
                    dataType: "json",
                    data: '{"username": "", "password": ""}',
                    success: function(r) {
                        clientid = r.data.clientid; // store the client id for later calls
                        token = r.data.token;  // store the token for later calls      
                        $('#divid').html(clientid); // display the client id
                        $('#divtoken').html(token); // display the token 
                    },
                    error: function (e) {
                        displaymessage(e.status, "auth"); // in case of error, display the error         
                    }
                });
            });
            
            // click function to create or delete tag list 
            $("#createtaglist").click(function(){
                // if there is no id, create one
                if (!currentlist.id){ 
                    // api call to create the tag list
                    $.ajax({
                        url: networkNode + "/OASREST/v2/taglists",
                        type: "POST",
                        contentType: "application/json; charset=utf-8", 
                        crossDomain: true,
                        dataType: "json",
                        headers: {"clientid": clientid, "token": token},
                        data: JSON.stringify(currentlist),
                        success: function(r) {
                            currentlist.id = r.data.id;                            
                            $('#divtaglistid').html(currentlist.id);
                            $('#diverror').empty();
                            $("#createtaglist").prop("value", "Delete Tag List"); // toggle button
                        },
                        error: function (e) {
                            displaymessage(e.status, "create"); // in case of error, display the error    
                        }
                    });
                // if there is an id, delete it
                }else{
                    clearInterval(polling); // stop the polling and clear out the variable                   
                    polling = null;
                    $("#dopolling").prop("value", "Start Polling"); // toggle polling button
                    // api call to delete the tag list
                    $.ajax({
                        url: networkNode + "/OASREST/v2/taglists/" + currentlist.id,
                        type: "DELETE",
                        contentType: "application/json; charset=utf-8", 
                        crossDomain: true,
                        dataType: "json",
                        headers: {"clientid": clientid, "token": token},
                        success: function(r) {
                            if(currentlist.tags.some(el => el.path === "Random.Value")){  // if the random tag has been added, remove it to reset to original list
                                currentlist.tags.pop(); 
                            }
                            delete currentlist.id; 
                            $('#divtaglistid').empty();  //empty the displays
                            $('#displaythis').empty();
                            $("#createtaglist").prop("value", "Create Tag List"); // toggle button
                        },
                        error: function (e) {
                            displaymessage(e.status, "delete"); // in case of error, display the error   
                        }
                    });
                }
            });

            // click event for adding random tag
            $("#updatetaglist").click(function(){
                if (currentlist.id == ""){ // if no list exists, exit
                    displaymessage("Tag List not found", "update");
                    return;
                }
                if(!currentlist.tags.some(el => el.path === "Random.Value")){  // check to see if it is already there, if it's not add it
                    currentlist.tags.push({"path": "Random.Value"});                
                    // api call to update the tag list
                    $.ajax({
                        url: networkNode + "/OASREST/v2/taglists",
                        type: "PUT",
                        contentType: "application/json; charset=utf-8", 
                        crossDomain: true,
                        dataType: "json",
                        headers: {"clientid": clientid, "token": token},
                        data: JSON.stringify(currentlist),
                        success: function(r) {
                        },
                        error: function (e) {
                            displaymessage(e.status, "update");  // in case of error, display the error                  
                        }
                    });
                }
            });           

            // click event to toggle the pump value
            $("#togglepump").click(function(){
                if (currentlist.id == ""){ // if no list exists, exit
                    displaymessage("Tag List not found", "toggle");
                    return;
                }
                var flagpump = false;
                if (pumpval == "False"){ // see what the current stored pump value is and flip it
                    flagpump = true;
                }
                // api call to update the pump value
                $.ajax({
                    url: networkNode + "/OASREST/v2/taglists/set",
                    type: "POST",
                    contentType: "application/json; charset=utf-8", 
                    crossDomain: true,
                    dataType: "json",
                    headers: {"clientid": clientid, "token": token},
                    data: '{"values":[{"path": "Pump.Value", "value": "' + flagpump + '"}]}',
                    success: function(r) {
                    },
                    error: function (e) {
                        displaymessage(e.status, "update");  // in case of error, display the error                          
                    }
                });
            });

            // click event to toggle polling
            $("#dopolling").click(function(){
                if (!currentlist.id){  // if no list exists, display message, exit
                    displaymessage("Tag List not found", "poll");
                    return;
                }
                if (polling == null){ // if polling exists, stop it
                    polling = setInterval("getthetags()", 1000);  // start the polling 
                    $("#dopolling").prop("value", "Stop Polling"); // toggle button
                } else { //if polling doesn't exist, start it
                    clearInterval(polling);  // stop the polling and clear the variable
                    polling = null;
                    $("#dopolling").prop("value", "Start Polling"); // toggle button
                }
            });

        });


    </script>
</head>
    <body>
        <div class='main'>
            <input type='button' id='doauth' class='button' value='Authenticate'><input type='button' id='createtaglist' class='button' value='Create Tag List'>
            <input type='button' id='dopolling' class='button' value='Start Polling'><input type='button' id='updatetaglist' class='button' value='Add Random Tag'>
            <input type='button' id='togglepump' class='button' value='Toggle Pump'><br><br>
            <div class='outer'><div class='label'>Client ID:</div><div  id='divid' class='value'></div></div>
            <div class='outer'><div class='label'>Token:</div><div id='divtoken' class='value'></div></div>
            <div class='outer'><div class='label'>Tag List ID:</div><div id='divtaglistid' class='value'></div></div>         
            <div class='outer'><div class='label'>Message:</div><div  id='diverror' class='value'></div></div><br>
            <div id='displaythis'></div>
        </div>
    </body>
</html>>

To download the source code for this tutorial, click here.

How to Access Real Time and Historical Alarm Data with the OAS REST API

How to Access Real Time and Historical Alarm Data with the OAS REST API


We are going to discuss how to view and edit alarms with the OAS REST API. The interface below is what we will be building. You can see the live version of it here: http://www.opcweb.com/examples/restexamples/alarm.htm.

Getting Started

To use the OAS REST API you must make sure that the OAS HTTP service is listening on the correct port. To do this, open the OAS Configuration application and select Configure > Options, then select the network node (localhost if working on the local machine) and click Select. Under the Networking tab, locate the field for REST API/WebHMI Port Number. The default is 58725 but can be changed. If you are accessing the server from a remote client, you will also need to make sure your machine and/or company firewalls allow TCP traffic on the selected port.

You can find full documentation for the OAS REST API here: http://restapi.openautomationsoftware.com as well as a link to open it in Postman.

How to Access Real Time and Historical Alarm Data with the OAS REST API

Setting up the Page

<!DOCTYPE html>
<html lang="en">
<head>
<meta charset="utf-8"/>
    <title>REST Example | Alarms</title>
    <link rel="stylesheet" href="client.css">
    <script src="https://code.jquery.com/jquery-3.1.1.min.js"></script>
    <script type="text/javascript">

Above is the start of the head tag and a link to the jQuery library. We will be using jQuery for this tutorial.

var networkNode = "http://www.opcweb.com:58725"; // variable for the network node
var clientid =  ""; // holds the client id from authorization
var token =  "";    // holds the token from authorization
var polling = null; // variable for setInterval function
var drawheader = true; // flag for whether the table header needs to be drawn
var inactive  = true; // flag for show/hide inactive alarms
var currentlist = {
            "filter": {
                "minpriority": 0,
                "maxpriority": 9999,
                "networknodes": [
                "localhost"
                ],
                "alarmtypes": [
                "Digital", "High", "Low", "High High", "Low Low", "Operator"
                ]
            },
            "history": false
        }; // object for holding json data

Next, we declare some variables that we will use later. The networkNode is the URL for where the OAS Service you are calling is located. The clientid and the token are variables that we will use to hold the authentication credentials that will be returned in our first call. Polling is a variable we will use to hold the setInterval function for our repeat calls to the API to get the alarm data. The drawheader is a flag that we set to let us know if we need to draw the header of our display again as we are polling. The currentlist object holds the data we are going to send to the API later: filters for which alarms we want to see and a boolean for whether or not we want to see historical alarms.

// function to clear out the variables and html         
function resetvariables(){
    clearInterval(polling);            
    currentlist.id = null;
    drawheader = true;
    polling = null;
    $("#tbalarms").empty();
    $('#divalarmlistid').empty();
    $("#togglepolling").prop("value", "Start Polling");

}        

The clearvariables() function above does just that. We will call it later in our application to reset our button text and reset our variables when needed.

// function to display error messages       
function displaymessage(mess, fnc){
    clearInterval(polling); // in the event of an error we stop the polling
    switch(mess) {
        case 401:
            $('#diverror').html("Authentication required.");
            break;
        case 404:
            if((fnc == "delete")||(fnc == "update")){
                $('#diverror').html("Alarm List not found.");
            }else{
                $('#diverror').html("404"); 
            }
            break;
        default:
            $('#diverror').html(mess);
    }                       
}

The displaymessage() function is called when our API request returns with an error. It will display the message on the page.

Authenticate

$("#doauth").click(function(){ // click funtion for authenticatation
    clearvariables(); // clear out the old variables, we are starting over   
    // api call for authenticatation
    $.ajax({
        url: networkNode + "/OASREST/v2/authenticate",
        type: "POST",
        contentType: "application/json; charset=utf-8", 
        crossDomain: true,
        dataType: "json",
        data: '{"username": "", "password": ""}',
        success: function(r) {
            clientid = r.data.clientid; // store the client id for later calls
            token = r.data.token;  // store the token for later calls      
            $('#divid').html(clientid); // display the client id
            $('#divtoken').html(token); // display the token
        },
        error: function (e) {
            displaymessage(e.status, "auth"); // in case of error, display the error         
        }
    });
});

The first call you will always need to make is to Authenticate. This will create a session and return a clientid and token that you will send in the header of all of your subsequent calls. The API call above is inside of a click function that handles the click event for the Authenticate button. The first thing we do is call the clearvariable() function in case the user has been using the application already. When the session is created it creates a new clientid and token. Anything that may have been done previously on the page will be tied to the old session and no longer be accessible so we clear out the old display as well.

We are using the jQuery ajax() method to send an asynchronous HTTP request to the server. The first parameter url specifies the address we are sending our request to. The networkNode we set above is used here. The Authenticate call is a POST which we specify in the type parameter. Next, contentType: application/json; charset=utf-8 designates the content to be in JSON format, encoded in the UTF-8 character encoding. The crossDomain parameter is set to true, allowing us to send our request to a resource that is outside of our own domain. The dataType parameter is set to “json”, letting the server know we expect the response to come back in JSON format. In out data parameter, what we are sending to the server, we have two variables: username and password. In this example, they are empty strings which will allow us to create a session in the default security group. For more information about security groups, see the Getting Started – Security tutorial in our knowledge base.

If we were to run the Authenticate function successfully here is what would be returned:

{
    "status": "OK",
    "data": {
        "clientid": "e90c8ae8-6b12-4690-a02b-f35ad03b3d2d",
        "token": "f16c3098-b295-4572-9a6b-f53ee984d21b"
    },
    "messages": [
        "Default credential provided - access to data and operations may be limited"
    ]
}

In which case, we process the return inside of our success function. We set the clientid page variable to the clientid property of the data object of the return object and the token page variable to the token property. If an error were to be returned, we handle it in our error function where we send the message to the displaymessage() function.

Create and Delete Alarm List

// click event to handle and toggle create/delete alarmlist button
$("#createalarmlist").click(function(){
    // if alarmlist id doesn't exist, create one.
    if (!currentlist.id){
        $.ajax({
            url: networkNode + "/OASREST/v2/alarmlists",
            type: "POST",
            contentType: "application/json; charset=utf-8", 
            crossDomain: true,
            dataType: "json",
            headers: {"clientid": clientid, "token": token},                    
            data: JSON.stringify(currentlist),
            success: function(r) {
                currentlist.id = r.data.id;  // store the returned alarmlist id in the object              
                $('#divalarmlistid').html(currentlist.id); // display the alarmlist id on the page
                $('#diverror').empty(); // success, so clear the error
                $("#createalarmlist").prop("value", "Delete Alarm List"); // toggle button text
            },
            error: function (e) {
                displaymessage(e.status, "createalarmlist");  // in case of error, display the error    
            }                        
        });
       
        // if alarmlist id exists, delete it.
    }else{                   
        $.ajax({
            url: networkNode + "/OASREST/v2/alarmlists/" + currentlist.id,
            type: "DELETE",
            contentType: "application/json; charset=utf-8", 
            crossDomain: true,
            dataType: "json",
            headers: {"clientid": clientid, "token": token},
            success: function(r) {
                 resetvariables(); // clear everything out to start again
                 $("#createalarmlist").prop("value", "Create Alarm List");  // toggle button text   
            },
            error: function (e) {
                displaymessage(e.status, "delete"); // in case of error, display the error    
            }
        });                   
    }                               
});

The $(“#createalarmlist”).click(function() handles both creating and deleting an alarm list depending on the button state. The first thing it does is to check to see if a currentlist.id exists. If it doesn’t, it creates one with the API call. This call is a “POST” and sends the clientid and token in the header. In the data parameter, it sends in our currentlist object after formatting it. The currentlist has our filter parameters for creating the alarm list. In the success function, we assign the returned list id to our currentlist object, display it on the page, clear out any old error messages and toggle the button text. In the case of an error, we display it.

If a currentlist.id already exists, we know the user has clicked the Delete Alarm List button, so we will delete it with our API call. This one is a “DELETE” type, appends the currentlist.id to the end of the url so the server knows which list to delete, passes the clientid and the token in the header and doesn’t need a data parameter. In the success function, we call the resetvariables() function to clear out all of the old list information because we are starting over and toggle the button text. In the case of an error, we display it.

Get Alarm List

// click function to toggle polling
$("#togglepolling").click(function(){
    // if no alarm list exists, exit
    if (!currentlist.id){
        displaymessage("Alarm List not found", "poll");
        return;
    }
    // if we aren't polling, start the polling
    if (polling == null){                    
        polling = setInterval(getalarmlist, 1000);
        getalarmlist();
        $("#togglepolling").prop("value", "Stop Polling"); // update polling button text
    // if we are polling, stop the polling
    } else {
        clearInterval(polling);
        polling = null;
        $("#togglepolling").prop("value", "Start Polling");  // update polling button text
    }
});

// gets the alarm data and draws the table
function getalarmlist(){
    var table = $("#tbalarms");
    // only draw the header one time
    if (drawheader){
        var th = "<tr>";
        th += "<th>Alarm Date</th>";
        th += "<th class='center'>Active</th>";
        th += "<th>Text</th>";
        th += "<th>Type</th>";
        th += "<th>Group</th>";
        th += "<th class='center'>Acked</th>";
        th += "<th class='center'>Delete</th>";
        th += "</tr>";
        table.append(th);
    }
    // call to the api to get the alarms for the current list
    $.ajax({
        url: networkNode + "/OASREST/v2/alarmlists/" + currentlist.id,
        type: "GET",
        contentType: "application/json; charset=utf-8", 
        crossDomain: true,
        dataType: "json",
        headers: {"clientid": clientid, "token": token},
        success: function(r) {
            $('#diverror').empty(); // success, so clear the errors                 
            for (var i = 0; i < r.data.length; i++){
                var temp = r.data[i].id;
                trid = temp.replaceAll('.', '_').replace(/\s/g, ''); // remove space and periods for row id     
                var ts = new Date(r.data[i].alarmdate) // hold the alarm date in a date variable
                var acttxt = ""; // variable for active column text
                var ackedtxt = "<img src='images/unchecked.png' style='cursor:pointer;' ondblclick='ackalarm(\"" + r.data[i].id + "\")'>"; // Acknowledged checkbox 
                var rclass = ""; // variable for row class
                // set the css class for the row base on active and acknowledged                    
                if (r.data[i].active) {
                    acttxt = "X";
                    rclass += "activerow";
                }else{
                    rclass += "inactive ";
                }
                if (r.data[i].acked) {
                    ackedtxt = "<img src='images/checked.png'>";
                    rclass += "ackedrow";
                }
                // build the row
                var str = "<tr class='" + rclass + "' id='" + trid + "'>";
                str += "<td class=''>" + fDate(ts) + "</td>";
                str += "<td class='center'>" + acttxt + "</td>";
                str += "<td class=''>" + r.data[i].text + "</td>";
                str += "<td class=''>" + r.data[i].type + "</td>";
                str += "<td class=''>" + r.data[i].group + "</td>";
                str += "<td class='center'>" + ackedtxt + "</td>";
                str += "<td class='center'><img src='images/delete.png' style='cursor:pointer;' onclick='deletealarm(\"" + r.data[i].id + "\")'></td>";
                str += "</tr>";
                // if the row already existed and this is an update, remove it first
                if(!drawheader){
                    $('#' + trid).remove();
                    $('#tbalarms tr:first').after(str);
                }else{                               
                    table.append(str);                                
                }                            
                // remove deleted alarms
                if(r.data[i].text == "DELETEALARM"){                           
                        $('#' + trid).remove();
                }
            }                           
            drawheader = false; // toggle flag for the header so the header row does not get redrawn after the first time
        }
    });
};

// function to format the date for display
function fDate(dt){
    var M = dt.getMonth() + 1;
    M = M.toString().padStart(2,0);
    var D = dt.getDate().toString().padStart(2,0);
    var H = dt.getHours().toString().padStart(2,0);
    var Min = dt.getMinutes().toString().padStart(2,0);
    var S = dt.getSeconds().toString().padStart(2,0);
    return M +"/" + D + "/" + dt.getFullYear() + " " + H + ":" + Min + ":" + S;
}

Now that we have our list created, we want to start polling the data. This is handled with the Start Polling button and the $(“#togglepolling”).click(function(). The first thing thing we do in the function is check to see if we have an alarm list created, if we don’t we display an error and exit the function. Next, we check to see if are already polling. If we aren’t, we use the JavaScript setInterval() function to call the getalarmlist() function every three seconds. We then immediately call the getalarmlist() function so that we don’t have to wait three seconds for it to run the first time.

Inside the getalarmlist() function, we check to see if the table header has already been drawn. If it hasn’t been, we draw it. Next, we call the API with a “GET” type, appending the currentlist id to the url, passing the clientid and token in the header and bypassing the data parameter as it is not needed for this call. In our success function, we clear out any old error messages and then build our display by looping through the returned array of alarms. We remove the periods and spaces from the alarm id to use it as the row id. Next, we look at alarms active and acknowledged states and do some formatting for those columns and the row color. We write out each of the returned alarm properties in our array and format the date for display. Then we check to see if this an update, (!drawheader). If it is we want to delete the old row before we add the new one. After that, we check the alarm text to see if we should delete the alarm and do so if that is the case. Finally, we set the drawheader to false so that we don’t keep redrawing it each time we poll the data. Back in our click event, we toggle the polling button text.

If the user has clicked the Stop Polling button, we clear the polling and set it to null and toggle the button text.

Update Alarms

// function to delete an alarm by id
function deletealarm(alarmid){
    var deletedata = [
        {
            "id": alarmid,
            "action" : "Delete",
            "networknode" : "localhost"
        }
    ]
    $.ajax({
        url: networkNode + "/OASREST/v2/alarmlists/set",
        type: "POST",
        headers: {"clientid": clientid, "token": token},  
        contentType: "application/json; charset=utf-8", 
        crossDomain: true,
        dataType: "json",
        data: JSON.stringify(deletedata),
        success: function(r) {        
        }
    });
};

// function to acknowledge an alarm by id
function ackalarm(alarmid){
    var ackdata = [
        {
            "id": alarmid,
            "action" : "Ack",
            "networknode" : "localhost"
        }
    ]
    $.ajax({
        url: networkNode + "/OASREST/v2/alarmlists/set",
        type: "POST",
        headers: {"clientid": clientid, "token": token},  
        contentType: "application/json; charset=utf-8", 
        crossDomain: true,
        dataType: "json",
        data: JSON.stringify(ackdata),
        success: function(r) {        
        }
    });
};

With the Update Alarms API call, you can Acknowledge, Delete and add Comments to an alarm. Valid operations are “Ack”, “Delete”, and “Comment” and are case-sensitive. In our demo, when the user clicks the Delete icon for the alarm, it fires the deletealarm() function, passing in the alarm id. The function calls the REST API with a “POST” type and passes the clientid and the token in the header. In the data parameter, we pass the alarm id, network node and the “Delete” action. In the polling that follows this call, the server sends “DELETEALARM” in the text of the alarm array for the deleted alarm letting us know to remove it from the display.

When the user double clicks the Acknowledged checkbox, it fires the ackalarm() function and passes in the alarm id. The function calls the REST API with a “POST” type and passes the clientid and the token in the header. In the data parameter, we pass the alarm id, network node and the “Ack” action. In the polling that follows this call, the server sends that alarm with the active property flagged as true and we then update the checkbox and row color.

Hide Inactive

$("#toggleactive").click(function(){
    if (polling){
        if (!currentlist.id){ // don't let them toggle active if there is no alarm list
            displaymessage("Alarm List not found", "toggleactive");
            return;
        }    
        if (inactive){
            $("#toggleactive").prop("value", "Show Inactive");
            $('#tbalarms tr').filter('.inactive').hide(); // hide the inactive rows
            inactive = false;   
        } else {              
            $("#toggleactive").prop("value", "Hide Inactive");
            $('#tbalarms tr').filter('.inactive').show(); // show the inactive rows
            inactive = true; 
        }            
    }else{
        displaymessage("Start Polling First", "toggleactive"); // in case of error, display the error    
    }
});

The Hide Inactive button does not make a call to the REST API, it just adjusts the display to hide or show the inactive alarms based on the button state.

From the Top…

<!DOCTYPE html>
<html lang="en">
<head>
<meta charset="utf-8"/>
    <title>REST Example | Alarms</title>
    <link rel="stylesheet" stype="text/css" href="client.css?id=12345678">
    <script src="https://code.jquery.com/jquery-3.1.1.min.js"></script>
    <script type="text/javascript">

        var clientid =  ""; // holds the client id from authorization
        var token =  "";    // holds the token from authorization
        var drawheader = true; // flag for whether the table header needs to be drawn
        var polling = null; // variable for setInterval function
        var inactive  = true; // flag for show/hide inactive alarms
        var networkNode = "http://www.opcweb.com:58725"; // variable for the network node
        var currentlist = {
                    "filter": {
                        "minpriority": 0,
                        "maxpriority": 9999,
                        "networknodes": [
                        "localhost"
                        ],
                        "alarmtypes": [
                        "Digital", "High", "Low", "High High", "Low Low", "Operator"
                        ]
                    },
                    "history": false
                }; // object for holding json data

        // function to clear out the variables and html         
        function resetvariables(){
            clearInterval(polling);            
            currentlist.id = null;
            drawheader = true;
            polling = null;
            $("#tbalarms").empty();
            $('#divalarmlistid').empty();
            $("#togglepolling").prop("value", "Start Polling");

        }

        // function to format the date for display
        function fDate(dt){
            var M = dt.getMonth() + 1;
            M = M.toString().padStart(2,0);
            var D = dt.getDate().toString().padStart(2,0);
            var H = dt.getHours().toString().padStart(2,0);
            var Min = dt.getMinutes().toString().padStart(2,0);
            var S = dt.getSeconds().toString().padStart(2,0);
            return M +"/" + D + "/" + dt.getFullYear() + " " + H + ":" + Min + ":" + S;
        }

        // function to display error messages       
        function displaymessage(mess, fnc){
            clearInterval(polling); // in the event of an error we stop the polling
            switch(mess) {
                case 401:
                    $('#diverror').html("Authentication required.");
                    break;
                case 404:
                    if((fnc == "delete")||(fnc == "update")){
                        $('#diverror').html("Alarm List not found.");
                    }else{
                        $('#diverror').html("404"); 
                    }
                    break;
                default:
                    $('#diverror').html(mess);
            }                       
        }

        // function to delete an alarm by id
        function deletealarm(alarmid){
            var deletedata = [
                {
                    "id": alarmid,
                    "action" : "Delete",
                    "networknode" : "localhost"
                }
            ]
            $.ajax({
                url: networkNode + "/OASREST/v2/alarmlists/set",
                type: "POST",
                headers: {"clientid": clientid, "token": token},  
                contentType: "application/json; charset=utf-8", 
                crossDomain: true,
                dataType: "json",
                data: JSON.stringify(deletedata),
                success: function(r) {        
                }
            });
        };

        // function to acknowledge an alarm by id
        function ackalarm(alarmid){
            var ackdata = [
                {
                    "id": alarmid,
                    "action" : "Ack",
                    "networknode" : "localhost"
                }
            ]
            $.ajax({
                url: networkNode + "/OASREST/v2/alarmlists/set",
                type: "POST",
                headers: {"clientid": clientid, "token": token},  
                contentType: "application/json; charset=utf-8", 
                crossDomain: true,
                dataType: "json",
                data: JSON.stringify(ackdata),
                success: function(r) {        
                }
            });
        };

        $(document).ready(function() {

            // function to authorize user and get token and client id
            $("#doauth").click(function(){
                resetvariables();
                // api call for authorization
                $.ajax({
                    url: networkNode + "/OASREST/v2/authenticate",
                    type: "POST",
                    contentType: "application/json; charset=utf-8", 
                    crossDomain: true,
                    dataType: "json",
                    data: '{"username": "", "password": ""}',
                    success: function(r) {
                        clientid = r.data.clientid; // set the clientid variable returned from the call 
                        token = r.data.token;   // set the token variable returned from the call
                        $('#divid').html(clientid); // display the client id
                        $('#divtoken').html(token); // display the token
                    },
                    error: function (e) {
                        displaymessage(e.status, "auth"); // in case of error, display the error    
                    }
                });
            });
            
            // click event to handle and toggle create/delete alarmlist button
            $("#createalarmlist").click(function(){
                // if alarmlist id doesn't exist, create one.
                if (!currentlist.id){
                    $.ajax({
                        url: networkNode + "/OASREST/v2/alarmlists",
                        type: "POST",
                        contentType: "application/json; charset=utf-8", 
                        crossDomain: true,
                        dataType: "json",
                        headers: {"clientid": clientid, "token": token},                    
                        data: JSON.stringify(currentlist),
                        success: function(r) {
                            currentlist.id = r.data.id;  // store the returned alarmlist id in the object              
                            $('#divalarmlistid').html(currentlist.id); // display the alarmlist id on the page
                            $('#diverror').empty(); // success, so clear the error
                            $("#createalarmlist").prop("value", "Delete Alarm List"); // toggle button text
                        },
                        error: function (e) {
                            displaymessage(e.status, "createalarmlist");  // in case of error, display the error    
                        }                        
                    });                   
                    // if alarmlist id exists, delete it.
                }else{                   
                    $.ajax({
                        url: networkNode + "/OASREST/v2/alarmlists/" + currentlist.id,
                        type: "DELETE",
                        contentType: "application/json; charset=utf-8", 
                        crossDomain: true,
                        dataType: "json",
                        headers: {"clientid": clientid, "token": token},
                        success: function(r) {
                            resetvariables(); // clear everything out to start again
                            $("#createalarmlist").prop("value", "Create Alarm List");  // toggle button text         
                        },
                        error: function (e) {
                            displaymessage(e.status, "delete"); // in case of error, display the error    
                        }
                    });             
                }                               
            });

            // click function to toggle polling
            $("#togglepolling").click(function(){
                // if no alarm list exists, exit
                if (!currentlist.id){
                    displaymessage("Alarm List not found", "poll");
                    return;
                }
                // if we aren't polling, start the polling
                if (polling == null){                    
                    polling = setInterval(getalarmlist, 1000);
                    getalarmlist();
                    $("#togglepolling").prop("value", "Stop Polling"); // update polling button text
                // if we are polling, stop the polling
                } else {
                    clearInterval(polling);
                    polling = null;
                    $("#togglepolling").prop("value", "Start Polling");  // update polling button text
                }
            });

            // gets the alarm data and draws the table
            function getalarmlist(){
                var table = $("#tbalarms");
                // only draw the header one time
                if (drawheader){
                    var th = "<tr>";
                    th += "<th>Alarm Date</th>";
                    th += "<th class='center'>Active</th>";
                    th += "<th>Text</th>";
                    th += "<th>Type</th>";
                    th += "<th>Group</th>";
                    th += "<th class='center'>Acked</th>";
                    th += "<th class='center'>Delete</th>";
                    th += "</tr>";
                    table.append(th);
                }
                // call to the api to get the alarms for the current list
                $.ajax({
                    url: networkNode + "/OASREST/v2/alarmlists/" + currentlist.id,
                    type: "GET",
                    contentType: "application/json; charset=utf-8", 
                    crossDomain: true,
                    dataType: "json",
                    headers: {"clientid": clientid, "token": token},
                    success: function(r) {
                        $('#diverror').empty(); // success, so clear the errors   
                        for (var i = 0; i < r.data.length; i++){
                            var temp = r.data[i].id;
                            trid = temp.replaceAll('.', '_').replace(/\s/g, ''); // remove space and periods for row id     
                            var ts = new Date(r.data[i].alarmdate) // hold the alarm date in a date variable
                            var acttxt = ""; // variable for active column text
                            var ackedtxt = "<img src='images/unchecked.png' style='cursor:pointer;' ondblclick='ackalarm(\"" + r.data[i].id + "\")'>"; // Acknowledged checkbox 
                            var rclass = ""; // variable for row class
                            // set the css class for the row base on active and acknowledged                    
                            if (r.data[i].active) {
                                acttxt = "X";
                                rclass += "activerow";
                            }else{
                                rclass += "inactive ";
                            }
                            if (r.data[i].acked) {
                                ackedtxt = "<img src='images/checked.png'>";
                                rclass += "ackedrow";
                            }
                            // build the row
                            var str = "<tr class='" + rclass + "' id='" + trid + "'>";
                            str += "<td class=''>" + fDate(ts) + "</td>";
                            str += "<td class='center'>" + acttxt + "</td>";
                            str += "<td class=''>" + r.data[i].text + "</td>";
                            str += "<td class=''>" + r.data[i].type + "</td>";
                            str += "<td class=''>" + r.data[i].group + "</td>";
                            str += "<td class='center'>" + ackedtxt + "</td>";
                            str += "<td class='center'><img src='images/delete.png' style='cursor:pointer;' onclick='deletealarm(\"" + r.data[i].id + "\")'></td>";
                            str += "</tr>";
                            // if the row already existed and this is an update, remove it first
                            if(!drawheader){
                                $('#' + trid).remove();
                                $('#tbalarms tr:first').after(str);
                            }else{                               
                                table.append(str);                                
                            }                            
                            // remove deleted alarms
                            if(r.data[i].text == "DELETEALARM"){                           
                                 $('#' + trid).remove();
                            }
                        }                           
                        drawheader = false; // toggle flag for the header so the header row does not get redrawn after the first time
                    }
                });
            };
           
            // click function to toggle polling
            $("#togglepolling").click(function(){
                // if no alarm list exists, exit
                if (!currentlist.id){
                    displaymessage("Alarm List not found", "poll");
                    return;
                }
                // if we aren't polling, start the polling
                if (polling == null){                    
                    polling = setInterval(getalarmlist, 1000);
                    getalarmlist();
                    $("#togglepolling").prop("value", "Stop Polling"); // update polling button text
                // if we are polling, stop the polling
                } else {
                    clearInterval(polling);
                    polling = null;
                    $("#togglepolling").prop("value", "Start Polling");  // update polling button text
                }
            });

            $("#toggleactive").click(function(){
                if (polling){
                    if (!currentlist.id){ // don't let them toggle active if there is no alarm list
                        displaymessage("Alarm List not found", "toggleactive");
                        return;
                    }    
                    if (inactive){
                        $("#toggleactive").prop("value", "Show Inactive");
                        $('#tbalarms tr').filter('.inactive').hide(); // hide the inactive rows
                        inactive = false;   
                    } else {              
                        $("#toggleactive").prop("value", "Hide Inactive");
                        $('#tbalarms tr').filter('.inactive').show(); // show the inactive rows
                        inactive = true; 
                    }            
                }else{
                    displaymessage("Start Polling First", "toggleactive"); // in case of error, display the error    
                }
             });

           
        });

    </script>
</head>
    <body>
        <div class='main'>
            <input type='button' id='doauth' class='button' value='Authenticate'><input type='button' id='createalarmlist' class='button' value='Create Alarm List'><input type='button' id='togglepolling' class='button' value='Start Polling'><input type='button' id='toggleactive' class='button' value='Hide Inactive'><br><br>
            <div class='outer'><div class='label'>Client ID:</div><div  id='divid' class='value'></div></div>
            <div class='outer'><div class='label'>Token:</div><div id='divtoken' class='value'></div></div>
            <div class='outer'><div class='label'>Alarm List ID:</div><div id='divalarmlistid' class='value'></div></div><br>
            <div class='outer'><div class='label'>Message:</div><div  id='diverror' class='value'></div></div><br>
            <div id='displaythis'></div>  
            <div style='overflow: auto; width: 100%; height: 500px;'><table id='tbalarms'></table></div>
        </div>
    </body>
</html>

To download the source code for this tutorial, click here.

How to Access Real Time and Historical Trend Data with the OAS REST API

How to Access Real Time and Historical Trend Data with the OAS REST API


We are going to discuss how to trend live and historical data with the OAS REST API. The interface below is what we will be building. You can see the live version of it here: http://www.opcweb.com/examples/restexamples/trend.htm.

In order for a tag to be available for trending, the Trend Point check box in the tag configuration needs to be set to true. This lets the OAS service know that it should buffer that data on the hard drive to be available for trending. The amount of time the service buffers those tags is by default 24 hours. You can change this setting under Configure >> Options >> Trending >> Longest Real Time Timeframe. Historical trends are often confusing to OAS users. In order for a tag to be available for an historical trend, it needs to have trending enabled and also be being currently logged with our Data Historian. The tags values have to have been recorded to a database for the time period involved in the historical trend.

Getting Started

To use the OAS REST API you must make sure that the OAS HTTP service is listening on the correct port. To do this, open the OAS Configuration application and select Configure > Options, then select the network node (localhost if working on the local machine) and click Select. Under the Networking tab, locate the field for REST API/WebHMI Port Number. The default is 58725 but can be changed. If you are accessing the server from a remote client, you will also need to make sure your machine and/or company firewalls allow TCP traffic on the selected port.

You can find full documentation for the OAS REST API here: http://restapi.openautomationsoftware.com as well as a link to open it in Postman.

Setting up the Page

<!DOCTYPE html>
<html lang="en">
<head>
<meta charset="utf-8"/>
    <title>REST Example | Trend</title>
    <link rel="stylesheet" href="client.css">
    <script src="https://code.jquery.com/jquery-3.1.1.min.js"></script>
    <script type="text/javascript">

Above is the start of the head tag and a link to the jQuery library. We will be using jQuery for this tutorial.

var networkNode = "http://www.opcweb.com:58725"; // variable for the network node
var clientid =  ""; // holds the client id from authorization
var token =  "";    // holds the token from authorization
var polling = null; // variable for setInterval function
var drawheader = true; // flag for whether the table header needs to be drawn
var currentlist = {
      "tags":[
           {"tag": "Random.Value"},
           {"tag": "Ramp.Value"},
           {"tag": "Sine.Value"}
      ],  
     "samplerate": 1, // rate of data update in seconds
     "timeframe": 100 // window of time in seconds
};

Next we declare some variables that we will use later. The networkNode is the URL for where the OAS Service you are calling is located. The clientid and the token are variables that we will use to hold the authentication credentials that will be returned in our first call. Polling is a variable we will use to hold the setInterval function for our repeat calls to the API to get the trend data. The drawheader is a flag that we set to let us know if we need to draw the header of our display again as we are polling. The currentlist object holds the data we are going to send to the API later: the tags that we want to trend, the samplerate and the timeframe.

// function to clear out variables for a reset
function clearvariables(){
    drawheader = true;
    currentlist.history = false;
    delete currentlist.id;                
    clearInterval(polling);
    polling = null;
    $("#createtrendlist").prop("value", "Create Trend List");   // toggle Create button
    $("#dopolling").prop("value", "Start Polling"); // toggle Start button
    $("#tbtrend").empty(); // clear out display 
    $("#diverror").empty(); // clear out display 
    $('#displaythis').empty(); // clear out display 
    $('#divtrendlistid').empty(); // clear out display 
}        

The clearvariables() function above does just that. We will call it later in our application to reset our button text and reset our variables when needed.

        // function to display error messages 
        function displaymessage(mess, fnc){
            clearInterval(polling); // in the event of an error we stop the polling
            switch(mess) {
                case 401:
                    $('#diverror').html("Authentication required.");
                    break;
                case 404:
                    if((fnc == "delete")||(fnc == "update")){
                        $('#diverror').html("Tag List not found.");
                    }else{
                        $('#diverror').html("404"); 
                    }
                    break;
                default:
                    $('#diverror').html(mess);
                }                       
        }

The displaymessage() function is called when our API request returns with an error. It will display the message on the page.

Authenticate

$("#doauth").click(function(){ // click funtion for authenticatation
    clearvariables(); // clear out the old variables, we are starting over   
    // api call for authenticatation
    $.ajax({
        url: networkNode + "/OASREST/v2/authenticate",
        type: "POST",
        contentType: "application/json; charset=utf-8", 
        crossDomain: true,
        dataType: "json",
        data: '{"username": "", "password": ""}',
        success: function(r) {
            clientid = r.data.clientid; // store the client id for later calls
            token = r.data.token;  // store the token for later calls      
            $('#divid').html(clientid); // display the client id
            $('#divtoken').html(token); // display the token
        },
        error: function (e) {
            displaymessage(e.status, "auth"); // in case of error, display the error         
        }
    });
});

The first call you will always need to make is to Authenticate. This will create a session and return a clientid and token that you will send in the header of all of your subsequent calls. The API call above is inside of a click function that handles the click event for the Authenticate button. The first thing we do is call the clearvariable() function in case the user has been using the application already. When the session is created it creates a new clientid and token. Anything that may have been done previously on the page will be tied to the old session and no longer be accessible so we clear out the old display as well.

We are using the jQuery ajax() method to send an asynchronous HTTP request to the server. The first parameter url specifies the address we are sending our request to. The networkNode we set above is used here. The Authenticate call is a POST which we specify in the type parameter. Next, contentType: application/json; charset=utf-8 designates the content to be in JSON format, encoded in the UTF-8 character encoding. The crossDomain parameter is set to true, allowing us to send our request to a resource that is outside of our own domain. The dataType parameter is set to “json”, letting the server know we expect the response to come back in JSON format. In out data parameter, what we are sending to the server, we have two variables: username and password. In this example, they are empty strings which will allow us to create a session in the default security group. For more information about security groups, see the Getting Started – Security tutorial in our knowledge base.

If we were to run the Authenticate function successfully here is what would be returned:

{
    "status": "OK",
    "data": {
        "clientid": "e90c8ae8-6b12-4690-a02b-f35ad03b3d2d",
        "token": "f16c3098-b295-4572-9a6b-f53ee984d21b"
    },
    "messages": [
        "Default credential provided - access to data and operations may be limited"
    ]
}

In which case, we process the return inside of our success function. We set the clientid page variable to the clientid property of the data object of the return object and the token page variable to the token property. If an error were to be returned, we handle it in our error function where we send the message to the displaymessage() function.

Create or Delete Trend List

// click event for create or deleting trend list
$("#createtrendlist").click(function(){
    if (!currentlist.id){ // if the list doesn't exist, create one
        currentlist.history = false; // reset the history flag, this is real time
        // api call to create the trend list
        $.ajax({
            url: networkNode + "/OASREST/v2/trendlists",
            type: "POST",
            contentType: "application/json; charset=utf-8", 
            crossDomain: true,
            dataType: "json",
            headers: {"clientid": clientid, "token": token},
            data: JSON.stringify(currentlist), // format and set the data for the call
            success: function(r) {
                currentlist.id = r.data.id; // store the trend list id
                $('#diverror').empty();  // we were successful, clear error display                
                $('#divtrendlistid').html(currentlist.id); // display the trend list ID
                $("#createtrendlist").prop("value", "Delete Trend List"); // toggle the create/delete button
            },
            error: function (e) {
                displaymessage(e.status, "create");  // in case of error, display the error                  
            }
        });
    }else{ // if the list exists, delete it
        // api call to delete the trend list
        $.ajax({
            url: networkNode + "/OASREST/v2/trendlists/" + currentlist.id,
            type: "DELETE",
            contentType: "application/json; charset=utf-8", 
            crossDomain: true,
            dataType: "json",
            headers: {"clientid": clientid, "token": token},
            success: function(r) {     
                clearvariables() // successful, clear out variables and display
            },
            error: function (e) {
                displaymessage(e.status, "delete");  // in case of error, display the error                  
            }
        });
    }
});

In the click event, $(“#createtrendlist”).click(function(), we handle the Create Trend List/Delete Trend List button click. First, we check to see if a trend list has already been created: if (!currentlist.id). If one has not, then we create one. Then, we set the currentlist.history to false because in this instance the user has clicked the Create Trend List button not the Create Historical Trend List button. Next, is our API call, it is a “POST”, we include the clientid and the token that we set in our Authenticate function in the headers. Before we pass the currentlist object that holds our trend list information in, we format it with the JSON.stringify() method that converts a JavaScript object or value to a JSON string. In the success function, we set the currentlist.id to the trend list id that that server returns (r.data.id), display the trend list id on the page, clear the error display because we were successful and toggle the button text. In the event of an error, we display the message.

If the currentlist.id already exists, we know the user has clicked the Delete Trend List button, so we call the API with “DELETE” type. The url in this call has the currentlist.id appended to it so that the server knows which list we are deleting. We include the clientid and the token in the headers and we have no data parameter. In the success function, we call the clearvariables() function to handle resetting the page because the user is starting over. In the event of an error, we display the message.

Get Trend List

// function to get and display the data for the trend list
function gettrendlist(){
    var table = $("#tbtrend");
    if (drawheader){ // only draw the header the first time through
        var th = "<tr>";
        th += "<th>Time Stamp</th>";  // loop trough the tags and draw the header
        for (var i  = 0; i < currentlist.tags.length; i++){
            th += "<th>" + currentlist.tags[i].tag + "</th>"
        }
        th += "</tr>";
        table.append(th);
        drawheader = false;  // set flag to false so we don't redraw header
    }
    // api call to get the data for the currentlist
    $.ajax({
        url: networkNode + "/OASREST/v2/trendlists/" + currentlist.id,
        type: "GET",
        contentType: "application/json; charset=utf-8", 
        crossDomain: true,
        dataType: "json",
        headers: {"clientid": clientid, "token": token},
        success: function(r) {
            var d = new Date(r.firsttime);  
            var interval = (r.lasttime - r.firsttime) / r.count;  // get the time interval based on first and last time and the number of data points returned
            for (var i = 0; i < r.count; i++){  // loop through tags and display the and draw the rows
                var ts = new Date (r.firsttime + (interval * i));
                    var str = "<tr>";
                    str += "<td>" + fDate(ts) + "</td>";
                    for (var j = 0; j < r.data.length; j++){
                        str += "<td>" + r.data[j][i] + "</td>";                                    
                    }
                str += "</tr>";
                table.append(str);  // add the row to the table
                if (currentlist.history){  // if we are displaying historical data, stop the polling once we get the data
                    clearInterval(polling);
                    polling = null;
                }                            
            }                                             
        },
        error: function (e) {
            displaymessage(e.status, "gettrend");  // in case of error, display the error                  
        }
    });
}
// click function to toggle polling
$("#dopolling").click(function(){
    if (!currentlist.id){ // check to see if a trend list exists.  If not, exit.
        displaymessage("Trend List not found", "poll");
        return;
    }
    if(currentlist.history){  // check to to see if it is a historical trend.  If so, exit.
        displaymessage("Polling not available for Historical Trend", "poll");
        return;
    }
    if (polling == null){  // if not polling, start the polling
        polling = setInterval(gettrendlist, 3000);
        gettrendlist();
        $("#dopolling").prop("value", "Stop Polling"); // toggle the button text
    } else {
        clearInterval(polling);
        polling = null; // if already polling, stop it
        $('#displaythis').empty(); // empty out the display 
        $("#dopolling").prop("value", "Start Polling"); // toggle the button text
    }
});

Now that we have created our trend list, we will start polling the data to create the live data stream. The $(“#dopolling”).click(function() checks to see if a trend list id exists. If it doesn’t, it displays an error message and exits the function. If an id does exist, the function then checks to see if the current trend list is a historical trend. Historical trends only return one data set, so we don’t want allow the user to turn polling on and off. If it is historical, we display an error message and exit the function. Next, we want to see if the user is trying to stop or start the polling by looking at whether or not the polling variable exists. If it doesn’t exist, we start the polling by calling the setInterval(gettrendlist, 3000). This will call the gettrendlist function every three seconds. Then we immediately call the gettrendlist function so we don’t have to wait three seconds for it to poll the first time.

In the gettrendlist function, we start by checking to see if our display table header has already been drawn, we only want to draw it the first time we poll. If it hasn’t been drawn, we draw it by creating a column header for Time Stamp and then looping through the currentlist.tags array and creating a column header for each tag item, using the tag property. Then we set the drawheader flag to false, so that we don’t draw it again. Next, we make our API call appending the currentlist.id to the url so the server knows which list we are looking for. It is a “GET” type , we pass our clientid and token in the header and there is no data needed. In the success function, the first thing we do is calculate the interval between points based on r.firsttime and r.lasttime and the number of data points returned. We then loop through the tags creating the table rows and and adding them to the table. We create the timestamp by adding our interval to the r.firsttime each time we go through. Then, we do some housekeeping and check to see if this is a historical trend. If it is, we stop the polling and clear it out because we only want to display data once for an historical trend. In the event of an error, we display the message.

If the user is trying to stop the polling we handle that on the other side of our if statement by clearing the polling. Then we clear the display and toggle the button.

Update Trend List

// click function to handle add Tank Level
$("#updatetrendlist").click(function(){
    if (!currentlist.id){  // if there is no trend list to add it to, exit
        displaymessage("Create a Trend List First", "update");
    return;
    }
    if(currentlist.history){ // if historical trend, exit, we are not logging Tank Level
        displaymessage("Not available for Historical Trend", "update");
        return;
    }  
    if(currentlist.tags.some(el => el.tag === "Tank Level.Value")){  // if the Tank Level already is included, exit
        return;
    }else{ // otherwise, add it to the tag array
        currentlist.tags.push({"tag": "Tank Level.Value"});
    }
    drawheader = true;  // we need to redraw the header, so reset the flag
    $("#tbtrend").empty();  // clear out the current display
    // api call to update the trend list            
    $.ajax({
        url: networkNode + "/OASREST/v2/trendlists",
        type: "PUT",
        contentType: "application/json; charset=utf-8", 
        crossDomain: true,
        dataType: "json",
        headers: {"clientid": clientid, "token": token},
        data: JSON.stringify(currentlist),
        success: function(r) {
            //polling = setInterval("getthetags()", 1000);
        },
        error: function (e) {
            displaymessage(e.status, "update");   // in case of error, display the error                 
        }
    });
});

When the user clicks the Add Tank Level button we need to update the trend list. In the $(“#updatetrendlist”).click(function(), the first thing we do is to check if we have a list to update. If we don’t we display an error message and exit the function. Then, we check to see if this is an historical trend, in which case we display an error message and exit the function. We are not logging historical data for the tank tag and, therefore, can’t display it. After that, we check to see if our list already has the Tank Level included. We only want it in the list once so we will exit the function if it is. If it is not, we use the array.push method to add the Tank Level to our object. Next, we set the drawheader flag back to true because we want the header be redrawn now that we have added a new tag. Then, our API call which is a “PUT”. We send the clientid and the token in the header and in the data parameter we format our currentlist object and send the server our updated list. In the success function, we resume polling. In the event of an error, we display the message.

Create Historical Trend

// click event to create the historical trend
    $("#createtrendhistory").click(function(){
    if(currentlist.tags.some(el => el.tag === "Tank Level.Value")){  // we don't want the Tank Level for this, if it exists, remove it
        currentlist.tags.pop();
    }
    clearvariables() // starting a new list, clear out old variables and display
    currentlist.history = true; // set the history to true
    currentlist.firsttime = "1620232331000";
    currentlist.lasttime = "1620232341000";
    $.ajax({
        url: networkNode + "/OASREST/v2/trendlists",
        type: "POST",
        contentType: "application/json; charset=utf-8", 
        crossDomain: true,
        dataType: "json",
        headers: {"clientid": clientid, "token": token},
        data: JSON.stringify(currentlist), // format and set the data for the call
        success: function(r) {
            console.log(r);
            currentlist.id = r.data.id; // set the current list id from the data returned
            $('#divtrendlistid').html(currentlist.id); // display the trend list id
            polling = setInterval(gettrendlist, 3000); // start the polling
            gettrendlist(); // get the data for the new list
        },
        error: function (e) {
            displaymessage(e.status, "history");  // in case of error, display the error                  
        }
    });
});

To create an Historical Trend list we use the same API call we do to create a real-time trend list but we add a few extra parameters. In the $(“#createtrendhistory”).click(function() we first check to see if the Tank Level is included on our currentlist. If it is, we remove it with array.pop(). We are not data logging this tag, so we can not show history for it, only real-time data. Next, we clear out our variables because most likely the user has already created a real-time trend list. Then, we set the history property of our currentlist object to false and add some date parameters. This is an historical trend so we need to give the server a date range, it is looking for firsttime and lasttime. These values are sent in in tick format, a numeric representation of the number of ticks since 1/1/1970. In JavaScript this can be retrieved from a Date object using the .GetTime() method. The call is a “POST” type and we send the clientid and the token in the header. In our success function, we set the currentlist.id from the id that is returned from the call and display it, start the polling and immediately call the gettrendlist() function gain so that we don’t have to wait the three seconds. In the event of an error, we display the message.

The Whole Ball-of-Wax

<!DOCTYPE html>
<html lang="en">
<head>
<meta charset="utf-8"/>
    <title>REST Example | Real Time Data</title>
    <link rel="stylesheet" href="client.css">
    <script src="https://code.jquery.com/jquery-3.1.1.min.js"></script>
    <script type="text/javascript">

        var networkNode = "http://www.opcweb.com:58725";
        var clientid =  ""; // holds the client id from authorization
        var token =  "";    // holds the token from authorization       
        var polling = null; // variable for setInterval function    
        var pumpval = null; // holds the last pump value
        var currentlist = {
            "tags":[    
                {"path": "Pump.Value"},
                {"path": "Ramp.Value"},
                {"path": "Sine.Value"}
            ]
        };

            // function to clear out variables for a reset
        function clearvariables(){
            delete currentlist.id;
            clearInterval(polling);
            polling = null;
            $('#diverror').empty();
            $('#divtaglistid').empty();
            $('#displaythis').empty();
            $("#createtaglist").prop("value", "Create Tag List");
            $("#dopolling").prop("value", "Start Polling");
        }
        
        // function to display error messages 
        function displaymessage(mess, fnc){
            clearInterval(polling); // in the event of an error we stop the polling
            switch(mess) {
                case 401:
                    $('#diverror').html("Authentication required.");
                    break;
                case 404:
                    if((fnc == "delete")||(fnc == "update")){
                        $('#diverror').html("Tag List not found.");
                    }else{
                        $('#diverror').html("404"); 
                    }
                    break;
                default:
                    $('#diverror').html(mess);
                }                       
        }
        
        // api call to get the latest tag values for the list
        function getthetags(){
            $.ajax({
                url: networkNode + "/OASREST/v2/taglists/" + currentlist.id,
                type: "GET",
                contentType: "application/json; charset=utf-8", 
                crossDomain: true,
                dataType: "json",
                headers: {"clientid": clientid, "token": token},
                success: function(r) {
                    console.log(r);
                    pumpval = r.tags[0].value; // hold onto the pump value so we can update it
                    $('#displaythis').empty(); // empty out old display
                    $.each(r.tags, function(key,tag) {
                        $('#displaythis').append(tag.path + ': ' + tag.value + "<br>");               
                    });              
                },
                error: function (e) {
                    displaymessage(e); // in case of error, display the error    
                }
            }); 
        }
        
        $(document).ready(function() {
            
            $("#doauth").click(function(){ // click funtion for authorization
                clearvariables(); // clear out the old variables, we are starting over   
                // api call for authorization
                $.ajax({
                    url: networkNode + "/OASREST/v2/authenticate",
                    type: "POST",
                    contentType: "application/json; charset=utf-8", 
                    crossDomain: true,
                    dataType: "json",
                    data: '{"username": "", "password": ""}',
                    success: function(r) {
                        clientid = r.data.clientid; // store the client id for later calls
                        token = r.data.token;  // store the token for later calls      
                        $('#divid').html(clientid); // display the client id
                        $('#divtoken').html(token); // display the token 
                    },
                    error: function (e) {
                        displaymessage(e.status, "auth"); // in case of error, display the error         
                    }
                });
            });
            
            // click function to create or delete tag list 
            $("#createtaglist").click(function(){
                // if there is no id, create one
                if (!currentlist.id){ 
                    // api call to create the tag list
                    $.ajax({
                        url: networkNode + "/OASREST/v2/taglists",
                        type: "POST",
                        contentType: "application/json; charset=utf-8", 
                        crossDomain: true,
                        dataType: "json",
                        headers: {"clientid": clientid, "token": token},
                        data: JSON.stringify(currentlist),
                        success: function(r) {
                            currentlist.id = r.data.id;                            
                            $('#divtaglistid').html(currentlist.id);
                            $('#diverror').empty();
                            $("#createtaglist").prop("value", "Delete Tag List"); // toggle button
                        },
                        error: function (e) {
                            displaymessage(e.status, "create"); // in case of error, display the error    
                        }
                    });
                // if there is an id, delete it
                }else{
                    clearInterval(polling); // stop the polling and clear out the variable                   
                    polling = null;
                    $("#dopolling").prop("value", "Start Polling"); // toggle polling button
                    // api call to delete the tag list
                    $.ajax({
                        url: networkNode + "/OASREST/v2/taglists/" + currentlist.id,
                        type: "DELETE",
                        contentType: "application/json; charset=utf-8", 
                        crossDomain: true,
                        dataType: "json",
                        headers: {"clientid": clientid, "token": token},
                        success: function(r) {
                            if(currentlist.tags.some(el => el.path === "Random.Value")){  // if the random tag has been added, remove it to reset to original list
                                currentlist.tags.pop(); 
                            }
                            delete currentlist.id; 
                            $('#divtaglistid').empty();  //empty the displays
                            $('#displaythis').empty();
                            $("#createtaglist").prop("value", "Create Tag List"); // toggle button
                        },
                        error: function (e) {
                            displaymessage(e.status, "delete"); // in case of error, display the error   
                        }
                    });
                }
            });

            // click event for adding random tag
            $("#updatetaglist").click(function(){
                if (currentlist.id == ""){ // if no list exists, exit
                    displaymessage("Tag List not found", "update");
                    return;
                }
                if(!currentlist.tags.some(el => el.path === "Random.Value")){  // check to see if it is already there, if it's not add it
                    currentlist.tags.push({"path": "Random.Value"});                
                    // api call to update the tag list
                    $.ajax({
                        url: networkNode + "/OASREST/v2/taglists",
                        type: "PUT",
                        contentType: "application/json; charset=utf-8", 
                        crossDomain: true,
                        dataType: "json",
                        headers: {"clientid": clientid, "token": token},
                        data: JSON.stringify(currentlist),
                        success: function(r) {
                        },
                        error: function (e) {
                            displaymessage(e.status, "update");  // in case of error, display the error                  
                        }
                    });
                }
            });           

            // click event to toggle the pump value
            $("#togglepump").click(function(){
                if (currentlist.id == ""){ // if no list exists, exit
                    displaymessage("Tag List not found", "toggle");
                    return;
                }
                var flagpump = false;
               if (pumpval == "False"){ // see what the current stored pump value is and flip it
                    flagpump = true;
                }
                // api call to update the pump value
                $.ajax({
                    url: networkNode + "/OASREST/v2/taglists/set",
                    type: "POST",
                    contentType: "application/json; charset=utf-8", 
                    crossDomain: true,
                    dataType: "json",
                    headers: {"clientid": clientid, "token": token},
                    data: '{"values":[{"path": "Pump.Value", "value": "' + flagpump + '"}]}',
                    success: function(r) {
                    },
                    error: function (e) {
                        displaymessage(e.status, "update");  // in case of error, display the error                          
                    }
                });
            });

            // click event to toggle polling
            $("#dopolling").click(function(){
                if (!currentlist.id){  // if no list exists, display message, exit
                    displaymessage("Tag List not found", "poll");
                    return;
                }
                if (polling == null){ // if polling exists, stop it
                    polling = setInterval("getthetags()", 1000);  // start the polling 
                    $("#dopolling").prop("value", "Stop Polling"); // toggle button
                } else { //if polling doesn't exist, start it
                    clearInterval(polling);  // stop the polling and clear the variable
                    polling = null;
                    $("#dopolling").prop("value", "Start Polling"); // toggle button
                }
            });

        });
</script>
</head>
    <body>
        <div class='main'>
            <input type='button' id='doauth' class='button' value='Authenticate'><input type='button' id='createtaglist' class='button' value='Create Tag List'><input type='button' id='dopolling' class='button' value='Start Polling'><input type='button' id='updatetaglist' class='button' value='Add Random Tag'><input type='button' id='togglepump' class='button' value='Toggle Pump'><br><br>
            <div class='outer'><div class='label'>Client ID:</div><div  id='divid' class='value'></div></div>
            <div class='outer'><div class='label'>Token:</div><div id='divtoken' class='value'></div></div>
            <div class='outer'><div class='label'>Tag List ID:</div><div id='divtaglistid' class='value'></div></div>         
            <div class='outer'><div class='label'>Message:</div><div  id='diverror' class='value'></div></div><br>
            <div id='displaythis'></div>
        </div>
    </body>
</html>

To download the source code for this tutorial, click here.

How do I troubleshoot REST API calls?

If there are errors executing a REST API call, you can check the OAS Configuration app, click on the triangle icon (should be flashing of there’s an error) and you’ll see system errors.

Locate the REST API and expand it out and you should see the failed calls. But it often won’t give you the detailed HTTP request/response and just contain the failed URL that was attempted. It’s a good way to see if people are hitting incorrect endpoints.

If you use Postman to execute REST API calls, you can see the proper URLs, headers, body contents, etc. for making proper calls.

If you ever get these response or codes, this is what they mean:
401: Unauthorized – you have not included the clientid and token fields in the request header, or the session has expired
500: Unknown server error – this may be something we need to investigate since the data was submitted properly but an error occurred on the server processing the request.
404: The object you’re trying to GET or PUT (update) does not exist

If you see “Service Unavailable” that means the REST API did not start up properly.
If you see a message indicating the Endpoint does not exist, this means the URL is not correct for the call.

If there’s something specific you’re attempting and don’t know what the issue is, you can always look at a successful call from Postman’s console and it will expose everything in the request header/body and response header/body. You can compare it to your failing call to see what you might need, such as the correct Content-type. You can always let us know what call you’re stuck on and we can investigate why it might not work for you.

How To Read and Write Live Data with the OAS REST API

Open Automation SoftwareREST API

The OAS REST API exposes functionality for reading and writing real-time and historical Tag Data, Trend Data, and Alarms. The API can also be used for managing OAS Server configurations.

Under the Networking tab, locate the field for REST API/WebHMI Port Number. The default is 58725 but can be changed. If you are accessing the server from a remote client, you will also need to make sure your machine and/or company firewalls allow TCP traffic on the selected port.

OAS REST API Online Documentation

You can view the full documentation for the OAS REST API at http://restapi.openautomationsoftware.com. It details all of the operations available to any REST API client and can be tested using the Postman application client. In the upper right corner of the documentation, you will see a button to Run in Postman, which will install the API documentation into the Postman client for direct execution against any OAS server. 


For more information about using the OAS REST API with Postman, see our Getting Started – REST API tutorial or watch the video below:

To start you will need to authenticate a session with the REST API, generating a clientid and credential token to use in all subsequent calls. The credentials posted in this operation must be configured in OAS Security settings on the server. To learn more about configuring security, see out Getting Started – Security tutorial in the knowledge base. To use the server’s default credentials, pass an empty string for both username and password fields, but only if the server is configured with the Default user group allowing access to operations.

<!DOCTYPE html>
<html lang="en">
<head>
<meta charset="utf-8"/>
    <title>REST Client</title>
    <script src="https://code.jquery.com/jquery-3.1.1.min.js"></script>
    <script type="text/javascript">
    $(document).ready(function() {
        $.ajax({
            url: "http://localhost:58725/OASREST/v2/authenticate",
            type: "POST",
            contentType: "application/json; charset=utf-8", 
            crossDomain: true,
            dataType: "json",
            data: '{"username": "", "password": ""}',
            success: function(r) {
                // display the response status code and text
                $('#displaythis').append("Status: "+ r.status +"<br>");
                $('#displaythis').append("Client ID: "+ r.data.clientid +"<br>");
                $('#displaythis').append("Token: "+ r.data.token +"<br>");
            }
        });
    })
    </script>
</head>
    <body>        
        <div id='displaythis'></div>
    </body>
</html>

How To Authenticate and Use the OAS REST API

AuthenticateOpen Automation SoftwareREST API

The OAS REST API exposes functionality for reading and writing real-time and historical Tag Data, Trend Data, and Alarms. The API can also be used for managing OAS Server configurations.

Configure the Port

To use the OAS REST API you must make sure that the OAS HTTP service is listening on the correct port. Open the OAS Configuration application and select Configure > Options, then select the Network Node and click Select.


Under the Networking tab, locate the field for REST API/WebHMI Port Number. The default is 58725 but can be changed. If you are accessing the server from a remote client, you will also need to make sure your machine and/or company firewalls allow TCP traffic on the selected port.


OAS REST API Online Documentation

You can view the full documentation for the OAS REST API at http://restapi.openautomationsoftware.com. It details all of the operations available to any REST API client and can be tested using the Postman application client. In the upper right corner of the documentation, you will see a button to Run in Postman, which will install the API documentation into the Postman client for direct execution against any OAS server. 


For more information about using the OAS REST API with Postman, see our Getting Started – REST API tutorial or watch the video below:

Authenticate a Session with the REST API

To start you will need to authenticate a session with the REST API, generating a clientid and credential token to use in all subsequent calls. The credentials posted in this operation must be configured in OAS Security settings on the server. To learn more about configuring security, see out Getting Started – Security tutorial in the knowledge base. To use the server’s default credentials, pass an empty string for both username and password fields, but only if the server is configured with the Default user group allowing access to operations.

<!DOCTYPE html>
<html lang="en">
<head>
<meta charset="utf-8"/>
    <title>REST Client</title>
    <script src="https://code.jquery.com/jquery-3.1.1.min.js"></script>
    <script type="text/javascript">
    $(document).ready(function() {
        $.ajax({
            url: "http://localhost:58725/OASREST/v2/authenticate",
            type: "POST",
            contentType: "application/json; charset=utf-8", 
            crossDomain: true,
            dataType: "json",
            data: '{"username": "", "password": ""}',
            success: function(r) {
                // display the response status code and text
                $('#displaythis').append("Status: "+ r.status +"<br>");
                $('#displaythis').append("Client ID: "+ r.data.clientid +"<br>");
                $('#displaythis').append("Token: "+ r.data.token +"<br>");
            }
        });
    })
    </script>
</head>
    <body>        
        <div id='displaythis'></div>
    </body>
</html>

IIoT Example Service Code

The OAS Example Service code example is a great way to learn how to programmatically add tags, update tag properties, and read and write live data to an OAS Engine.

You can view the .NET Programmatic Interface video for demonstration of the OAS Example Service Code and explanation of use of the most common methods.

  • 00:00 – Introduction
  • 00:33 – Source code example
  • 01:07 – Visual studio projects example
  • 01:33 – How to get a visual studio app
  • 01:40 – How to create projects and use visual studio
  • 03:05 – OAS service code example
  • 15:00 – Tag variables
  • 15:37 – How to browse tags
  • 17:10 – Networking
  • 20:55 – How to implement security
  • 21:31 – How to publish
  • 22:15 – How to register service
  • 23:41 – How to change project name
  • 26:20 – Questions

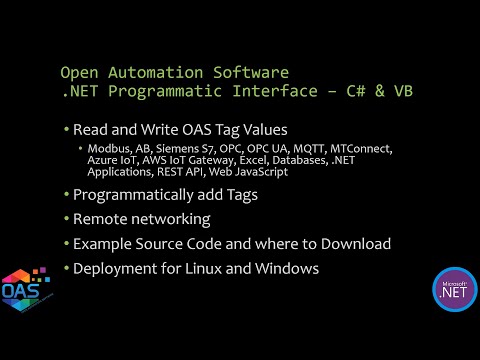
Download the OAS Example Service code.

Right click on the zip file that you have downloaded and choose Properties to select Unblock checkbox if Security warning is shown.

There are 4 Visual Studio projects all use the same methods to provide a working example.

  • C# .NET Core Console App
  • VB .NET Core Console App
  • C# Windows Service
  • VB Windows Service

These projects use the OASConfig.dll and OASData.dll assemblies that are included in the OAS platform installation directory, the default is C:\Program Files\Open Automation Software\OAS.

These projects are a good starting point if you need to setup unattended execution of processing and transferring data.  They can be easily modified to include your own routines.

Note: It is recommend to run Visual Studio in Administrative mode for full access to project files.  Either modify the properties of the shortcut under Advanced button or right click on the VS shortcut to Run as administrator.

Key Methods

Constructor

private OASData.Data oasd = new OASData.Data();
private OASConfig.Config oassys = new OASConfig.Config();

Create Tags

string DemoErrorString = "";
string DemoResultString = oassys.SetTagProperties(DemoPropertyValues, "localhost", ref DemoErrorString);
  • PropertyValues is an array of arrays
  • NetworkNode is optional and can be an IP Address network node, or registered domain name
  • ErrorString will set the string passed by reference with Success if successful, or an error string if the tags were not created or updated.

First element is an array containing the property names.  These property names will match the Tag CSV Export header.

object[] DemoDesiredColumns = new object[5];
DemoDesiredColumns[0] = "Tag"; // Required
DemoDesiredColumns[1] = "Value - Data Type";
DemoDesiredColumns[2] = "Value - Source";
DemoDesiredColumns[3] = "Value - Simulation Type";
DemoDesiredColumns[4] = "Value - Simulation Rate";
DemoPropertyValues[0] = DemoDesiredColumns; // First record is the header

Additional elements contain the values for each Tag.

object[] DemoTagValues1 = new object[5];
DemoTagValues1[0] = "OAS Demo Service.Source Tags.Ramp";
DemoTagValues1[1] = "Double";
DemoTagValues1[2] = "Simulation";
DemoTagValues1[3] = "Ramp";
DemoTagValues1[4] = 0.25;
DemoPropertyValues[1] = DemoTagValues1;

Write Tags Asynchronously

oasd.WriteTags(OASTags, OASValues);
  • Tags is a string array of tag names and variables.
  • Values is an object array containing the values to write to each tag.
  • TimeStamps array can optionally be provided to set the time of the value if the Data Source of the Tag is Value.

If the Data Source is defined to a device or application writes to .Value will be written to the source defined.

Examples: Modbus, Siemens, AB, OPC UA, MQTT

Read Tags Asynchronously

Call AddTags to add a list of tags for subscription.

oasd.AddTags(ReadTags);
  • Tags is a string array of tag names and variables.

Values will be returned in the ValuesChangedAll event anytime value changes in a tag variable.

oasd.ValuesChangedAll += OASDValuesChangedAll;
private void OASDValuesChangedAll(string[] Tags, object[] Values, bool[] Qualities, DateTime[] TimeStamps)

Call RemoveTags to remove any of the tag variables from subscription.

Write Tags Synchronously

SyncWriteTags is a blocking call that waits for the call to return from the service.

Errors = oasd.SyncWriteTags(Tags, Values);
  • Tags is a string array of tag names and variables.
  • Values is an object array containing the values to write to each tag.
  • Errors is an Integer array that returns
  • 0 when successful
  • 1 when OAS Engine is not reachable
  • 2 when the Tags array size is not equal to the Values array

Write Tags Synchronously with Confirmation

SyncWriteTagsWithConfirmation is a blocking call that waits for the values of the tag variables written call to return from the service.

Errors = oasd. SyncWriteTagsWithConfirmation(Tags, Values, 10000, 0.0001);
  • Tags is a string array of tag names and variables.
  • Values is an object array containing the values to write to each tag.
  • Include optional timeout with default of 10,000 milliseconds and deadband for floating point values with default of 0.0001.
  • Errors is an Integer array that returns
  • 0 when successful
  • 1 when OAS Engine is not reachable
  • 2 when the Values array is null
  • 3 when the Tags array size is not equal to the Values array

Read Tags Synchronously

SyncReadTags is a blocking call that obtains the current value of the list of tag variables.

Values = oasd.SyncReadTags(Tags, ref Errors, 10000);
  • The returned value is an object array with the values for each tag variable.
  • Tags is a string array of tag names and variables to read.
  • Errors is an integer array returning:
  • 0 if the tag variable quality is good
  • 1 if the quality is bad
  • 2 if the value could not be returned within the timeout specified
  • Timeout is specified in milliseconds to wait for the call to return.

Networking

Tag names can include an IP Address, network node name, or registered domain name if the application is deployed remote from the OAS Engine.

Basis Networking Example:

\\192.168.0.1\TagName.Value

If Live Data Cloud networking is implemented for self-hosting with a dynamic IP Address the LDC syntax is applicable.

Live Data Cloud Networking Example:

\\www.opcweb.com\RemoteSCADAHosting.MyLDCNode.TagName.Value

Register Service

Linux

Windows

  • Windows: Use InstallUtil to register service
  • Using Visual Studio Command Prompt as Administrator
  • InstallUtil OASDemoService.exe

To change the name of the service set the properties of ServiceInstaller1 in ProjectInstaller.

  • Description
  • DisplayName
  • ServiceName

See our OASConfig documentation and OASData documentation for more details.

Automatic Configuration with Dynamic User Interface

Open Automation Software offers OEMs full programmatic setup for their end users.  This method greatly reduces the potential for human error in the setup process.  Deployment of custom applications can be implemented from predefined scripts using SharePoint, Excel or a number of other methods.  Time is saved both in deployment and in troubleshooting because of the decreased likelihood for error and the speed that you can deploy new and update existing projects.

The video below demonstrates how to use the Automated HMI Example that is included in the installation of Open Automation Software.  The application automatically sets up data source configurations, trending, data logging and alarm limits.  The HMI clients will adapt themselves automatically based upon what data source is defined.

.NET Programmatic Server Configuration

.NET Users can programmatically define all OAS configurations including tags and data logging as demonstrated in this video above. The OASConfig .NET Standard 2.0 assembly for .NET 5, .NET Core 2.o or greater, .NET Framework 4.61 or greater, Xamarin.iOS 10.14 or greater, Xamarin.Android 8.0 or greater, and UWP 1.0.0.16299 or greater or the OPCSystems assembly for .NET Framework 4.6 or less. The components are free to use and can be included in Windows Services, Web Services, ASP.NET or .NET MVC Web Applications, WinForm Applications, WPF Applications, and .NET Core Console applications. The assemblies can be used to communicate and setup local and remote services. Learn More…

REST API

The OAS Platform REST API allows developers to read and write real time Tag data, read real time and historical Alarms and Trends, and even create or update Tag configurations. It utilizes JSON data over HTTP(s) and can be used by any virtually any development platform or language. Learn More…

What’s the difference between the REST API and Web HMI?

REST API

The OAS Platform REST API, like all APIs is a programmatic interface. It allows developers to read and write real time Tag data, read real time and historical Alarms and Trends, and even create or update Tag configurations. Because it utilizes JSON data over HTTP(s), it can be used by any virtually any development platform or language. It is also a perfect alternative to the .NET Data Connector for applications not running .NET code. Developers need to handle client to server communication to the API within their code. This includes web technologies such as Javascript, but if browser visualization is required, Web HMI may be the preferred product to utilize.

REST API Language Support

  • Any language that can support sending JSON over HTTP/S (.NET, PHP, Python, JS, NodeJS, Java, and more)
  • Fully documented and interactive API found here

Typical Applications

  • Automated solutions without the need for a user interface or data visualization
  • Programmatic configuration of the OAS Platform when using the .NET Data Connector is not possible (e.g. your platform is not .NET)
  • Native mobile applications

Skills Required

  • Knowledge of HTTP processes and methods
  • Familiarity with JSON object structures

Learn more about the OAS REST API >>

Web HMI

The Web HMI product is specifically geared towards web applications that need to visualize real time and historical data. It consists of a set of Javascript libraries intended to be included in your web pages which handle server communication and screen updates. While the Web HMI product does include programmatic methods for reading and writing Tag data, development is strictly done within HTML and intended to be run in a browser.

Web HMI Language and Platform Support

  • Any web application platform – built on standards (HTML, CSS, Javascript)
  • Any web development platform
  • Purely a Javascript solution for browser-to-OAS communications

Typical Applications

  • Real time and historical data visualization
  • System management and control user interfaces
  • Browser-based desktop and mobile applications

Skills Required

  • Web application development skills
  • Familiarity with JSON object structures
  • Javascript skills for direct access to the Web HMI script library functions

Learn more about OAS Web HMI >>

Can the REST API push data to another destination?

REST APIs by their very nature are HTTP services. This means that they are based on a request/response model. They are not event-driven and not capable of pushing data to a destination. You can poll against the REST API for updated values, but the data is only as current as the polling rate. So if the polling rate is longer than the refresh rate on the server value, you may miss updates.

If you would like to move data based on events, you must write your own solutions using one of our other developer tools, such as the .NET Data Connector or the Universal Driver Interface.