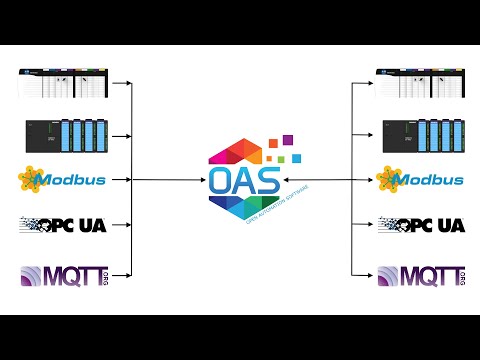
View the following video on how to setup publishing data to Azure Event Hubs.
- 00:00 – Introduction
- 00:45 – Getting Started Guide
- 01:10 – Create Event Hub
- 01:44 – Azure Portal
- 02:25 – Setup Driver
- 04:00 – Publish Select Tags
- 07:15 – Save Configuration
- 08:00 – Monitor Data
- 10:20 – IoT Publish
Create an Event Hub
You need to create an Event Hub for your device to connect to. The following steps show you how to complete this task using the Azure portal:
Step 1
Sign in to the Azure portal.
Step 2
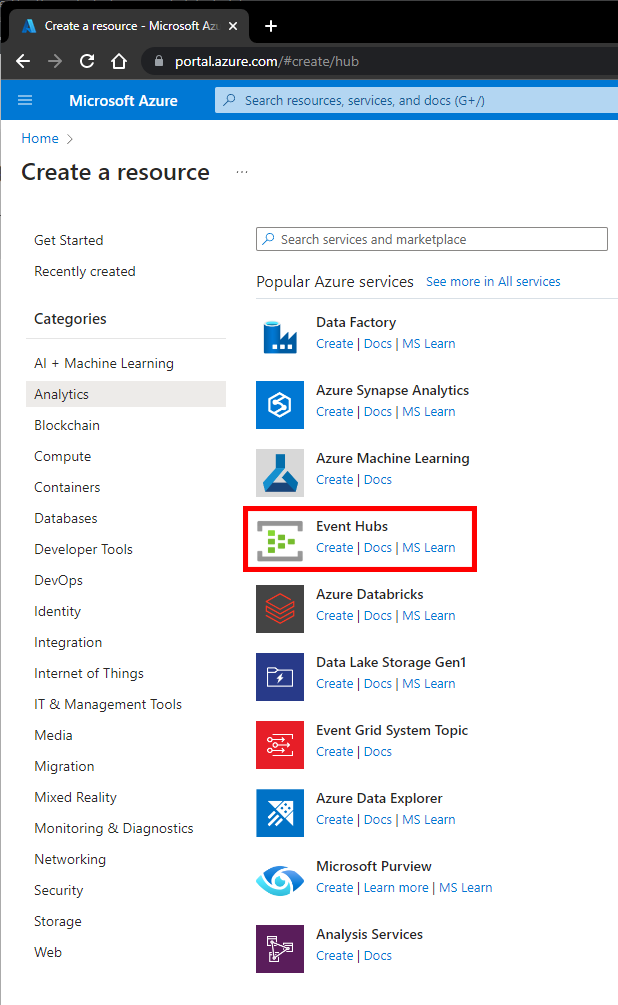
From the left menu, click Create a resource, then click Analytics, and then click Event Hubs.
Step 3
On the Basic tab of the Create Namespace step that appears enter your Project Details.
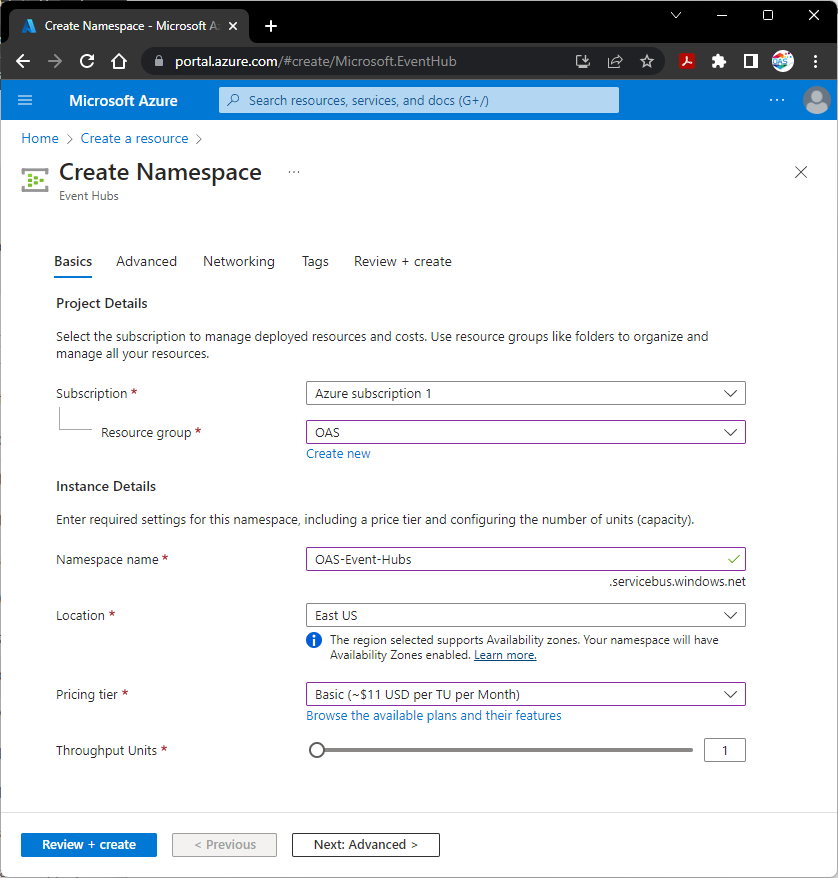
- Select the Azure Subscription to use for the Event Hub.
- Select existing or create a a new Resource group.
- Enter a Namespace name.
- Select Location.
- Select a Pricing tier.
- Set the Throughput Units.
Select Review + create

Then the Create button after the Validation succeeded.
You will see Deployment is in progress for a minute, then when finished you will see Your deployment is complete and the resource will be ready for use.
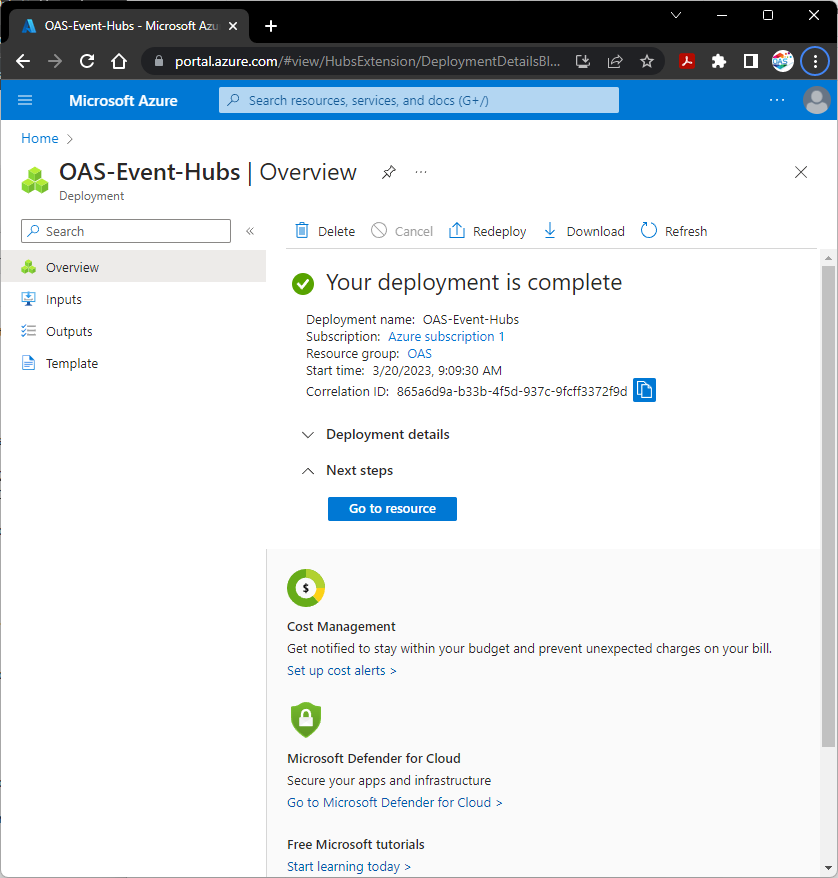
Select Go to resource.
Step 4

In Event Hubs Namespace select + Event Hub to add an Event Hub to publish data to.
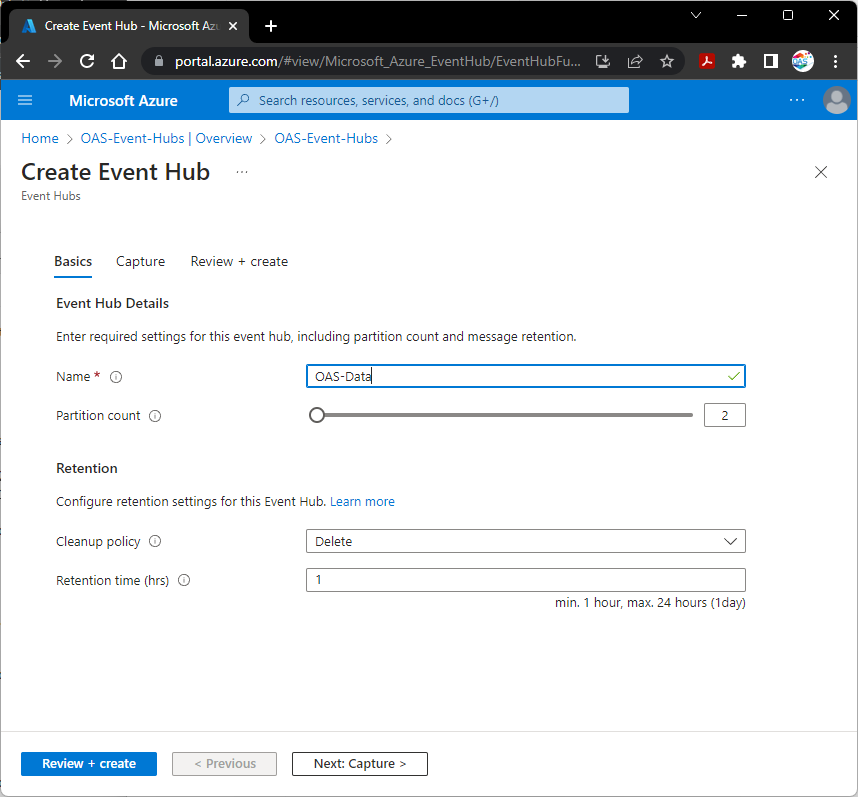
Set the Event Hub Name and select Review + create.
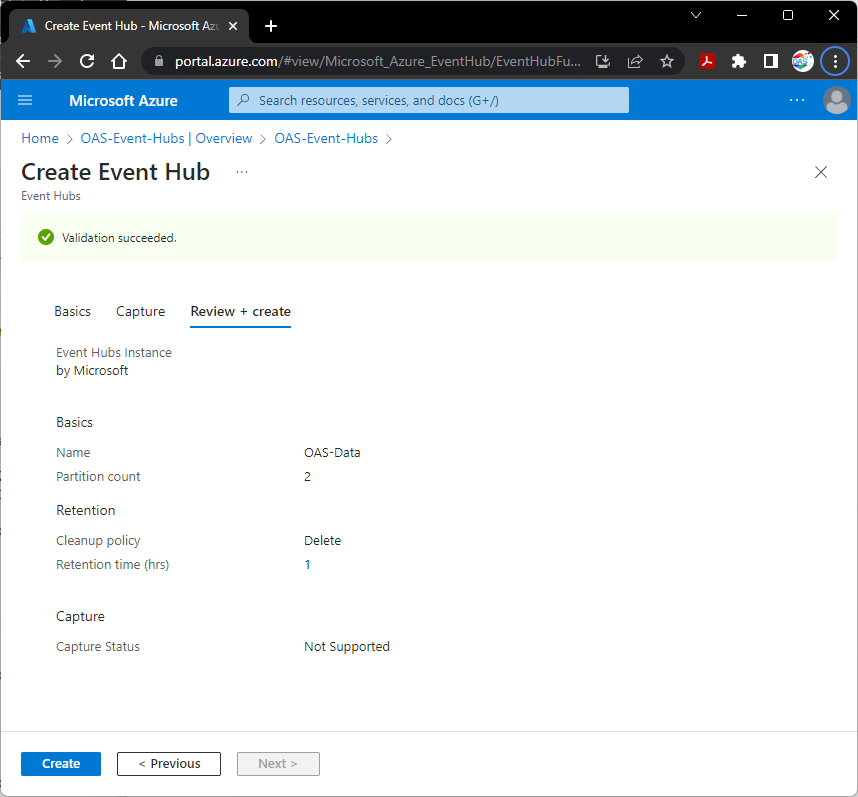
Select Create when the prompt of Validation succeeded appears.
The Event Hub is now ready for use with OAS to publish data to.
Step 5
Next click Shared access policies from the left menu. In the pane that appears to the right, click RootManageSharedAccessKey or use + Add to create a new key.
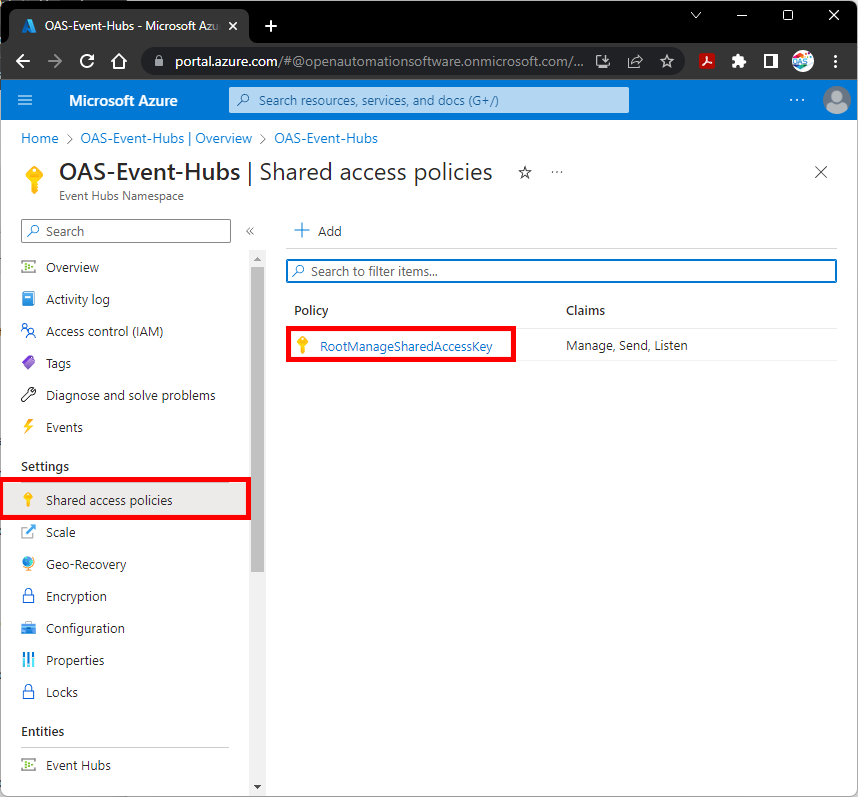
In the panel that appears to the right, select the Copy to clipboard icon next to Connection string – primary key. Save this as well, you will need it later.
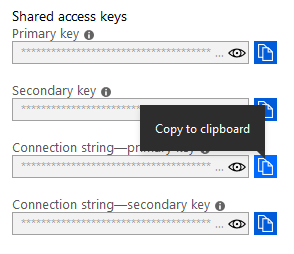
You have now created your Event Hub the connection string you need to complete the rest of this tutorial.
Step 6 (Optional Schema)
If you wish to transfer data with an Avro schema define a Schema Group in the Schema Registry. Azure Event Hub Schemas provide a serialization to reduce the message size during transmit. Note: Schemas are not available for use in a Basic Azure Event Hubs account, a Standard, Premium, or Dedicated account is required to use schemas.
It is important to note that the data type in the schema definition must match the value data type of the tag.
Following is example.
{
“namespace”: “com.oasiot.oas-data”,
“type”: “record”,
“name”: “oas-data”,
“fields”: [
{
“name”: “Ramp”,
“type”: “double”
},
{
“name”: “Sine”,
“type”: “double”
},
{
“name”: “Pump”,
“type”: “boolean”
},
{
“name”: “Status”,
“type”: [
“string”,
“null”
],
“default”: null
}
]
}
Notice the Status field that include a definition of both the data type and null to allow transfer if the data quality is bad.
“type”: [
“string”,
“null”
]
In the example above if Ramp, Sine, or Pump is bad quality the complete message will be rejected and not transfer. While the tag defined to the Status field could be bad quality.
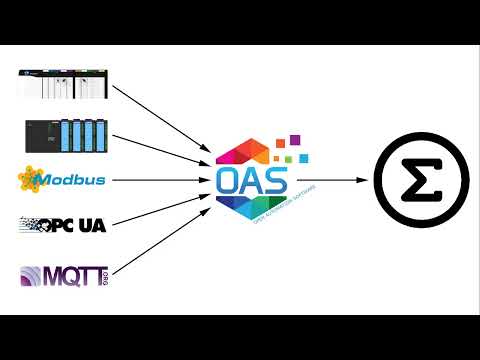
Create an Azure IoT Driver
Step 1
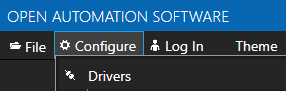
Open Configure OAS application.
Step 2
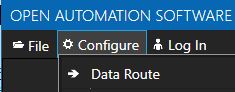
Select Configure – Drivers from the top menu.
Step 3
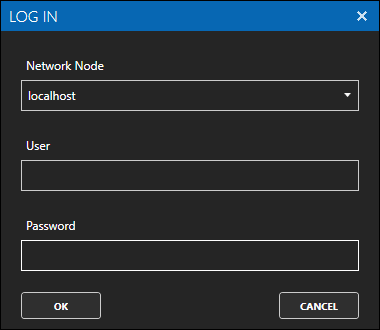
Select your Network Node, either localhost or remote.
Step 4
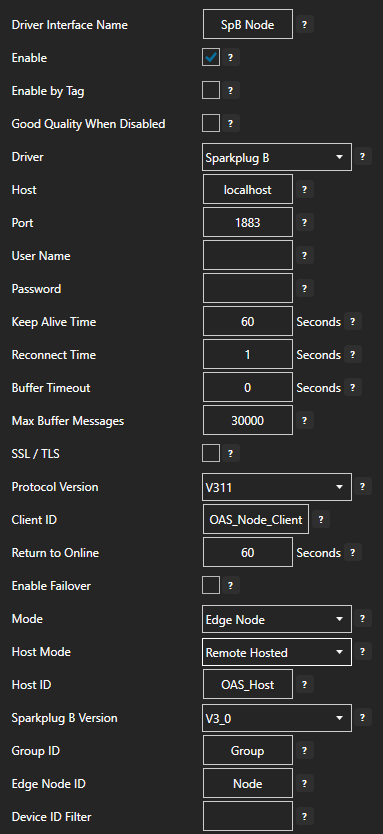
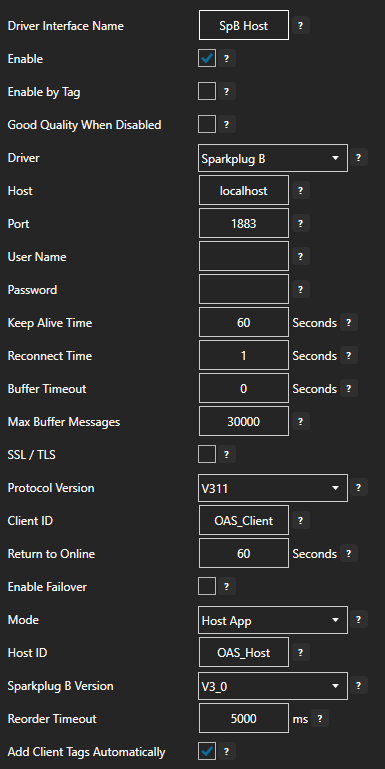
Enter the Driver Interface Name you wish to use.
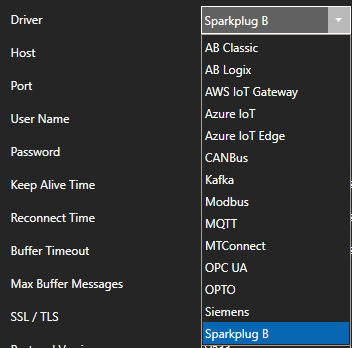
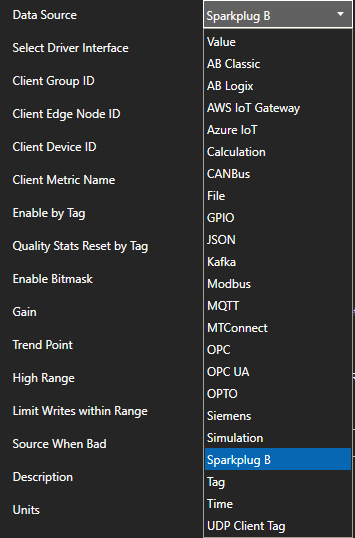
Select Azure IoT from the Driver combo box.
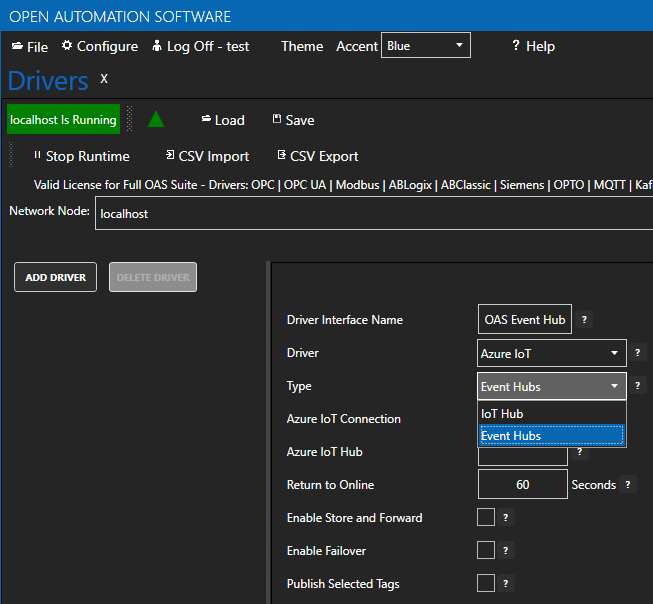
Select Event Hubs from the Type combo box.
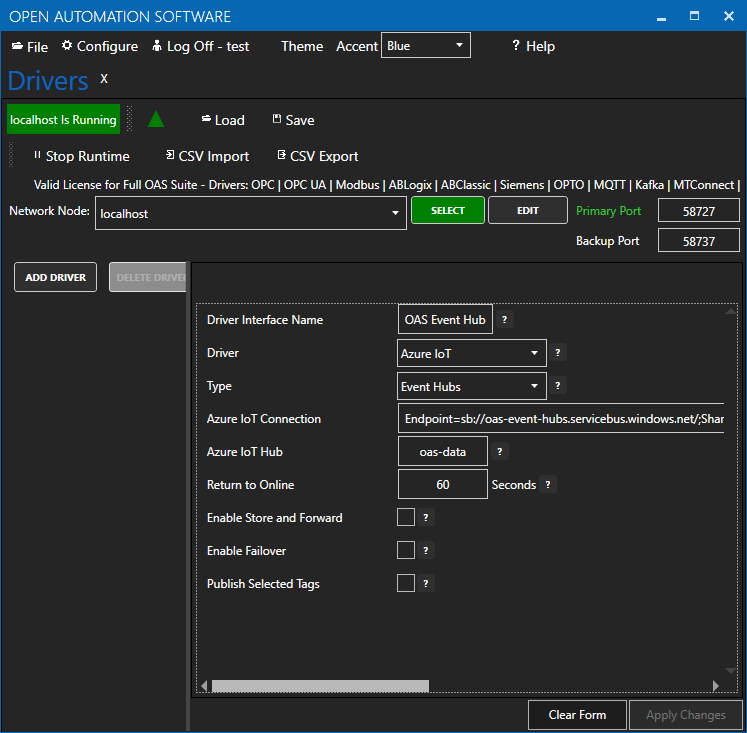
Copy the Connection string – primary key previously save from the Azure portal and past in the Azure IoT Connection property. This typically begins with Endpoint=sb://.
(Optional) Schema Type: Avro
Note: If Avro Schema is to be used for serialization the following connection properties are required instead of the Azure IoT Connection.
- Event Hub Host
- Tenant Id
- Client Id
- Client Secret
- Schema Group
- Schema GUID
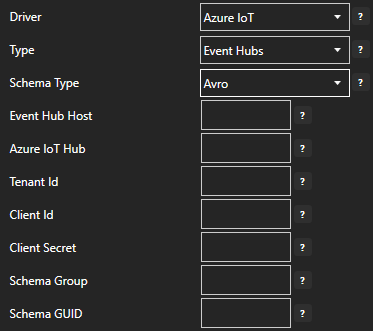
Set the Azure IoT Hub property to the Event Hub Name previously defined.
Step 5
To enable data buffering when communication failure occurs check Enable Store and Forward. Values will be stored in the directory specified under Configure >> Options >> Store and Forward.
Step 6
Optionally define a secondary failover Connection and Hub if the primary server fails with the property Enable Failover.
If both the primary and secondary servers are offline the Return to Online settings determines the retry frequency.
View Driver Interface Failover for more information and and video demonstrating communications failover.
Step 7
Click Add Driver on the top left.

Publish Live Data to your Azure IoT Hub.
There are 2 ways to publish data from OAS to Azure IoT Hub. Both require Tags to be setup first for the data sources you want to transfer.
Option 1 – Publish Selected Tags to your Azure Event Hub.
View the following video for a complete demonstration of how to publish data to Azure IoT Data Hub.
- 00:00 – Introduction
- 00:23 – Set up Tags in OAS
- 00:41 – Configure Azure IoT
- 01:53 – Publish Selected Tags
- 05:31 – Visual Studio Code
- 08:00 – Step by step instructions
- 08:12 – Bulk Publish to AWS IOT
- 09:21 – Step by step instructions / Publish Data to AWS IOT Gateway
- 09:33 – Bulk Publish to mqtt broker
- 10:29 – MQTT Explorer
- 11:20 – Step by step instructions/ Getting Started MQTT
- 11:34 – Save button of the OAS Configuration tool
Step 1
Enable Publish Selected Tags at the bottom of the Driver configuration.

Step 2
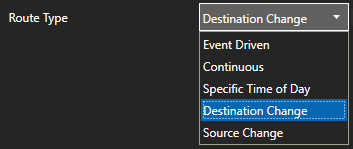
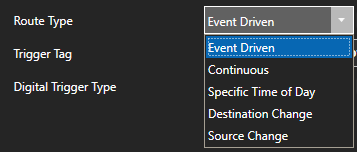
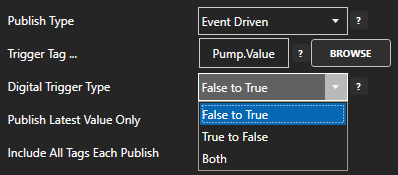
Select to publish data continuously at a specified interval, based on event, or at a specific time of day.
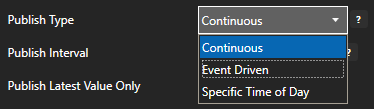
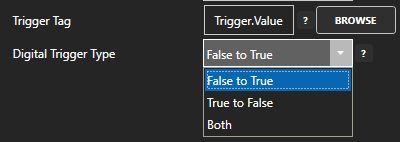
If Event Driven browse for a local or remote OAS tag that will trigger the publish. Select a Boolean tag that will change state from false to true, true to false, or both. Or choose an Integer tag that trigger a publish anytime the value changes other than 0.
Step 3
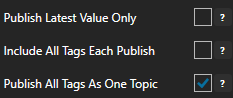
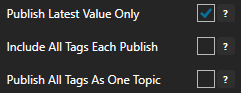
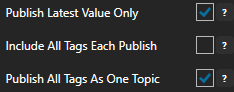
Enable Publish Latest Value Only to send only the latest value of each tag when published or disable to send all value changes since the last time a publish occurred.
Enabled Include All Tags Each Publish to send at least the latest value of each tag when published or disable to only send the tags that have changed since the last publish.
Enable Publish All Tags As One Topic to publish all tag values as one topic or disable to send each tag as its own topic.
See examples in Step 6 below for each selectable option.
Step 4
Specify the Publish Topic Id if choosing to Publish All Tags As One Topic.
Specify the Tag Id, Value Id, an optional Quality Id, and Timestamp Id for each tag value that is sent.
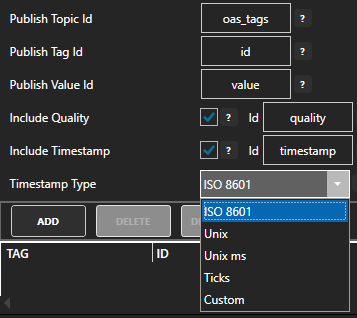
When including the Timestamp Id also specify the timestamp format, use Custom to specify your own date and time format.
Step 5
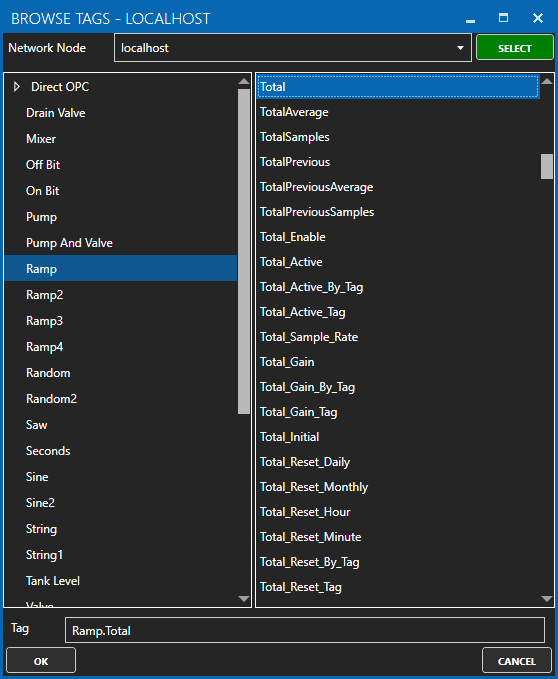
Specify local and remote OAS tag variables to include in each publish and specify the Id. Value is the current value from the data source or you can select any of the over 600 tag variables of each tag to publish.
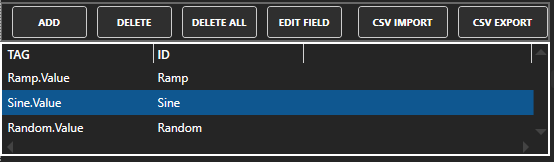
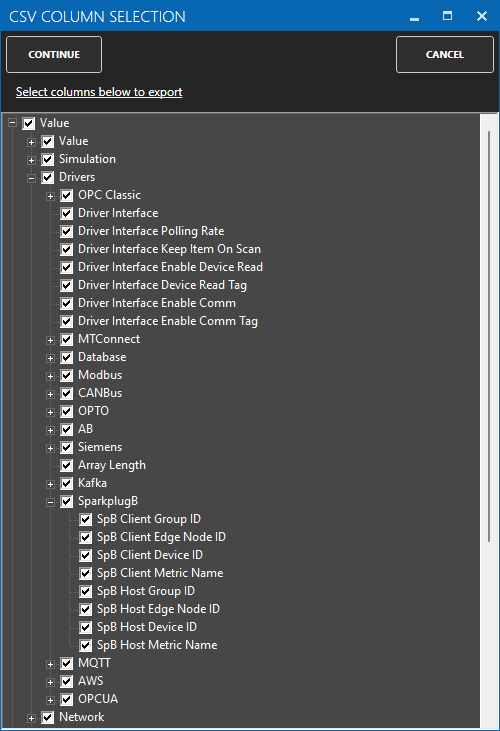
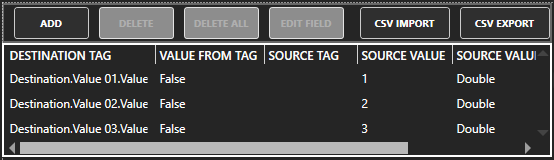
Optionally use CSV Export and CSV Import buttons to set up additional tags to publish using Microsoft Excel.
When selecting remote tags use Basic Networking syntax or Live Data Cloud syntax in the tag path.
Step 6
Select Apply Changes to begin publishing to Azure Event Hub. Select Save to save the new driver configuration within the tag file.
Examples:
Examples of publishing every 2 seconds with each tag value changing every second:
{
“deviceId”: “OASIOT”,
“topic”: “oas_tags”,
“values”: [
{
“id”: “Ramp”,
“value”: 39,
“quality”: true,
“timestamp”: “2022-03-21T08:55:39.000Z”
},
{
“id”: “Sine”,
“value”: 0.8090169943749475,
“quality”: true,
“timestamp”: “2022-03-21T08:55:39.000Z”
},
{
“id”: “Random”,
“value”: 10,
“quality”: true,
“timestamp”: “2022-03-21T08:55:39.000Z”
}
]
}
{
“deviceId”: “OASIOT”,
“topic”: “oas_tags”,
“values”: [
{
“id”: “Ramp”,
“value”: 16,
“quality”: true,
“timestamp”: “2022-03-21T09:03:36.000Z”
},
{
“id”: “Sine”,
“value”: 0.587785252292473,
“quality”: true,
“timestamp”: “2022-03-21T09:03:36.000Z”
},
{
“id”: “Random”,
“value”: 96,
“quality”: true,
“timestamp”: “2022-03-21T09:03:36.000Z”
},
{
“id”: “Ramp”,
“value”: 17,
“quality”: true,
“timestamp”: “2022-03-21T09:03:37.000Z”
},
{
“id”: “Sine”,
“value”: 0.6691306063588583,
“quality”: true,
“timestamp”: “2022-03-21T09:03:37.000Z”
},
{
“id”: “Random”,
“value”: 26,
“quality”: true,
“timestamp”: “2022-03-21T09:03:37.000Z”
}
]
}
{
“deviceId”: “OASIOT”,
“id”: “Ramp”,
“value”: 35,
“quality”: true,
“timestamp”: “2022-03-21T09:07:15.000Z”
}
{
“deviceId”: “OASIOT”,
“id”: “Sine”,
“value”: -1,
“quality”: true,
“timestamp”: “2022-03-21T09:07:15.000Z”
}
{
“deviceId”: “OASIOT”,
“id”: “Random”,
“value”: 83,
“quality”: true,
“timestamp”: “2022-03-21T09:07:15.000Z”
}
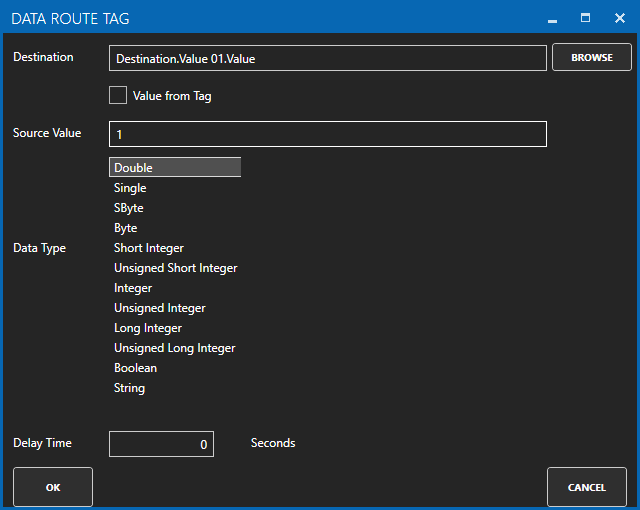
Option 2 – Use Data Route to Send Data to Azure Event Hub
Step 1
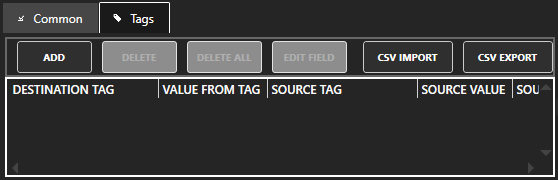
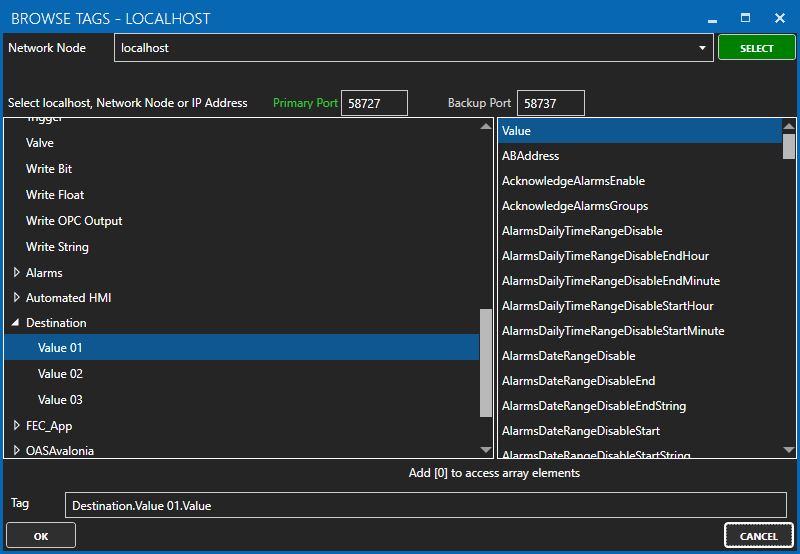
Select Configure >> Tags from the top menu.
Step 2
Select your Network Node, either local or remote.
Step 2
From the demo tags select the Ramp Tag.
Step 3
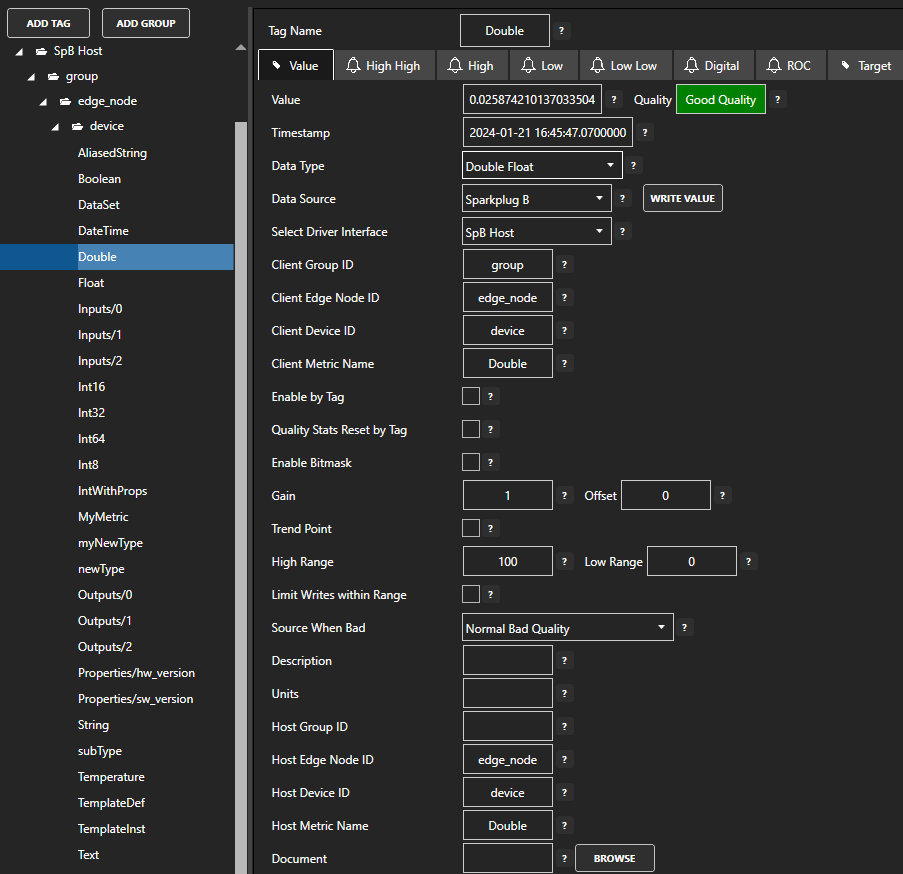
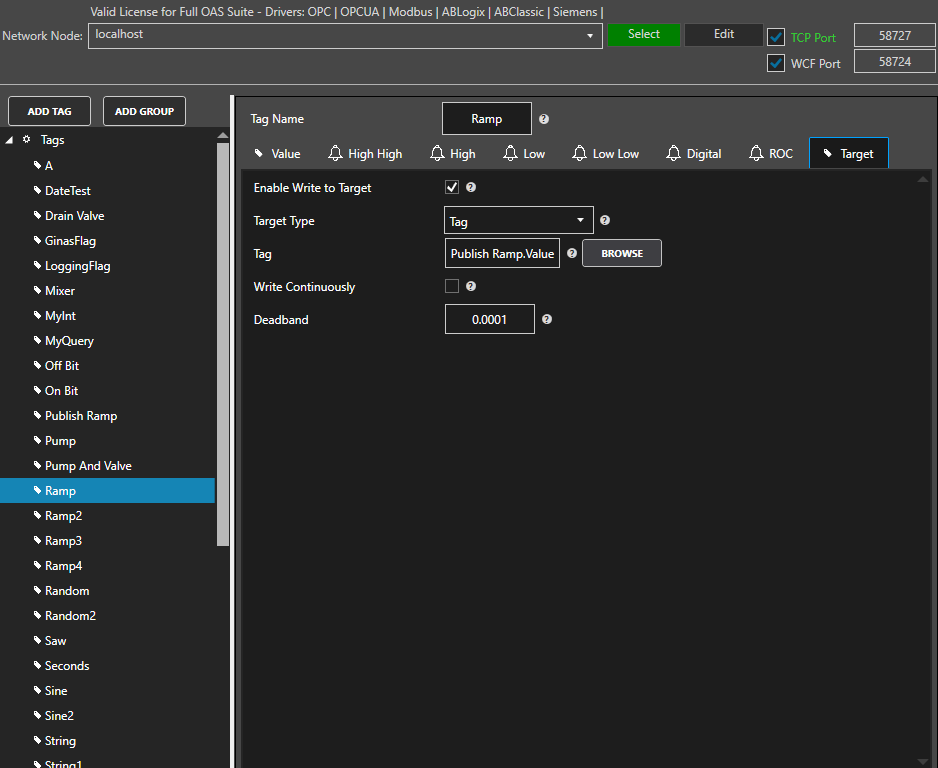
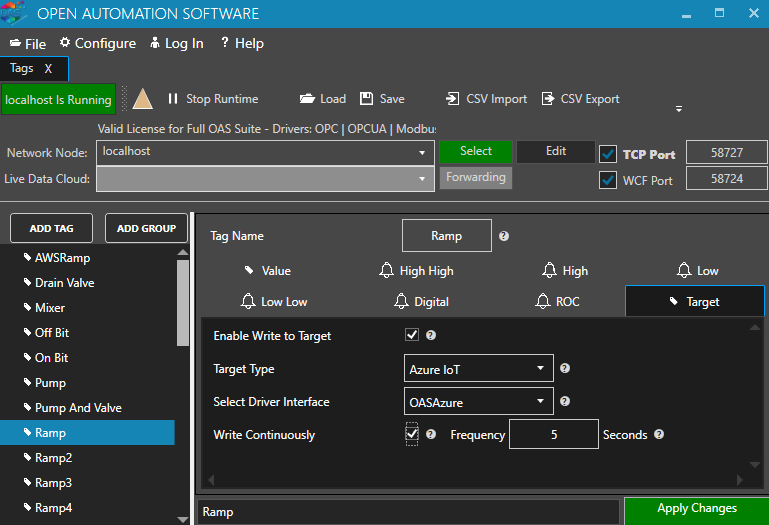
Select the Target tab.
Step 4
Enable Write to target.
Step 5
Select the Azure IoT in the Target Type dropdown.
Step 6
Select the Driver interface you created.
Step 7
Apply the Changes and you should now be writing to your Event Hub.
Step 8
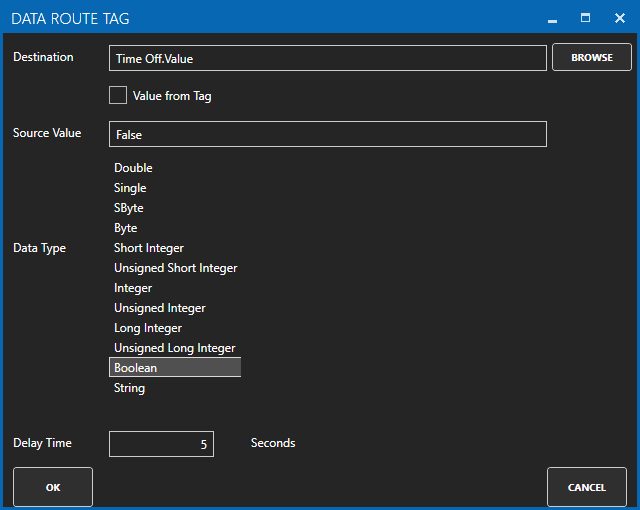
The message is formatted as follows.
{“deviceId”:”myFirstDevice”,”TagName”:”Ramp”,”Value”:66,”DataType”:”DoubleFloat”,”Quality”:true,”TimeStamp”:”2016-04-11T14:38:53.7125255″}
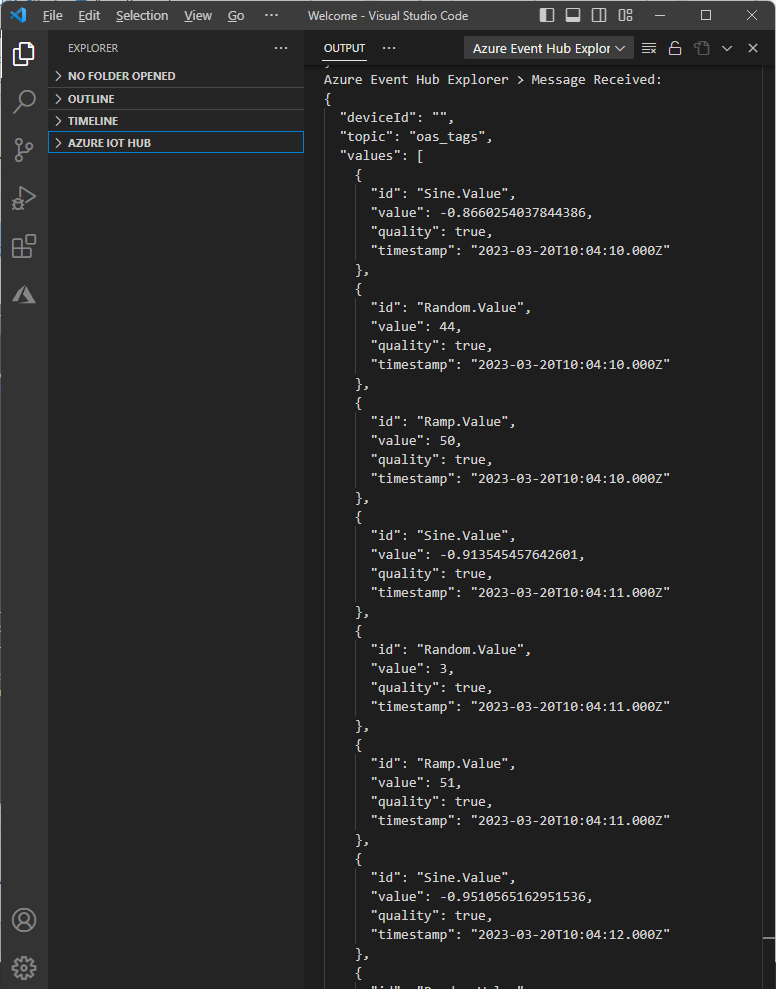
Use Visual Studio Code to Monitor Events.
Visual Studio Code can be used to monitor the events published to Azure Event Hubs.
Sign in to your Azure account and connect Visual Studio to your Azure account.
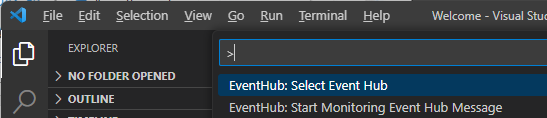
Select View-Command-Palette to select EventHub: Select Event Hub.
When prompted select your subscription, namespace, and Event Hub.
Select View-Command-Palette to select EventHub: Start Monitoring Event Hub Message.