Security is implemented to restrict modifying configuration parameters and limit real-time and historical data access.
The OAS Engine can have multiple security groups defined, each with a different level of access.
Each security group can have multiple users associated with it.
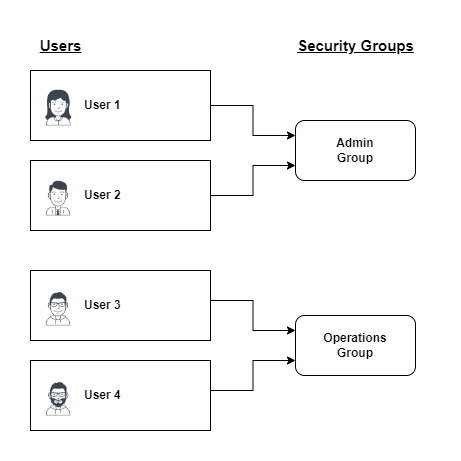
Each user can only belong to one security group that is not the Default group.
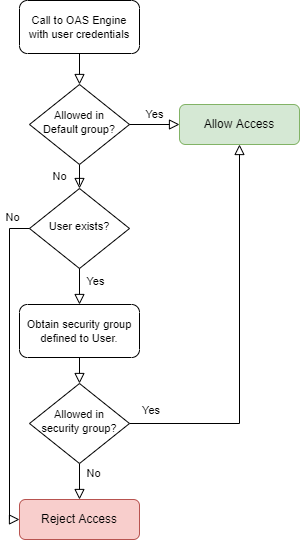
In each OAS Engine there is a Default security group that is used to determine access level without a user specified. If the feature is protected in the Default group then the security group defined to the User will be used to allow or deny access for the call made to the OAS Engine.
Following are the steps to setup security in the OAS platform.
Step 1 – Define Administrator User
An admin credential is created or reset using the AdminCreate utility located in the OAS Engine directory.
On Windows, the AdminCreate utility is automatically launched on the first attempt to login.
On Linux, an admin credential is created or reset using the AdminCreate utility found in the OAS installation directory.
To use the AdminCreate utility, execute the following:
chmod +x AdminCreate

./AdminCreate
You will then be prompted for the credential details.
NOTE: On Linux, if you used the installation script, it will create a user under which the OAS service will be running (default username of oasuser).
Running AdminCreate under the root user account will not update the security settings for the installed OASEngine. AdminCreate needs to be run while logged in as oasuser, and from within the installation path of that user.
After an admin credential has been created, select Log In from the menu and log in with the admin user you have just added.

Step 2 – Set Default Security Access
Warning: Make certain to first add an Admin User in step 1 to all access and modification to the security configuration before disabling access and modification of Security in the Default Group.
The Default Security Group contains all of the security settings if a remote client application is not logged and is connected to the service.
Select Configure-Security.

Select the Default security group.
All features of the Default security group are disabled by default.
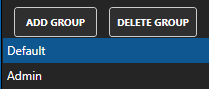
Step 3 Create Additional Security Groups
Create security groups for customized access level to associate with a user or multiple users.
Change the Group Name property to the new desired security group name.

Select Enable All Features to provide full access to all features or disable and set the desired access level for the security group under each of the tabs.
Click on the question mark next to the property to see a description of what the security property restricts.
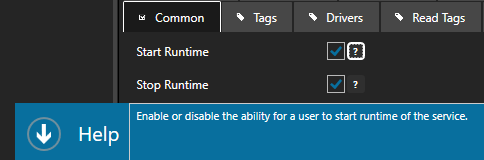

- The Common properties are general features that are common to the entire OAS Service that can be restricted.
- The Tags properties limit the creation, modification, removal, and browsing of tags. Use Disable All Tags from Browsing to restrict which tags are available to users.
- The Read Tags properties provide the feature to disable or enable real-time data access to Tags. You can either Disable All Tags From Reading and then Enable specific Tags, or leave all Tags for reading, but just Disable specific Tags. The Read Tags properties affect real-time data access from HMI controls like OAS WPF HMI .NET, OAS WinForm HMI .NET and OAS Web HMI and also restrict real-time Trending and Data Logging on remote OAS Engines.
- The Write Tags properties limit client applications from writing to Tags.
- The Trends properties are for a few specific name retrieval functions for browsing trend tags and history fields.
- The Trend RealTime properties help to limit access for real-time trending.
- The Trend History properties allow restriction of history replay from clients.
- The Data Log properties limit data logging configuration parameters from access and modification.
- The Alarms properties limit obtaining the Alarm Group Names and adding alarms programmatically or editing alarm comments.
- The Alarm Ack properties limit the ability to acknowledge alarms based on alarm priority and Alarm Groups.
- The Alarm RealTime properties limit the ability to access the current alarms based on alarm priority and Alarm Groups. This also restricts Alarm Logging and Alarm Notification of alarms on this OAS Engine on other remote OAS Engines.
- The Alarm History properties limit the ability to access historical alarms from a database based on alarm priority and Alarm Groups.
- The Alarm Log properties limit alarm logging configuration parameters from access and modification. To limit the actual alarms being logged use the Alarm RealTime properties.
- The Alarm Notification properties limit alarm notification configuration parameters from access and modification.
- The Dashboard properties determine what level of access is provided in the Web HMI Dashboard.
- The Reports properties limit report configuration parameters from access and modification.
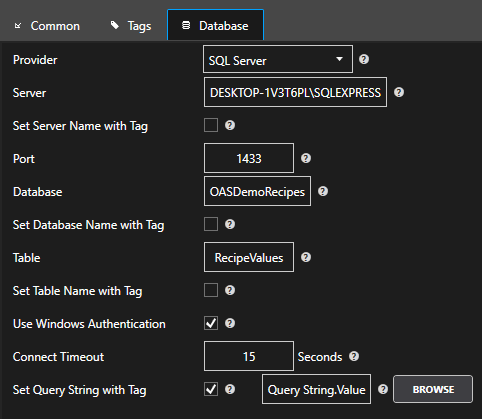
- The Recipes properties limit the recipe configuration parameters from access and modification.
- The Options properties limit the options configuration parameters from access and modification.
- The Security properties limit the security configuration parameters from access and modification.
Select Add Group to add the new security group.

Note: To define multiple security groups you can use CSV Export / Import.

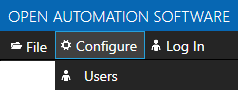
Step 4 Define Additional Users
Define Security Users with Configure-Users to assign a Security Group to each User. You cannot define the Default Security Group to a User.
Similar to Step 1 above with different user names, unique passwords, and the desired security group to use for each user.
Note: To define multiple users you can use CSV Export / Import.
Step 5 Implement User Credentials in Client Applications
LogIn Method in .NET Applications
Each of the OAS .NET Assemblies have a LogIn method to call within your application to provide authentication to data in the OAS Engine. If the Read Tags security feature is restricted and the LogIn is not specified the data quality on the client applications will be bad quality. Other features may be restricted to acknowledge alarms or receive with the alarm control, view live or historical trend data, history, or access or set configuration properties in the OAS Engine.
Example use the OPCWPFDashboard assembly:
C#
OPCWPFDashboard.OPCWPFLogIn oasLogIn = new OPCWPFDashboard.OPCWPFLogIn();
oasLogIn.LogIn("UserName", "Password");
// Alternatively use the ShowUserLogIn method to prompt the user for a user name and password.
oasLogIn.ShowUserLogIn();
VB
Dim oasLogIn As New OPCWPFDashboard.OPCWPFLogIn
oasLogIn.LogIn("UserName", "Password")
' Alternatively use the ShowUserLogIn method to prompt the user for a user name and password.
oasLogIn.ShowUserLogIn()
Use the LogOff() method to clear the user credentials.
The above methods are applicable for the following assemblies and components.
- OPCWPFDashboard.OPCWPFLogIn visualization in WPF .NET Framework applications.
- OPCWPFDashboard.OPCWPFTrend for realtime and historical trending in WPF .NET Framework applications. There is also a LogIn icon on the toolbar.
- OPCWPFDashboard.OPCWPFAlarm for realtime and historical alarming in WPF .NET Framework applications. There is also a LogIn icon on the toolbar.
- OPCControls.OPCControlsLogin visualization in WinForm .NET Framework applications.
- OPCTrendControl for realtime and historical trending in WinForm .NET Framework applications. There is also a LogIn icon on the toolbar.
- OPCAlarmControl for realtime and historical alarming in WinForm .NET Framework applications. There is also a LogIn icon on the toolbar.
- OPCSystems.OPCSystemsComponent for programmatic server configuration in .NET Framework applications.
- OASConfig for programmatic server configuration in .NET Core, .NET 5, and .NET 6 applications.
- OPCSystemsDataConnector.OPCSystemsDataLogin for programmatic data access in .NET Framework applications.
- OASData for programmatic data access in .NET Core, .NET 5, and .NET 6 applications.
- OPCTrendDataOnly for programmatic live and historical trend data in .NET Framework applications.
- OASTrends for programmatic live and historical trend data in .NET Core, .NET 5, and .NET 6 applications.
- OPCAlarmDataOnly for programmatic live and historical alarms in .NET Framework applications.
- OASAlarms for programmatic live and historical alarms in .NET Core, .NET 5, and .NET 6 applications.
REST Authenticate
Use the Authenticate call with a user name and password of the OAS REST API to return a clientID and token from the OAS Engine. the clientID and token are used in all subsequent calls to the OAS Engine.
Note: A blank user name and password cannot be used in the REST API for any of the configuration calls.
Web Authentication
Refer to Web UI Programming-Authentication Overview and Examples of how to return a token from the OAS Engine.
Remote Service Credentials
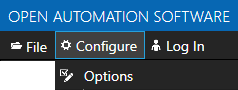
For all remote OAS Engines that will communicate to this OAS Engine go to Configure-Options-Remote Services for the remote nodes and set the Security User Name and Security Password.
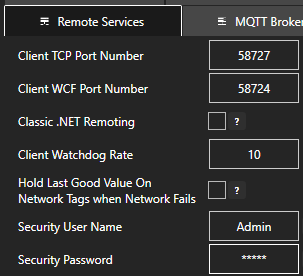
These properties will allow the OAS Engine to run under this defined user account to give remote client access privileges for Read Tags for Calculations and Data Logging, and for Realtime Alarms for Alarm Logging and Alarm Notification. This is important if the remote OAS Engines have Security restrictions for these features.
OPCSystems.NET DA OPC Server Credentials
To set the user name and password credentials of the classic OPC DA OPC Server OPCSystems.NET edit the file DANSrv.exe.config at set the UserName and Password properties.
<add key="UserName" value=""/>
<add key="Password" value=""/>
OAS OPC UA Server Access
To provide authentication to remote OAS Engines of the OPC UA Server go to Configure-Options and set the OPC UA Security Access to either OASServiceUser or OPCClientUser.
You can view the OAS Security video to familiarize yourself with the following steps to setup security.
- 00:00 – Introduction
- 00:19 – What Security is implemented for?
- 00:27 – Security Groups
- 00:44 – Creating an Admin User
- 01:18 – Security Configuration
- 01:44 – Configuring the Default Security Group
- 02:29 – Creating a New Security Group
- 04:26 – Set Up Alarms
- 05:13 – Dashboard Tab
- 05:22 – Reports Tab
- 05:29 – Recipes Tab
- 05:34 – UDP Broadcast Tab
- 05:39 – Live Data Cloud
- 05:46 – Security Tab
- 05:57 – Options Tab
- 06:03 – New Security Group
- 06:43 – Saving the Configuration File
- 07:31 – Restrict Tag Access
- 010:59 – Implementing Security in a Client Application
- 011:57 – Logins Methods
- 012:08 – Tag Access Demonstration
- 013:18 – Login Method
- 014:15 – Log Off Method
- 014:28 – Logging into Rest API
- 015:12 – Web Applications
- 015:34 – Provide Security to a remote OAS Service
- 016:05 – Pass Security to the OAS OPC Server
- 016:25 – Copy the file out of the directory
- 017:05 – OAS Excel Security Option
- 017:23 – More Information