Web HMI in WordPress

The Web HMI, Web Trend, and Web Alarm products are completely open architecture that can be integrated into any web platform.  WordPress is one of the most popular platforms to create websites. 

You can view the Web HMI in WordPress Video to familiarize yourself with the following steps to easily add a live user interface to your WordPress site.

What You Will Need to Start

In order to set up Web HMI in WordPress, you will need to have the ability to install a plugin on your WordPress site.  Depending on your plan with WordPress or your user restrictions you may or may not be able to do this.

You will also need to have the OAS Service running and a license for WebHMI.

Adding the Script Files

The first thing you will need to do is add some script files to your site.  If you don’t already have one, create a folder at the root of your site and call it js for JavaScript.  If you already have a scripts folder, you can just use that one.

OAS installs with the script files you need.  On my machine, they have been installed to: C:\Program Files\Open Automation Software\OAS\HTML_HMI.  The files that you need are:

  • opc-lib-min.js
  • lib/jquery-1.8.3.min.js

The opc-lib-min.js file is the OAS Web HMI Script Library. The other file is the jQuery library.  If your site already references a newer version of jQuery you may use that instead.

Copy those files into the js folder you just created.

Referencing the Script Files in the Page Headers

Next you will need to add references to the script files in the page headers of your site.  If you already have the ability to do that, you can skip adding the plugin. 

To add the plugin, go to the Dashboard of your WordPress site and from the left menu choose Plugins >> Add New.  In the keyword search box, enter:  Header and Footer Scripts. 

When you see the Header and Footer Scripts plugin in the results, click Install Now. Once it has installed, click Activate.

Next, from the left menu of the Dashboard, choose Pages >> Add New.  Give your new page a title. At the bottom of the new page, you should see a new section that says Insert Script to Head.

Here is what you need to add:

<script  src="/js/lib/jquery-1.8.3.min.js"></script>
<script type="text/javascript" src="/js/opc-lib-min.js"></script>
<script type="text/javascript">
      OAS_config = {
        token:'7e61b230-481d-4551-b24b-ba9046e3d8f2',
        serverURL: 'http://localhost:58725'}
</script>

The first is the reference to the jquery library.  Second, is the link to the opc-lib-min.  If you put have yours in a different location, please be sure to change the src to reflect that.

The next line is the OAS_Config script block.

It has a security token in it that keeps session for the OAS WebHMI.  It also has the URL for the OAS Service you want to point to.  After the colon is the port number that you have the OAS Service set up on. Please note: that if your WordPress site is not on your local machine but your OAS Service is, you will need to have your service tied to a publicly accessible IP address or domain name, localhost will not work.

Click Save Draft to save your work.

Add HMI to the Page

Click the Plus Sign to Add a Block. You will need to choose Custom HTML.

To create a div tag, enter:

<div id='myDiv' oas-tag-txt='{"tag":"Sine.Value"}'></div>

You must have an ID for the div, it can be whatever you want.  The OAS demo tags include a Sine Tag. If you don’t have a Sine Tag in your current configuration, enter the name of a tag that you do have followed by .Value. for the oas-tag-txt.

There are two articles in our knowledge base that you can reference to help you write your own:

Click Save Draft to save your work and then Preview to see the results.

You should now be displaying the Sine Value (or the value of whatever tag you used) from your OAS Service in your WordPress site.  If you open your OAS Configuration Application, you should be able to see the values updating together with a slight delay.

Utilizing the Web HMI Wizard

The OAS Web HMI Wizard is a tool to help developers create a Web HMI interface.  Click Here to Open the Web HMI Wizard. There is a video that goes into detail about how to use it in here: Web HMI Wizard.

Open the Wizard and then expand the oas-tag-txt section on the left. Enter Sine.Value into the tag box. In the format string box below that, enter My Sine Value is {0}. In the format float box further down, enter .00. Now on the left you should see some code displayed in the HTML ELEMENT window and the Live Demo window below that should be displaying your Sine Value as a string truncated to two decimal places with the My Sine Value is in front of it.

Cut and paste the code from the HTML ELEMENT box into your WordPress site inside of a Custom HTML block to add it to your page.

Add the Header Scripts to Your Whole Site at Once

If you’d like to add the header scripts to all of the pages in your site instead of just one, you can. First, cut the code out of your first page. Then go to your WordPress Dashboard and from the left menu select Settings >> Header & Footer Scripts. Paste the code into the Header Box there and click Save Settings. You can also add the OAS_Config script block to an external file and then just add a script reference to that file to further contain things.

Authentication Examples

Security is included for free with all of the product features of Open Automation Software.   To ensure that all requests for server data be performed by an authorized user, the OAS Web HMI Script Library attaches an authentication token to each request. This token is generated by the Open Automation Software Server when provided a valid credential.  The token will expire after a period of disuse, or when the Open Automation Software Server is restarted, so it should be generated dynamically when a page is initially accessed.

This article covers how to generate and store these tokens with:

  1. ASP.NET both C# and VB
  2. JavaScript

STEP 1

The first step for either method is the same: define and configure your security groups and users. This Getting Started – Security article describes how to do that with the OAS configuration tool.  There is also a video about that here.  Security users and group can also be set up with the OAS programmatic interface, learn about that here.

You will need to include a few files at the top of your pages as well:

  •  jQuery v1.8.3 or later
  •  The OAS Web HMI Script Library
  • A small block of Javascript containing an authentication token and URL location of the Open Automation Software Server.

You can learn more about that on our Installation and Configuration page.


STEP 2

ASP.NET Authentication

Here is the login page for the .NET example:

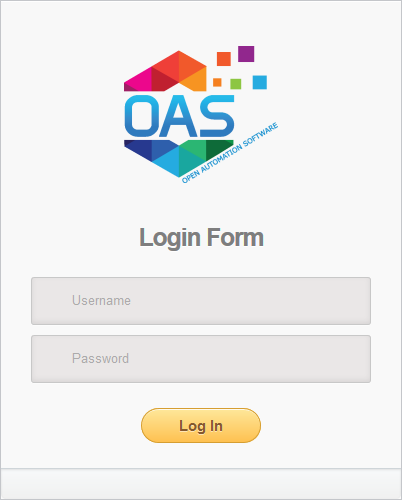
In the button click event, first assign the username and password entered by the user to local variables.  Next, instantiate a new instance of the OASConfig.Config object. Then, assign the token returned by the GetToken method to an ASP.NET session variable.  Doing so allows you to retrieve that information in the subsequent pages.  Depending on the version of ASP.NET you are using, you can pass the token in different ways.  The example also stores the OAS Server address as a session variable.  Finally, redirect the user to the next page.

C#

protected void btnSubmit_Click(object sender, EventArgs e) {
  string un = username.Value; 
  string pw = password.Value; 
  string err = "";
  var config = new OASConfig.Config();
  Session["token"] = config.GetToken(un, pw, "", ref err); 
  Session["OASServer"] = "http://localhost:58725"; 
  Response.Redirect("default.aspx");
}

VB

Private Sub btnSubmit_Click(sender As Object, e As EventArgs) Handles btnSubmit.Click
  Dim un As String = username.Value 
  Dim pw As String = password.Value 
  Dim err As String = ""
  Dim token As String = ""
  Dim config As New OASConfig.Config()  
  token = config.GetToken(un, pw, "", err) 
  Session("token") = token
  Session("OASServer") = "http://localhost:58725" 
  Response.Redirect("default.aspx")
End Sub

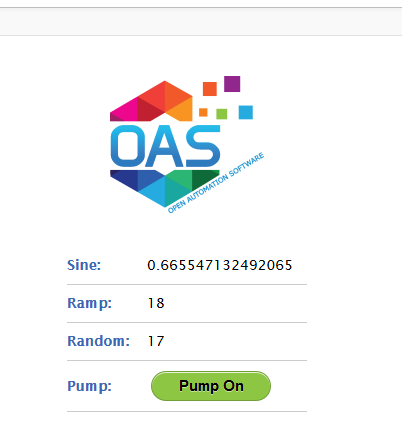
If a token was successfully created and the user has permissions to view tags, the display screen will look like this: 

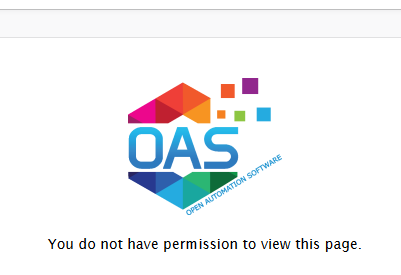
If they did not provide valid credentials, the screen they will see will look like this:

The OAS Service generates a token whether or not the user provides valid credentials.  However, if the user has bypassed the login page, no token has been created.  So here, check to for the existence of a token. If none exists, return them to the login page to authenticate.  If one does exist, use the ASP.NET ScriptManager to programmatically write JavaScript to pass the token to the OAS Service on the client side.

C#

protected void Page_Load(object sender, EventArgs e) {
  string token = "";
  if (Session["token"] != null) {
    token = Session["token"].ToString();
  }
  if (token == "") {
    Response.Redirect("login.aspx");
  }
  ScriptManager.RegisterStartupScript(this, this.GetType(),
    "OASWebToken",
    "OAS_config = {token:'" + token + "',serverURL: '" + Session["OASServer"] + "'};",
    true);
}

VB

Protected Sub Page_Load(ByVal sender As Object, ByVal e As System.EventArgs)
Handles Me.Load
  Dim token As String = Session("token")
  If token = "" Then
    Response.Redirect("login.aspx")
  Else
    Dim server As String = Session("OASServer")
    ScriptManager.RegisterStartupScript(Page, Me.GetType(), "OASWebToken",
      "OAS_config = {token:'" + token + "',serverURL:'" + server + "'};", True)
  End If
End Sub

JavaScript Authentication

Next, let’s look at how to do this entirely from the client side using JavaScript.

At the top is the OAS_config tag, set with a dummy token and the OAS Service URL. I also have a watch_tags call in it so that it is talking to the OAS Service and am specifying a function, updateStuff(), in the refresh_callback. In the updateStuff() function, I first check to see if if a new token has been created in the submit function above. If it has been, I add it to window object’s localStorage so that I access it from subsequent pages. I then, redirect the user to the next page. There, the submit function takes the username and password and calls OAS.authenticate to validate the user and retrieve the new token. The event.preventDefault() stops the form from submitting and allow the updateStuff() to handle it.

JavaScript for Login Page

<script type='text/javascript'>
  OAS_config = {
    token:'-481d-4551-b24b-7e61b230ba9046e3d8f2',
    serverURL: 'http://localhost:58725',
    refresh_callback: updateStuff,
    watch_tags:["Sine.Value"]
  };

  $( document ).ready(function() {
    $( "#form1" ).submit(function( event ) { 
      // on submit, get the
      // username and pw and authenticate
      var un = $("#username").val();
      var pw = $("#password").val();
      OAS.authenticate(un,pw);
      event.preventDefault();
    });
  });
  
  function updateStuff() {
    if (OAS.token != OAS_config.token) {
      //check to see if a new token was created
      localStorage.setItem('token', OAS.token);  //store the token in local storage
      location.href = "default.htm"; // redirect to main page
      console.log("Token Set:" + localStorage.getItem('token'));
    }
  }
</script>

JavaScript for Display Page

At the top of your display pages, you will need to include the following JavaScript as well.  It retrieves the token from localStorage and puts in the OAS_config.

<script type='text/javascript'>  
   OAS_config  = {
   token: localStorage.getItem('token'),
   serverURL: 'http://localhost:58725'
   };        
</script>

STEP 3

The HTML for All Authentication Methods

If the a token has been generated, the user is allowed to stay on the page.  If authentication fails, the user should not be able to view anything; this can be accomplished by creating a Boolean tag in the OAS Configuration tool called FlagTrue. For organizational purposes, put it in a folder called SecurityDemoFlags. Set the default value of the flag to true. Surround the portion of the page that is not to be displayed to unauthorized users with a div tag. Use an OAS attribute on the tag to control visibility. If the user is not able to read tags, tags will come in with bad_q. Set the bad_q for the Boolean tag controlling visibility to false. With it set this way, unauthorized users will not be able to see this area of the page and authorized users will.

Below there is another div which displays the message: You do not have permission to view this page. Use the same flag to control visibility for this div.  When an unauthorized user visits the page, OAS sends the false bad_q indicator to the tag that set above. This div has an OAS attribute of “trigger: on_false”.

Learn more about adding OAS attributes to HTML tags here in our HTML Attribute Reference or by using our Web HMI Wizard.

In this demo, there are several tags and a button that toggles a pump on or off.  If the user has read permissions only, the button would display the value of the pump but would not allow the user to change it.   You can create different groups/users and control what the users are able to see and do.

<div style="margin-left: auto; margin-right: auto; width: 240px; text-align: center;">
  <img src='images/logo.png'/>
    <div id="divDisplay" style="margin-top:30px;" 
      oas-tag-vis='{
        "tag": "SecurityDemoFlags.FlagTrue.Value",
        "config": { "bad_q": false }
    }'>
    <div class="d1">
      <span class='heading'>Sine:</span>
      <label id='lb1' oas-tag-txt='{"tag":"Sine.Value"}'></label>
    </div>
    <div class="d1">
      <span class='heading'>Ramp:</span>
      <label id='lb2' oas-tag-txt='{"tag":"Ramp.Value"}'></label>
    </div>
    <div class="d1">
      <span class='heading'>Random:</span>
      <label id='lb3' oas-tag-txt='{"tag":"Random.Value"}'></label>
    </div>
    <div class="d1">
      <span class='heading'>Pump:</span>
      <button onclick="return false;" id='test' 
        oas-tag-txt='{
          "tag": "Pump.Value",
          "config": {
            "formats": {
              "bool_f": "Pump Off",
              "bool_t": "Pump On"
            }
          }
        }' 
        oas-tag-set='{
          "tag": "Pump.Value",
          "config": {
            "evt": "click",
            "set": "toggle",
            "set_confirm": false
          }
        }' 
        oas-tag-bkg='{
          "type": "group",
          "all_f": { "color": "#FF0033" },
          "bad_q": {},
          "group": [
            { "tag": "Pump.Value", "config": { "color": "#8DC642" } }
          ]}'>
      </button>
    </div>
  </div>
</div>

<div style="width: 500px; text-align: center; margin-left: auto; margin-right: auto;" id="divMessage"
  oas-tag-vis='{
    "tag": "SecurityDemoFlags.FlagTrue.Value",
    "config": { "trigger":"on_false" }
}'>You do not have permission to view this page.</div>

Here are downloadable source code examples for all three types of Authentication:

How quickly can I update Web HMI screen elements?

We have customers updating over 100 elements on screen every second, but to get such rapid sub-second updates is not always realistic in a web browser.

Network requests can take 50-500ms (or more) even on local networks, depending on the networking hardware and configuration. Then the web browser needs to process the incoming data and update elements based on your own javascript or the Web HMI markup rules.

There are too many variables so any performance metrics are impossible to supply. We suggest experimentation within your own web application code and networking environment to determine your performance benchmarks.

Does Web HMI support SSL?

Using SSL with Web HMI is fully supported. You must first install an SSL Certificate on your server for the domain name(s) that you intend to use, for example “https://hmi.myserver.com:58726”. Once the certificate is installed properly on the server, check Use SSL and select the installed certificate from the dropdown menu. For detailed instructions, please see read:  Configuring OAS Web Services.  Purchasing and installing an SSL certificate is outside of the scope of the OAS product. For more information on Windows and Certificates, see the following article.

Frequently Asked Questions – Web HMI

How do I show different images from multiple states?
Create 5 tags of the Data Type Boolean and set the Data Source to Calculation. Then in the calculation field you would add the logic to convert the integer value to a Boolean state. For example, if you wanted to set a Calculation to True when an integer tag equals 3, it would look like this:
 
[SomeIntegerTag.Value] = 3
 
Then after setting up the 5 Boolean tags you set them up in a group in the oas-tag-src attribute of the image tag in HTML:
 
<div id='test' oas-tag-src='{
    "type": "group",
    "all_f": "DefaultImageUrl",
    "bad_q": "BadDataQualityUrl",
    "group": [
        {
            "tag": "SomeTag01.Value",
            "config": "SomeImageUrl01"
        },
        {
            "tag": "SomeTag02.Value",
            "config": "SomeImageUrl02"
        },
        {
            "tag": "SomeTag03.Value",
            "config": "SomeImageUrl03"
        },
        {
            "tag": "SomeTag04.Value",
            "config": "SomeImageUrl04"
        },
        {
            "tag": "SomeTag05.Value",
            "config": "SomeImageUrl05"
        }
    ]
}'></div>
 
As long as the 5 states are mutually exclusive and only one can be true at a time, your image will switch to the associated image in the group section of the attribute. If none are true, it will default to the all_f URL, and if any tag in the group has bad data quality, the image will switch to the URLin the bad_q section.
 
For more information on Calculation Tags and how to use them, see the following:
How quickly can I update Web HMI screen elements?
We have customers updating over 100 elements on screen every second, but to get such rapid sub-second updates is not always realistic in a web browser. Network requests can take 50-500ms (or more) even on local networks, depending on the networking hardware and configuration. Then the web browser needs to process the incoming data and update elements based on your own javascript or the Web HMI markup rules. There are too many variables so any performance metrics are impossible to supply. We suggest experimentation within your own web application code and networking environment to determine your performance benchmarks.
Does Web HMI support SSL?

Using SSL with Web HMI is fully supported. You must first install an SSL Certificate on your server for the domain name(s) that you intend to use, for example “https://hmi.myserver.com:58726”. Once the certificate is installed properly on the server, check Use SSL and select the installed certificate from the dropdown menu. For detailed instructions, please see read:  Configuring OAS Web Services.  Purchasing and installing an SSL certificate is outside of the scope of the OAS product. For more information on Windows and Certificates, see the following article.

What is a good HTML editor other than Notepad?
You can use any editor you are familiar.  Notepad++ has a lot of options for representing HTML elements as well as editor functions and more...it's also nice and clean: https://notepad-plus-plus.org/  
When there is a large number of Tags specified on one page I do not receive any data.
Use the max_tags_per_msg config parameter as shown in the Programming Reference-HTML5 – Other Configuration Options.
The format of numeric values is showing commas or decimal points and not following the regional language settings.
Use the locale config parameter as shown in the Programming Reference-HTML5 – Other Configuration Options.
What is the client side script to read or write a value?
Use the OPC.get_value(string) or OPC.set_value(string, string) functions as described in Programming Reference-HTML5 – Client Script Library Reference.

Videos – Web HMI

The following videos are a complement to this section on creating Web HMI web pages.

Web Visualization

Use Web HMI to visualize IIoT data using Web HMI to deliver IIoT data directly to ASP.NET,.NET MVC, PHP, Ruby, or raw code to update any HTML element dynamically.

Web HMI Dashboard

Web HMI Dashboard with no coding required for live and historical visualization, trending, and alarming. Persist user sessions with user login. Extend project code to your own custom visualization.

  • 00:00 – Introduction
  • 00:08 – What’s Web HMI Dashboard
  • 00:20 – Features of a WEB HMI Dashboard
  • 00:23 – Secure Login
  • 00:31 – Modular Design
  • 00:37 – Configurable
  • 00:44 – Customizable
  • 00:49 – Lightweight
  • 01:05 – Demo
  • 01:33 – Alarm Dashboard
  • 01:39 – Trend Dashboard
  • 01:55 – Add a Dashboard
  • 02:04 – Add a Module
  • 02:59 – Built-in Modules
  • 03:04 – Numeric Tag Module Configuration
  • 03:59 – Add another numeric tag module / rewrite module
  • 04:53 – Boolean Tag Module
  • 05:00 – Boolean Tag Configuration
  • 05:56 – Display Multiple Tags with real time values
  • 06:04 – Tag Data Module Configuration
  • 07:09 – Alarms Module
  • 07:17 – Alarms Module Configuration
  • 08:21 – Trends Module
  • 08:28 – Configuration
  • 10:28 – Custom Module
  • 10:34 – Configuration
  • 11:16 – Demo Module
  • 11:43 – Getting Started
  • 11:47 – Application Set up
  • 12:00 – Open Service Control
  • 12:58 – Open OAS Configuration App
  • 13:20 – Static Files
  • 13:35 – Configuration
  • 14:46 – Removing a Module
  • 16:25 – Deploying to IIS
  • 18:41 – Conclusion

Web HMI Demonstration

Demonstration of Web HMI for live data using HTML5, CSS, Javascript, JQuery, and JSON.

  • 00:00 – Introduction
  • 00:07 – What’s HMI?
  • 00:54 – Open Standards
  • 01:03 – Web HMI utilizes a direct line of communication
  • 01:23 – What can be built with Web HMI?
  • 02:51 – Setting Up the server
  • 02:57 – First Step – Registering a listener on the server
  • 03:40 – Configure Tags
  • 04:25 – Writing Code
  • 05:47 – Text Editor
  • 06:07 – HTML attributes
  • 14:12 – Develop Same Functionality Programmatically
  • 18:30 – More Information

Web HMI Wizard

How to use the Web HMI Wizard to automatically create HTML code to provide live data.

  • 00:00 – Introduction
  • 00:26 – Methods for Using OAS Web HMI Product
  • 00:32 – Programmatic Method
  • 01:00 – Web HMI Code Wizard
  • 01:26 – What is the Web HMI Code Wizard?
  • 02:09 – Code Wizard closer look
  • 07:38 – HTML Element View
  • 08:59 – HTML Attribute list
  • 09:34 – Tag Text
  • 13:55 – Other HTML Attributes
  • 15:05 – More Information

Web HMI in WordPress

How to add live data interface to existing WordPress site.