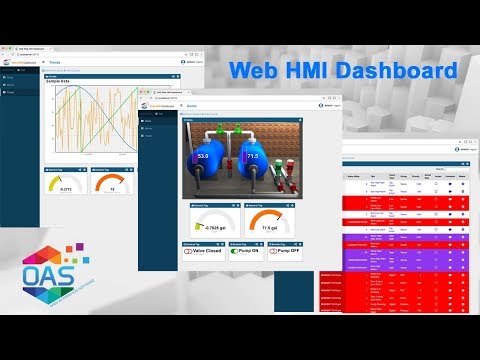
If you are interested in visualizing your data in a desktop or mobile browser with zero programming, you may be interested in Getting Started with the Web HMI Dashboard.
Features
The OAS Web HMI provides a flexible, platform-independent way to integrate with Open Automation Software Servers. The addition of the Alarm Control allows you to retrieve and interact with real time and historical alarms from the OAS Server. Included in this release are:
- A configuration interface for specifying Alarms to monitor and be displayed
- A client-side Javascript API for interacting with Alarm data and extending functionality
Requirements
OAS Web HMI Alarm Control requires the following:
- an instance of anOpen Automation Software Serveraccessible over an internal or external network
- working knowledge of HTML
- working knowledge of Javascript
- working knowledge of OAS Web HMI configuration
Installation and Configuration
Configuration of OAS Web HMI will not be covered in this document. Once you have a working installation of OAS Web HMI, adding Alarm Control configuration is fairly simple. As with OAS Web HMI, the following are required for Alarm Control operation:
- jQuery v1.8.3 or later, found at jquery.com and is also distributed with the Web HMI product
- The OAS Web HMI Script Library
- The OAS Web HMI Stylesheet, which is used for styling modal dialogs and can be modified to fit your web design
- A small block of Javascript containing an authentication token and URL location of the Open Automation Software Server
- The OAS Web Alarm Stylesheet, which is used for styling alarm colors and fonts to fit your web design
- DataTables jQuery plugin, included with the Web HMI distribution
- FontAwesome web font, included with the Web HMI distribution, and used for high quality inline icons
The following is an example of a properly configured, minimal HTML page:
<html>
    <head>
        <script type="text/javascript" src="js/jquery-1.8.3.min.js"></script>
        <script type="text/javascript" src="js/opc-lib-min.js"></script>
        <link rel="stylesheet" stype="text/css" href="css/opc-style.css"/>
        <script type="text/javascript">
            OAS_config = {
                token:'7e61b230-481d-4551-b24b-ba9046e3d8f2',
                serverURL: 'http://localhost:58725'
            };
        </script>
    </head>
    <body>
        Hello World
    </body>
</html>
Of course, this example does not contain any bindings to OAS Server Tags, but contains all elements necessary to connect to a server located at http://localhost:58725 using an authentication token of 7e61b230-481d-4551-b24b-ba9046e3d8f2.
Alarm Control description and options
After defining the Alarm Control bindings, or Alarm Bindings, the OAS Web HMI library will continually poll the server for realtime data, or Historical Data, depending on the context.
The Javascript OAS_config variable contains several options for determining the behavior of the Script Library. This variable is a standard JSON construct. The minimal definition with defaults displayed is:
OAS_config =
{
    interval: 1000,
    token:'',
    serverURL:'http://localhost:58725'
};
To add Alarm Bindings to this configuration, you will add the following node to your OAS_config construct. The alarm_bindings node is an array of Alarm Binding objects, each representing data to be displayed in a single table.
alarm_bindings:[
{
  alarmid: <string>,
  callback: <function>,
  rowClickCallback: <function>,
  showDelete: <bool>,
  showHistory: <bool>,
  showComment: <bool>,
  showSearch: <bool>,
  showInfo: <bool>,
  pagination: <bool>,
  pageLength: <number>,
  height: <number>,
  filter: {
    includealarmactive: <bool>,
    includealarmactiveacked: <bool>,
    includealarmnotactive: <bool>,
    includealarmnotactiveacked: <bool>
    maxpriority: <number>,
    minpriority: <number>,
    alarmgroups: <array of string>,
    alarmtypes: <array of string>
  },
  networkNodes: <array of string>,
  columns: <array of objects>
}
- alarmid: string
A unique identifier for the alarm which is used to bind to an HTML element of the same id. When the page is rendered, the script library will fill the designated element with the alarm control.
- callback: function(ab, data)
This optional callback will be executed after each call to the server, passing in a reference to the Alarm Binding object, and the raw data returned by the server.
- rowClickCallback: function(data)
This optional callback will be executed after a row in the alarm control is clicked, passing in the data for the selected row.
- showDelete: bool
If set to true, a delete icon will be displayed on each alarm row. Clicking the icon will cause the alarm to be deleted on the server and in the web interface. If the current user does not have rights to delete the alarm, this icon will be displayed in a disabled state. The showDelete option defaults to true if omitted.
- showHistory: bool
If set to true, fields will be displayed in the header of the alarm control allowing users to select a date range to display historical alarms. The showHistory option defaults to false if omitted.
- dateTimeFormat: string
Format for the alarm date and time
alarm_bindings:[
          {
            alarmid:"alarm1",
            dateTimeFormat: "yyyy/mm/dd hh:MM aa"
          }
yyyy : 4-digit year
yy: 2-digit year
mm: 2-digit month
dd: 2-digit day
hh: hours (12)
HH: hours (24)
MM: minutes
ss: seconds
aa: am/pm.
- showComment: bool
If set to true, a comment icon will be displayed on each alarm row. Clicking the icon will allow users to add a comment to the alarm. If the current user does not have rights to comment on the alarm, this icon will be displayed in a disabled state. The showComment option defaults to true if omitted.
- showSearch: bool
If set to true, a search field will be displayed in the header of the alarm control allowing users to quickly filter alarms by any free text. The showSearch option defaults to true if omitted.
- showInfo: bool
If set to true, a brief summary will be displayed in the footer of the alarm control, describing the number of records being displayed. The showInfo option defaults to true if omitted.
- pagination: bool
If set to true, alarms will be paginated within the view based on the number of alarms allowed per page (defaults to 10). The pagination option defaults to true if omitted.
- pageLength: number
This optional value determines the maximum number of alarms to display on each page. This setting defaults to 10 and has no effect if pagination is disabled.
- height: number
This optional value indicates the fixed height in pixels that the alarm control will be rendered. If alarms exceed the rendered height, they will be scrollable within the alarm control window. If the height setting is omitted, the alarm control will expand to fit the number of controls it contains.
- filter: object
This filter object partially determines which alarms are pulled from the server to be displayed. If the filter object is omitted, the default setting are as follows:
{
    includealarmactive: true,
    includealarmactiveacked: true,
    includealarmnotactive: true,
    includealarmnotactiveacked: false,
    maxpriority: 1000000,
    minpriority: 0,
    alarmgroups:[],
    alarmtypes:[
        "Digital",
        "High",
        "High High",
        "Low",
        "Low Low",
        "Operator Event",
        "ROC",
        "System",
        "Tag Event"
    ]
}
- networkNodes: array of strings
This optional value will pull alarms for specific network nodes. If omitted, it will pull only alarms for the Open Automation Software Server to which the client is connected, or effectively ‘localhost’.
- columns: array of column objects
By default, the alarm control will display the following columns in the following order:
- Alarm Date/Time
- Active
- Alarm Value
- Text
- Alarm Type
- Group
- Priority
- Document
If you would like to alter the order, hide any of these columns, or include others, you will need to include a full definition and settings for all data fields exposed by the alarm interface. The default array is as follows:
[
    {name: "AlarmID", text: "Alarm ID", type: "string", visible: false},
    {name: "AlarmDateTime", text: "Alarm Date/Time", type: "datetime", visible: true, sort:'desc', width:'130px', searchable:false},
    {name: "Active", text: "Active", type: "boolean", visible: true, width:'50px', align:'center'},
    {name: "AlarmValue", text: "Alarm Value", type: "string", visible: true, align:'right'},
    {name: "Text", text: "Text", type: "string", visible: true},
    {name: "AlarmType", text: "Alarm Type", type: "string", visible: true},
    {name: "Group", text: "Group", type: "string", visible: true},
    {name: "Priority", text: "Priority", type: "string", visible: true, width:'50px', align:'right'},
    {name: "AckedDateTime", text: "Acked Date/Time", type: "datetime", visible: false},
    {name: "Acked", text: "Acked", type: "boolean", visible: false},
    {name: "AckedUser", text: "Acked User", type: "string", visible: false},
    {name: "ClearedDateTime", text: "Cleared Date/Time", type: "datetime", visible: false},
    {name: "ClearedValue", text: "Cleared Value", type: "string", visible: false},
    {name: "NetworkNode", text: "Network Node", type: "string", visible: false},
    {name: "Units", text: "Units", type: "string", visible: false},
    {name: "TimeDelay", text: "Delay Time", type: "string", visible: false},
    {name: "Document", text: "Document", type: "string", width:'50px', align:'center', visible: true, searchable:false, sortable:false},
    {name: "Comment", text: "", type: "string", visible: false, searchable:false, sortable:false},
    {name: "OKToComment", text: "Comment", type: "string", width:'50px', align:'center', visible: true, searchable:false, sortable:false},
    {name: "OKToDelete", text: "Delete", type: "string", width:'50px', align:'center', visible: true, searchable:false, sortable:false}
]
- name: string : the unique column identifier. These must be written as is, since each column name corresponds to an alarm field.
- text: string: the column header label.
- type: string: string|datetime : determines how the field is rendered.
- visible: bool: determines if the column is rendered. All columns must be defined, but not all columns must be displayed.
- width: string: optional pixel width for the column written in the format ’00px’. By default the column will expand to fit.
- align: string: left|right|center : optional text alignment, defaults to left
- searchable: bool: values included when using the inline search box, defaults to true.
- sortable: bool: allows the user to sort all alarms by clicking the column header, defaults to true.
grouping: bool
Enable or disable grouping by alarms. You must also supply a list of columns used for grouping alarms in the groupingColumns property.
groupingColumns: string
A comma-delimited list of columns used for grouping alarms. The order in which the columns are listed will be the order in which they will be grouped. Also, columns listed in the groupingColumns will not be displayed in alarm table columns.
Acknowledging Alarms
While the alarm control is active, users can acknowledge alarms by double-clicking an alarm row. Once acknowledged, the alarm will change appearance based on the configured styling.
Styling the Alarm Control
The alarm control is styled with an external stylesheet. This stylesheet is included with the distribution and can be seen in the example. If you are comfortable manipulating CSS for styling your web applications, altering these styles is fairly straightforward.
With this stylesheet, you will be able to set the colors, fonts, backgrounds and more for each type of alarm as well as their current state, and combinations thereof.
Miscellaneous
OAS.init()
Use OAS.init() after making any changes to OAS_config. For example, when altering any alarm features, you can then call OAS.init() to force the OAS_config to reload with the new settings.