View the steps in the Getting Started – Smart Client Click Once Deployment section in this topic.
FAQs – Smart Client Deployment
Videos – Smart Client Deployment
Smart Client with .NET Framework 1.1
![]()
Perform the following steps to setup the Example application for Smart Client Deployment using the .NET Framework 1.1 with application developed with Visual Studio 2003. Although possible to run applications as a Smart Client on systems with .NET Framework 1.1 only, you can see it is easier to use the .NET Framework 2.0 Click Once deployment that is included in Visual Studio 2005.
Step 1
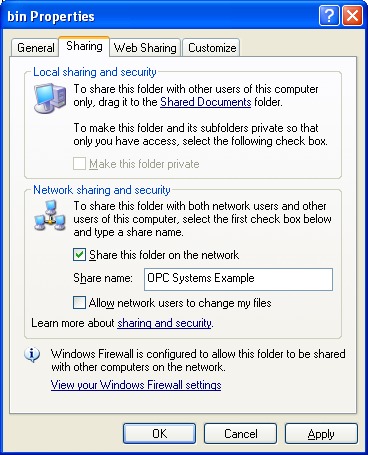
Share the directory where the application resides.
By default this would be C:Program FilesEEIOPC Systems.NETExamplebin.
Step 2
Open port 58724 on all systems that will be communicating together that have a firewall.
On each OAS Service system that you wish to connect to and each remote system you will be running the application from add TCP port number 58724 if a firewall is enabled. This port number is adjustable in the service and in all .NET dlls.
For Windows XP SP2 Select Control Panel-Windows Firewall.
Select the Add Port button.
Enter a Name and the Port Number 58724.
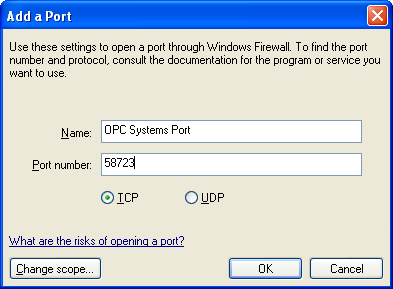
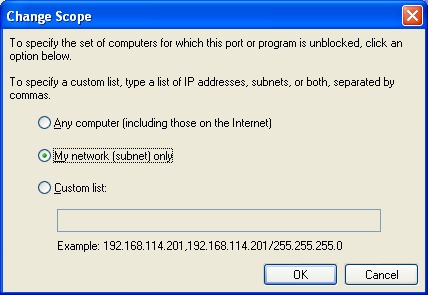
Use the Change scope button to limit the IP range to the systems that will be communicating together.
Step 3
On all remote systems that will be running the Smart Client Example application use the Microsoft .NET Framework Configuration tool to Trust the Example application.
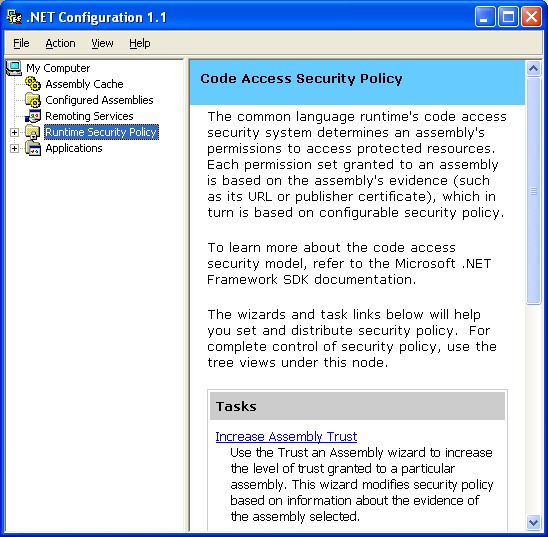
Select Control Panel-Administrative Tools-Microsoft .NET Framework 1.1 Configuration. (Please note that if you do not see the Microsoft .NET Framework 1.1 or 2.0 Configuration tool install the .NET Framework in the operating system.).
Select Runtime Security Policy.
Use the Increase Assembly Trust Task to add all of the files from the shared network folder on the hosting system from Step 1.
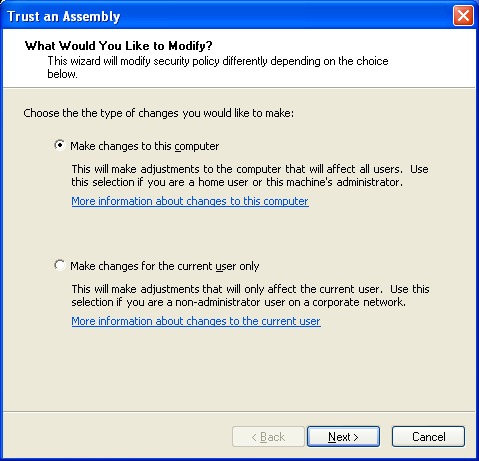
Select each file from the shared network folder one by one.
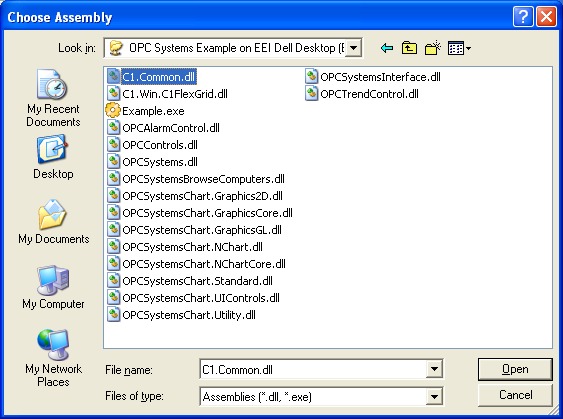
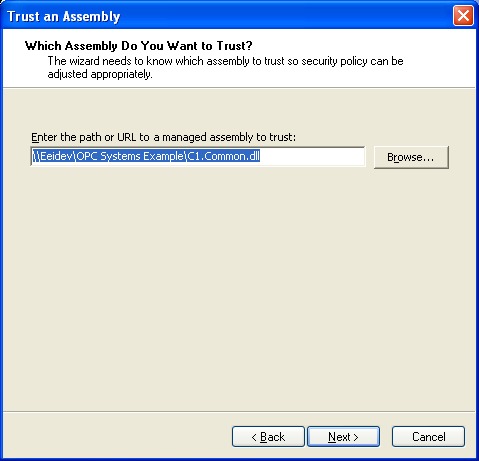
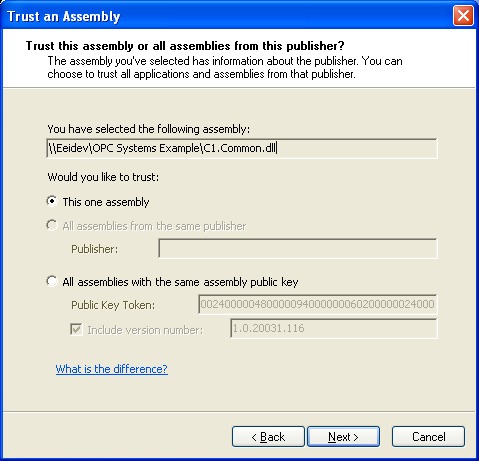
Set the level of minimum security to Full Trust.
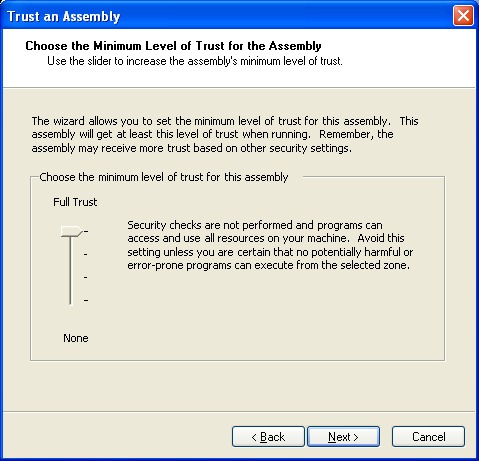
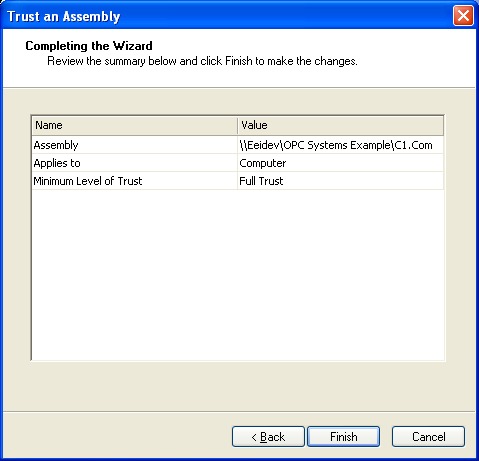
Select Finish and repeat the Increase Assembly Trust Task for all of these files in the shared folder.

Step 4
You are now ready to run the application from all remote PCs that you performed Steps 2 and 3.
Simply run Example.exe from the shared network folder on the server PC.
From the Example application select Network Node from the pull down menu to enter the Node Name or IP Address of any system with OAS Service running.
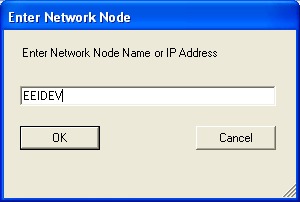
Select any of the menu buttons to view and control data from the source OAS Service.
Notice that the application is running on the remote PC without the files on the PC.
Also the communications to the source system is dynamically set with the Network Node dialog. Feel free to change the Network Node to any system that is running the OAS Service with the DemotTags configuration.
With Open Automation Software you can easily build networked applications that connect to multiple licensed OAS Services. You can either programmatically set the Network Node as in the Example application or simply set the component Tag properties to include the desired Network Node.
The user interface is far superior to a web browser; you are truly running the application on the Remote system.
Now that all of the application files are in one directory it is very easy to make updates to the one directory and all remote systems run the same common updated application, versioning has never been easier.
Getting Started – Smart Client Click Once Deployment
The Example application installed with Open Automation Software is a Smart Client compatible application demonstrating remote connectivity to any Open Automation Software Service. The application includes OPC Controls.NET, OAS Trend .NET, OAS Alarm .NET, and the OAS Configuration component.
When building your own Smart Client application make sure to include either the Network Node name or IP Address of the OAS Services you wish to connect to. This would include the OPC Controls Tag properties, the OPC Trend pen Tag names, the OPC Alarm window network nodes, and any routines using the Open Automation Software programmatic interface.
Open Automation Software uses TCP port number 58724, so be sure to add your applications you deploy to any firewalls on your system with this TCP port number as an exception. The TCP port number is adjustable in both the service and as the WCFPortNumber property in each .NET dll.
To deploy applications with Visual Studio 2005 with the .NET Framework 2.0 is extremely simple.
Step 1
Make sure IIS is installed and running on the system you wish to deploy to.
Step 2
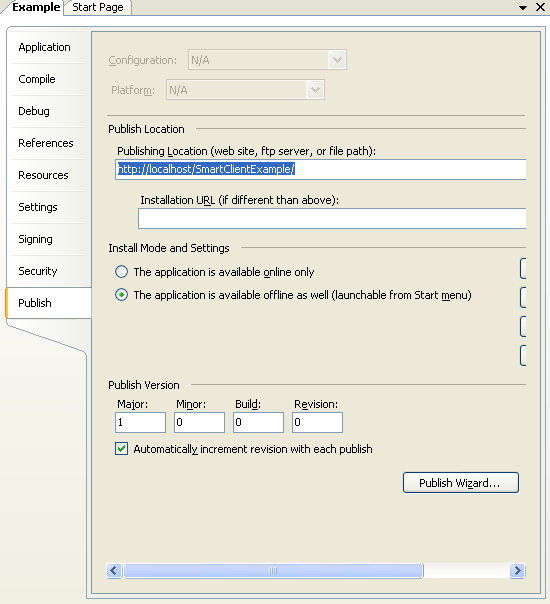
In Visual Studio 2005 select the Properties of the project you wish to deploy.
Next select the Publish tab to view the Click Once deployment section.
Step 3
Set the Publish Location to the local or remote system that is running IIS.
Step 4
Set the initial Publish Version and either leave the automatic increment or disable the feature and set it manually each time you want to make an update to the application.
Step 5
Select the Publish Wizard button to begin the steps of deploying the application.
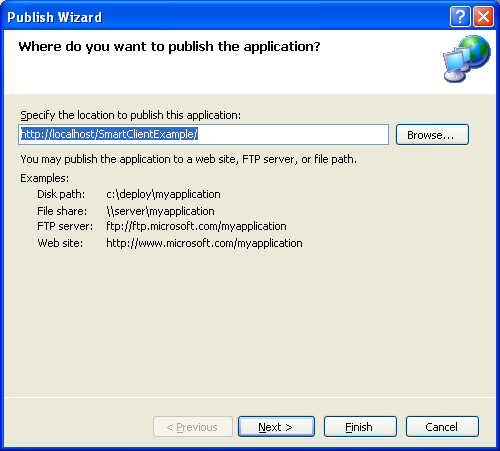
Step 6
Determine if the application will be installed remotely to run on each system even if the server is not reachable or if the application will only be available with the server is online.
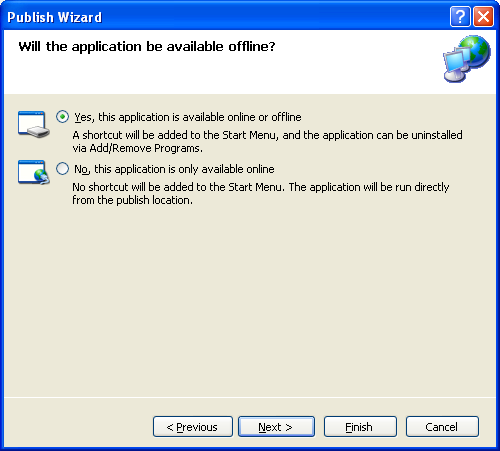
Step 7
Confirm that the deployment virtual directory is correct and select Finish.
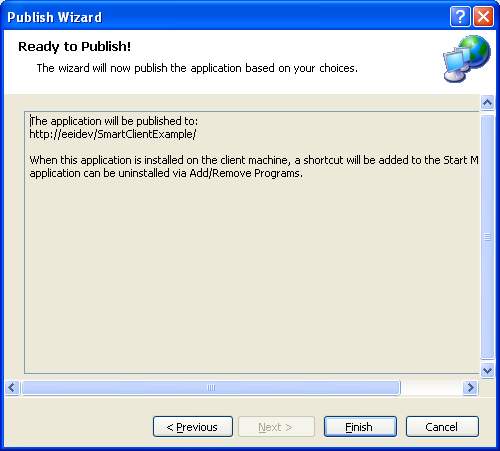
Step 8
Open port 58724 on all systems that will be communicating together that have a firewall enabled.
On each OAS Service system that you wish to connect to and each remote system you will be running the application from add TCP port number 58724 if a firewall is enabled. This port number is adjustable in the service and in all .NET dlls.
For Windows XP SP2 Select Control Panel-Windows Firewall.
Select the Add Port button.
Enter a Name and the Port Number 58724.

Use the Change scope button to limit the IP range to the systems that will be communicating together.

Step 9
From any remote client system simply open url of the deployment server publish page using a web browser and select the Install button.
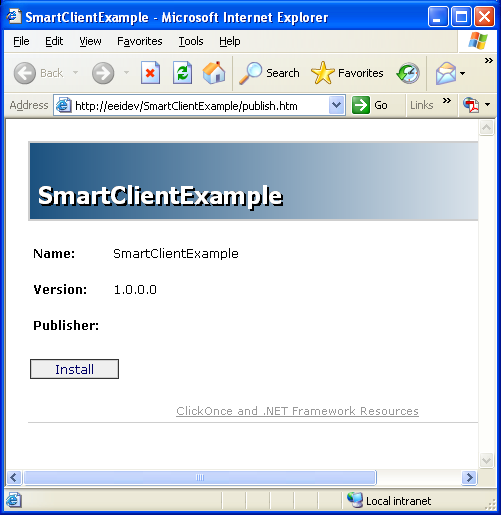
With Smart Client deployment you can now easily deploy updates to one location and make updates just to the one deployment server and all remote users automatically receive the updates on the next time they run the system.
When the application is installed for offline/online deployment each time it runs it connects to the deployment server to see if there is a newer version available. The user is prompted to install the update or ignore and continue to run the application.
Overview – Smart Client Deployment
Applications developed with 100% managed components can be executed on remote systems without installing the application itself on the remote systems. This makes application updates extremely simple and provides a better user experience than web applications provide.
The .NET Framework provides built in security to limit remote application execution without proper authorization.
Visual Studio 2005, 2008, 2010, 2012, 2013, 2015, 2017, 2019, and 2022 make Smart Client deployment very easy with a deployment wizard for the Project you wish to deploy. This wizard allows you to set version information that the remote systems will use to determine if an update is available.
This deployment method requires the client systems to have version 2.0 of the .NET Framework if you are using Visual Studio 2005 and version 3.5 of the .NET Framework if you are using Visual Studio 2008.
Components that include COM or legacy ActiveX controls are not Smart Client compatible.
All .NET components of Open Automation Software are Smart Client compatible.
There are a few simple steps to deploy an application as a Smart Client.
The following examples walk you through a complete Smart Client execution.
NOTE: If you want to visualize your data in a desktop or mobile browser with zero programming, you may be interested in the OAS Open UIEngine .
The UIEngine is a robust no-code web application and HMI builder for developing rich user interfaces in a browser-based development environment.
See the UIEngine Documentation to learn more.


