Web HMI Graphics

NOTE: If you want to visualize your data in a desktop or mobile browser with zero programming, you may be interested in the OAS Open UIEngine .
The UIEngine is a robust no-code web application and HMI builder for developing rich user interfaces in a browser-based development environment.
See the UIEngine Documentation to learn more.

Using image tags in Web HMI

Many applications require some dynamic graphical elements to indicate value changes on the server. The simplest example may be an image of a switch changing from the “on” state to the “off” state depending on the value of a Boolean server tag.

In more complex implementations, multiple tags can be used to change the state of an HTML image, allowing more nuanced visual representations of data. Such an implementation could use multiple images to represent a motor in various states such as “running”, “idle”, “running and overheated”, “idle and overheated”, as well as an image to indicate bad data quality received from the server for this element.

Web HMI Graphics Introduction

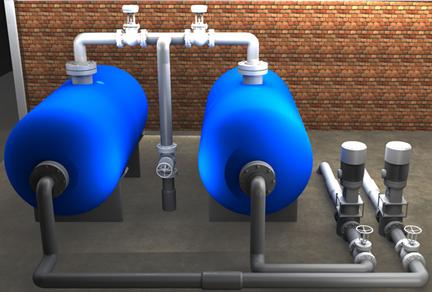
In this example, we are going to configure an HTML image tag using Web HMI attributes in order to indicate the various states of a valve. The end result will appear to change the color of the valve between red, green, and yellow to indicate when the valve is closed, open, or receiving bad data, respectively.

Web-HMI-Graphics-1

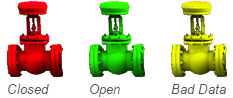
These images will be superimposed on a background depicting the entire system, so operators can see the physical layout as well as the data.

Web HMI Graphics 4

Setting the Stage for Web HMI Graphics

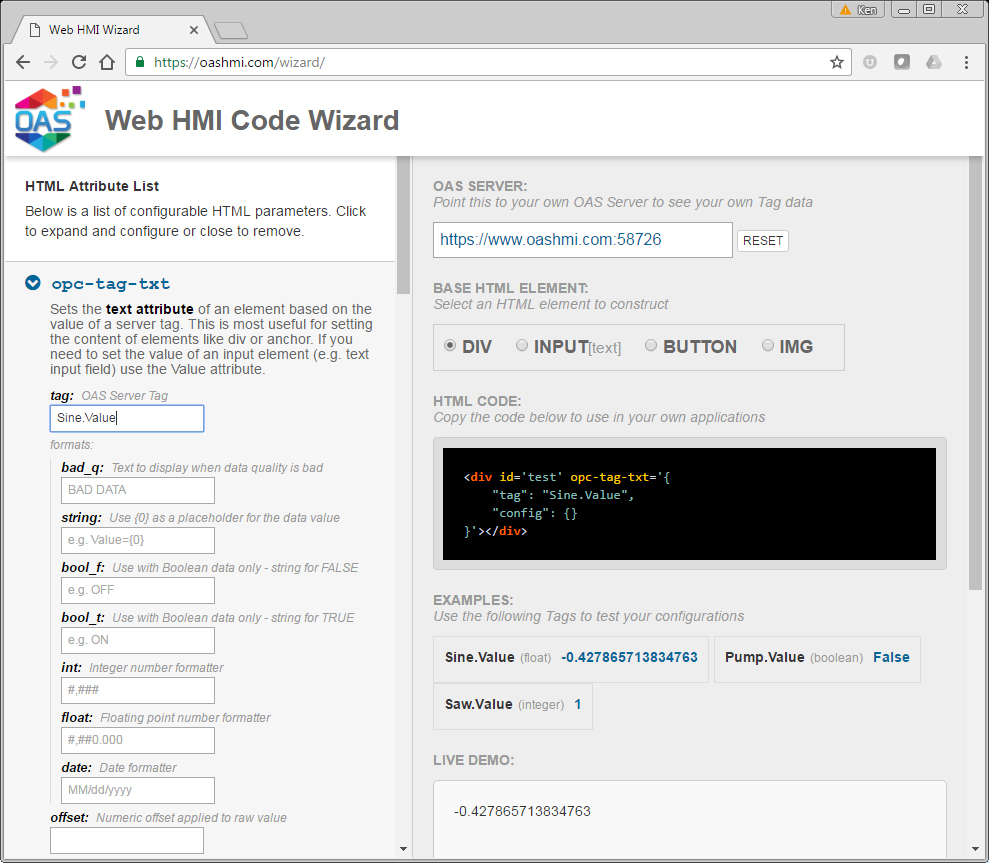
The first step is to create an HTML page with the necessary script library references and configuration. To learn more about how to set up a basic Web HMI page, see this tutorial.

Once you have a basic page configured, you’ll add a CSS stylesheet section to the HTML <head> element which will be the place where we define the layout and positioning of elements. It should look like this:

<head>
  // script references go here…
 
  <style>
 
    #bkg_image {
      position:relative;
      width:767px;
      height:518px;
      background: url(images/new_tanks/Background.jpg) 0 0 no-repeat;
    }
 
    #valve1 {
      position:absolute; 
      top:9px; 
      left:206px;
    }
 
  </style>
 
</head>

The #bkg_image entry refers to an element with the id of “bkg_image”. This will be the container for the valve image and will have a background image set within it. The background is the physical layout of the system.

The #valve1 entry refers to an element with the id of “valve1”, which will be the image of the valve itself. As mentioned above, this will use absolute positioning, but will be relative to the container.

More about CSS

If you’re not familiar with CSS, setting the position to relative means that anything contained within it will be positioned relative to the container itself. So if we set a coordinate for anything within it, they will always be relative to the background image. The width, height, and background settings are pretty straightforward. If you want to learn more about CSS, you can visit the W3Schools site.

Adding the elements to the page

The next step is to add the background and valve elements to the page. Your HTML <body> should look like this:

<body>
  
  <div id="bkg_image">
    <img id="valve1" 
      oas-tag-src='{"type":"group",
        "group":[
          {"tag":"WPF.New Tanks Demo.Tank1 Inlet Valve.Value","config":"images/new_tanks/ValveTopLeft_Green.png"}
        ],
        "all_f":"images/new_tanks/ValveTopLeft_Red.png",
        "bad_q":"images/new_tanks/ValveTopLeft_Yellow.png"
      }'
    />
  </div>
 
</body>

The oas-tag-src attribute applied to an <img> tag will change the image source based on the value of Open Automation Software Server tag values. The first setting is “type”:”group”. This tells the framework that we’re using a “group” attribute because we’ll be applying a group of tags. This is similar to the oas-tag-bg, oas-tag-fg, and others.

The next setting is the group itself. This is a list of tags and configurations to apply when the tag evaluates to a Boolean True. The structure follows this format:

"group":[
  {"tag":"YourTagName.Value","config":"image url"},
  {"tag":"AnotherTagName.Value","config":"image url"},
  …
]

Each tag in the group list is evaluated in the order it is written. The first tag that evaluates as True will have its configuration applied, and no others will be checked. In this example, we only have one tag in the list, but you could add others to indicate values such as “Open and high pressure”, “Open and low pressure”, changing colors for each to create a more nuanced interface.

The “all_f” setting applies an image URL when all of the tags within the group evaluate to False, and the “bad_q” setting applies an image URL when any tag within the group is sending bad data quality to the browser.

Making the image clickable

Displaying a dynamic image on a layout is very useful, but to make an HMI interactive, you’ll want to make the image clickable, letting operators open and close a valve remotely.

To achieve this, modify the <img> tag to look like this:

img id="valve1" 
  oas-tag-src='{"type":"group",
    "group":[
      {"tag":"WPF.New Tanks Demo.Tank1 Inlet Valve.Value","config":"images/new_tanks/ValveTopLeft_Green.png"}
    ],
    "all_f":"images/new_tanks/ValveTopLeft_Red.png",
    "bad_q":"images/new_tanks/ValveTopLeft_Yellow.png"
  }'
  oas-tag-set='{"tag":"WPF.New Tanks Demo.Tank1 Inlet Valve.Value",
    "config":{"evt":"click","set":"toggle"}}'
/>

The oas-tag-set attribute makes the image active, responding to a click event. When the image is clicked, it sends a “toggle” message to the server to switch the Boolean value to the opposite of the current state. You’ll notice that the “tag” setting of this attribute matches the “tag” in the oas-tag-src. This ensures that clicking the image will set the same tag being used for display purposes.

The end result

After all pieces are put together, and you run the example in a browser, you should see the following result. Notice the green valve overlaid on the background to indicate that the valve is open:

Web-HMI-Graphics-5

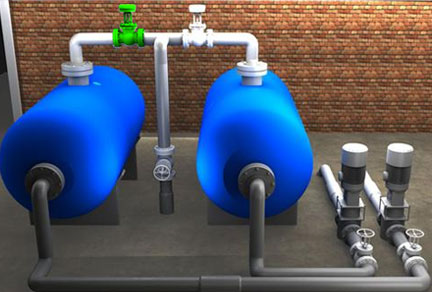
Using this same technique, you can place additional dynamic images on a physical layout to achieve a fully functional HMI in a web page. An example of this fully functional HMI can be found by going to www.opcweb.com.

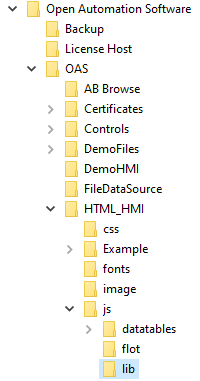
The source of the full online example is installed with Open Automation Software in:
C:\Program Files\Open Automation Software\OAS\HTML_HMI\Example\html_hmi_demo.zip

Web HMI Wizard

The OAS HMI Wizard provides an easy way to generate HTML code for inclusion in your web-based HMI or SCADA application.

NOTE: If you want to visualize your data in a desktop or mobile browser with zero programming, you may be interested in the OAS Open UIEngine .
The UIEngine is a robust no-code web application and HMI builder for developing rich user interfaces in a browser-based development environment.
See the UIEngine Documentation to learn more.

The OAS HMI Wizard is also self-hosted on your own OAS installation at http://localhost:58725/app/wizard/.  Use this self-hosted wizard to prototype update from your own tags.

View the following video to see how to use the Web HMI Wizard to automatically create HTML code to provide live data.

  • 00:00 – Introduction
  • 00:26 – Methods for Using OAS Web HMI Product
  • 00:32 – Programmatic Method
  • 01:00 – Web HMI Code Wizard
  • 01:26 – What is the Web HMI Code Wizard?
  • 02:09 – Code Wizard closer look
  • 07:38 – HTML Element View
  • 08:59 – HTML Attribute list
  • 09:34 – Tag Text
  • 13:55 – Other HTML Attributes
  • 15:05 – More Information

To use the wizard:

  1. Locate in the left hand pane the parameter your require code for.
  2. Fill in the parameter values e.g tag name, client side event etc. The HTML code sample updates as you enter values.
  3. Select the HTML element you wish to output (top of right hand pane).
  4. Copy the code snippet and paste into your HTML page.

Visit http://opcweb.com:58725/app/wizard/ to run the online interactive html wizard.

HTML Wizard
HTML Wizard

Getting Started – Web HMI

The following content will get you started with Web HMI, building your own web user interfaces with real time data.

NOTE: If you want to visualize your data in a desktop or mobile browser with zero programming, you may be interested in the OAS Open UIEngine .
The UIEngine is a robust no-code web application and HMI builder for developing rich user interfaces in a browser-based development environment.
See the UIEngine Documentation to learn more.

For full reference information on Web HMI visit Programming Reference – Web HMI

View the following video to see how to use Web HMI to create user interfaces.


Step 1

Configure Web Services within the OAS Platform. For instructions on how to accomplish this as well as optionally using SSL for secure communications, see the following article:
Configuring OAS Web Services


Step 2

Create a project directory. (Example C:\myWebHMI)


Step 3

Copy the 4 supplied files from C:\Program Files\Open Automation Software\OAS\HTML_HMI, js and css subdirectories to your project directory keeping the directory structure just the same.


Directories
1. js/lib/jquery-1.8.3.min.js
2. js/lib/json2.js
3. js/opc-lib-min.js
4. css/opc-style.css

Note: You can use any version of jQuery as long as it is v1.8 or greater, and the json2 library is only necessary for older browsers such as IE 8.


Step 4

Open/create a new text document and add the following minimum code:

<!DOCTYPE html>
<html>
    <head>
        <script type="text/javascript" src="js/lib/jquery-1.8.3.min.js"></script>
        <script type="text/javascript" src="js/opc-lib-min.js"></script>
        <script type="text/javascript" src="js/lib/json2.js"></script>
        <link rel="stylesheet" stype="text/css" href="css/opc-style.css"/>
        <script type="text/javascript">
            OAS_config = {
                token:'7e61b230-481d-4551-b24b-ba9046e3d8f2',
                serverURL: 'http://localhost:58725'
            };
        </script>
    </head>
    <body>
    </body>
</html>

Networking

In the web page set the serverURL to the IP Address, Network Node Name, or registered domain name of the Linux or Windows devices where the OAS Engine located.

serverURL: 'http://192.168.0.1:58725'

Specify the tag names in the HTML code as local tags.  The web browser can be run locally or remotely, it will communicate to the server specified in the serverURL as a relative path for the tag values.  In this example the tags would be running on the same server as 192.168.0.1 and the content in the page would reference the tag as local even if the client browsers are running on remote devices.

Local Tag

myGroup.myTag.Value

If the tag is located on a different system than the serverURL or you want to host data from multiple OAS Engines use the Remote Tag Access syntax.

Basic Networking

\\192.168.0.1\myGroup.myTag.Value

Live Data Cloud Networking from local OAS Engine

RemoteSCADAHosting.myLiveDataCloudNode.myGroup.myTag.Value

Live Data Cloud Networking though remote OAS Engine

\\192.168.0.1\RemoteSCADAHosting.myLiveDataCloudNode.myGroup.myTag.Value

Step 5

If you are new to HTML code use the HTML Wizard code generator at http://opcweb.com/wizard/ to generate the code for you.

HTML Wizard
HTML Wizard

In the body add the following code to display the Ramp tag value:

<div>Ramp Value =  <label id="txt1" oas-tag-txt='{"tag":"Ramp.Value","config":{"formats":{"bad_q":"?????","float":"0.0"}}}' ></label></div>

Step 6

Below the Ramp code add the following code to display the Pump tag Value:

<div>Pump Value = <label id="txt2" oas-tag-txt='{"tag":"Pump.Value","config":{"formats":{"bad_q":"?????"}}}' ></label></div>

Step 7

Finally below the Pump code add the following to create a button that will allow you to “Toggle” the Pump Value.

<div><button id="tog2" oas-tag-set='{"tag":"Pump.Value","config":{"evt":"click","offset":0,"set":"toggle","set_src":""}}'>Toggle Pump</button></div>

NOTE: To be able to set a value (write to it) it must first be setup to read in the web application.


Step 8

Save your file as myWebHMI.html

Web HMI Getting Started 3

Step 9

Deploy the your application to any web server. This can be IIS on Windows, or any HTTP server on Linux, and even cloud hosting services.


Step 10

To see the results open a browser to the location of your HTML file.


Full Source Code

Your final code should look like this:

<!DOCTYPE html>
<html>
    <head>
        <script type="text/javascript" src="js/lib/jquery-1.8.3.min.js"></script>
        <script type="text/javascript" src="js/opc-lib-min.js"></script>
        <script type="text/javascript" src="js/lib/json2.js"></script>
        <link rel="stylesheet" stype="text/css" href="css/opc-style.css"/>
        <script type="text/javascript">
            OAS_config = {
                token:'7e61b230-481d-4551-b24b-ba9046e3d8f2',
                serverURL: 'http://localhost:58725'
            };
        </script>
    </head>
    <body>
    <div>Ramp Value =  <label id="txt1" oas-tag-txt='{"tag":"Ramp.Value","config":{"formats":{"bad_q":"?????","float":"0.0"}}}' ></label></div>
    <div>Pump Value = <label id="txt2" oas-tag-txt='{"tag":"Pump.Value","config":{"formats":{"bad_q":"?????"}}}' ></label></div>
    <div><button id="tog2" oas-tag-set='{"tag":"Pump.Value","config":{"evt":"click","offset":0,"set":"toggle","set_src":""}}'>Toggle Pump</button></div>
    </body>
</html>

NOTE: To be able to set a value (write to it) it must first be setup to read in the web application.

Open Automation Software provides a tool for automatically creating the HTML code to read and write to Open Automation Software Tags using the HTML HMI Wizard.

Installation and Configuration

For installing and configuring the Open Automation Software Server, please refer to the product documentation. To configure a web page to communicate with the server, you must include:

  • jQuery v1.8.3 or later, found at jquery.com and is also distributed with the OAS Web HMI product
  • The OAS Web HMI Script Library
  • The OAS Web HMI Stylesheet, which is used for styling modal dialogs and can be modified to fit your web design
  • A small block of Javascript containing an authentication token and URL location of the Open Automation Software Server – configuration options will be detailed below

NOTE: As of v2.6.0 of the Web HMI script library, object and attribute names have been changed to avoid confusion with OPC protocols and standards. The new object names are as follows:

  • OPC_config is now OAS_config
  • Top level OPC class used for calls such as OPC.authenticate is now OAS
  • Markup attributes are no longer prefixed opc-tag-, and are now oas-tag-.
  • Script libraries are backward-compatible, so existing code with “OPC” nomenclature will still function with no issues

To check your current script version, open an application using Web HMI in your browser, open a debug console and execute the command: OPC.version

The following is an example of a properly configured, minimal HTML page:

<html>
    <head>
        <script type="text/javascript" src="js/jquery-1.8.3.min.js"></script>
        <script type="text/javascript" src="js/opc-lib-min.js"></script>
        <link rel="stylesheet" stype="text/css" href="css/opc-style.css"/>
        <script type="text/javascript">
            OAS_config = {
                token:'7e61b230-481d-4551-b24b-ba9046e3d8f2',
                serverURL: 'http://localhost:58725'
            };
        </script>
    </head>
    <body>
        Hello World
    </body>
</html>

Of course, this example does not contain any bindings to OAS Server Tags, but contains all elements necessary to connect to a server located at http://localhost:58725 using an authentication token of7e61b230-481d-4551-b24b-ba9046e3d8f2.

Overview – Web HMI

NOTE: If you want to visualize your data in a desktop or mobile browser with zero programming, you may be interested in the OAS Open UIEngine .
The UIEngine is a robust no-code web application and HMI builder for developing rich user interfaces in a browser-based development environment.
See the UIEngine Documentation to learn more.

For programmatic custom applications, Web HMI is an SDK for embedding real time OAS data in your own application code using Javascript.

OAS Web HMI provides a flexible, platform-independent way to integrate with Open Automation Software Servers.

  • “Controls” themselves are simply existing HTML elements marked up with attributes that are parsed at runtime, so you are free to use any web technology that you prefer, including (but not limited to) ASP.NET or .NET MVC, JSP, PHP, Ruby on Rails, or even static HTML with JavaScript.
  • Compatible with front end frameworks such as Angular and VueJS.
  • Easily integrates with existing web applications
  • Based on ubiquitous standard technologies including JavascriptjQueryJSONHTML, and CSS