Use the OPC Systems component in your Visual Studio application to programmatically modify alarm notification groups. Refer to the FormConfigureAlarmNotification Form in the WinForm Example Code example for an example and how to add and modify alarm logging groups.
All notification groups can be exported to a CSV file by right clicking on the Local service and select Export CSV.
Note: You cannot have Excel open with the CSV file during the import as Excel will lock the file for exclusive use. First close the file in Excel, and then proceed with the import.
The Alarm Notification feature is used to summarize alarm totals and send e-mails based on specified filter criteria of alarm conditions.
In order to utilize alarm notification you must first define the Tag Alarm Limits as described in Configure Tags of this Quick Start section. For a complete list of all Alarm Notification properties refer to the OAS Configuration – Alarm Notification section in this help file.
Step 1
Start Configure OAS application.
Load the DemoTags Tag configuration or use the new Tag configuration you have created.
Step 2
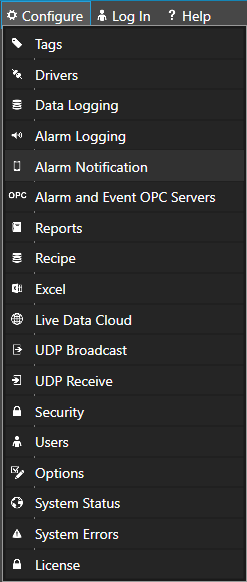
Select Configure-Alarm Notification.
Step 3
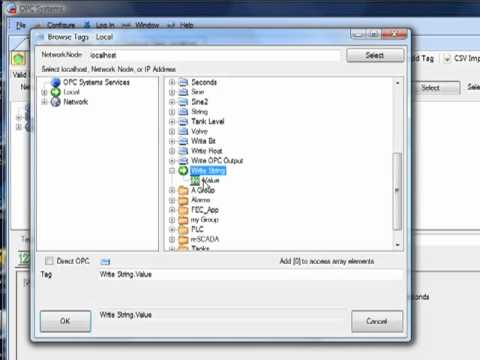
Select the Local OAS Service by selecting the Select button next to the Network Node drop down.
Step 4
Enter the Notification Group Name of Simulation in the field in the upper right.
Step 5
Check Notification Active in the Common Properties Tab.
Step 6
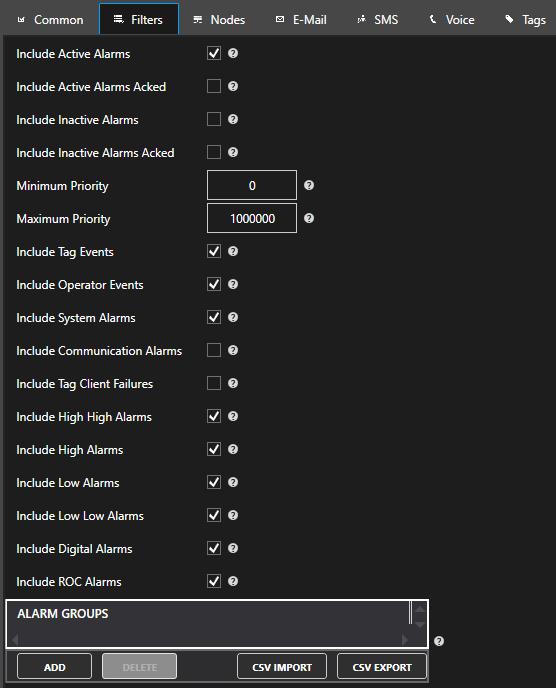
Select the Filters Tab.
Notice how you can define filtering based on Alarm Priority, Alarm Groups, and Alarm Types.
Step 7
Select the notification type your would like to set up – Email, SMS or Voice. To use SMS or Voice as a notification type you will need to use the Twilio service.
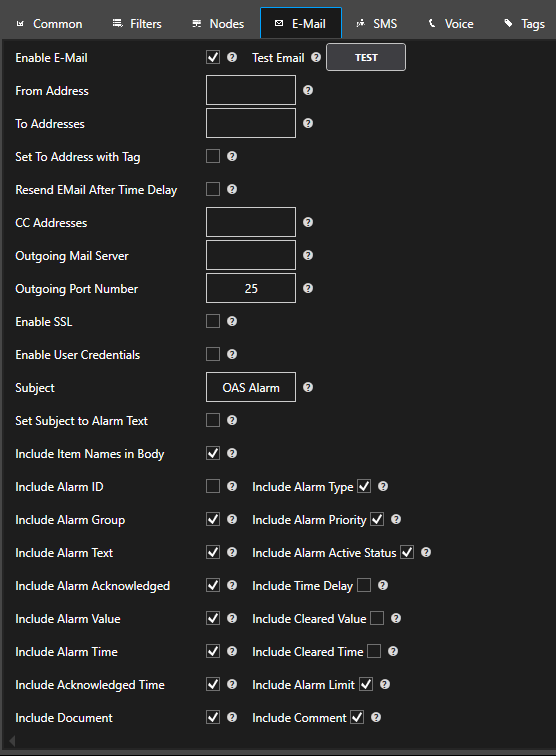
7.1 For Email notifications select the Email tab
You can define to send alarms that meet the filter criteria to an e-mail account. Use a semicolon to separate multiple e-mail addresses.
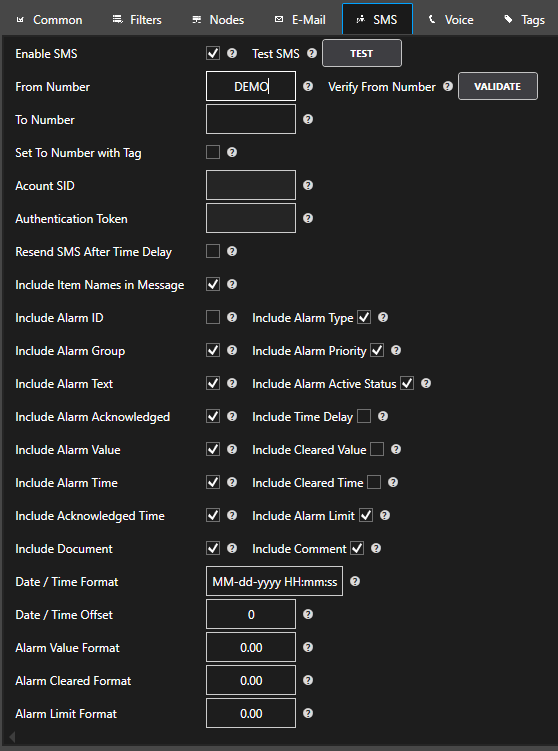
7.2 For SMS notifications select the SMS tab
To trial the functionality you can use the demo mode to send 10 notifications. To use SMS as a notification type you will need to use the Twilio service.
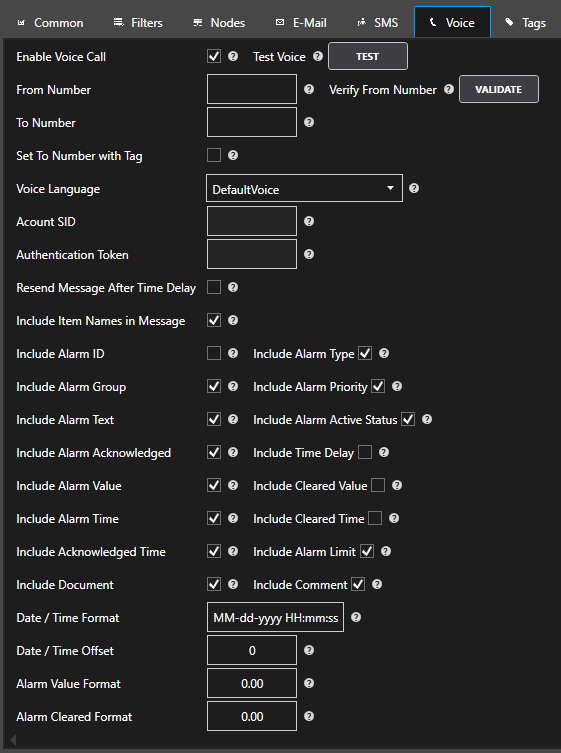
7.3 For Voice notifications select the Voice tab
To trial the functionality you can use the demo mode to send 10 notifications. To use Voice as a notification type you will need to use the Twilio service.
Step 8
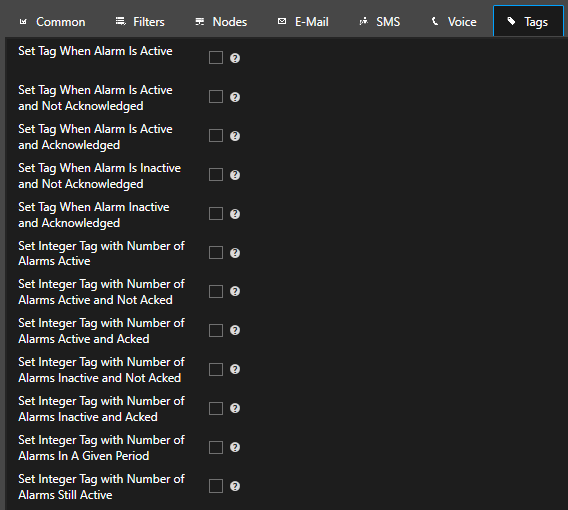
Select the Tags Tab
With the Tags properties you can assign to automatically write alarm statistics to Open Automation Software Tags. Useful to drive an external alarm horn through a PLC or display how many alarms are currently active.
Step 9
Select Configure-Tags and add a Boolean Tag with the name Alarm Is Active.
Add an Integer Tag with the name Number Of Alarms Active.
Add an Integer Tag with the name Number Of Alarms In Last 24 Hours.
Step 10
Return to Configure-Alarm Notification:
Enable the property to Set Tag When Alarm Active
Assign the Tag name Alarm Is Active.Value
Enable the property to Set Integer Tag with Alarm Active Count
Assign the Tag name Number Of Alarms Active.
Enable the property to Set Integer Tag with Number Of Alarms In A Given Period
Assign the Tag name Number Of Alarms In Last 24 Hours
Step 11
Select the AddGroup button at the top of the left pane to add the Alarm Notification group.
Step 12
Select the Save button on the toolbar at the top.
Step 13
Save the file DemoAlarmNotification.AlarmNotification in the directory C:OPCSystemsDemo.
You can specify for this configuration to load automatically when the Service starts using Configure-Options which is described also in this Training Guide.
Step 14
Return to Configure-Tags and select each tag and note that the current number of alarms and active state are updated automatically to the appropriate tag.
The OAS Alarm Notification feature is included as part of the Alarms .NET and Web Alarms products. If you want to develop server or desktop applications using WinForms, WPF or the Dotnet SDK then you would choose the Alarms .NET product. On the other hand, if you want to develop web-based applications with HTML and JavaScript the you would choose the Web Alarms product.
Both products give you the ability to configure alarm thresholds on any of your tags. This includes Digital, Low, Low Log, High, High High and Rate of Change alarm types with configurable parameters such as threshold value, delay, deadband, priority, alarm text, alarm group and more. By default, OAS stores the run-time alarm state in memory and allows you to configure alarm buffering in case of restart. OAS also provides alarm acknowledgement features through the alarm controls and its APIs.
The Alarm Notification feature allows you to send alarm notifications via E-mail, SMS or Voice. E-mail notifications are configured to send using an SMPT server. The SMS and Voice notifications are integrated with Twilio and require a Twilio account.
Alarm notifications work by configuring one or more Notification Groups. Each notification group is essentially a filter and any alarms that match the filter will trigger a notification for that alarm. This includes parameters such as alarm state, alarm type, priority and alarm group. You can create as many notification groups as you need.
Supported features:
Customize which alarm details are included
Dynamically set “To Address” using another Tag
Dynamically set “Phone Number” using another Tag
Repeat notification after time delay
Prevent sending multiple notifications within configurable time period
Acknowledge alarm by E-mail reply
View the Getting Started section on Alarm Notification to follow simple steps.
Security Login Error occurs with Open or Create routines.
View the Database Security Login topic on how to setup security logins and access writes to create, open, and read and write to the database.
The database engine language is different than the Regional Language settings of the Data Logging and / Alarm Logging Service. Data Logging updates, Alarm Logging updates, trend history, and / alarm history is not working due to invalid date format.
Go to Configure-Options-History and Enable History Date Format.
Examples:
yyyy-MM-dd HH:mm:ss
MM/dd/yyyy HH:mm:ss
Use the OPC Systems component in your Visual Studio application to programmatically modify alarm logging groups. Refer to the FormConfigureAlarmLogging Form in the WinForm Example Code example for an example and how to add and modify alarm logging groups.
To use Alarm Logging the product feature Alarm .NET or Web Alarm needs to be enabled, it is included with either of these product features.
Start the Configure OAS application from the program group Open Automation Software.
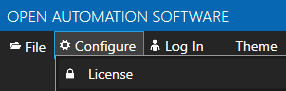
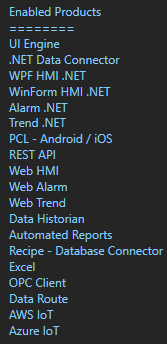
Select Configure-License and verify that Alarm .NET or Web Alarm is one of the enabled products in the lower left of the form. If you do not see either Alarm .NET or Web Alarm enabled email support@oasiot.com to update your license.
NOTE: To configure remote OAS Engines enter the IP Address or node name in the Network Node field and click on Select.
Step 2: Configure Alarm Logging
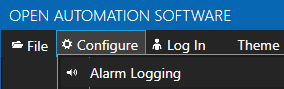
Select Configure-Alarm Logging.
In the Common tab enter a unique Logging Group Name.
Check Logging Active in the Common Properties Tab.
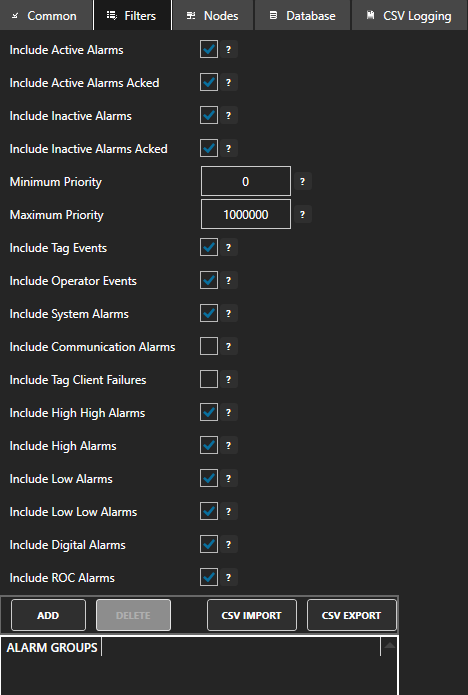
Step 3: Set Alarm Filters
In the Filters tab specify what types of alarms to log along with which alarm groups and alarm priorities. Leave the ALARM GROUPS list blank to log all alarm groups.
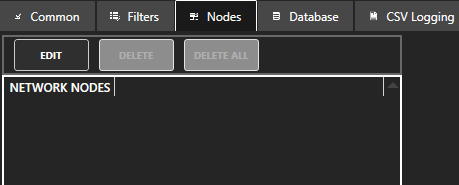
In the Nodes tab specify which OAS Engines to receive alarms from. Leave the list blank or specify localhost to log alarms from the local OAS Engine.
Step 4: Log Alarms to a Database
Select the Database tab to log the alarms to a database table.
Enable Log to Database.
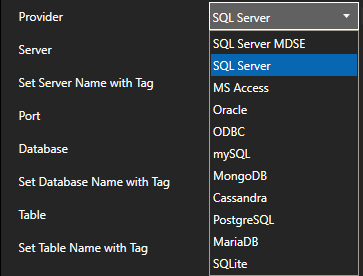
Select the database Provider to use.
NOTE: MS Access is not supported on Linux or Docker deployments.
NOTE: When logging to SQL Azure use the SQL Server Provider and view the following guide to setup Microsoft Azure: Windows Azure Setup
Specify the database Server to connect with.
NOTE: Not applicable for MS Access and SQLite.
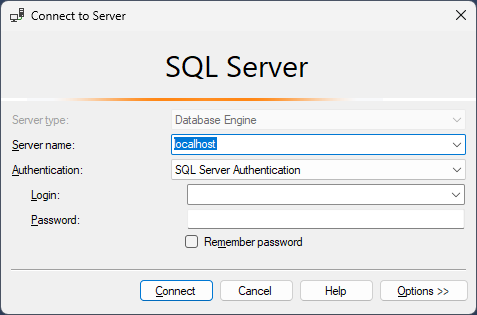
When logging to SQL Server the Server name can be copied from SQL Server Management Studio when connecting to the database engine.
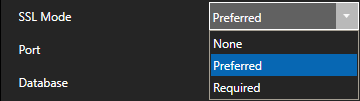
When logging to mySQL set the SSL Mode.
When logging to MongoDB use Add Srv if +srv option needs to be added to the Server.
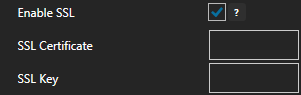
When logging to PostgreSQL select Enable SSL to specify a certificate.
Set the Database to log to.
When using SQLite or Microsoft Access specify the full path of the database. Example: C:\DatabaseName.mdb for older versions of Access and C:\DatabaseName.accdb for Access 2007 and greater.
Set the Table to log to.
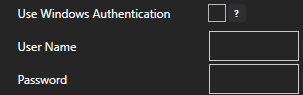
When logging to SQL Server uncheck Use Windows Authentication to specify SQL User Name Password. Leave enabled to connect using Windows Authentication.
Enable Log One Record Per Alarm if you want to insert only one record for each alarm instance. Leave disabled to log a new record for every change in alarm state, return to normal and acknowledged.
When enabled there will only be one record for each occurrence of an alarm. If the alarm returns the normal start or acknowledged the existing record will be updated with the new information. If it is a new occurrence of an alarm a new record will be created.
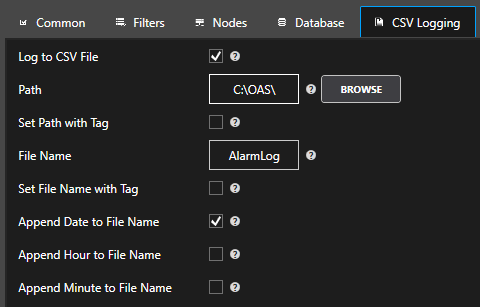
Step 5: Log Alarms to a CSV File
Use the following configuration for CSV text logging:
NOTE: There is no historical replay to alarm windows with CSV logging.
Step 6: Add Alarm Logging Group
Select the Add Group button to add the Alarm Logging group.
Step 7: Save Alarm Logging Configuration
Select the Save button on the toolbar at the top.
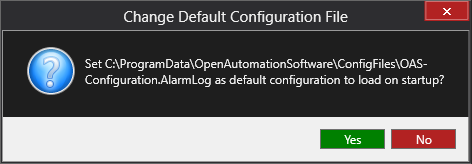
Enter a file name to be saved in C:\ProgramData\OpenAutomationSoftware\ConfigFiles directory on Windows or ConfigFiles subdirectory on Linux.
When prompted to set the file as the default configuration to load on startup select Yes.
Alarm records should now be recorded for alarms that match the filter criteria in the Filters tab.
The OAS Alarm Logging feature is included as part of the Alarms .NET and Web Alarms products. If you want to develop server or desktop applications using WinForms, WPF or the Dotnet SDK then you would choose the Alarms .NET product. On the other hand, if you want to develop web-based applications with HTML and JavaScript the you would choose the Web Alarms product.
Both products give you the ability to configure alarm thresholds on any of your tags. This includes Digital, Low, Low Log, High, High High and Rate of Change alarm types with configurable parameters such as threshold value, delay, deadband, priority, alarm text, alarm group and more. By default, OAS stores the run-time alarm state in memory and allows you to configure alarm buffering in case of restart. OAS also provides alarm acknowledgement features through the alarm controls and its APIs.
The Alarm Logging feature allows store alarms in a database and thus gives you a history of alarms that you can then query. It supports the following providers: SQL Server, Access, Oracle, ODBC, MySQL, MongoDB, Cassandra, PostgreSQL, MariaDB and SQLite. In addition to this you can also log to CSV files.
The alarm logging works by configuring one or more Logging Groups. Each logging group is essentially a filter and any alarms that match the filter will be logged. This includes parameters such as alarm state, alarm type, priority and alarm group. You can create as many logging groups as you need.


 Start Configure OAS application.