The OPC Controls Button component performs exactly like the standard Button component with additional properties to automatically update from any Open Automation Software Tag Parameter. For programmatic help refer to the OPCControls Help file.
To add an OPC Controls Button select the OPCControlsButton component from the ToolBox and place it on any Windows Form of your choice. See Add OPC Controls Components to Visual Studio.NET to add the OPC Controls Button to the ToolBox.
OPC Controls Button Properties
Refer to OPCControlshelp for all properties and members of the OPC Controls.NET components. All properties can be assigned in code; however no programming is required to use the properties.
Use the SetValueOPCSystems property to enable the ability to write to a Tag Parameter when the button is clicked. If the Tag Parameter is assigned to an OPC Item as a source the OPC Item will be written to with the value specified when the OPC Controls Button is clicked.
The following properties can automatically be set by Open Automation Software Tag values.
The OPC Controls Label component performs exactly like the standard Label component with additional properties to automatically update from any Open Automation Software Tag Parameter. For programmatic help refer to the OPCControls Help file.
To add an OPC Controls Label select the OPCControlsLabel component from the ToolBox and place it on any Windows Form of your choice. See Add OPC Controls Components to Visual Studio.NET to add the OPC Controls Label to the ToolBox.
OPC Controls Label Properties
Refer to OPCControls help for all properties and members of the OPC Controls.NET components. All properties can be assigned in code; however no programming is required to use the properties.
The following properties can automatically be set by Open Automation Software Tag values.
The OPC.NET Winform Controls are a set of .NET Controls to be used for building simple or complex user interfaces or HMIs. These Controls are specifically designed to be used for developing Classic WinForm applications for Windows desktop PCs and servers.
00:10 – How to Create an HMI Presentation using OPC Controls.NET
00:30 – How to Use the Controls without Writing any Code
00:36 – Create a Winform Application
01:11 – Select OPC Controls Components
01:33 – Label Control
01:47 – Network Node
02:21 – Set the Formatting
02:32 – OPC Controls Button
02:40 – Set the Color of the Button
02:47 – Set the Pump Value
03:20 – Test the Application
03:47 – More Questions
If you do not have a copy of Visual Studio you can download a free version of Visual Studio Community (formerly Visual Basic Express or C# Express) from https://visualstudio.microsoft.com/vs/express/. You can choose whether to use Visual Basic or C#, but if you have no experience with either language, Visual Basic is easier for new developers. No programming is required to use WinForm HMI.
All OAS .NET Assemblies are distributed with the OAS Platform and located within the installation directory and subdirectory \Controls\.
The following steps can be used to add visualization to a C# or Visual Basic.NET application. Refer to the VB.NET example for programmatic interface of using the OPCControls components. All properties are programmatically accessible.
The following example demonstrates the use of WinForm HMI with no code required.
Step 1: Create New Project
Load the default DemoTagsTag configuration file if you have replaced your tag configuration with your own tags.
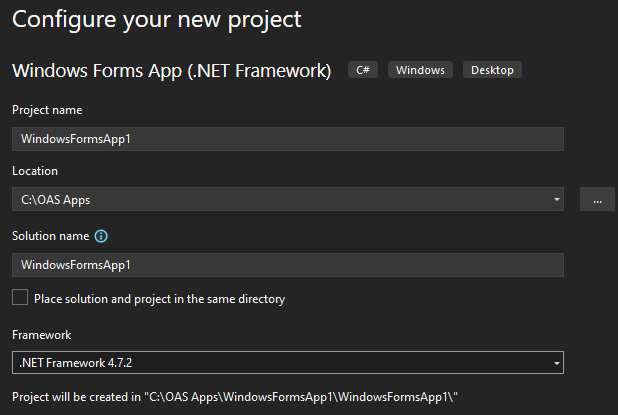
Start Visual Studio and select File->New->Project to create a new C# or VB project for Windows Forms App (.NET Framework) or Windows Forms App for .NET 8+.
When prompted choose C# or Visual Basic as language to target WindowsDesktop applications.
Choose Windows Forms App (.NET Framework) or Windows Forms for .NET 8 as the new project type for C# or Visual Basic.
Set the Project name, Location, and the Framework of 4.6.2 or greater.
Select Create in the lower right corner.
Step 2: Add Controls to Form
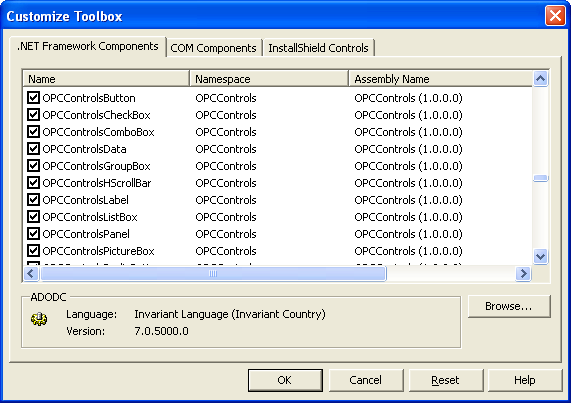
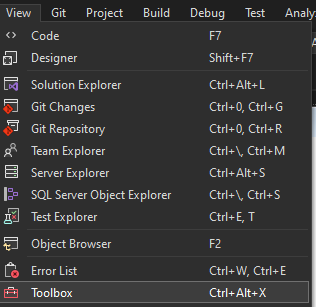
Select View-Toolbox to select controls from the Open Automation Software group.
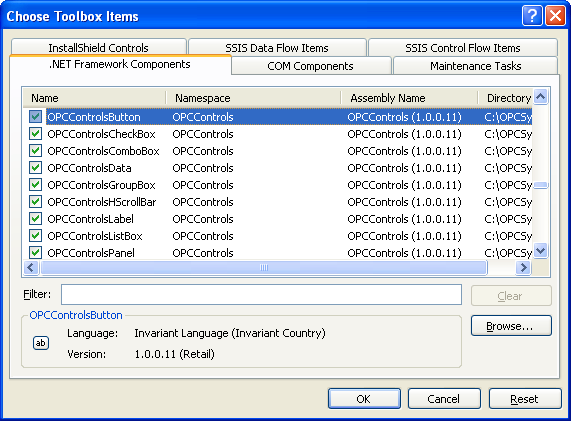
From the Toolbox if OPCControls components are not available right click in the Toolbox and select Choose Items.
NOTE: If you have installed Visual Studio after Open Automation Software you can either right click on the Toolbox and select Choose Items to include the OPCControls.dll assembly from C:\Program Files\Open Automation Software\OAS\Controls\NetFramework\OPCControls\ or uninstall Open Automation Software and reinstall to register the OPCControls.dll assembly with Visual Studio.
From the .NET Framework Components select all of the OPC Controls components and then select OK.
Label
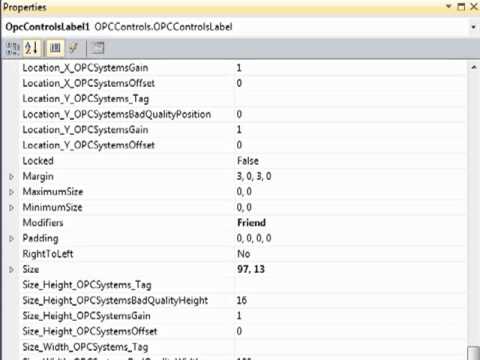
Add an OPCControlsLabel component onto the Form.
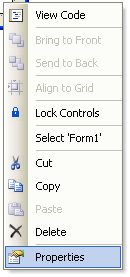
Right click on the OPCControlsLabel window and select Properties.
Select the TextOPCSystems_Tag property and use the browse button at the right to set the Open Automation Software Tag to Ramp.Value.
NOTE: If you wish to run this application on remote PCs make sure to include the Network Node or IP Address of the OAS Engine. Select your Network Node or IP Address in the Browse Tags window.
Value is the most commonly used Variable. See Tag Variables for a complete list of all variables possible.
The following is an example of accessing an element of an array as a read only variable.
myGroup.myTag.Value[0]
Note: All Tag names are case sensitive. Ramp.Value is valid, ramp.value is not.
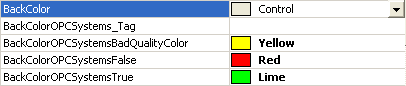
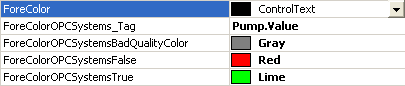
Button
Add an OPCControlsButton to the Form.
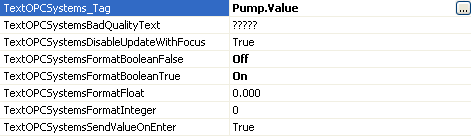
Set the TextOPCSystems_Tag to Pump.Value. If the Pump Tag does not exist create a Boolean Tag using Configure-Tags with the name Pump.
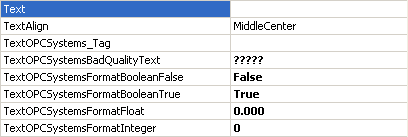
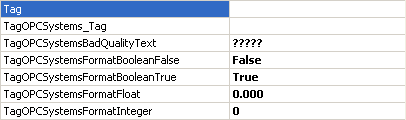
Set the Format fields as defined below.
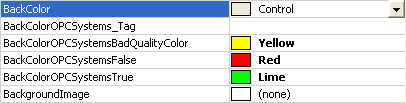
Set the BackColorOPCSystems_Tag to Pump.Value.
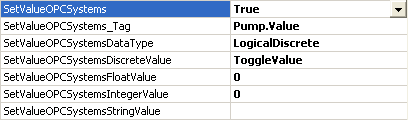
Set the SetValueOPCSystems_Tag to Pump.Value and the SetValueOPCSystems property to True.
TextBox
Add an OPCControlsTextBox to the Form.
Set the TextOPCSystems_Tag property to Pump.Value. The Format properties for Boolean to Off and On.
Step 4: Build Project
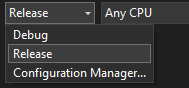
Set the compile mode on the Visual Studio toolbar to Release.
Select Build from the VS menu and select to build the application.
Step 5: Run Project
Use Windows File Explorer to browse for the application located in the bin\Release directory and run the application.
Step 6: Deploy Application
NOTE: For remote deployment first make sure the Tags as described in steps 4, 5, and 6 are set to a Network Node or IP Address. You can optionally use the OPCControlsNetworkNodes component and assign a network node alias to change all “localhost” tags to the desired remote node. This is done with the AddNetworkNodeAlias method. Refer to the VB.NET Example on the exact syntax of how to use this method. Notice how all OPC Controls data sources for a particular node can be reassigned to a remote node with one simple call.
To deploy the application simply copy the files in the bin\Release directory to the target systems, or follow the Smart Client Deployment guide using Click Once Deployment. The remote system that will run the application should have the .NET Framework version installed that the application targets.
Step 7: Other Controls and Properties
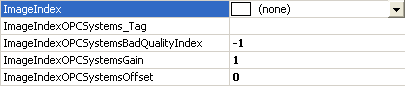
There are other OPCControls Components to add to the project with different properties to each control. ImageIndex is available in many of the controls to display different images based on analog or discrete data.
The OPC .NET WinForm HMI .NET product provides Human Machine Interface (HMI).NET controls and real-time data communications components. The product includes the Windows Services to read and write OAS Tag Parameters and process data to unlimited local and remote applications developed with the OPC Controls components.
All of the component names are called OPCControls which are all included with the OPC .NET WinForm HMI .NET product.
Applications developed with OPC .NET WinForm HMI .NET can run locally and remotely.
For step by step instructions of using OPC .NET WinForm HMI .NET review the Getting Started – WinForm HMI section or view the following video presentations.
NOTE: If you want to visualize your data in a desktop or mobile browser with zero programming, you may be interested in the OAS Open UIEngine .
The UIEngine is a robust no-code web application and HMI builder for developing rich user interfaces in a browser-based development environment.
See the UIEngine Documentation to learn more.
There are many ways to implement window navigation in a WPF application. The WPF Page Navigation video for information on how to do it without writing any code using the WPFPageNavigation control.
NOTE: If you want to visualize your data in a desktop or mobile browser with zero programming, you may be interested in the OAS Open UIEngine .
The UIEngine is a robust no-code web application and HMI builder for developing rich user interfaces in a browser-based development environment.
See the UIEngine Documentation to learn more.
The following videos demonstrate how to use the Live Data Dashboard application to create your own HMI content within the Live Data Dashboard application.
This application has built in features to provide users the ability to setup and persist the information they are interested across a network, to remember the users session views and bring the information back to them for their desired information.
Live Data Dashboard Overview
How to create a WPF Dashboard application using the Live Data Dashboard template. User controlled windows that persist on server for remote recall.
Live Data Dashboard Adding Window
How to add a Window to the Live Data Dashboard.
Live Data Dashboard Reports and Documents
How to add report and document interface options to Live Data Dashboard.
The Dashboard HMI template is a WPF VB.Net project template for .Net Framework 4.0 and is a unique tool that provides you with a number of advantages over starting from scratch.
The template comes with several demo windows to show you how that final application goes together, how to implement menus and the use of custom object to keep track of operator’s windows and preferences.
NOTE: If you want to visualize your data in a desktop or mobile browser with zero programming, you may be interested in the OAS Open UIEngine .
The UIEngine is a robust no-code web application and HMI builder for developing rich user interfaces in a browser-based development environment.
See the UIEngine Documentation to learn more.
How can I learn about Expression Blend and how to use it?
View the Expression Blend for WPF video in the WPF HMI Videos section.
After updating Open Automation Software with the incremental update the project no longer compiles or the application no longer works.
Make sure to Unblock the dlls before copying to C:\Program Files\Open Automation Software\OAS\Controls\NetFramework\ or C:\Program Files\Open Automation Software\OAS\Controls\NetStandard\.
To Unblock the files copy to a trusted location for your system, Desktop works well, then right click on the file and select Properties to select Unblock. Then copy from your Desktop to the correct directory in C:\Program Files\Open Automation Software\OAS\Controls\.
My OPCWPFDashboard Button flashes when the user hovers the mouse over the button.
This is default for a WPF Button control, but the behavior can be changed with the following steps using Expression Blend.
Select the button, and right click on the button, select Edit Template-Edit a Copy. Select OK.
With the new template selected reset the RenderMouseOver, and RenderPressed property.
Select Triggers, and delete the IsKeyboardFocused trigger.
Apply the new template to all buttons. Select the button, right click, and select Edit Template-Apply Resource.