Requirements and Project Description
This real-world example project demonstrates how to use a remote, 3rd party REST API as a data source for a Universal Driver Interface (UDI) implementation. Doing this will allow you to deploy and configure one or more instances of the driver without any additional code. One the driver is compiled, it can be managed through the OAS Configuration app alongside other UDI implementations and built-in communications drivers provided by OAS. Some of the project requirements are:
- Use a 3rd-party weather API to provide weather data
- Expose multiple data points for a given location, such as temperature, wind direction, current weather conditions, and more
- Allow each data point to be individually fed into OAS Tags for real time and historical logging
- Use a postal code for weather data lookup, in any region of the world
- The driver must run on any platform, including Linux and Raspberry Pi, since we’ll want a small footprint on a machine that can access the internet
- The driver polling rate must be configurable to match the request limits on the 3rd-party weather service account
The Running Driver
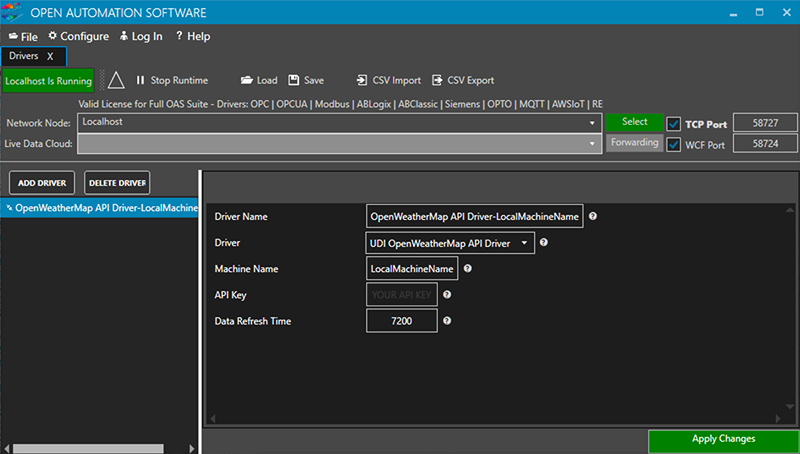
Driver Configuration
The driver configuration is fairly simple. You assign your OpenWeatherMap.org API Key to the API Key field and set the Data Refresh Time (in seconds) to match the data refresh time associated with your account. Free accounts refresh data every 2 hours or 7200 seconds.
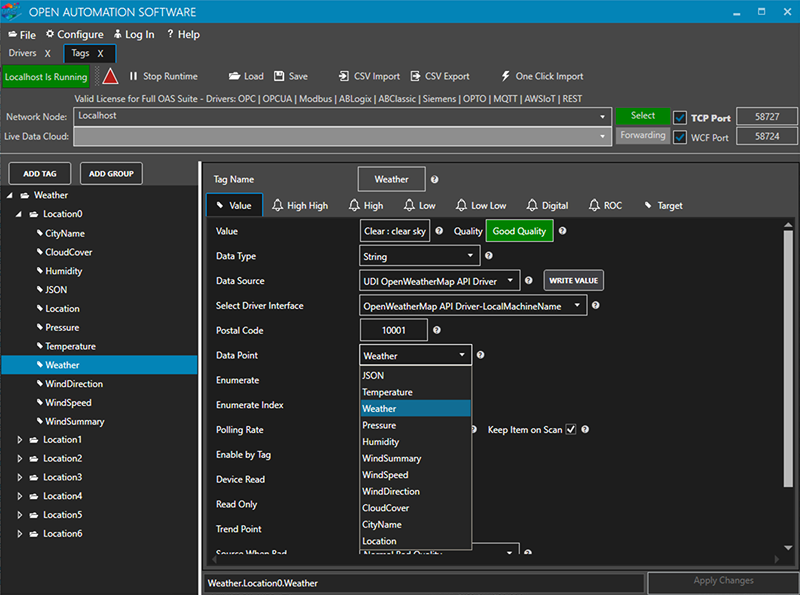
Tag Configuration
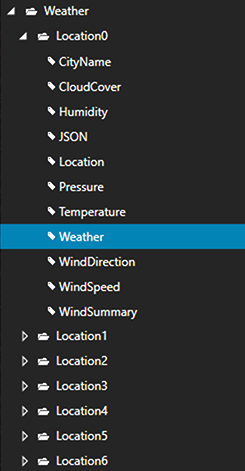
The driver establishes several different data points that you can map to your tags. This screen shot shows the tags and tag groups automatically created for you when you start the driver and connect it to your OAS server. When you select the Data Source as the UDI OpenWeatherMap API Driver, you can choose from any of the Data Points shown here.
If you’d like to set up and run the driver, all example code can be found in the OAS installation directory under:
<installation path>\Universal Drivers\Standard\OpenWeatherMap API Example
Follow the instructions here, to set it up for deployment on a Linux or Raspberry Pi device. Below is a full description of the project requirements and the API used for loading data into the OAS Platform.
Optionally, you can download the full source code HERE.
Prerequisites
In order to build this solution, you will need the following tools and skills:
- Project Source Code
- Visual Studio (full or Community edition) on a Windows PC
- An OAS Platform installation (a demo copy is fine)
- A OpenWeatherMap.org account to provide an API key specific to you or your organization (free accounts work with this example)
- A Linux or Raspberry Pi device to host the compiled driver
- VB.NET or C# development skills
- Familiarity with HTTP calls and JSON structures used in REST APIs
- Familiarity with Linux command line or console commands, including remote connectivity via SSH
- Optionally an FTP tool for transferring files between your PC and the deployment target for the driver
The API and Driver
For this example project, we’ll be using the OpenWeatherMap.org API for getting current weather data for a geographic region, based on postal, or ZIP code if within the US. OpenWeatherMap.org has many operations in the API, and you’re free to explore them, but we’ll only be focusing on the call for current conditions.
OpenWeatherMap.org Current documentation:
https://openweathermap.org/current
Request Data
This is a simple HTTP GET in the following format:
http://api.openweathermap.org/data/2.5/weather?zip={postal code},{country code}&appid={api key}
{api key} is a string containing the API key assigned to your OpenWeatherMap.org account
{postal code} is the ZIP code or postal code for the desired region
{country code} is the two character country code (e.g. “us” for USA, “ca” for Canada. Full List Here). When using US ZIP codes, you can omit the preceding comma and country code
Response Data
Like most REST APIs, the OpenWeatherMap.org API returns JSON formatted data. Specifically, the Current call returns data that looks like the following:
{
   "coord":{
      "lon":-122.09,
      "lat":37.39
   },
   "weather":[
      {
         "id":500,
         "main":"Rain",
         "description":"light rain",
         "icon":"10d"
      }
   ],
   "base":"stations",
   "main":{
      "temp":280.44,
      "pressure":1017,
      "humidity":61,
      "temp_min":279.15,
      "temp_max":281.15
   },
   "visibility":12874,
   "wind":{
      "speed":8.2,
      "deg":340,
      "gust":11.3
   },
   "clouds":{
      "all":1
   },
   "dt":1519061700,
   "sys":{
      "type":1,
      "id":392,
      "message":0.0027,
      "country":"US",
      "sunrise":1519051894,
      "sunset":1519091585
   },
   "id":0,
   "name":"Mountain View",
   "cod":200
}
Within the driver, we’ll be parsing this JSON and pulling out individual data points, such as the “temp”, “humidity” and more. We’ll also be cacheing the full JSON response for every postal code being monitored, so you can analyze the data yourself within the OAS Configuration app.
Polling Limits
The OpenWeatherMap.org API has polling limits and data “freshness” based on the type of account you purchase. With a free account, you are limited to 60 calls per minute, and data is only guaranteed to be updated every 2 hours or less. With that in mind, we’ll write the driver code to cache weather data and only get server data for any region when it either isn’t in cache or is more than 2 hours old.
Automatic Driver and Tag Set-up
 The sample project source code automatically configures a driver instance and adds several tags to the OAS Server to which it connects, so you can immediately see data flowing as soon as the driver is up and running. Within the OAS Configuration app, if you select Configure > Drivers, you’ll see an instance of the sample driver, and when you select Configure > Tags, you’ll see a Tag Group called “Weather” and several Tag Groups below it for each postal code being monitored. Within each location Group, you’ll see tags for each data point that is supported by the driver.
The Hosting App
The Driver does all of the heavy lifting for parsing data, but the Hosting App loads the driver and keeps it running. The UDI supports any type of application supported by the target platform. On a Windows machine, this is typically a Windows Service, since it can be configured to automatically start up with the machine. On other platforms such as Linux, the same thing is accomplished with a Console Application, configured as a system service, or “daemon”. Using a Console Application as a Hosting App also has the advantage of making it very easy to debug the driver by manually launching it and getting feedback via the console output.
Related articles/further reading:


