WPF Page Navigation
How to add page navigation to a WPF application with easy to use WPF HMI Page Navigation controls.
There are many ways to implement window navigation in a WPF application. The WPF Page Navigation video for information on how to do it without writing any code using the WPFPageNavigation control.
The following videos demonstrate how to use the Live Data Dashboard application to create your own HMI content within the Live Data Dashboard application.
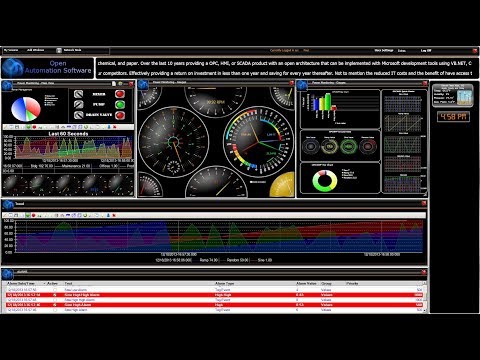
This application has built in features to provide users the ability to setup and persist the information they are interested across a network, to remember the users session views and bring the information back to them for their desired information.
How to create a WPF Dashboard application using the Live Data Dashboard template. User controlled windows that persist on server for remote recall.
How to add a Window to the Live Data Dashboard.
How to add report and document interface options to Live Data Dashboard.
How to add gadgets to the Live Data Dashboard.
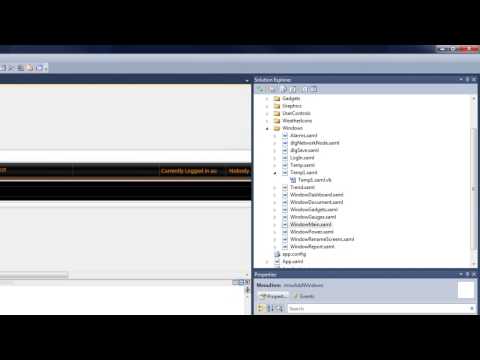
The Dashboard HMI template is a WPF VB.Net project template for .Net Framework 4.0 and is a unique tool that provides you with a number of advantages over starting from scratch.
The template comes with several demo windows to show you how that final application goes together, how to implement menus and the use of custom object to keep track of operator’s windows and preferences.
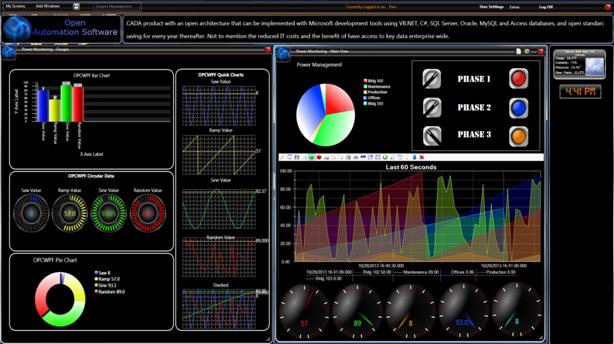
You can use the OPCWPFContent control to binding live Tag values to other WPF controls.
OPCWPFDashboard controls support Data Biding.
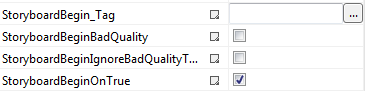
The OPCWPF Storyboard component performs as a storyboard controller to begin, pause, skip to fill and stop Storyboard animations with properties to automatically update from any Open Automation Software Tag Parameter.
To add an OPCWPF Storyboard select the OPCWPFStoryboard component from the ToolBox and place it on any Windows Form of your choice. See Add OPCWPFDashboard Controls Components to Visual Studio.NET to add the OPCWPFStoryboard to the ToolBox.
Refer to OPCWPF help for all properties and members of the OPC WPF components. All properties can be assigned in code; however no programming is required to use the properties.
Enabled

Story Board Begin
Storyboard Pause
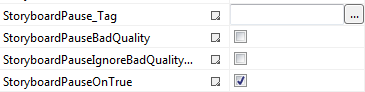
Storyboard Resume
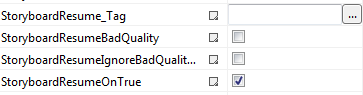
Storyboard Skip to Fill
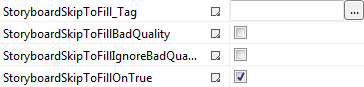
Storyboard Stop

Load the default DemoTags Tag configuration if you have replaced your tag configuration with your own tags.
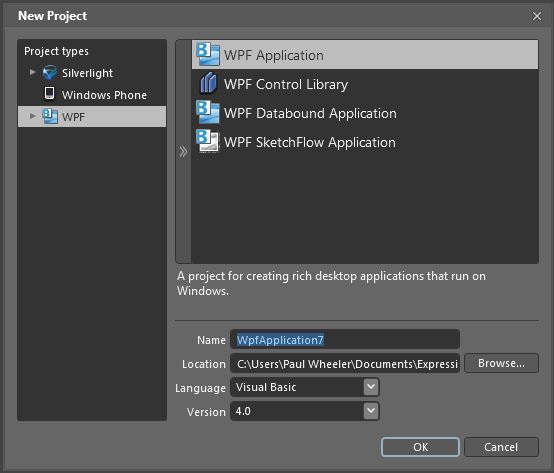
Start Expression Blend 4.0 and select New Project to create a new C#, or VB.
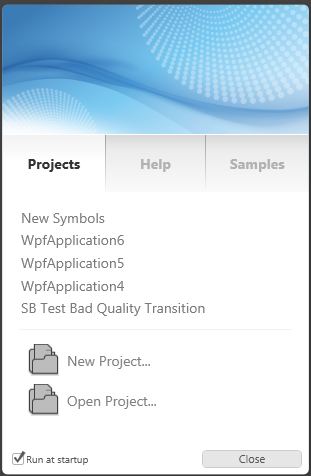
Select WPF Application as the project type and Version 3.5 or 4.0
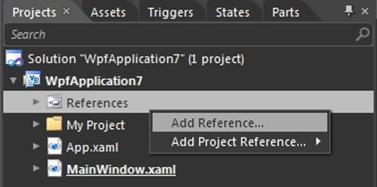
From the Assets tab if OPCWPF components are not available, In the Projects Tab right click on References and select Add Reference to the following DLL.
For Version 3.5…
C:\Program Files\Open Automation Software\OAS\Blend3.5OPCWPF.dll
Or if you are using Version 4…
C:\Program Files\Open Automation Software\OAS\Blend4.0OPCWPFDashboard.dll
If it is available go to Step 4.
From the Assets Tab add an OPCWPFLabel component onto the Window.
![]()
Choose the Selection Tool and then click on the label.
Select the Content_Tag property and use the browse button at the right to set the Open Automation Software Tag to Ramp.Value.
![]()
Note: If you wish to run this application on remote PCs make sure to include the Network Node or IP Address of the OAS Service source.
Note: All Tag names are case sensitive. Ramp.Value is valid, ramp.value is not.
Note: You can use the DirectOPC interface to connect directly to OPC Server Items is you just need to gain access to the server items without having to create Open Automation Software Tags.
Add an OPCWPFButton to the Window.
![]()
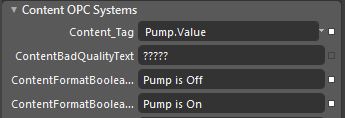
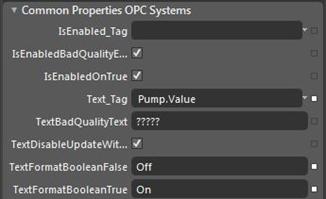
Set the Content_Tag to Pump.Value. If the Pump Tag does not exist create a Boolean Tag using Configure-Tags with the name Pump.
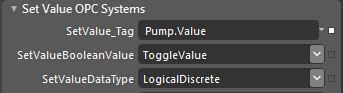
Set the Format fields as defined below…
Set the Background01_Tag to Pump.Value.
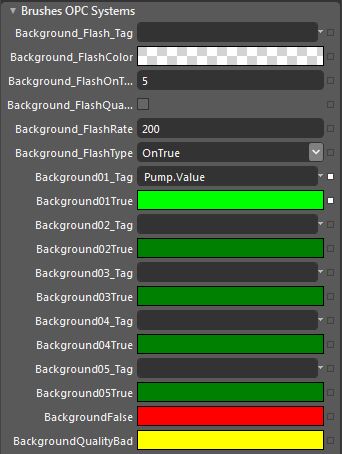
Set the SetValue_Tag to Pump.Value.
Add an OPCWPFTextBox to the Window.
![]()
Set the Text_Tag property to Pump.Value. The Format properties for Boolean to Off and On.
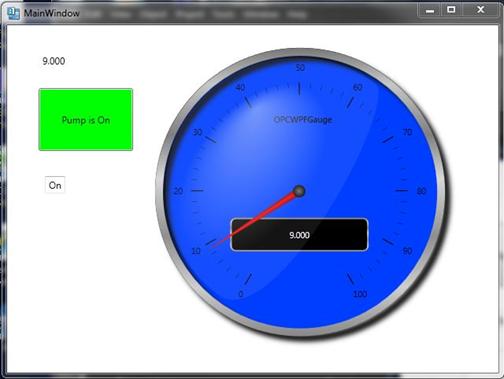
Add an OPCWPFDashboard360Gauge.
![]()
Set the Value_Tag to Ramp.Value.
![]()
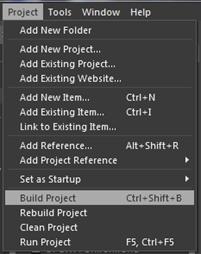
Select Build from the Project Menu to Build the application.
Use Windows Explorer to browse for the application located in the binRelease directory and run the application.
To deploy the application to remote nodes first make sure the Tags as described in steps 4, 5, and 6 are set to a Network Node or IP Address. Then simply copy the files in the binRelease directory to the target systems or follow the Smart Client deployment section in this help file to deploy your application using Click Once Deployment.
Note: You can also use the OPCWPFNetworkNodes component and assign a network node alias to change all “localhost” tags to the desired remote node. This is done with the AddNetworkNodeAlias method. Refer to the WinForm Example Code on the exact syntax of how to use this method. Notice how all OPC Controls data sources for a particular node can be reassigned to a remote node with one simple call.
There are many different properties to each control. In WPF you can convert graphics to an Image Brush. The Image Brush can then be used as a background in most OPCWPF Controls.
The OPC WPF Data component can be used to access data via code with very simple methods. Refer to the Forms FormReadValues and FormWriteValues in the WinForm Example Code.
Refer to the WPF Example application for demonstration example of all properties of all controls.
Microsoft Blend for Visual Studio (formerly Microsoft Expression Blend) is a user interface design tool developed and sold by Microsoft for creating graphical interfaces for web and desktop applications that blend the features of these two types of applications. It is an interactive, WYSIWYG front-end for designing XAML-based interfaces for Windows Presentation Foundation, Silverlight and UWP applications.
Learn how to develop OAS Visualizations using Microsoft Blend or Expression Blend.