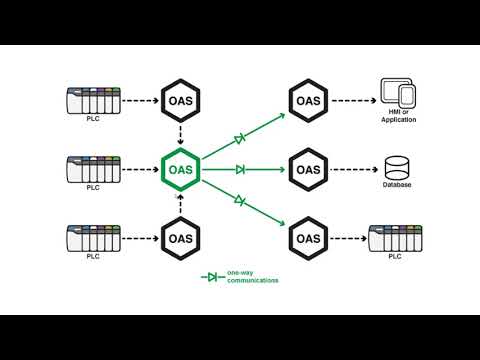
The Network Forwarding feature makes it possible for client devices to reach data servers live data through multiple redirect servers, as many as you like, to bridge multiple networks together end to end. If the data servers do not need a fixed IP address it can be used in combination with the Live Data Cloud feature.
In order to use Network Forwarding you just need to install Open Automation Software on each redirect server. If you plan to use different TCP port numbers through the forwarding use Configure-Options-Networking to set the source TCP Port Number and Configure-Options-Remote Services to set the client TCP Port Number.
.NET Tag Access
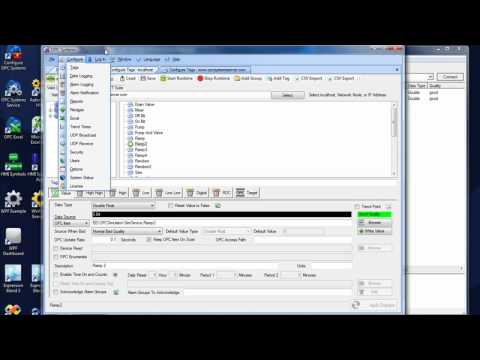
Using the Tag Browse dialog from any .NET, Excel, or service client enter the IP Address, Network Node Name, or registered domain name in the Network Node field and click on Select.

Then using the Forwarding button define as many redirect servers as you like, each one having Open Automation Software installed and running.

You can optionally specify a Live Data Cloud data server as well if that is the final data server. Of leave the Live Data Cloud data server blank if it has a fixed IP address.
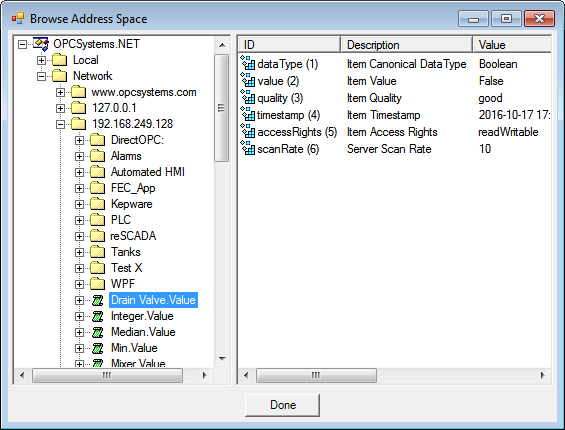
You can then browse for the Tag name and property (most common is Value) to return the following.
In the following example 192.168.249.128 is the first redirect server that forwards communications onto www.opcsystems.com, and then finally the Live Data Cloud server OAS_SONY.
With a Live Data Cloud Node:
\\192.168.249.128\RemoteSCADAHosting.www<dot>opcsystems.com<dot>com_SUBNODE_OAS_SONY.TagName.Value
In the following example 192.168.249.128 is the first redirect server that forwards communications onto www.opcsystems.com were the tag resides.
Without a Live Data Cloud Node
\\192.168.249.128\RemoteSCADAHosting.www<dot>opcsystems.com<dot>com_SUBNODE_LIVE DATA CLOUD NOT USED.TagName.Value
There is additional syntax to note when using Network Forwarding.
[list]
[li]The network nodes following RemoteSCADAHosting use <dot> in replace of any period. For example and IP address would be represented as 192<dot>168<dot>0<dot>1 instead of 192.168.0.1.[/li]
[li]All redirect servers are separated by _SUBNODE_.[/li]
[li]The last server must either be a Live Data Cloud data server or the words LIVE DATA CLOUD NOT USED.[/li]
[/list]
Note: If you are using Calculation Tags, Data Logging, or other service to service communications where the Live Data Cloud server is performing data functions on remote data from data servers you do not need to specify the first server IP address.
With a Live Data Cloud Node:
RemoteSCADAHosting.www<dot>opcsystems.com<dot>com_SUBNODE_OAS_SONY.TagName.Value
Without a Live Data Cloud Node:
RemoteSCADAHosting.www<dot>opcsystems.com<dot>com_SUBNODE_LIVE DATA CLOUD NOT USED.TagName.Value
.NET Tag access is applicable for the following
- WPF HMI .NET
- WinForm HMI .NET
- Cross-Platform HMI
- Trend .NET
- .NET Data Connector
- PCL iOS and Android HMI
- Microsoft Excel
- Data Logging
- Recipe
- Calculation Tags
- Tunnel Target Tags
Web Tag Access
In the web page specify the IP Address, Network Node Name, or registered domain name that has the HTML HMI registered over your desired port in the serverURL config property.
serverURL: 'http://www.192.168.249.128.com:58725'
Specify the tag names in the HTML code as RemoteSCADAHosting tags without the first network node portion as the Live Data Cloud server is already reached through the serverURL.
With a Live Data Cloud Node:
RemoteSCADAHosting.www<dot>opcsystems.com<dot>com_SUBNODE_OAS_SONY.TagName.Value
Without a Live Data Cloud Node:
RemoteSCADAHosting.www<dot>opcsystems.com<dot>com_SUBNODE_LIVE DATA CLOUD NOT USED.TagName.Value
The web browser can be run locally or remotely, it will communicate to the server specified in the serverURL as a relative path for the tag values.
Web Tag access is applicable for the following
- Web HMI
- Web Trend
- HTTP API for Tag data
- HTTP API for Trend data
.NET Alarm Access
Using the Network Node Browse dialog from Alarm Logging, Alarm Notification, or Alarm .NET control enter the IP Address, Network Node Name, or registered domain name in the Network Node field and click on Select.
Then using the Forwarding button define as many redirect servers as you like, each one having Open Automation Software installed and running.
You can specify multiple network nodes in the AlarmNetworkNodes.
With a Live Data Cloud Node:
\\192.168.249.128\RemoteSCADAHosting.www<dot>opcsystems.com<dot>com_SUBNODE_OAS_SONY
Without a Live Data Cloud Node:
\\192.168.249.128\RemoteSCADAHosting.www<dot>opcsystems.com<dot>com_SUBNODE_LIVE DATA CLOUD NOT USED
.NET Alarm access is applicable for the following
- Alarm .NET
- Alarm Logging
- Alarm Notification
Web Alarm Access
In the web page specify the IP Address, Network Node Name, or registered domain name that has the HTML HMI registered over your desired port in the serverURL config property.
serverURL: 'http:// 192.168.249.128:58725'
In the alarm_bindings specify the networkNodes property with RemoteSCADAHosting.
With a Live Data Cloud Node:
RemoteSCADAHosting.www<dot>opcsystems.com<dot>com_SUBNODE_OAS_SONY
Without a Live Data Cloud Node:
RemoteSCADAHosting.www<dot>opcsystems.com<dot>com_SUBNODE_LIVE DATA CLOUD NOT USED
Web Alarm access is applicable for the following
- Web Alarm
- HTTP API for Alarm data
OPCSystems.NET OPC Server Access
When providing Tag access to remote third party OPC Clients install OAS setup on each OPC Client PC to install the OPCSystems.NET OPC Server. You can use a Custom installation to install only OPCClient.NET if you prefer not to install everything on the OPC Client PC.
Modify the file NetworkNodes.txt with Notepad or other text editor to add the IP Addresses, Network Nodes Name, or registered domain names that have the OAS server tags running. The file will be in C:\Program Files\Open Automation Software\OAS\.
You can then browse for the Tag name and property (most common is Value) directly in the OPC Client in the Network folder to return the following to the OPC Client as and OPC Item.
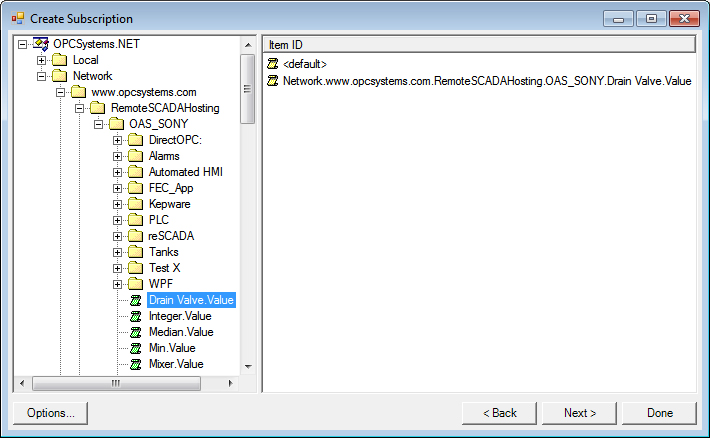
Network.www.opcsystems.com.RemoteSCADAHosting.OAS_SONY.TagName.Value
OPCSystems.NET OPC Server access is applicable for the following
.NET Configuration Access
The OPCSystems component provides free access to all configuration settings of a service including Tags, Data Logging, Alarm Logging, Alarm Notification, Security, etc.
Each method of the OPCSystems component has an optional NetworkNode parameter and RemoteSCADAHosting parameter. When you specify these parameters it will perform the configuration access to the remote service specified by IP address, network node name, or registered domain name through the Live Data Cloud server to the Live Data Cloud data server.
VB Example With a Live Data Cloud Node:
ResultString = OPCSystemsComponent1.TagCSVImport(CSVStrings, "192.168.249.128", ErrorString, "RemoteSCADAHosting.www<dot>opcsystems.com<dot>com_SUBNODE_OAS_SONY")
VB Example Without a Live Data Cloud Node:
ResultString = OPCSystemsComponent1.TagCSVImport(CSVStrings, "192.168.249.128", ErrorString, "RemoteSCADAHosting.www<dot>opcsystems.com<dot>com_SUBNODE_LIVE DATA CLOUD NOT USED")
C# Example With a Live Data Cloud Node:
ResultString = OPCSystemsComponent1.TagCSVImport(CSVStrings, "192.168.249.128", ErrorString, "RemoteSCADAHosting.www<dot>opcsystems.com<dot>com_SUBNODE_OAS_SONY");
C# Example Without a Live Data Cloud Node:
ResultString = OPCSystemsComponent1.TagCSVImport(CSVStrings, "192.168.249.128", ErrorString, "RemoteSCADAHosting.www<dot>opcsystems.com<dot>com_SUBNODE_LIVE DATA CLOUD NOT USED");
.NET Configuration access is applicable for the following
- OPCSystems .NET component (free to use)
Web Configuration Access
View the REST API documentation on how to access configuration information via web interface.


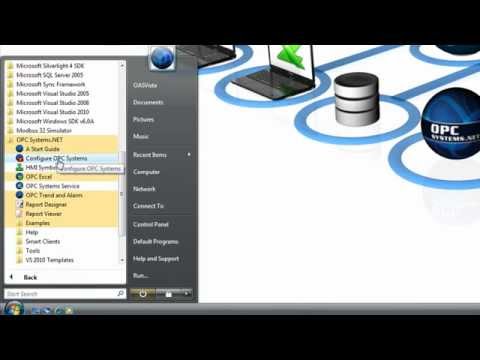
 Start Configure OAS application.